How do you prune and shape English ivy? Four shapes, each with a different level of difficulty
In terms of growth rate, English ivy is a relatively slow-growing plant, so many people think there is no need to prune it. This idea is actually wrong. Pruning not only makes English ivy more beautiful, but also benefits its growth. So how do you prune English ivy? How do you shape English ivy? Let the editor tell you the answers.
How to prune English ivy
1. Shortening
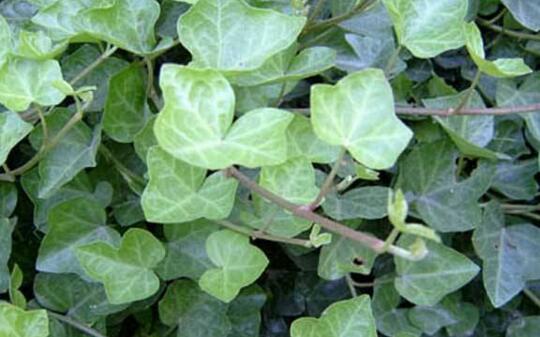
Shortening branches and leaves that are growing rapidly, are too tall or too dense can effectively control the growth vigor of English ivy. When pruning, it is appropriate to make the cut about 5 cm from the branching stem, as this will not affect the recovery ability of English ivy. After that, carry out normal care according to English ivy cultivation methods.
2. Pinching
Pinching means removing the top of the young buds of English ivy. It can prevent the plant from growing excessively, and this process is generally carried out during the growth period of young plants. It can inhibit their growth rate. Doing it too early or too late will not achieve the best effect.
How to shape English ivy
1. Pillar-attached style
Choose a tall pot with a diameter of about 30 cm and a height of about 30-40 cm. Plant a palm pole about 1 m tall in the middle of the pot, then plant English ivy around the pole. Use silk thread to tie the branches and leaves to the pole so that the branches and leaves grow around the pole. This shape is called the pillar-attached style.
2. Hanging style
The so-called hanging style means hanging English ivy on a wall and letting its branches and leaves grow in a hanging manner in all directions. Spider plants and others are also commonly used this way. So how do you shape hanging-style English ivy? Choose 4-6 year old English ivy, prune the branches and leaves according to your own preferences, cut off overly dense branches, and keep 5-10 branches hanging down, making the branches lean to one side.
3. Flower basket style
Fix a flower-basket-style support above the flower pot, plant English ivy in the pot, and during growth, fix the branches and leaves of the English ivy onto the support. Gradually, the vines of the English ivy will attach to the support and eventually grow into a shape like a flower basket.
4. Single-trunk style
The branches of English ivy usually do not grow upright upward, so making it into a single-trunk style requires some patience. If you want the single-trunk style, how do you shape English ivy? Choose a straight, upright purple clay pot with six or eight sides, and plant 2-3 year old English ivy in the pot. When the branches grow to 20-30 cm, pinch them to encourage branching. In short, during the growth period, you must keep pinching, keep the thick and remove the weak, and repot once every 2-3 years. After the plant has grown for 5~6 years, shaping can basically begin.
Can English ivy be grown hydroponically? Hydroponic cultivation methods for English ivy
English ivy is green all year round, and its stems and vines are slender and soft. It can not only decorate the home, but also purify indoor air and absorb harmful gases such as benzene and formaldehyde released by furniture and decoration, reducing the harm of harmful gases to the human body. So can English ivy be grown hydroponically? What are the hydroponic cultivation methods for English ivy? Let us take a look together below.
Can English ivy be grown hydroponically
English ivy has strong adaptability to the environment. It likes warm, humid and semi-shady environments, is relatively cold-tolerant, and most fears high-temperature and dry environments. It is relatively shade-tolerant and can also grow in sufficient sunlight, but avoid strong direct sunlight. Judging from the growth habits of English ivy, English ivy is very suitable for hydroponics.
For hydroponic English ivy, it is best to use the method of rooting cuttings in water. The roots produced this way are not only good-looking, but also avoid the root damage that occurs when washing roots. Select tender English ivy branches with aerial roots and insert them into a prepared transparent container. In about 10 days, water roots can grow. The water in the container should not be too much; some roots need to be kept in the air.
How to grow English ivy hydroponically
In the early stage of hydroponics, attention should be paid to changing the water frequently. It is best to change it to clean water once every 1 or 2 days, thereby ensuring the water body is clean and preventing the lower end of the branches from rotting. After about 10 days, English ivy can grow white, tender aerial roots. After new roots grow, the water should likewise be changed frequently. After about another 2 or 3 weeks, hydroponic English ivy will show a lush growth trend.
During the root emergence process of hydroponic English ivy, do not give light. Hydroponic English ivy needs to be placed in diffused light or a shady place, and the temperature must be suitable, not too hot or too cold. Only after the roots have grown should light be gradually given. English ivy is a shade-tolerant plant and avoids direct strong light, so when growing English ivy hydroponically, only diffused light is needed.
In summer, hydroponic English ivy should avoid direct strong light, and attention should be paid to ventilation and cooling. In northern winter, the indoor room temperature should preferably be kept above 10°C. At intervals, wash the branches and leaves once with clean water close to room temperature to increase air humidity and keep the leaves clean and emerald green. In midsummer, because English ivy is in a dormant period, it should be grown in clean water instead. In winter, placing it in a sunny indoor spot allows it to overwinter safely.
After hydroponic English ivy is potted, the first application of nutrient solution should be thorough. After that, add solution once every 10 days. On ordinary days, add water to keep the substrate moist. But be careful not to use too much water, so as to avoid root rot. During the peak growth season, foliar fertilization can be done with a 0.2% potassium dihydrogen phosphate solution. Afterward, the nutrient solution should still be replaced once every 2 or 3 weeks. In addition, when planting hydroponic English ivy, be careful to protect the root system, and straighten it out as much as possible so that most of all the roots can be soaked in water.
Three hydroponic cultivation methods for English ivy
1. Original-pot hydroponic method
Choose relatively strong branches, or branches that already have aerial roots, as the hydroponic mother material. If conditions permit, it is best not to cut the branches first. Place a water basin beside a large pot of English ivy, directly put the branches with aerial roots into the water, and let them grow on their own. This can avoid the risk of cultivation failure. Even if no new roots grow, the tender buds can still continue to grow. After the roots are strong, cut them off.
During the root emergence process, do not give light. It is best to place it in diffused light or a shady place. The temperature should be suitable, not too hot or too cold. A large temperature difference is not conducive to plant growth. After the roots grow, light can be gradually given. But it is worth noting that some varieties of English ivy grow poorly in direct sunlight.
After rooting, do not rush to change from hydroponics to soil culture. It is best to continue cultivating until the root system is thick and strong before changing, otherwise the relatively weak new roots may not be able to supply enough nutrients to the new buds. At the same time, it may also cause the new roots to be injured, and afterward it will be very difficult for them to grow again.
2. Branch water-cutting method
Branch water-cutting is suitable in spring and autumn. As winter goes and spring comes, first select semi-lignified vines of English ivy, cut them off and remove the leaves at the base, then insert them directly into clean water. Because English ivy has the characteristic of growing aerial roots, it can quickly adapt to the hydroponic environment after being inserted into clean water. In the early period of water-cutting, attention should be paid to changing the water frequently. It is best to change it to clean water once every 1 to 2 days, thereby ensuring the water body is clean and preventing the lower end of the branches from rotting. After about 10 days, white tender aerial roots grow out one by one. After new roots grow, the water should likewise be changed frequently. After about another 2 to 3 weeks, the lovely English ivy will show relatively strong growth momentum. At this time, add hydroponic flower nutrient solution to the water and maintain it in a place with bright light. Do not think that after adding nutrient solution there is no need to change the water. In fact, the nutrient solution still needs to be replaced once every 2 to 3 weeks.
In addition, in midsummer, because English ivy is in a dormant period, it should be grown in clean water instead. In winter, placing it in a sunny indoor spot allows it to overwinter safely. As for how to prune the vines according to shaping needs and your own preferences, that is a matter of individual judgment.
3. Whole-plant hydroponic method
Take English ivy out of the flower pot, soak the soil ball in water by washing the roots, and carefully remove the soil from the root system. At this time, be careful not to be rough and break too many roots. Severe root damage is not conducive to future hydroponics.
The root-washing method has some drawbacks. For example, when washing roots, it is unavoidable to wash off the root hairs on the surface of the root system, which is unfavorable for the survival of the plant. Second, after washing, the root system will still carry the color of soil, and it is not very attractive when grown hydroponically in a transparent container.
Therefore, for hydroponic English ivy, it is best to use the method of rooting branch cuttings in water. The roots produced this way are not only good in color, but also avoid the root damage that occurs when washing roots.
Summary: The hydroponic cultivation methods for English ivy have been introduced here. Everyone also understands that English ivy can be grown in water. You can try hydroponic English ivy. The hydroponic method for English ivy is simple, easy to operate, and can make English ivy show off its elegance even more.
The making of tree bonsai
Tree bonsai is made by selecting young trees or old tree stumps of ornamental trees and, after cultivation, artistic processing and planting arrangement, placing them in exquisite pots. In its making art, the most important thing is to master the biological characteristics of various trees and fully bring out their natural beauty of posture, charm and color. For example, the lushness and vigor of pines and cypresses, the antique elegance and quiet fragrance of plum stumps, the plainness and ancient simplicity of elms and maples, the unrestrained elegance of green bamboo, and the clear branches and leaves of Japanese apricot and boxwood. The cultivation, making and management of tree bonsai is meticulous work that is both highly artistic and highly scientific. A good bonsai with beautiful shaping and lasting appeal is formed through the aesthetic conception and superb artistic techniques of skilled craftsmen, and it also requires careful maintenance and management to ensure its lush growth and graceful posture. The production and management techniques of tree bonsai generally include the following aspects: tree species selection, tree embryo cultivation, processing and shaping, potting and scenery matching, and maintenance management. Maintenance management also includes: placement location, watering, fertilizing, pruning and posture adjustment, repotting and soil changing, pest and disease control, and so on.
1. Selection of tree species
There are many materials suitable for making tree bonsai. Generally, those with twisted roots, dense branches and fine leaves, beautiful posture, and brilliant flowers and fruits are preferred. At the same time, they are required to have biological characteristics such as strong sprouting ability, tolerance to pruning, and long lifespan.
The material selection for tree bonsai in our country has a long history and tradition. During the Jiaqing period of the Qing Dynasty (1796-1820), Wu Xi Su Ling wrote "Random Records of Bonsai," which recorded many tree bonsai and divided bonsai plants into the Four Great Masters, Seven Worthies, Eighteen Scholars, and Four Elegants of Flowers and Plants.
Four Great Masters: Caragana sinica, boxwood, winter jasmine, and Juniperus chinensis 'Kaizuka'.
Seven Worthies: Huangshan pine, Sabina chinensis 'Pyramidalis', elm, maple, holly, ginkgo, and Japanese apricot.
Eighteen Scholars: plum, peach, tiger thorn, jigging, goji, rhododendron, emerald cypress, papaya, wintersweet, nandina, camellia, Buddhist pine, Malus spectabilis, phoenix-tail bamboo, crape myrtle, pomegranate, serissa, and gardenia.
Four Elegants of Flowers and Plants: orchid, chrysanthemum, narcissus, and acorus.
Many of the tree species used in the ancient tree bonsai mentioned above are still common materials for making bonsai today. However, with continuous introduction and discovery, there are now as many as one to two hundred materials suitable for tree bonsai, generally divided into the following categories:
Pine and cypress category: Japanese white pine, Huangshan pine, black pine, Pinus densiflora 'Umbraculifera', Japanese cedar, dawn redwood, Chinese swamp cypress, sabina, Sabina chinensis 'Procumbens', Sabina chinensis 'Aurea', emerald cypress, Juniperus procumbens, Sabina chinensis 'Tamariscifolia', Sabina chinensis 'Filifera', Sabina chinensis 'Pyramidalis', Chinese juniper, Buddhist pine, yew, and so on.
Mixed wood category: Chinese elm, boxwood, Japanese apricot, syzygium, loropetalum, orange jasmine, Chinese hackberry, Fujian tea, tamarisk, small-leaf privet, and so on. Leaf wood category: trident maple, red maple, ginkgo, Chinese holly, phoenix-tail bamboo, Buddhist bamboo, Buddha belly bamboo, palm bamboo, sago cycad, and so on.
Flowering wood category: camellia, sasanqua, Caragana sinica, Chaenomeles speciosa, plum, ornamental peach, crape myrtle, Malus halliana, Malus spectabilis, winter jasmine, osmanthus, rhododendron, serissa, Jasminum floridum, and so on.
Fruit wood category: fruiting pomegranate, firethorn, nandina, kumquat, finger citron, hawthorn, Chinese holly, Diospyros cathayensis, Elaeagnus pungens, Ardisia japonica, Diospyros oldhamii, persimmon, goji, coral cherry, and so on. Vine category: Chinese trumpet creeper, English ivy, star jasmine, Euonymus fortunei, wisteria, honeysuckle, and so on.
2. Collection and cultivation of tree stumps
The materials for tree bonsai mainly come from two aspects: propagation and seedling raising, and collecting tree stumps. The former uses propagation methods such as sowing, cuttings, layering, grafting, and division to obtain saplings for cultivation from a young age. Shaping is relatively free, and the thickness of tree trunks and branches is relatively even, but it takes a long time. The latter digs up tree stumps that have grown for many years from the mountains and fields, then processes them according to the material and carries out cultivation and processing, which can greatly shorten the time. It is often also possible to select old stumps with natural, beautiful forms and antique, simple ruggedness to make into fine bonsai works. The disadvantage is that it is limited by the inherent form of the stump, and the thickness ratio between the trunk and side branches is not easy to make even. In addition, some precious tree species such as Japanese white pine, sassafras, and red maple cannot be dug up in the mountains and fields, so saplings have to be obtained through artificial propagation.
Regarding propagation and seedling-raising techniques, many horticultural books introduce them, so this book will not repeat them. Here, the methods for digging and cultivating tree stumps are introduced.
Digging tree stumps must involve certain scientific methods, otherwise it is difficult for them to survive, let alone become finished products, which wastes time, manpower, and natural resources.
In selecting tree stumps for digging, comprehensive consideration should be given to aspects such as tree species, tree age, form, and future prospects. Regarding tree species selection, this has already been introduced above. As for tree age, old stumps that have grown for many years are valued, but they must also grow vigorously. As for the form of the stump, do not blindly pursue weirdness or likeness in shape (likeness in shape is not a selection standard for bonsai art). Instead, those with the characteristics of ancient ruggedness, strangeness, and vigorous twists and turns are preferred, and special attention should be paid to the form of the roots and trunk. Generally, tree stumps should not be too tall or too large, so as to facilitate survival, processing, potting and display. Although some tree stumps have certain defects, from a developmental perspective, as long as they can be processed to make up for them, they can still be used.
The time for digging tree stumps is generally after the trees enter dormancy, preferably in early spring after the soil thaws and before the trees have sprouted. Digging in late autumn or early winter is also possible, but winter maintenance is more troublesome, especially in the north, where they must be kept in a greenhouse. As for deep winter, because the soil layer is frozen, digging is difficult and roots are easily damaged, so it is not very suitable. The time for digging tree stumps must also be adapted to local conditions and determined according to the habits of the tree species. For tree species that are not cold-tolerant, it is better to dig in March to April to avoid frost damage.
When digging, the main root can generally be cut off, but more lateral roots and fibrous roots should be retained. For pines and cypresses and some taproot tree species, it is better to retain more of the main root; otherwise, survival is difficult. After the tree stump is dug up, a heavy pruning can be carried out. Pruning should be based on the form of the stump and with preliminary consideration of future shaping. Generally, a part of the main branches and trunk is retained and shortened, and the rest are all cut off. For evergreen tree species with weak sprouting ability, such as pines and cypresses, the branches and leaves must not all be cut off. For collected tree stumps, the roots do not need to carry soil. It is best to dip them in mud, put them into baskets or crates, and fill in moss to protect the fibrous roots from withering due to water loss. After bringing them back, they must be planted as soon as possible.
No matter how beautiful the natural form of a tree stump collected from the mountains and fields is, to make it into bonsai it must still go through a certain period of cultivation, called "nurturing the embryo." Some bonsai enthusiasts are eager for quick success and plant freshly collected tree stumps into relatively shallow glazed pots or purple clay pots, or even expose the roots and claws, trying to complete the bonsai in one go. As a result, most find it hard to survive, let alone take shape. This is what is meant by haste makes waste.
For nurturing the embryo, it is best to choose a place with loose, fertile soil, good drainage, and sufficient sunlight for ground planting, or to use clay pots for planting, so as to facilitate shaping and processing. When planting, bury it appropriately deeply, preferably leaving only the bud eyes above the soil. For tree stumps with relatively tall trunks, moss can be used to wrap the trunk. After planting, water thoroughly once, and cover the stump with a little straw to maintain humidity. In high summer temperatures, build a shade shed and spray water frequently. In winter, surround it with straw curtains to prevent freezing. On ordinary days, pay attention to replenishing water. During the vigorous growth period of the tree, water must not be lacking, but also be careful not to water too much, to prevent root rot. In dry weather, it is best to spray water on the leaves often. To make the tree embryo take shape as soon as possible, fertilizing is very important. Newly planted tree stumps have relatively tender roots, so it is better to apply thin fertilizer frequently. Fertilizer can be decomposed cake fertilizer or manure fertilizer, diluted before use. During the embryo-nurturing period, work such as pruning, bud removal, and pest and disease control must also be done well.
Pruning mainly refers to cutting off branches and trunks that will not be needed in future shaping, so as to avoid consuming nutrients. Dead branches, diseased branches, and so on must also be cut off; otherwise, they will affect the sprouting of new buds or lead to the spread of pests and diseases.
Bud removal mainly refers to removing excess buds. Generally, retain the buds needed for future shaping (including spare buds), and remove all the rest, so as to avoid growing useless branches and trunks. When the retained buds grow into branches and trunks, further selection can be made, cutting off unused branches and trunks, and removing the terminal buds of the retained branches and trunks to encourage axillary buds to sprout side branches, increasing the layers and density of branches and leaves.
3. Processing and shaping of the tree embryo
For saplings cultivated from a young age, processing and shaping generally begin after 3 to 5 years; for tree stumps collected from the mountains and fields, processing and shaping can mostly be carried out after one year of embryo nurturing.
Before processing, ground-planted tree embryos can be dug up and temporarily planted in pots of basically suitable size, so as to facilitate operation and shaping. Large tree embryos can also be processed and shaped on site.
Processing and making must follow a series of artistic techniques of bonsai creation. First carefully observe and consider the tree embryo material, and decide what theme to express and how to shape it according to the characteristics of the material, which is "processing according to the material." Arrange the skeleton of the roots, trunk, and branches of the tree embryo according to the rules of bonsai art, making it into a living bonsai art work with coordination and evenness, beautiful lines, and profound artistic conception. For example, if pine is chosen as the material, it is suitable to express the vigor and uprightness of its main root, with branches and leaves spread out flat in cloud-like layers; cypress is suitable to express its ancient, simple and peculiar trunk, with branches and leaves in clustered form; plum shaping is suitable for sparse branches slanting across; winter jasmine is suitable for drooping branches and arched curves; ... This is considered from the natural characteristics of the tree species. In addition, consideration must also be given to the inherent shape of the stump. For example, some stumps have straight trunks, which can follow their nature and be made into the straight-trunk style; some stumps have naturally curved trunks, suitable for making into the curved-trunk style or cascade style; some stumps have withered and bare trunks, suitable for making into the dead-peak style; ... Processing according to the material can save labor in bonsai making and also give natural wild charm. If everything is left entirely to nature, then there is no such thing as bonsai art, but if the traces of artificial work are too heavy, then natural beauty is lost. Therefore, for the shaping of tree stumps, one must never rigidly adhere to conventions or apply fixed patterns.
The shaping and processing methods also have a certain sequence. Usually, the trunk is done first and then the branches, from bottom to top, by bending, pruning, or carving, which can be determined according to the needs of the tree species and shaping. Different regions have different processing methods due to different customs. Generally, for pines and cypresses and tree species with weak sprouting ability, bending is the main method. For tree species with strong sprouting ability such as Chinese elm, Japanese apricot, Fujian tea, and trident maple, pruning can be the main method. Tree stumps processed by the bending method are freely shaped, full of twists and changes, and take shape relatively quickly; tree stumps processed by the pruning method are vigorous and natural, but take shape relatively slowly. In southern regions, the climate is warm and trees grow quickly, so it is suitable for bending and shaping; in northern regions, the climate is cold and trees grow relatively slowly, so it is suitable for bending and shaping. Of course, these are only general situations. The styles and schools of bonsai in different places are different, and the shaping methods are vastly different. For example, the Lingnan school uses the pruning and shaping method of "storing branches and cutting the trunk"; the Yang school uses the bending and shaping method of "one inch, three bends"; the Su school uses the shaping method of "rough bending and fine pruning"; the Hui school uses the shaping method of "zigzag bending"; the Chuan school uses the "square bend" or "dropped bend" shaping method, and so on. If we master the most basic methods of pruning and bending and apply them flexibly according to specific circumstances, ideal results can often be produced.
(1) Bending method: that is, by using binding materials such as palm fiber, hemp skin, or metal wire, the tree branches and trunk are bent into various shapes.
Metal wire binding method: This method is simple and easy to carry out, and allows free bending and stretching, but removal is a little troublesome. It is best to use iron wire that has been heated over fire, but usually relatively economical galvanized iron wire is used. Choose iron wire of appropriate thickness according to the thickness of the branch or trunk being bent. Metal wire generally uses sizes 12-24, used according to matching. Iron wire thickness selection table
Iron wire No. 12 No. 12 No. 16 No. 18 No. 20 No. 22 No. 24
Branch or trunk diameter 15 mm 10 mm 6 mm 4 mm 3 mm 2 mm 1.5 mm
When bending, first fix one end of the metal wire at the base or crossing point of the branch or trunk, then slowly wind it tightly against the bark so that the metal wire forms about a 45° angle with the branch or trunk. If the branch or trunk is to be twisted downward to the right, the metal wire is wound clockwise; otherwise, it is wound counterclockwise. Be careful to twist and bend at the same time so that the metal wire stays close to the bark and the branch or trunk is less likely to break. Do not use too much force, to prevent damaging the bark or breaking the branch or trunk. For tree species with thin bark that are easily damaged, such as pomegranate and red maple, the branch or trunk can first be wrapped with hemp skin, and then the metal wire can be used for bending. If repeated metal wire winding is used on one branch, attention must be paid to keeping the winding direction consistent and avoiding crossing as much as possible.
Palm fiber binding method: This is a traditional shaping method in our country's bonsai. Its advantages are: the palm fiber harmonizes with the color of the branches and trunk, it can be appreciated immediately after processing, it is not easy to damage the bark, and removal is convenient, but bending is relatively difficult. Generally, first twist palm fiber into palm ropes of different thicknesses, tie the middle section of the palm rope around the lower end of the trunk to be bent (or make a loop knot), twist the two ends together a few times, place it on the upper end of the branch or trunk to be bent, tie a slip knot, then slowly bend the branch or trunk to the required curvature, then tighten the palm rope and tie a dead knot, thus completing one bend. Generally, the bend should not be excessive; otherwise, it is easy to lose the natural form. The key to palm fiber binding lies in mastering the force point. According to the needs of shaping, choose the position for placing the palm fiber and tying the knot.
The order of palm fiber binding: at the beginning, bind the trunk first, then the branches and leaves; when binding branches and leaves, bind the top first, then the lower part; when binding each part, bind the large branches first, then the small branches; when binding the trunk, proceed from the base to the top.
In long-term practice, old bonsai craftsmen in various places have summarized many kinds of palm fiber binding methods, called palm methods. Such palm methods differ slightly by region or school, but the basic principles are the same, and the purpose is to use palm fiber to tie the tree branches and trunk into the required form. The palm method is a means, not an end. After mastering the basic principles, it can be handled flexibly according to shaping needs.
For bending relatively thick branches or trunks, they can first be wrapped with hemp skin, and a strip of hemp fiber can be placed on the outer side of the place to be bent to strengthen the toughness of the trunk. If the branch or trunk is too thick and difficult to bend, the "cutting method" can also be used, that is, use a sharp small knife to cut a deep opening 3-5 cm long at the bending point of the trunk, and then wrap the cut surface with hemp skin as above. This makes bending easier and also less likely to break. To help the cut heal, it is best to make the cut surface perpendicular to the plane where the bend is located.
Whether metal wire or palm fiber is used for binding, generally it can be removed after one year to set the shape. If not removed in time, as the branches thicken, the metal wire or palm fiber will sink into the bark layer, affecting tree growth and appearance. However, for slower-growing tree species and relatively thick branches or trunks, the time can be extended by about half a year to a year.
Binding time for various tree species: Attention should be paid to binding at the right time, so that the branches are soft, easy to bend, and grow well after binding. If binding is not done at the right time, the branches are likely to break, and development and growth will also be affected. Tree species bound in winter and spring include: Chinese juniper, magnolia, Hydrangea paniculata, butterfly tree, wintersweet, plum, peach, cherry, Prunus glandulosa, Prunus triloba, Malus spectabilis, Malus halliana, pomegranate, crape myrtle, Chinese elm, Chinese hackberry, Vitex negundo, and so on. For the species after wintersweet, before they take shape, the newly lignified branches should also be bound once in summer. Tree species bound in summer and autumn include: Buddhist pine, Huashan pine, Diospyros cathayensis, Elaeagnus pungens, serissa, osmanthus, and so on. Tree species bound in winter and autumn include: Chaenomeles speciosa, firethorn, Japanese apricot, boxwood, and so on. Some tree species such as Euonymus alatus, winter jasmine, and goji can be bound at any time. Flower-viewing tree species such as camellia and rhododendron are all suitable for binding before flowering.
(2) Pruning method: that is, through pruning of branches and trunk, removing excess parts and retaining the essence, so as to make the tree form beautiful. This is one of the main means of shaping tree bonsai. The effects of pruning include weakening, dwarfing, and changing the tree form. When pruning, adjust and cut off messy crossing branches, overlapping branches, parallel branches, opposite branches, and so on. For the retained branches, nutrients are concentrated and they grow thick and strong. When the cultivated branch grows to a suitable thickness, carry out strong pruning to shorten it and produce the second section of branch; when the second section of branch grows to a suitable thickness, prune and cut again, and the third and fourth sections are treated in the same way in turn. Generally, two small branches are kept on each section of branch, one long and one short. After many years of pruning, the branches and trunk become shortened and thick, vigorous and powerful, gradually forming the required tree shape.
Pruning methods: there are measures such as pinching, cutting, thinning, and wounding. Pinching means pinching buds and pinching leaves. Removing the top of new shoots during the growth period is called pinching. Pinching can promote axillary bud growth, produce more branches, inhibit height growth, and help make the bonsai shape beautiful. Pinching leaves can promote the sprouting of new leaves. For example, if elm has its old leaves removed during the growth period, the new leaves will become smaller and more delicate, which is favorable for viewing; if maples and pomegranates have old leaves removed, the sprouting new leaves will be red, bright and pleasing to the eye. Cutting means shortening current-year branches. After shortening, medium and short branches increase, and the mother branch thickens. As the saying goes, when branches are sparse, cut; when cut, branches become dense, which is favorable for shaping branch layers. Retrenching means shortening perennial branches. It is the main technique of the Lingnan school's "storing branches and cutting the trunk," and is favorable for renewing and rejuvenating old trees. When collecting wild tree stumps, during the embryo-nurturing process, the method of retrenching and cutting the trunk is often used. It is both a measure for dwarfing the stump and a means of renewing and rejuvenating old stumps. Thinning refers to thinning pruning, cutting away part of overly dense branches from the base, which helps improve ventilation and light transmission conditions and promotes vigorous growth of the retained branches. Wounding refers to measures such as scoring, girdling, twisting branches, twisting shoots, and bending branches on tree branches and trunks. Flower-viewing and fruit-viewing bonsai often adopt this method to promote flowering and fruiting.
The pruning period should be timely and suitable for the tree. Generally, deciduous tree species can be pruned in all four seasons, but pruning after leaf fall and before sprouting is preferable. Pines and cypresses tend to bleed resin after pruning, so winter pruning is preferable; tree species that grow quickly and have strong sprouting ability, such as tamarisk and elm, can be pruned multiple times a year; for flower-viewing tree species, those that bloom on current-year new branches, such as crabapple, apple, crape myrtle, and pomegranate, should be pruned before sprouting; tree species that bloom on one-year-old branches, such as ornamental peach, plum, and winter jasmine, should be pruned after flowering.
(3) Carving method: In order to show the antiquity of the tree, sometimes a chisel or sharp carving knife can be used to carve the trunk according to shaping techniques, creating natural uneven changes. Part of the bark can also be peeled off, or the trunk can even be split away by half (such as the split-trunk style shaping of plum stumps), making the tree present a naturally withered and aged posture. But when carving, artificial traces of knife cuts and axe cuts must not be revealed. This method is mostly used for pines and cypresses and relatively large old tree stumps.
(4) Root-raising method: Tree stump bonsai emphasizes exposed roots and claws and twisted roots, and this is also one of the important contents of bonsai appreciation. The root-raising technique usually first plants the tree in a deep pot, and then year by year removes the soil mounded above, so that thick roots are raised above the soil surface. At the same time, the root parts can also be artistically curled to make them appear even more ancient, strange, plain, and wild. But when raising roots, moderation must be exercised. The root system must not be exposed too much all at once, so as not to affect the growth of the stump or even cause death. The root systems of tree species such as elm and Caragana sinica are slender and soft. When raising roots, the long roots can be coiled into antique shapes, but the coiling of the root system must be orderly and aesthetically pleasing. It must not be tangled randomly and lose naturalness, which would instead affect the effect.
The forms of trees in nature are ever-changing, and as a miniature of them, bonsai should of course also be diverse. Therefore, it is difficult to set specific standards for tree shaping. But it must conform to nature and be rich in pictorial quality. Arbitrary fabrication loses the natural form of the tree. But merely conforming to nature is also not enough. Artistic processing must also be carried out on the basis of nature. This is the same principle as painting. To reach a certain artistic level, one must usually observe various trees in nature more, accumulate perceptual knowledge, and especially be good at mastering the typical postures of trees commonly used in bonsai, such as the natural form characteristics of pine, cypress, willow, plum, and common mixed trees. At the same time, observe more methods of painting trees in landscape paintings and learn techniques from them. In addition, artistic accomplishment should be improved from many aspects such as aesthetics and literature.
4. Planting of trees
Tree embryos that have been processed and shaped, if they cannot yet take shape for the time being, can continue to be cultivated in the ground; if they are already close to taking shape, they can be potted and matched with scenery.
(1) Pot selection: Only when a beautifully shaped tree is matched with a pot of moderate size, appropriate depth, matching style, harmonious color, and suitable texture can it become a perfect bonsai art work.
When choosing a pot, first pay attention to moderate size. If the pot used is too large, the inside of the pot will appear empty, and the tree will appear short; at the same time, a large pot holds more soil, so it will store too much water, which in mild cases causes excessive vegetative growth of the tree and affects shaping, and in severe cases causes root rot. If the pot used is too small, the bonsai will appear top-heavy and lack stability, and it is also likely to cause insufficient water and nutrients, affecting tree growth. Generally speaking, for short and sturdy trees, when planted alone, the pot mouth surface must be smaller than the crown range, and the pot length must be greater than the height of the trunk; for tall and towering trees, when planted alone, the pot mouth surface must be larger than the crown range, and the pot length must be smaller than the height of the trunk; for combined planting styles, it is better to use a slightly larger pot to express a certain spatial environment. In addition, when using a shallow pot, the pot mouth surface should preferably be larger rather than smaller; when using a deep pot, it should preferably be smaller rather than larger.
The depth of the pot has a great influence on bonsai shaping and also a certain influence on plant growth. If the pot used is too deep, the tree in the pot will appear low and short, and at the same time it is not conducive to the growth of drought-loving plants; if the pot used is too shallow, trees with relatively thick and tall trunks will appear unstable, and it will also be difficult to plant, which is not conducive to the growth of moisture-loving plants and flower-and-fruit tree species. Generally speaking, the combined planting style should use the shallowest pot; the straight-trunk style should use a relatively shallow pot; the slanting-trunk style, lying-trunk style, and curved-trunk style should use a pot of moderate depth; the cascade style should use the deepest tall cylinder pot, but the large cascade style sometimes instead uses a medium-deep pot to contrast and show the length of the hanging branches. In addition, for regular-style tree bonsai, it is customary to use a slightly deeper pot; while for natural-style tree bonsai, especially those with accessories placed in the pot, the pot must not be deep.
When selecting and matching pots, the style and the content of the scenery must be consistent in tone so that they can be harmonious. At the same time, consideration must also be given to benefiting plant growth. For example, if the posture of the tree is vigorous and upright, then the lines of the pot should also be firm and straight, using square, rectangular, and various angular pots to concentrate the expression of a masculine beauty; if the posture of the tree is twisted and graceful, then the outline of the pot should preferably use curved lines, using round, oval, and various rounded pots to display a feminine beauty. It must be explained that this method of selecting pots is not absolute. Sometimes, in order to create a contrast, the opposite approach is also taken. Straight-formed trees use short-footed pots; elegant and slanting trees use tall-footed pots.
Trees that grow quickly and have developed root systems should use pots with flared or straight mouths to facilitate repotting; trees that grow slowly and have undeveloped root systems can use pots with various mouth forms.
For trees with traditional regular-style shaping, it is suitable to use square pots or round pots whose length, width, and height dimensions differ little, and pots in styles such as crabapple shape, hexagonal shape, and plum blossom shape can also be used; trees without obvious directionality should use relatively shallow pots such as round or square ones; the slanting-trunk style should use relatively shallow pots such as rectangular or oval ones; multi-trunk style, forest style, connected-root style, and stone-attached style bonsai have relatively complex content, so it is suitable to use shallow pots with simple shapes such as rectangular or oval ones.
The texture of the pot has a certain influence on both viewing and planting plants. Pines and cypresses generally should use purple clay ceramic pots; mixed wood categories generally mostly use glazed ceramic pots; flower-viewing and fruit-viewing categories should use tile pots for cultivation, which is favorable for flowering and fruiting, and when viewing, an outer porcelain pot or glazed ceramic pot can be added; miniature bonsai should use purple clay ceramic pots or glazed ceramic pots; extra-large bonsai can use carved stone pots or cement pots.
The colors of the pot and the tree scenery should both contrast and harmonize. Pines and cypresses are emerald green in all four seasons, and when matched with dark-colored purple clay ceramic pots such as red or purple, they appear even more antique and simple. Flower-and-fruit categories are rich in color, so it is suitable to match them with brightly colored glazed ceramic pots, making the colors of the flowers and fruits even more gorgeous. For example, red plum, Chaenomeles speciosa, wisteria, and firethorn can be matched with white, light blue, light green, or light yellow glazed ceramic pots; yellow-flowered rhododendron, white plum, Caragana sinica, and winter jasmine can be matched with relatively dark-colored glazed ceramic pots; for foliage-viewing and mixed wood categories, even more attention must be paid to the color of the pot, such as red maple suitable for a light-colored pot and ginkgo suitable for a dark-colored pot. In addition, when matching pots, the color of the tree trunk must also be considered.
The above introduced the main points to note in selecting and matching pots. They cannot be regarded as absolute rules and should be applied flexibly according to specific circumstances. Selecting and matching pots is an important step in the artistic creation of bonsai and has a great bearing on the success or failure of a bonsai work. Serious exploration and research are needed, and only through extensive practice can one become fully proficient.
(2) Soil use: The pot soil for tree bonsai should be selected according to the biological characteristics of each tree species. Different tree species have different requirements for the physical and chemical properties of the soil. Some require acidic soil, such as rhododendron, camellia, loropetalum, and gardenia; some require neutral soil or calcareous soil, such as Chinese elm, zelkova, and Chinese hackberry; tamarisk and goji can tolerate alkaline soil. This shows that different bonsai trees should use different pot soils. But generally, bonsai plants all need fertile, loose sandy loam rich in humus.
There are many types of pot soil, such as humus soil, paddy field soil, mountain soil, leaf mold, pond mud, river sand, and so on, all suitable for bonsai soil. Culture soil can also be prepared according to different situations. Ordinary culture soil is usually prepared from the following materials: 4 parts fertile field soil (garden soil), 4 parts leaf mold (soil formed by piling up and decomposing large amounts of leaves and weeds), and 2 parts coarse sand, then mix evenly with a small amount of rice husk ash and sieve it. Fertilized culture soil is made by mixing 1-2 parts cake fertilizer into ordinary culture soil.
(3) Planting: When planting, first select the pot and soil well, and use broken tiles and wire mesh (plastic mesh is better) to plug the drainage hole at the bottom of the pot. Shallow pots mostly use wire mesh, while deeper pots can use broken tiles, with two pieces overlapped to fill one hole. The deepest tall cylinder pots need more tiles and sand soil placed at the bottom of the pot to facilitate drainage. The work of filling the hole is very important and is related to the survival of the bonsai plant, so it must not be done carelessly. If it is not handled properly and the water hole is blocked, water cannot drain out after watering, and water will accumulate in the pot soil, causing root rot in plants. When using a shallow pot to plant a relatively large tree, metal wire must be used to tie the tree roots firmly to the bottom of the pot. An iron rod can first be placed at the bottom of the pot, and the metal wire passed through the pot hole to tie the iron rod, so that the tree roots can be fixed during planting and will not shake because the pot soil is shallow, affecting root development and growth.
After the position of the tree is determined, put the pre-sieved culture soil into the pot. If the pot soil is divided into coarse and fine, first place the coarse-grained soil at the bottom of the pot, then place the fine-grained soil to mound the roots and fill firmly. When mounding soil, while putting it in, use a bamboo stick to press the soil closely against the roots, but do not press the soil too tightly, as long as there are no large gaps, which is favorable for air and water permeability. When the soil is placed near the pot mouth, leave a little watering space to facilitate watering. If it is a shallow pot, then no watering space may be left, and sometimes soil must be mounded for planting. The depth of tree planting must also be according to the needs of shaping. Generally, it is enough to slightly expose the root part above the soil surface.
After the tree is planted, it can be watered. Newly planted soil is relatively loose, so it is best to use a fine watering can to spray water. The first watering must be thorough. After watering, place it in a windless, semi-shady place, pay attention to watering frequently, and keep the pot soil moist. After about half a month, new roots will grow, and only then can normal management begin.
For the planting of stone-attached style bonsai, there are roughly two situations: one is to plant the tree in a hole in the rock, which is relatively simple, but attention must be paid to using a bamboo stick to press the soil closely against the tree roots; the other is to embrace the rock on all sides with the tree's root system, which is relatively difficult. The tree roots can be carefully inserted into the cracks of the selected rock, the outside entirely coated with mud, then wrapped and tied with moss, and planted together with the stone into the soil. After two or three years, when the roots have grown fully and are tightly embedded with the stone cracks, it can be taken out and planted in a shallow pot.
5. Stone matching and accessories for tree bonsai
In tree bonsai, rocks or accessories are often used in combination with trees for arrangement. This is a unique scenery-making technique of our country's bonsai art. In a pot of pine and cypress bonsai, arranging some rocks will make a tree of only a foot appear to have the momentum of reaching the sky. In cascade-style bonsai, placing a sharp peak stone at the root makes it seem as if the tree is growing on a cliff. When tree bonsai is dotted with rocks, it adds poetic and pictorial charm and natural interest. Pine-and-stone bonsai and bamboo-and-stone bonsai are both techniques of setting off and contrast.
Stone matching can be divided into natural style and courtyard style: natural-style stone matching imitates the natural combination of wild trees and strange peaks and rocks; courtyard-style stone matching imitates the artificially arranged scenery of trees and stones in courtyards.
Accessories refer to small ceramic or stone models such as pavilions, terraces, towers, chambers, animals, and figures. After adding accessories to tree bonsai, a flavor of life can be added. When using accessories, attention must be paid to conforming to the natural environment and the interest of the scenery, and to the proportions of distance and size, as well as harmony of color. Accessories are usually placed on the soil surface of the bonsai or on the matching stones. For temporary decorative treatment for display and appreciation or exhibitions, accessories are generally not placed at ordinary times, so as to avoid affecting management work such as watering and fertilizing the trees.