How to Grow Ivy? Master the Growing Methods and Precautions, Environment Is Key
Around the world, ivy is a symbol of all things beautiful - for example, it carries the meaning of longevity and eternal life. Combined with the many benefits and uses of ivy, it is deeply loved by people. So how do you grow ivy well? Let's take a look at the growing methods and precautions for ivy.
The Growing Environment of Ivy
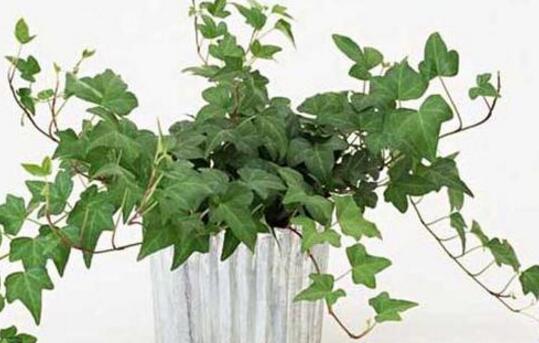
If you want to know how to grow ivy, you first need to understand its most suitable growing environment. Ivy likes a warm and humid environment. In terms of temperature, its cold tolerance is average; in terms of soil, it is not tolerant of saline-alkaline soil; in terms of light, it prefers shade. So when planting, we should try our best to create an environment that is favorable for its growth.
Growing Methods and Precautions for Ivy
1. What Kind of Soil Does Ivy Need?
Although ivy is not strict about soil requirements, it prefers fertile, loose, acidic soil and is not tolerant of soil with relatively high alkalinity. So when choosing soil, sandy leaf mold and garden soil are preferable. Do not use soil with too high alkalinity.
Precautions: Among the growing methods and precautions for ivy, after choosing the soil, it should also be disinfected. Non-professionals can spread the soil in the sun for 1-2 days, which is basically enough to remove fungi and insect sources from the soil.
2. Suitable Temperature for Ivy
The most suitable growing temperature for ivy is 18-20 degrees, but under normal circumstances it is difficult to keep the temperature in this range without greenhouse cultivation, so as long as the temperature does not exceed 30 degrees and does not fall below 10 degrees, it is fine. The overwintering temperature should be kept above 3 degrees, and in summer the temperature must not exceed 35 degrees.
Precautions: When the temperature exceeds 35°C, ivy leaves will turn yellow, and when it is below zero degrees, its leaves may suffer frost damage. So in summer, pay attention to cooling, such as providing shade, etc.; in winter, take good anti-freezing measures, such as putting on an insulating bag or moving it back indoors.
3. Light Requirements for Ivy
Ivy is a shade-loving plant, but it can also grow in a full-light environment. The most suitable light, however, is a bright place without direct sunlight. Only with sufficient light can the leaf color be deep green.
Precautions: If ivy is planted outdoors in a sunny place, it should be properly shaded in summer. In addition, do not grow it in a dark place, otherwise it will grow slowly due to insufficient light.
How to Grow Ivy
1. Planting
Before potting, rotted base fertilizer should first be placed at the bottom of the pot, then excessively long, overly dense, and rotten roots should be cut off. After planting, water thoroughly, then place it in a cool place and wait for new branches to grow. After that, carry out normal management according to the growing methods and precautions for ivy.
2. How to Fertilize Ivy
During the vigorous growth periods in spring and autumn, apply a thin liquid fertilizer once every 15-20 days; in winter, stop fertilizing. When fertilizing, nitrogen fertilizer should be the main type, but phosphorus and potassium fertilizer should also be supplemented to avoid excessive growth of ivy or fading of leaf patterns.
After ivy has taken shape, fertilization can be adjusted to once every 30 days, mainly with mixed liquid fertilizer. Once the plant has taken shape, it does not need routine fertilization. When the leaves turn yellow, a 1000-fold urea solution can be sprayed on the leaf surface.
Precautions: During the growing season, do not overfertilize. For young plants, apply rotted 10-fold liquid fertilizer mixed with an equal amount of 500-fold potassium dihydrogen phosphate solution once every 15 days. This avoids excessive growth or overly thick leaves caused by overfertilization, which would affect the plant's appearance.
3. Watering
Ivy likes a humid environment, so during the growing season, water needs to be replenished in time. In summer, the number of waterings can be slightly increased; in autumn, the number of waterings should be reduced; in winter, when the temperature is relatively low, the soil should be kept on the drier side.
Precautions: Ivy likes a humid environment, so while watering, you can also spray water on the leaf surface during the growing season. Keeping humidity between 50%-60% is beneficial for plant growth. In winter, although watering can be reduced, the soil should not be allowed to become compacted. You can water once a week.
4. Scientific Propagation
Ivy stems and vines root very easily, so cutting is commonly used for propagation. The time can be chosen in spring or autumn. Cut healthy branches from the plant, trim them into cuttings about 15 cm long, then insert them into prepared potting soil. Be careful to keep the soil moist and provide proper care. After 30 days, they will root.
Precautions: During propagation, ensure the soil remains moist. After inserting the cuttings into the potting soil, water once, then check the soil moisture afterward. If it is too dry, place the bottom of the pot in water and let water enter the pot through the drainage holes to keep the soil moist.
How to Grow Ivy So It Grows Fast
If you want ivy to grow fast, besides understanding the growing methods and precautions for ivy mentioned above, you also need shaping and pruning, such as pinching the tips when buds appear in spring and cutting off overly dense weak branches and dead branches. This can prevent excessive branches and vines from affecting its appearance.
Growing Methods for Pennywort (Focusing on Hydroponic Methods)
First, here is a big picture - this is pennywort!
Pennywort picture
Growing pennywort hydroponically is relatively a method loved by lazy gardeners. The details are introduced below.Hydroponic Growing Methods for Pennywort。
1. Water Quality Requirements for Pennywort: Ordinary tap water is fine. Change the water frequently. In summer, change the water once every 3-4 days, with the water level at half the bottle. In winter, change the water once a week. In winter, leaf transpiration is lower, so each water change can be about 1/3 of the container.
2. Light Requirements for Pennywort:Pennywort relatively likes light. I generally place pennywort in a place where sunlight can reach it, such as a windowsill. In summer, the light duration can be longer. 4-5 hours is necessary. In winter, if there is little light, a UV lamp or fluorescent lamp can be used instead of sunlight.
3. Temperature Requirements for Pennywort:I am from the south, and growing pennywort hydroponically takes no effort at all. The southern climate is very suitable for growing pennywort. Keeping the normal temperature at 10-26 degrees is very suitable. Too hot or too cold is not suitable for pennywort growth.
4. How to Prevent Pests for Pennywort:The natural enemy of pennywort is the water snail. Water snails will eat the roots and tender buds of pennywort. If you see this kind of small pest in the water, do not show any mercy. A large outbreak can kill your pennywort.
5. Fertilizing Pennywort:Personally, I do not really recommend fertilizing pennywort, because the nutrients produced by its own photosynthesis are enough. Of course, if you want it to become more luxuriant, you can apply a moderate amount of fertilizer. Ordinary fertilizer can be dissolved in water in the basin and left for it to absorb on its own, but be careful not to make the concentration too strong. A small amount is enough.
6. Propagation Methods for Pennywort:Pennywort is generally propagated by division. In summer, use scissors to cut at the position where the creeping stem has rooted, and transplant the front plant into another water basin to propagate. In addition, in summer pennywort will produce small flowers, and the seeds produced afterward can also be used to propagate new plants.
Precautions for Growing Pennywort
1. Get the water, soil, and sunlight right:Pennywort has round leaves with wavy edges and long stems, and blooms small yellow-green flowers in summer and autumn. It can be grown in water or on land. It likes warmth and humidity. A semi-sunny or shaded cultivation spot is best. Avoid direct sunlight. It is not picky about cultivation soil, but loose, well-drained cultivation soil is best. Propagation can use division or cuttings. It is easy to grow. Keep the cultivation soil moist, and roots will develop in about 1-2 weeks. Since the plant is moisture-tolerant and emergent, it is also suitable for growing in water basins and ponds. If grown in water, be sure to change the water once a week and add a special nutrient solution for foliage plants.
2. Choose well-drained cultivation soil:Pennywort does not need a very large pot. It can also be grown in a larger bowl, or in a narcissus pot used for growing narcissus. Use ordinary vegetable garden soil, mix in an appropriate amount of river sand, and add a small amount of organic fertilizer as base fertilizer. When planting pennywort, it can be planted flat, with the rhizomes only slightly covered and no longer visible. Do not plant too deep. Then place it in a semi-shaded place for a week and let it see sunlight after new leaves have grown.
3. Get the temperature right:Pennywort is afraid of cold. For pennywort placed outdoors in winter, all the water can be poured out and it can be placed in a south-facing, sunny, wind-sheltered spot, where it can overwinter safely. Only some leaves will die off, and the underground root system will sprout again the following spring. In cold northern regions without heating, you can make a cover and cover the whole pot, pour out the water, keep it moist, and as long as the room temperature does not fall below zero, it will continue to grow the next year.
Related reading:
The Benefits of Pennywort
Pennywort Leaves Turning Yellow
More plants:
[Peace Lily][Dieffenbachia][Lucky Bamboo][Fatsia japonica][Nandina][Ivy][Epiphyllum]
[Spider Plant][Winter Jasmine][Cymbidium][Aglaia odorata][Crinum asiaticum][Magnolia][Peace Lily][Anthurium]
[Strelitzia][Hydrangea][Dahlia][Cineraria][Clematis][Lantana][Pansy][Daphne]
[Tulip][Cestrum nocturnum][Tuberose][Hibiscus][Kalanchoe][Gerbera][Mimosa][Campanula]
[Water Lily][Oriental Lily][Hydrangea][Red Maple][Japanese Maple][Salvia splendens][Iris]
What to Do When Asparagus Fern Leaves Turn Yellow - Asparagus Fern Growing Methods
Asparagus fern leaves are slender and elegant, densely arranged like feathers. The plant shape is graceful and uniquely charming, making it deeply loved by people. It is a relatively common indoor foliage flower. Friends who have grown asparagus fern will find that its leaves easily turn yellow during cultivation. What should be done when asparagus fern leaves turn yellow? Today, the editor will teach everyone some care methods for asparagus fern.
Causes of Asparagus Fern Leaves Turning Yellow
1. Temperature too high. Although asparagus fern likes warmth, it should not be placed near a fire for a long time, otherwise the entire fronds will turn yellow and fall off, and the stems will also dry up.
2. Direct exposure to strong sunlight. Asparagus fern cannot be exposed to strong direct sunlight, as this will cause branches and leaves to wither and yellow. In addition, if asparagus fern is exposed to strong light for too long, the plant will first stop growing, and then the leaves will turn yellow and fall.
3. Improper watering. Asparagus fern likes moisture. If watering is neglected, or only the surface potting soil is watered, the root system will not absorb enough water, and the stems and leaves will slowly turn yellow. But never allow water to accumulate in the flowerpot either; too much water easily causes root rot and yellow, withered leaves.
4. Insufficient light. Asparagus fern likes warmth. If it is placed in a shaded environment for a long time, the plant will grow weakly and then turn yellow. In winter, it is best to place it in a place with plenty of sunlight. If it is placed in a place with insufficient light, plus poor ventilation and cold, it is prone to causing branches and leaves to wither and yellow. If this happens, replace the asparagus fern with new growing medium.
5. Improper fertilization. Fertilize asparagus fern regularly so it has enough nutrients. If nutrient supply falls short of demand, the phenomenon of yellow branches and leaves will appear. If the concentration is too high or fertilizer that has not yet rotted is applied, it can easily burn the seedlings and cause drying up. If fertilizer is not applied for a long time, it will also become nutrient-deficient and turn yellow.
6. Suffering frost damage. Asparagus fern likes warmth. In winter, when the temperature is relatively low, if the indoor temperature is below 5°C, a plastic cover should be used to protect it from the cold, otherwise it can easily freeze and wither.
7. Infection by pests and diseases. Once asparagus fern is infected by pests such as scale insects, it will also cause branches and leaves to wither and yellow, and it should be controlled in time.
8. Improper placement. If asparagus fern is placed next to a television, the leaf tips will gradually dry up.
Methods for What to Do When Asparagus Fern Leaves Turn Yellow
1. Place it properly. Asparagus fern likes a semi-shaded, semi-sunny environment that is slightly humid. First, avoid exposure to strong sunlight, but choose a place where it can receive some sunlight; second, it should be able to feel air circulation; third, keep it away from stoves and televisions; fourth, keep it warm, and the minimum room temperature should not be below 5°C. If the room temperature is 0-4°C, use a plastic cover to protect it from the cold.
2. Regulate fertilizer and water. During the growth period of asparagus fern, fertilization does not need to be too frequent. Generally, topdressing is only suitable in spring and autumn, applying a thin rotted manure or urine or a low-concentration compound fertilizer solution once every 10-15 days, or applying rice-washing water or soybean juice water. Fertilization is not suitable during high summer temperatures or low winter temperatures. Fertilization should be controlled so as not to be excessive or mistimed. Watering should follow the principle of not watering until dry, and when dry, water thoroughly at one time, leaving no standing water on the pot surface. Dust on the leaf surface should be removed regularly by spraying water.
3. Prune in time. Asparagus fern tends to grow in clusters. First, when repotting and adding soil, prune old and damaged fibrous roots and thin out excess stems and leaves to avoid excessive nutrient consumption and to protect the roots and leaves; second, cut off locally yellowed leaves; third, for stems and leaves that are yellow and withered at the same time, cut them off together.
Care for What to Do When Asparagus Fern Leaves Turn Yellow
At different stages, the focus of asparagus fern care is also different. In late November, asparagus fern can be fertilized once. Starting in December, move it indoors, water once every half month (using the immersion method), supplement light with a fluorescent lamp on cloudy and rainy days, and spray once every two or three days.
In March of the following year, asparagus fern can be moved outdoors to fully receive light, but avoid direct strong light. Whether the potting soil needs watering can be determined according to the daily weather conditions and the dryness and moisture of the potting soil, while spraying once in the morning and once in the evening occurs almost every day. Fertilize with fertilizer water (urea solution can be used) once a week.
From early May to late August, the plant needs indirect sunlight or shading, and cannot be exposed to strong sunlight. Water once every 2-3 days, and sprinkle more water around the environment to increase air humidity. In this way, asparagus fern can maintain vigorous growth momentum. Note that when the summer temperature is too high, the plant can be placed under tree shade, but it cannot be placed under an air conditioner where it is exposed to blowing air, as this easily causes yellow leaves. From September to November, move the plant out from under the tree and place it directly on a platform, rotating the pot once a week. Fertilizer and water management are the same as spring care.
Conclusion:Although asparagus fern has the characteristic of remaining evergreen for many years, if cared for improperly, it often shows symptoms of yellowing branches and leaves, affecting its ornamental effect. After understanding the measures for what to do when asparagus fern leaves turn yellow and its care methods, you should pay more attention during the process of growing asparagus fern! For more home improvement information, you can visit Lejiaju Website.
[More Information]
|The Language of Red Roses|Formaldehyde-Removing Plants|The Benefits of Pothos Flowers|The Benefits and Uses of Hangzhou White Chrysanthemum|When Do Lotus Flowers Bloom|
|The Benefits and Uses of Jasmine Tea|Pachira aquatica Pictures|The Benefits of Lavender|The Language of Small Daisies|The Benefits of Kunlun Snow Chrysanthemum|
|Growing Methods for Bromeliads|Growing Methods for Clivia|Growing Methods for Ivy|Ginkgo Tree Planting|Orchid Varieties|
|Are Carnations Easy to Grow|Growing Methods for Bougainvillea|The Benefits and Uses of Yellow Chrysanthemum|The Language of Gesang Flowers|Is Calla Lily Poisonous|
|What Plants Absorb Formaldehyde|Potted Flower Pictures|The Benefits of Jasmine Tea|The Benefits and Uses of Aucklandia|Hydroponic Lucky Bamboo|