What to do when the leaves of the pearl plum (Sorbaria sorbifolia) turn yellow? Control the amount of watering and avoid direct strong light
The pearl plum (Sorbaria sorbifolia) is a flowering plant cultivated worldwide and is highly ornamental, but if it is not cared for properly, problems such as yellowing leaves easily occur. So what should be done when the leaves of the pearl plum turn yellow? Below, the editor will walk you through it.
I. What to do when the leaves of the pearl plum turn yellow
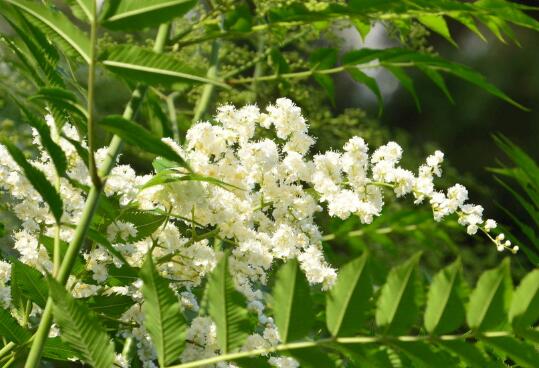
To know what to do when the leaves of the pearl plum turn yellow, we first need to understand what causes it. There are many reasons this happens, such as overly strong light or too little watering, all of which can cause this phenomenon. So how should such situations be handled? There is a detailed introduction below; let's read on.
II. Causes of yellowing leaves in the pearl plum and how to handle them
1. Too little watering
The pearl plum is a plant that likes to grow in a warm and moist environment, so its water requirements are quite high. If too little watering is given during cultivation, it will cause the leaves of the pearl plum to turn yellow, and if the method is not changed for a long time, it can even cause the plant to wither and die.
Handling method: When the pearl plum's leaves turn yellow because of too little watering, we need to appropriately increase the amount of watering. When watering, it is best to water thoroughly at one time, but remember not to water too much, because this easily causes waterlogging, which can lead to root rot in the pearl plum.
2. Light too strong
The pearl plum is a light-loving plant. In spring and autumn, the light is more suitable, and we can let it receive light all day. However, in summer, the sunlight is stronger, and if it is kept outdoors in the blazing sun for a long time, it will cause the leaves of the pearl plum to turn yellow.
Handling method: When the summer sunlight is strong, especially at midday, we can move the pearl plum indoors to a semi-shaded place for cultivation. This way it will not lack light, nor will its leaves turn yellow due to overly strong light.
3. Lack of iron
During the cultivation of the pearl plum, if it lacks iron or other elements, it can also cause the leaves of the pearl plum to turn yellow. This is because a lack of growth elements causes the leaves to lose their green color.
Handling method: If the leaves turn yellow due to iron deficiency, we can apply an appropriate amount of compound fertilizer or minerals to the soil. This can supplement the various growth elements it has lost, thereby preventing the leaves of the pearl plum from turning yellow.
4. Pests and diseases
During the growth of the pearl plum, if it is not cared for properly, problems such as pests and diseases easily occur, and this is also a main cause of yellowing leaves in the pearl plum. Many pests and diseases cause this phenomenon in their early stages, and if not dealt with for a long time, they can also cause the plant to wither and die.
Handling method: When pests and diseases appear on the pearl plum, we must deal with them promptly. However, since the handling methods for various pests and diseases differ, the editor will not introduce them one by one here. Friends who want to learn more can refer to the article on pest and disease control for the pearl plum.
Cultivation of miniature bougainvillea
"Cultivation of Miniature Bougainvillea"
Miniature potted plants are small in size, with exaggerated shapes and simple lines. Decorating a balcony, room, or windowsill with them is even more poetic and picturesque, with a unique charm. Using bougainvillea as material for miniature potted plants, from cutting propagation to the first appearance of shape and then blooming takes only five or six months. Bougainvillea is strong by nature, tolerant of high temperatures and blazing sun, and when grown as a miniature pot plant needs no special treatment in summer, has few pests and diseases, and is easy and rough to care for. Bougainvillea has brilliant flower colors, and varieties have changeable leaf colors; the branches are easy to bend into shapes. A miniature potted plant can offer flowers to admire when in bloom, leaves to appreciate when not in bloom, and branches to view when leafless, giving it extremely strong ornamental value. Today I will share some experiences with miniature bougainvillea potted plants with fellow flower lovers.
1. Choosing pots: Choose miniature pots under 10 cm, especially small and exquisite ones of 6-8 cm. Purple clay pots and ceramic pots are both fine, and small plastic pots or uniquely styled plastic packaging boxes for ice cream, yogurt, or chocolate also work. The appearance and color of the pot should echo the bougainvillea's tree posture, leaf color, and flower color. For example, tall cylindrical signed pots are suitable for cascade and semi-cascade styles; long-waisted oval or rectangular pots are suitable for planting straight trunks and slanted trunks; round pots pair with plants of coiled, low form; polygonal pots are for planting tall trunks that produce fine trailing tendrils and sparse, graceful branches. Elegant light-colored pots are for varieties with brilliant flower colors, while dark, dignified pots are for varieties with light-colored flowers.
2. Soil: Miniature pots have small volume, while bougainvillea has strong growth vigor, a large flower quantity, and high water and fertilizer demands, yet it fears waterlogging. Therefore, the soil must be fertile, loose, well-draining, good at holding fertilizer and retaining water, and rich in humus sandy loam. For example, use leaf mold + sandy loam, or a mix of peat + perlite + garden soil. The requirement is that the pot surface does not accumulate water after heavy rain, and under sun exposure it does not harden or become compacted; the surface layer may look pale and dry while the soil beneath is still moist.
3. Choose varieties that bloom frequently, have variegated leaves, and are easy to regulate in plant shape, such as double-petaled large red, Yijin, and orange-yellow; variegated red and silver-edged white; single-petaled green-leaf water red, orange-red, cherry red, etc.; in Hangzhou, they generally can bloom in 2-3 batches a year.
4. Cutting propagation and selection of seedlings: Miniature potted bougainvillea is fast and convenient to propagate by cuttings. In Hangzhou, in May-June, select short-jointed, 0.3-1 cm diameter, one-year-old lignified or semi-lignified branches. The cuttings should be 6-8 cm long with 3-4 nodes. Keep the front two leaves (or half-leaves) and insert them into a sterilized substrate. Maintain moisture and give light during care. Apply foliar fertilizer after about 20 days, and after rooting gradually expose them to strong light for hardening. At 45-60 days after cutting, move them early with a small amount of substrate into miniature pots; after 2-3 days of recovery they enter routine management. Miniature bougainvillea seedlings can also be obtained directly by finding small, many-year-old dwarf, gnarled-trunk stumps, trimming the roots and pruning the branches, and potting them up; they can also be obtained by air-layering propagation with bagging on old, twisty, varied branches.
5. Goals and measures for early-stage care. Early-stage care is the foundation. The goal is shaping and cultivating the crown. All measures revolve around dense nodes, short branches, a compact plant shape, and simple, smooth modeling. Branches may be bent or folded, but do not deliberately pursue twisty curves; generally 1-2 bends on the main trunk and 2-3 branches are enough. The branches and leaves should be somewhat more than those of other woody miniature potted plants, but should not be too dense, so as to facilitate overall balance of metabolism; design the plant shape and picture according to the pot and the original characteristics of the material, with the direction of branches and leaves and the layout having emphasis, so that the branches and leaves are orderly in density and well-arranged. The crown should be about 1.5 times the pot diameter.
a. Watering and fertilizing: The pot is miniature, the volume is small, and there is little soil, so avoid heavy water and strong fertilizer. The soil should tend toward dry; do not water until dry. On sunny days in spring and late autumn, water in the morning or forenoon; in summer and early autumn, water at both morning and evening, with a small amount of water in the evening to moisten the soil so the leaves can recover from wilting, and water thoroughly in the morning. For fertilizing, every few days mix a little dilute fertilizer water into the water used for watering. For the first few times, mainly nitrogen with phosphorus and potassium as secondary; afterward, mainly phosphorus and potassium. To prevent excessive rain from causing leggy growth, if conditions permit, it can be kept under a sunny rain shelter.
b. Pinching, topping, wiring, and pruning:
Determine the timing of topping and pinching according to shaping needs. Generally, once there are 4-5 leaves, pinch and top to lower the plant height and lower the branching position. After the first branching has formed, pinch again to form secondary branching.
Wiring should be done early; it can be carried out once the plant has been established and resumed growth. Use 0.6-0.8 mm diameter aluminum wire, insert one end into the soil, and wind the other end around the branch in a spiral at about a 45-degree angle, from the main trunk to the tender branches, from bottom to top; when wrapping, the aluminum wire should hug the branch closely, with moderate spacing. After wrapping, bend the branch into the desired form, and finally use the aluminum wire to press down on the leaf axil of the tender top leaves, prompting the tender branch internodes to elongate and form natural bent branches. Wiring should be carried out promptly as the branches grow. You can also use plastic binding tape to tie thicker aluminum wire together with tender branches and then bend them into shape. When growth is vigorous and branches are too long, timely moderate pruning should also be done, shortening and cutting back to promote re-branching, while cutting away overlapping branches and other excess branches.
c. Spraying growth retardants: When new branches appear, begin spraying 0.5% daminozide once every 7-10 days. If spraying 20-50 PPM paclobutrazol, then attention must be paid to controlling the dosage and extending the interval.
d. Bougainvillea is a strongly sun-loving plant, heat-tolerant and not afraid of sun exposure, and should be kept in direct light for care, generally without needing shade. Cascade and semi-cascade plants can be placed tilted or inverted.
e. When the branches and crown have initially formed, some flower-promoting measures must be taken: such as widening the spacing between pots, raising them for ventilation, increasing phosphorus and potassium fertilizer, controlling the amount of watering, and continuing wiring to regulate the plant shape, etc.
6. Flowering-period management: About two months after planting, flower buds may appear. At this time, pause wiring. For each branch, keep 3-4 inflorescences for double-petaled varieties and 6-7 inflorescences for single-petaled varieties, then pinch. Concentrate the nutrients so double-petaled flowers bloom into balls, and single-petaled flowers are large and brightly colored. During the flowering period, appropriately increase the amount of watering in the evening, and continue watering with dilute fertilizer water mainly containing phosphorus and potassium. To prevent severe wilting, a small amount of water can be added at noon, and the water temperature should be close to the soil temperature.
7. Post-flowering management: If a miniature potted bougainvillea is managed properly, it can bloom in three batches a year; new plants cultivated from May cuttings may also bloom twice in the same year. After flowering, cut back and shorten promptly to maintain the plant shape and prevent branches from growing too long; apply additional dilute fertilizer water mainly of nitrogen with phosphorus and potassium as secondary; wire new branches early, spray growth retardants, etc.
8. Overwintering: Because the pot is miniature, it is greatly affected by changes in outside temperature and is prone to cold damage in winter. It should be placed indoors on a sunny windowsill or in a warm cabinet, and every effort should be made to keep it no lower than 8°C. If cold causes leaf drop, keep the pot soil tending dry and let it go dormant; when too dry, pour a small amount of lukewarm water along the edge of the pot. If the temperature is high and sunlight is good and it does not drop leaves, and can even bloom normally, then normal maintenance and management are needed.
9. Later-stage care: After 1-2 years of miniature pot cultivation, repot and change the soil, trim the roots, and prune the branches; or partially change the soil, raise the roots, and take measures to make the main trunk appear old and weathered. After a year of care, the prototype initially appears. Transitioning from an ordinary miniature potted plant to an artistic potted plant or miniature bonsai still requires many years of a shaping process mainly based on pruning with wiring as a supplement.
Cultivation techniques for Bawang mei
Phalaenopsis is a monopodial tropical epiphytic orchid in the orchid family. Its upright thick stem can reach as high as 8 cm, with broad, soft, fleshy alternate leaves. Aerial roots grow between the leaves on the lower part of the stem, and during cultivation the surface of the growing medium is also covered with similar roots, so the root zone requires good ventilation. The potting substrate generally uses fern roots, sphagnum moss, bark chunks, coconut shell chunks, etc. Any well-draining potting substrate can be used, and the most commonly used is the roots of the fern Osmunda japonica. Dry the roots, cut them into small pieces 5 cm long, then add some leaf mold or peat, as well as coarse sand or perlite, and mix them together. However, fern roots are not easy to obtain in northern regions and can only be bought at flower markets, so bark chunks and small moss are generally used. For bark chunks, it is best to cut fir bark into small pieces; generally 2 parts chopped bark and 1 part sphagnum moss, and a little coarse bone meal can also be added to make the mix. Sphagnum moss and the like must first be soaked in water, then the excess water squeezed out, and mixed with some coarse sand, perlite, crushed bricks (stones), etc. before use.If phalaenopsis is planted in an ordinary pot, a multi-holed pot is generally preferred. For better ventilation, a shallow pot should be used, and the pot height is best less than the pot diameter. It can also be planted in a basket woven from wooden strips or metal wire, or tied to the trunk of a tree branch or tree fern. In the flowerpot, generally put half a pot of broken tiles to aid drainage. If using a hanging basket, a thin layer of sphagnum moss must be spread at the bottom of the basket to prevent the potting soil from being lost through the gaps between the wooden strips or the mesh holes. Generally speaking, phalaenopsis needs repotting once a year. When the plant's root system begins to regrow (usually in spring), that is the most suitable time for repotting. Using sphagnum moss as the cultivation substrate can last one year, so it needs repotting once a year. Whether potting up or repotting, newly potted plants must not be watered immediately. During the first three or four weeks, usually it is only necessary to spray the leaves once a day. Repotting is very important in the cultivation and management of phalaenopsis; otherwise, as the cultivation substrate ages and the sphagnum moss rots, aeration becomes poorer, causing the root system to grow outside the pot, and in severe cases causing root rot, a serious decline in plant vigor, and even death. During cultivation, if individual plants are found to have weakened vigor, or the potting substrate has rotted and is not breathable, repotting can also be carried out at any time to restore their growth vigor.
Phalaenopsis generally needs a stable warm and humid environment year-round, even during brief dormancy. The most suitable temperature is 25°C to 28°C during the day and 18°C to 20°C at night. Special attention should be paid: phalaenopsis is very sensitive to low temperatures, and when kept at 15°C for a long time it stops growing. Below 15°C, phalaenopsis stops absorbing water, thereby causing physiological dehydration in the plant itself, with leaves turning yellow and falling off; if it lasts longer, all the leaves on the whole plant fall off and the plant dies. Because the place of origin of phalaenopsis has relatively high humidity, the humidity in places where phalaenopsis is generally cultivated should be maintained at 70% to 80% year-round. You can spray water toward the leaf surface once a day; when spraying, it is best to use a mist, and do not let water droplets remain on the leaves of the phalaenopsis. If they remain on the leaves overnight, black spots will appear at that location. Second, phalaenopsis likes a well-ventilated environment and fears muggy heat. Poor ventilation easily causes rot, thereby leading to weakened seedling growth and the occurrence of disease. Phalaenopsis needs bright diffused light year-round, and generally strong direct light should be avoided.
Latest information
Home cultivation of phalaenopsis
The "Plant Panda" Magnolia Center settles in the South China Botanical Garden 2009 home decoration fashion flowers are highly sought after Yunnan ranks first nationwide in the number of new flower varieties