What to Do About Root Rot in Cymbidium Orchids? Master the Rescue Methods and Repot in Time
Cymbidium orchid, a hybrid variety of orchid, has large flowers and rich colors, and is deeply loved by flower enthusiasts. In daily life, many people grow cymbidium orchids, but during the cultivation process, they often encounter root rot. So what should be done about cymbidium orchid root rot? Next, the editor will bring you several rescue methods for cymbidium orchid root rot.
I. What to Do About Cymbidium Orchid Root Rot: Find the Cause
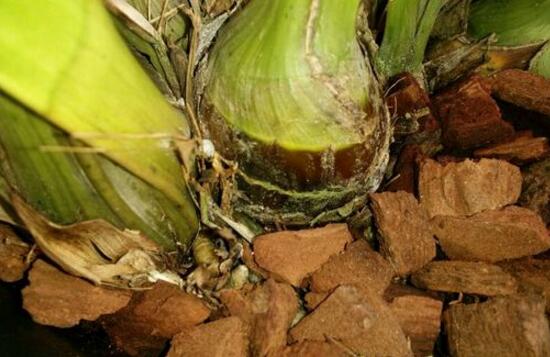
After blooming, cymbidium orchids are very grand and brightly colored, both elegant and magnificent. But many of the flower enthusiasts who grow them are beginners, and for various reasons, they often end up causing the roots of their cymbidium orchids to rot. So what should be done about cymbidium orchid root rot? At this point, everyone should not panic, but calmly find the cause. Below are three causes of cymbidium orchid root rot and their rescue methods. Let us continue reading.
II. Causes of Cymbidium Orchid Root Rot
1. Unsuitable soil
There are many causes of cymbidium orchid root rot, and we should first think of soil factors. In the cultivation methods for cymbidium orchids, it was mentioned that they need loose soil, so once the soil is not loose, the root aeration is poor, and it easily causes root oxygen deprivation and rot.
2. Overwatering
Cymbidium orchids like a moist environment, but they also have fleshy roots that can store water. So overwatering will cause water accumulation in the pot soil, poor root respiration, and easily lead to cymbidium orchid root rot, after which symptoms of yellowing leaves will also appear.
3. Improper fertilizing
During the growth process of cymbidium orchids, we need to fertilize them appropriately, but this "appropriately" is hard to control. Many beginners apply fertilizer that is too concentrated or too much, causing fertilizer damage and leading to root rot. Overall, there are only these three causes of cymbidium orchid root rot. Next, let us look at the rescue methods.
III. Rescue Methods for Cymbidium Orchid Root Rot
1. Trim the roots
If the cymbidium orchid you are growing at home has root rot, do not panic. First pull the whole plant out, then cut off all the rotted roots and dead leaves. Note that debris next to the rotted roots should also be cut away to prevent the decayed parts from spreading and worsening the condition of the cymbidium orchid.
2. Disinfect
After cutting off the rotted parts, we need to disinfect the plant. Specific steps: disinfect the cymbidium orchid with a 1% potassium permanganate solution, soak it for two hours, then rinse it clean, and place it in the sun for a period of time. After that, replace it with new soil. The editor recommends using a soil mix made from sphagnum moss, bark chunks, vermiculite, leaf mold, and peat soil.
3. Repot
For the rescue methods for cymbidium orchid root rot, after completing the above steps, only the last step remains, and that is repotting. Move the treated cymbidium orchid into a deeper pot with good air circulation. Some wood blocks or bricks can be placed at the bottom of the pot to increase air circulation. Then spray water around the leaves frequently every day, and often open the windows for ventilation. Believe that before long your plant will recover its health.
Through the above introduction, I believe everyone should know what to do when encountering root rot symptoms again! Overall, cymbidium orchids are not difficult to grow. As long as everyone is a bit more careful, root rot will basically not occur. Of course, if it does occur, do not panic. Just rescue it according to the above methods. Regarding the causes and rescue methods of cymbidium orchid root rot, the editor has introduced them here, hoping to be of help to everyone.
[Cymbidium Orchid Root Rot] What to Do About Cymbidium Orchid Root Rot and How to Save It
Cymbidium orchid is a plant that can remain evergreen all year round and is very suitable for indoor cultivation. Cymbidium orchid belongs to orchids with axial growth. When choosing a flower pot, you need to choose a long cylindrical pot, and the cultivation environment must have good ventilation. Also, charcoal and other materials that help drainage should be added at the bottom of the pot. The main purpose of this is to prevent cymbidium orchid root rot, because when drainage is poor or ventilation is not smooth, it will cause the roots of the cymbidium orchid to rot. If half of the cymbidium orchid's roots rot, then the cymbidium orchid can basically be judged as done for. Below is a summary of how we should handle cymbidium orchid root rot when we encounter it.
What to Do About Cymbidium Orchid Root Rot 1. Cut off the rotted partsTip the cymbidium orchid out, place it in a cool, dry, and ventilated place for one or two days, cut off all the blackened rotted roots, and remove the potting medium next to the rotted roots, leaving no hidden dangers. Be sure to water less, and when watering with nutrient water and rooting water, also water less! To avoid another occurrence of root rot.
2. Strictly disinfect the orchid plant and potting mediumSoak the orchid plant in 1‰ potassium permanganate solution for 2 hours, rinse with clean water; dry it, and sun it in the sun for 2 hours. The new potting medium I use includes: 50% catalpa bark, 20% crushed brick particles, 20% honeycomb coal cinders, and 10% rotted pine needles. The first 3 items are washed clean with water, then soaked and disinfected with boiling water. The pine needles are exposed to sunlight and sprayed with 2% thiophanate solution for disinfection.
3. Switch to clay pots for growingA cymbidium orchid with root rot needs a certain amount of humidity, but must not be too wet. This requires good air permeability. I chose two clay pots. To increase air circulation, I also enlarged the drainage holes at the bottom of the pots, and placed several long wooden strips under the pots to increase air permeability. Plant the disinfected cymbidium orchid in the pot, with a layer of bark 2-3 cm in diameter and walnut-sized crushed brick particles at the very bottom, a medium-sized potting medium mixture in the middle, and the smallest material on top.
4. Daily managementAfter watering the cymbidium orchid thoroughly to settle the roots, keep it under weak light for more than 10 days, spray twice a day, and after half a month place it on a south-facing windowsill for care. After about 1 month, the plant grew new roots, and after 3 months, purple-red new shoots grew from the pseudobulbs. Do not fertilize before the plant grows new roots. After new roots and shoots grow, only apply light fertilizer, adding 1-2‰ compound fertilizer to water used for raising goldfish and watering it on.
In summer, when temperatures are high, I placed a shallow plastic basin under the cymbidium orchid filled with water to increase humidity, sprayed around the flower pot every morning, noon, and evening, and opened the windows for ventilation at the same time, so that it passed through summer smoothly. Spraying carbendazim or thiophanate once every half month meant basically no pests or diseases occurred.
In November, two plump flower buds grew on the pseudobulbs of the new seedling closest to the windowsill. At this time, phosphorus fertilizer was additionally applied once every 10 days, spraying the leaf surfaces with 2‰ potassium dihydrogen phosphate, and all newly grown leaf buds were removed so that nutrients were concentrated to supply the growth of the flower buds.
What to Do About Cymbidium Orchid Root Rot
Placing several pots of cymbidium orchids indoors can increase the oxygen content of indoor air and improve the environment at the same time. Now outdoor air is relatively poor. Rather than buying an air purifier, it is better to choose to grow cymbidium orchids, which can cultivate the mind and at the same time improve physical health. When growing cymbidium orchids, root rot sometimes occurs, so if cymbidium orchid root rot occurs, what should be done?
What to Do About Cymbidium Orchid Root RotI. Causes of Cymbidium Orchid Root Rot——Soil
If the soil used for cultivating cymbidium orchids has not been fully decomposed, then it will generate heat. Using this kind of overly rotted soil to grow cymbidium orchids will make it difficult for water to evaporate and worsen air permeability. Therefore, under such conditions, cymbidium orchids are very prone to root rot, and bacteria will also easily invade the leaves and rhizomes.
II. Causes of Cymbidium Orchid Root Rot——Fertilizing
Applying too much fertilizer to cymbidium orchids, with too high heat, burns the cymbidium orchid and causes root rot. Or overwatering, with too much water content in the soil, can also cause difficulty in root respiration and produce root rot. At the same time, in a high-temperature environment, bacteria reproduce more quickly, so bacteria invade and cause root rot.
III. What to Do About Cymbidium Orchid Root Rot
Take the cymbidium orchid with root rot out of the pot, peel off the outer soil, and rinse with water. After that, use scissors to cut away the rotted root system, place the roots in a 0.1% potassium permanganate solution and soak for 5 minutes, then add carbendazim and dry it in a cool environment.