How to mix nutrient soil for Clivia? 6 soil formulas and introduction to special flower pots
Clivia has powerful effects. It not only looks beautiful, but can also purify the air, and more importantly, it can improve feng shui. Such a plant is naturally kept in many homes, but growing Clivia well is not easy. The first step for beginners, choosing pots and soil, stumps a whole group of people. So how should Clivia nutrient soil be mixed? Which special flower pot for Clivia should be chosen? For this, let the editor answer your questions.
I. How to mix Clivia nutrient soil, 6 soil preparation methods
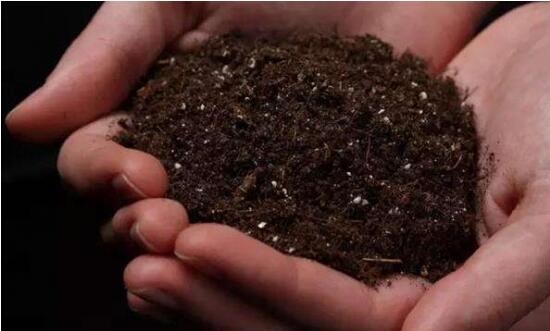
In Clivia cultivation methods, it has been introduced that it likes loose, fertile nutrient soil that drains well and is rich in humus. So for how to mix Clivia nutrient soil, everyone should choose according to its growth habits. For this, based on the many years of cultivation experience of veteran growers online, the editor has summarized 6 methods for preparing Clivia nutrient soil, as follows:
1. Humus soil
This nutrient soil is the most ideal material for cultivating Clivia. The preparation method is: in autumn and winter, collect nearby fallen leaves or weeds, as well as animal waste (cat or dog waste is fine), then mix them with a small amount of soil to make a pile, press it firm, cover it with thin mud on top, turn the pile once after half a year, and it will be decomposed by the second year. When using it, turn it over and dry it in the sun, then sift out the coarse debris and it is ready to use.
2. Forest leaf mold
On the forest surface, a large amount of leaf mold accumulates year after year, and friends nearby can collect it easily. However, when collecting, everyone should preferably choose the middle layer of deep leaves, leaf mold that feels loose and light when held in the hand, is dark brown in color, but smells fresh. The characteristics of this soil: loose texture, slightly acidic, good permeability, and rich nutrition, so it is a top-grade raw material for preparing Clivia nutrient soil.
3. Horse manure soil
Characteristics of horse manure soil: soft soil texture, good air permeability, heat preservation and moisture resistance, rich in humus, and not easy to compact after watering, making it very suitable for Clivia. As for how to mix this kind of Clivia nutrient soil, the method is very simple: take horse manure that has been piled for 1-2 years, and after sun exposure, drying, and sifting, make it into nutrient soil.
Note: Fresh horse manure cannot be used, because it contains weed seeds, pathogens, insect eggs, and so on. Only after 1-2 years of decomposition, using the high temperature produced by microbial fermentation, can pathogens and insect eggs be killed.
4. Grass peat soil/peat soil
Characteristics of grass peat soil: soft texture, water and fertilizer retention, good air permeability, rich in humic acid. After mixing with river sand, it can become Clivia nutrient soil. So how should this kind of Clivia nutrient soil be mixed? It is understood that grass peat soil is formed from aquatic plants in low-lying areas buried underground for many years and carbonized through the action of peat moss. Everyone can find it in soil layers 50—100 cm deep.
5. River sand
As the name suggests, it is sand from rivers. It has good air permeability and is rich in trace elements: iron, magnesium, sulfur, copper, zinc, molybdenum, and so on, all of which are indispensable for Clivia growth; at the same time, sand can also inhibit the breeding of mold and destroy the development of mycelium. Therefore, river sand is also a material for Clivia nutrient soil. Preparation method: take river sand, wash it and steam-disinfect it, then use a sieve to keep river sand of 1-2 mm.
6. Furnace ash slag
That is, slag after burning. The characteristics of this soil: loose texture, air and water permeability, water and fertilizer retention and warmth preservation, contains more trace elements, can promote Clivia roots to be thick and seedlings to be strong, and is an ideal additive for preparing Clivia nutrient soil. Preparation method: furnace ash slag is not furnace ash powder, but crushed slag sprayed from a fluidized bed furnace or ordinary furnace slag, the coarse slag sifted through a 4 mm sieve.
II. Special flower pots for Clivia
After the Clivia nutrient soil is prepared, the choice of flower pot cannot be troublesome either. It is understood that the requirements for special flower pots for Clivia are actually not strict. Clay tile pots, ceramic pots, porcelain pots, and plastic pots are all acceptable, and their advantages and disadvantages are also obvious, as follows:
1. Clay tile pot: good air permeability, drains well, conducive to Clivia growth. Disadvantage: not beautiful enough;
2. Ceramic pot: better looking than clay tile pots. A purple-red pot paired with dark green Clivia appears steady. Disadvantage: the bottom hole is relatively large, and air permeability is average;
3. Porcelain pot: the best looking, can set off Clivia as even more delicate and moving. Disadvantage: the bottom hole is rather small, and air permeability is relatively poor;
4. Plastic pot: cheap, lightweight, and printed ones are also very beautiful. Disadvantage: many holes at the bottom, and air permeability is not very good either, but better than porcelain pots.
Regarding special flower pots for Clivia, there are basically the above 4 types, and everyone can choose according to their own preferences; as for nutrient soil, the choice is much broader, and everyone can choose the most conveniently available one. After choosing, then carefully maintain them, and your Clivia will become very beautiful. Regarding Clivia nutrient soil and special flower pots, the editor has introduced this much, hoping to bring help to everyone.
Introduction to Clivia soil replacement methods and precautions
For Clivia soil replacement, you can refer to this soil
There are many flower lovers who like Clivia, but very few flower lovers know how to care for Clivia. Some flower lovers may never have changed the soil for their Clivia when growing it, not because they are lazy, but mostly because they do not have this awareness. So why should Clivia be given new soil? And how should Clivia soil be correctly replaced?
I. Why should Clivia be given new soil
Mainly because the nutrient materials in the soil in the pot are consumed relatively heavily, so the soil needs to be replaced.
Schematic diagram of Clivia soil replacement
II. Preparation for Clivia soil replacement
1. Prepare soil: mix leaf mold, pine needles, river sand, and charcoal slag in a ratio of 4, 2, 3, 1 in spring and summer, stir evenly, spray with water to a semi-moist state, put in a plastic bag, and let it sit for three to five days for later use (in autumn and winter, the leaf mold and river sand can be increased or decreased);
2. Fry small hemp seeds or sunflower seeds and set aside for later use. In autumn and winter, do not exceed 10%; in spring and summer, reduce appropriately or do not use;
3. Prepare pots: according to how many flowers you have, the size of the flowers, and the number of roots, prepare an appropriate number and size of special Clivia pots, soak them thoroughly with water, and set aside for later use. Special reminder: use suitable pots according to the size of the flower, and absolutely avoid using a large pot for a small flower;
4. Before changing the soil, stop watering for 7 to 10 days or 7 to 15 days according to the size of the flower pot.
Clivia soil replacement
III. Ratio for Clivia new soil replacement
Leaf mold 50%, pine needles 20%, old soil 15%, sand particles 10%, charcoal 5%. Before use, the soil can be moistened with water, and it is best if it clumps when gathered and scatters immediately when dropped to the ground.
Explanation: The old soil removed from replacement should first be dried in the sun. This process is also a sterilization process. Then use a 3*3 mm fine sieve to sift out broken soil, keep the relatively coarse part, and mix it into the new soil. Mixing old soil into new soil is very beneficial to the flower, because it is less likely to damage the roots and the seedlings recover quickly, and it also saves soil.
IV. Steps for Clivia soil replacement
1. Remove from pot
Pull the Clivia out of the pot, gently remove the attached old soil by hand, inspect the root system, remove rotting roots and shriveled roots, and wipe and disinfect broken root areas with potassium permanganate solution or plant ash.
2. Potting
Use broken tiles to block the bottom of the pot, scatter a layer of charcoal particles. If there is no charcoal, other broken brick particles can be used instead. Then sprinkle a layer of soil, then scatter an appropriate amount of small hemp seeds and sunflower seeds as base fertilizer, then sprinkle another layer of soil to avoid direct contact between fertilizer and roots.
3. Adding soil
Hold the Clivia, fill the roots with soil, then hold the Clivia with one hand and support the root part with the other hand and place it into the pot, then fill soil around the Clivia, pressing while filling to avoid contact between roots and pot. The filled soil should be 2 cm lower than the pot rim to make watering convenient.
4. Watering
If the soil humidity is high, first place the Clivia in a cool, ventilated place for 2-3 days, then water thoroughly with a large amount of water. If the soil humidity is not high, water thoroughly with a large amount of water directly.
Clivia soil replacement
V. Precautions for Clivia soil replacement
1. Time for soil replacement
Generally speaking, Clivia should be repotted once a year, as this is more helpful for Clivia growth. However, this does not mean it can be repotted at any time. Soil replacement is best carried out in spring and autumn, because the temperature is suitable at this time and Clivia grows vigorously, so growth will not be affected by soil replacement.
Flower lovers can, according to the actual conditions of their region, repot and replace soil in March to April or in August to September. At this time the weather is warm and cool (note the difference between northern and southern regions; southern regions should appropriately delay), and the temperature is moderate. This is the second vigorous growth period of Clivia. According to the plant's growth condition, growers can carry out autumn repotting in mid-August.
2. Try to avoid soil replacement during the flowering period
It should be noted that after Clivia shoots its scape, or during the bud development and flowering period, it is best not to replace the soil, because at this stage the plant needs relatively more nutrients, and carrying out soil replacement will affect the continuous supply of nutrients. However, if soil replacement is necessary due to root rot or yellow leaves caused by poor soil quality, care should also be taken not to break up the root ball, and to minimize root loss caused by soil replacement.
3. Avoid damaging roots
When taking out Clivia with a soil ball, be careful not to break the soil ball apart, so as not to damage the root system. Gently remove the soil, and at the same time remove aged and rotting fleshy roots (but fleshy roots that are not rotting should not be cut off no matter how long they grow, because these fleshy roots and their tips have many root hairs. Besides absorbing water and nutrients, these root hairs can also secrete various acids, dissolve nutrients in the soil that are not easily soluble, and expand absorption. If they are cut off, although the plant will not die, it will definitely affect growth).
4. Adjusting to the pot
After Clivia soil replacement, place it in a shaded place for about 10 days to slow water evaporation and allow it to gradually recover its strength. After 10 days, light can be gradually increased.
5. The pot is not better the larger it is
Prepare a suitable special pot according to the size of the Clivia (especially the number of roots), and avoid using a large pot to grow a small Clivia.
Editor's tip:Never replace the soil during Clivia's seedling recovery period, vigorous growth period, flower bud period, or flowering period. It is best to carry out soil replacement during Clivia's dormant period or early growth stage. If flower lovers have better methods for replacing Clivia soil, they can also share them with everyone.
Introduction to soil cultivation methods and water culture techniques for Clivia
Clivia is native to the tropical regions of southern Africa and grows beneath trees, so it fears heat and cannot tolerate cold. It likes semi-shaded and humid environments and fears strong direct sunlight. The optimal growth temperature is between 18-28°C. Below 10°C or above 30°C, growth is inhibited. Clivia likes ventilated environments and likes deep, fertile, loose soil. It is suitable for growing in loose, fertile, slightly acidic organic soil. Clivia is a famous greenhouse flower and is suitable for indoor cultivation. The cultivation methods for Clivia are introduced as follows:
Clivia propagation methods
Common Clivia propagation methods are seed sowing propagation and division propagation.
1. Seed sowing propagation method
The pollination method is: when the perianth has split for 2-3 days, the flower bud is mature, and the stigma secretes sticky liquid, that is the time for pollination. When pollinating, use a new writing brush to dip up pollen from the stamens and gently shake it onto the pistil stigma. To increase the seed-setting rate, pollination can be done once between 9-10 am and once between 2-3 pm. After about 8-9 months, the seeds can mature. When the fruit skin gradually changes from green to black-purple, the fruit cluster can be cut off, and after 10-20 days the seeds can be peeled out. Before sowing, soak the seeds in warm water at 30-35°C for 20-30 minutes, then take them out and air-dry for 1-2 hours (at this time, if they can be soaked in 10% sodium phosphate solution for 20-30 minutes, then taken out, washed, and soaked in clean water for 10-15 hours, it is even better), and then they can be sown into culture soil. After sowing, place the flower pot in an environment at room temperature of 20-25°C and humidity of about 90%, and in about 1-2 weeks the radicle will sprout.
Before carrying out seed sowing propagation, first prepare culture soil. Many materials can be used to make culture soil, but one relatively easy-to-obtain type is loose soil with sufficient humus taken from the forest surface layer, mixed with 1/3 clean fine sandy soil.
2. Division propagation method
Asexual propagation of flowers includes cuttings, division, layering, grafting, and other methods, but asexual propagation of Clivia generally only uses the division method. This method is even more common for Clivia nobilis. To propagate by division, first do several preparation tasks:
① For home pot cultivation, prepare flower pots. The flower pots are best clay pots. Do not buy porcelain or ceramic ones just for the beauty of the pot surface, because they have poor air permeability and are not conducive to plant development and growth.
② Prepare medium soil, preferably disinfected. If using humus soil mixed with fine sand, the humus soil should be sprayed and disinfected with a 1000-2000 times water solution of potassium permanganate; fine river sand should also be scalded and disinfected with boiling water to avoid seedlings being infected by pathogens and rotting.
③ Prepare a small amount of charcoal powder to apply to wounds to absorb moisture and prevent rot.
④ Sharpen the cutting knife, and finally quickly dry-grind it on a whetstone (without adding water) several dozen times, so that the blade becomes highly heated in order to kill pathogens.
When dividing Clivia, first take the mother Clivia plant out of the pot, remove the old soil, and find the axillary buds that can be divided. If the offset plant grows on the outer edge of the mother plant and is relatively small, you can hold the bulb part with one hand and pinch the base of the offset with the other hand, give it a tear and twist, and the offset can be separated from the mother body; if the offset is thick and strong and not easy to break off, use the prepared sharp knife to cut it off. Never force it off, so as not to damage the young plant. After the offset is cut off, immediately apply dry charcoal powder to the wound to absorb the flowing liquid and prevent rot. Next, pot the offset for planting. When planting, the planting depth should be enough to bury the base pseudobulb of the offset, keep the part near the seedling slightly higher, and cover with sterilized sandy soil. After planting, water thoroughly once immediately, and when the wound heals after 2 weeks, add another layer of culture soil. Generally, new roots grow after 1-2 months, and flowering occurs in 1-2 years. Clivia propagated by division has relatively stable heredity and can maintain the various characteristics of the original species.
Clivia cultivation methods are divided into soil culture methods and water culture methods. Below we will look specifically at these 2 cultivation methods.
Clivia soil culture techniques
Clivia cultivation is relatively simple. First choose good pot soil, and it can be placed indoors near a window, with fertilizer and water controlled according to the temperature characteristics of each region. During the growth period, the pot soil must be kept moist. During the high-temperature semi-dormant period, the pot soil should be on the dry side, and water should often be sprayed on the leaf surface to achieve the purpose of cooling. Clivia likes fertilizer. Every 2 to 3 years in spring and autumn, repot once and add decomposed cake fertilizer into the pot soil. Each year before the growth period, apply 5 to 40 grams of decomposed cake fertilizer under the pot soil surface, and apply liquid fertilizer once during growth. During management, frequently turn the pot to prevent leaves from leaning to one side. If leaning occurs, correct it promptly. When the temperature is 25 to 30°C, leaves are prone to excessive growth, making the leaves narrow and long and affecting the ornamental effect, so when cultivating Clivia, be sure to pay attention to regulating room temperature.
1. Soil
Clivia is suitable for soil rich in humus. This kind of soil has good air permeability, good water permeability, and is fertile and slightly acidic. Generally, the Clivia soil configuration is 6 parts leaf mold, 2 parts pine needles, 1 part river sand or furnace ash slag, and 1 part base fertilizer (hemp seeds, etc.). Leaf mold mainly refers to oak leaves, also called oak tree. This kind of leaf is thick in texture and is very good humus. It is nutritious and has good water permeability. Other leaves are too thin and disappear after decomposition, so they cannot be mixed with other media to make soil. When cultivating, the pot used should gradually increase as the plant grows. When cultivating one-year-old seedlings, a 3-inch pot is suitable. In the second year, change to a 5-inch pot, and afterward repot into a pot one size larger every 1-2 years. Repotting can be carried out in spring and autumn.
2. Watering
Clivia has relatively well-developed fleshy roots, and a certain amount of water is stored in the roots, so this flower is relatively drought-tolerant. However, even drought-tolerant flowers cannot be seriously short of water, especially in summer when high temperatures are combined with dry air, one must not forget to water in time. Otherwise, the roots and leaves of the flower will be damaged, causing new leaves not to sprout and the original leaves to scorch, which not only affects flowering but may even cause plant death. However, too much watering will also cause root rot. So it must be well controlled. Always pay attention to the dry and wet condition of the pot soil. When it is half dry, water once, but the amount should not be too much. Keeping the pot soil moist but not soggy is just right.
If conditions permit, magnetized water is naturally best; next is rainwater, snow water, or living water from rivers; next is pond water; the worst is tap water. Flower growers living in large cities only have tap water available, so they can use a small water vat or basin or bucket, put the tap water in it, and water after 2-3 days. This can allow some harmful impurities in the water to settle. In addition, it can allow the substances contained in the water to be oxidized and purified, and can make the water temperature close to the pot soil temperature, so it will not be too cold or too hot and cause harm to the plant.
3. Fertilizing
Many flowers like fertilizer, but fertilizing fertilizer-loving flowers also has a limit. Too much fertilizing is unfavorable to growth and may even cause plant root rot or scorching. Clivia also belongs to this type of plant, and must be fertilized in appropriate amounts. Flowers have different nutrient requirements at different growth and development stages. Therefore, different fertilizing methods suitable for the plant's needs should be adopted at each stage. Such as base fertilizer, topdressing, and foliar fertilization.
① Applying base fertilizer (also called basal fertilizer). The purpose is to create conditions for plant growth and development and meet its nutrient needs. Clivia base fertilizer should be applied when repotting every 2 years. Apply commonly used barnyard manure (that is, poultry and livestock manure), compost, green manure, soybean cake fertilizer, and so on into the soil.
② Topdressing. Mainly to promote plant growth. Clivia can be given fertilizers such as cake fertilizer, fish meal, and bone meal. Apply less at initial planting, and later as the plant grows and leaves increase, the fertilizing amount gradually increases accordingly. When fertilizing, dig open the pot soil and apply into the soil at a depth of 2-3 cm, but note that the fertilizer applied should not be too close to the root system, so as not to burn the root system. Applying this kind of solid fertilizer generally once a month is enough, and it should not be more frequent.
③ Topdressing with liquid fertilizer. Topdressing with liquid fertilizer is to mix the soaked and decomposed clear supernatant liquid of animal and plant materials with 30-40 times clean water and then pour it onto the pot soil. Small seedlings should be watered with 40 times water, medium seedlings with 30 times water, and large seedlings can use only 20 times water. After applying the fertilizer liquid, water once with clean water after 1-2 days (the amount of water should not be too much), so that the fertilizer penetrates to the roots in the pot soil and fully exerts its fertilizer effect. Do not water 1-2 days before applying liquid fertilizer. Let the pot soil be relatively dry before applying the fertilizer liquid, which is more effective. The best fertilizing time is early morning; when pouring, the fertilizer liquid should be poured along the pot edge, and care should be taken to avoid applying it on the plant and leaves. In addition, the fertilizer variety should also be selected according to different seasons. For example, in spring and winter, it is suitable to apply some phosphorus and potassium fertilizers, such as fish meal, bone meal, and hemp cake, which help leaf vein formation and improve leaf glossiness; while in autumn, it is suitable to apply decomposed soaking liquid of animal hair, horns, hooves, or soybean cake, diluted with 30-40 times clean water before pouring, to help leaf growth.
④ Foliar topdressing. Using this method of fertilizing mainly compensates for the lack of nutrients in the soil, solves the problem of nutrient deficiency in the plant body, and makes seedlings grow quickly and flowers and fruits grow plump. Foliar fertilization is to spray the diluted fertilizer liquid directly onto the plant's leaf surface with a misting device, allowing nutrient elements to penetrate through leaf epidermal cells and stomata into the leaf tissues and then be transported throughout the plant. Commonly used fertilizer varieties include urea, monopotassium phosphate, and superphosphate. When spraying, spray evenly on both the front and back sides of the leaves. Spray once every 4-6 days during the growing season, and once every 2 weeks during semi-dormancy. Generally spray after sunrise. After the plant flowers, spraying should be stopped. It must be noted that this method can only be used when the plant is found to be deficient in fertilizer. If the plant has sufficient nutrition and grows vigorously, it should not be used.
4. Cooling in summer
In midsummer, the temperature is often above 30°C, which is extremely unfavorable to Clivia growth. For this reason, it is common to build a shed for cooling. You can also bury the Clivia together with the pot in sand (bury the pot completely), then sprinkle water on the sand once each morning and evening. In this way, the pot soil can be kept moist, and more importantly, the heat absorption effect of water evaporation from the sand can be used to achieve the purpose of cooling.
5. Later management
The Clivia flowering period is generally from February to April. After flowering, appropriate cooling, ventilation, and reduced light can be used to prolong the flowering period. The length of the Clivia flowering period can be controlled through people's cultivation techniques.
① Fertilizing: apply once bone meal, well-fermented fish internal organs, and soybean cake water, which can make flower colors vivid, flowers larger, and leaves thicker. Otherwise, it is easy to have small flowers, few in number, and light flower color. At the same time, care should be taken to avoid excessive nitrogen fertilizer application and insufficient phosphorus and potassium fertilizer, which may cause weak growth or excessive leaf growth and affect bud appearance and flowering.
② Light: give a certain amount of light conditions to meet the requirements of photosynthesis and flowering for light. Under strong light, the flowering period is short and flower color is vivid; under weak light, flower color is light. Too long or too strong light, or long-term shading and insufficient light, will all affect nutrient production and accumulation, making it impossible to show buds and flower.
③ Temperature: suitable temperature has an obvious effect on the quality of flowering. If the temperature is too high, root hairs exist for an extremely short time, and the function of absorbing water and fertilizer is greatly reduced, causing Clivia to appear semi-dormant; if the temperature is lower than 10°C, growth will also be inhibited; during the growth period it should be controlled at 15-25°C, and during the flowering period it should be 15-20°C. If root hairs exist for a long time and the water and fertilizer absorption function is good, the leaves will grow short and wide, and the flower vigor will be luxuriant. It should also be noted that Clivia should maintain a temperature difference of about 8°C between day and night, because the organic matter it produces under higher daytime temperatures needs to be stored and digested under lower nighttime temperatures.
④ Moisture: Clivia must not lack water throughout the plant growth period. When entering the flowering period, the water requirement is even greater, and the growth humidity should not be lower than 60%.
Clivia water culture techniques
Clivia can also be grown in water. Below we will look at the water culture methods for Clivia.
1. Container selection
To hydroponically grow Clivia, first choose a good container. Generally speaking, a transparent glass container is better. If growing one seedling, only a glass jar is needed. If water-cultivating in large quantities, you can use thin iron wire to weave a metal mesh with a hole diameter of one centimeter, and make a glass hydroponic box slightly smaller than the metal mesh; or use a goldfish tank instead. Then cover the hydroponic box with the metal mesh, insert the Clivia seedlings separately through the mesh holes into the nutrient solution, and the depth of the flower roots in the culture solution should not exceed the base pseudobulb of the root part.
2. Nutrient solution preparation
Nutrient solutions are divided into inorganic and organic types. The inorganic nutrient solution can be prepared in the following proportions: calcium 1.5 g, ferrous sulfate 0.01 g, urea g, monopotassium phosphate 1 g, magnesium sulfate 0.5 g. After the above 5 inorganic salts are all prepared, dissolve them in 1000 g water and it is ready to use. The organic nutrient solution is prepared as follows: fried hemp seed powder 100 g, bone meal (made from unsalted fresh bones) 100 g, soybean cake powder 150 g, cooked sesame powder 50 g, then dissolve in 1000 g water. Comparing the above two nutrient solutions, organic fertilizer has rich components, but the nutrient content is not high; inorganic fertilizer has relatively single components, but the fertilizer effect is strong and takes effect quickly. To make up for each other's shortcomings, the two can be used in combination. If used alone, inorganic fertilizer should be applied once a week, and organic fertilizer once every 5 days.
3. Water used
For hydroponic Clivia, tap water cannot be used directly. It must be water that has been “aged.” The so-called “aged” water means putting tap water in a container and exposing it to sunlight for 3-5 days, so that chlorides such as bleaching powder that are harmful to Clivia roots settle. For “aged” water, from the appearance, the sediment changes from strip-like to clump-like, and the water color is best when green. After the water is “aged” well, the root part must be submerged, but the pseudobulb must definitely not be submerged. If the water level is too shallow, Clivia cannot get sufficient water supply; if the water level is too deep (submerging the pseudobulb), it will cause root rot. During cultivation, pay attention to observing changes in water quality. If the roots are found to be somewhat yellow or black, it indicates that the water is both short of oxygen and low in fertilizer, and the water must be changed immediately.
4. Air
Whether the ventilation of the roots of hydroponic Clivia can be handled well is the key to the success or failure of hydroponics. After a period of cultivation, a layer of green moss grows on the roots of hydroponic Clivia. When the green moss is too thick, it will seriously affect root respiration and corrode the culture solution. At this time, use a soft, clean brush to gently brush away the green moss layer on the roots (it does not need to be brushed very clean, because a small amount of green moss on the roots has little effect). In addition, often check whether the oxygen in the water is sufficient. The checking method is: put two or three small fish into the hydroponic box. If the small fish swim freely in the water, it means the water is not short of oxygen. If the small fish always float to the surface, with mouth and gills exposed to breathe, it means the water is short of oxygen. After discovering oxygen deficiency in the water, oxygen must be supplemented. There are two methods: one is to change the water, and the other is to use a small oxygen pump to supply oxygen to the water.
5. Sunlight
In terms of sunlight treatment, Clivia is a semi-shade and semi-sun plant, and attention should be paid to light. Especially in summer, avoid direct strong sunlight and let it receive scattered light. In addition, according to the light-facing characteristic of Clivia leaves, pay attention to making the leaves receive light evenly. Otherwise, the leaves will be inconsistent in length, and the growth direction will also be staggered front and back. Generally, the light angle should be adjusted once every two or three days.
6. Temperature
In terms of temperature treatment, the environmental temperature for adult Clivia is preferably 11-25°C, and small seedlings can be slightly higher, 20-35°C is fine. For growing Clivia in water, master the day-night temperature difference. In winter, keep it around 20°C during the day, and not lower than 15°C at night.