Freesia leaves turning yellow is mostly due to unsuitable light, improper water and fertilizer, and major environmental changes
The beauty of freesia should leave a deep impression on anyone who has seen it. Not only are its flowers beautiful, but its sword-like leaves are also very lovely. However, during cultivation, many flower lovers encounter yellowing leaves, which seriously affects the ornamental value of freesia. So what causes freesia leaves to turn yellow? On this, the editor has summarized 4 causes of yellow leaves and attached solutions. Let's take a look together.
I. What causes freesia leaves to turn yellow
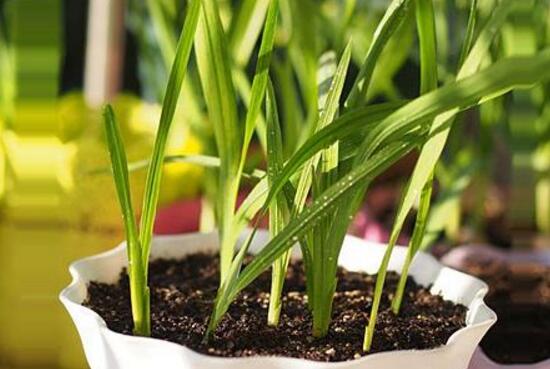
Delicate and colorful flowers paired with emerald green leaves, this is the expression of freesia's beauty. But if yellow leaves appear, this beautiful scene will be ruined, and at that time flower lovers must be very anxious! So what causes freesia leaves to turn yellow? Based on the experience of expert gardeners, the editor has summarized 4 points: sudden environmental changes, unsuitable light, improper watering, and improper fertilizing. Next, let's take a look at the solutions.
II. Solutions for freesia leaves turning yellow
1. Sudden environmental changes
Regarding the causes of freesia leaves turning yellow, many people think of light, water and fertilizer, but environmental factors are the first thing everyone should consider. Nowadays, many flower lovers buy their freesia online, which easily creates a large regional span, so the freesia cannot adapt for a while, resulting in yellow leaf symptoms.
Solution: Communicate with the seller in time to learn about the growing environment of the freesia before it was purchased, and then adjust it appropriately at home. After that, change it slowly until it fully adapts to the current environment. After a period of time, the plant will recover to health.
2. Unsuitable light
Freesia likes light, and during growth, sufficient light allows it to grow better; however, freesia is relatively shade-loving and avoids direct strong light. For this reason, beginners find it hard to control, resulting in unsuitable light and ultimately causing freesia leaves to turn yellow.
① Too much light: Leaves are easily scorched, causing dry and withered leaf tips and edges, and yellow spots appearing on the sun-facing part of the leaves. Solution: Move the flowerpot to a semi-shaded place for care, and water appropriately. After several weeks, gradually move it into the sunlight.
② Insufficient light: Freesia cannot get enough light, making it hard to form chlorophyll, and the whole plant's leaves will gradually turn yellow and fall off. Solution: Move the plant into the sunlight to supplement light, and note that it should be shaded when the light is too strong.
3. Improper watering
During the growth of freesia, water is indispensable, and during the peak growing season, even more watering is needed. However, watering is also a cause of freesia leaves turning yellow, so everyone must water appropriately.
① Overwatering: Water accumulates in the potting soil, and after a long time, the leaf tips of freesia will wither and turn yellow. Main symptoms: Old leaves show no obvious change, young leaves are dull yellow and lusterless, and wilt and droop. Solution: Move the flowerpot to a ventilated sunny place so the water evaporates quickly; in severe cases, remove it from the pot, wait for the potting soil to dry naturally, and then put it back in the pot.
② Underwatering: The soil is dry, the leaves cannot absorb water, and the edges wither and dry out. Main symptoms: Old leaves turn yellow and fall off from bottom to top, while new leaves grow normally. Solution: Water it immediately, make sure to water thoroughly, and ensure the potting soil stays moist; if the temperature is too high, also spray water appropriately to increase air humidity.
4. Improper fertilizing
To ensure freesia leaves stay emerald green and it keeps blooming, appropriate fertilizing is very important. However, many beginners are not careful about fertilizing, and even when they do fertilize, they tend to apply too much, resulting in freesia leaves turning yellow and affecting its ornamental value.
① Overfertilizing: It easily causes fertilizer damage and root burn, leading to yellowing leaves. Main symptoms: Old leaves scorch yellow and fall off, new leaf tips are dry brown, and the surface is uneven and not smooth. Solution: Stop fertilizing, water to dilute the fertilizer in the soil, and in severe cases directly remove it from the pot and change the soil.
② Underfertilizing: The leaves cannot absorb nutrients and naturally turn yellow. Main symptoms: Old leaves gradually turn from green to yellow, young leaves are dull in color and appear yellow-green. Solution: Fertilize appropriately. Usually, when fertilizing, apply thin fertilizer frequently, and water with some alum water at the right time.
Overall, the cultivation method for freesia is not difficult, but because many flower lovers are beginners, yellow leaf symptoms will inevitably appear. However, after reading the whole article, I believe everyone has a better idea now. If yellow leaf problems appear, just follow the methods above. The editor will introduce freesia leaves turning yellow here, hoping it can help everyone.
What to do when freesia leaves turn yellow: freesia propagation methods and planting techniques
Freesia sometimes develops yellow leaves during cultivation. What should we do? Today we will tell everyone about freesia propagation methods and planting techniques.
What to do when freesia leaves turn yellow
1. Water yellowing: Overwatering causes water accumulation and leads to yellow leaves. Young leaves are dull yellow and lusterless, old leaves show no obvious change, branches are thin and yellow-green, and new shoots shrink and stop growing, indicating overwatering. Remove the plant from the pot, place it in a ventilated and cool place to let the soil ball dry naturally, and then put it back in the pot.
2. Scorch yellowing: Strong direct sunlight hitting some shade-loving plants (such as spider plant, hosta, etc.) easily causes dry and withered leaf tips and edges, and yellow spots appear on the sun-facing part of the leaves. Move it to a shaded place.
3. Drought yellowing: Yellowing from lack of water is different from yellowing from too much water. Yellowing from lack of water means leaf tips or edges wither and dry out, and old leaves wither yellow and fall off from bottom to top, but new leaves grow relatively normally. Just be careful to water enough and water thoroughly.
4. Fertilizer yellowing: Yellowing of flowers caused by overfertilizing or too high concentration. It shows as dry brown tips on new leaves. Generally, the leaf surface is thick and lusterless, uneven and not smooth, and old leaves scorch yellow and fall off. Stop fertilizing immediately, and in severe cases use a large amount of water to rinse out part of the fertilizer.
5. Light-deficiency yellowing: Placed in a shaded environment for a long time, the leaves cannot get enough sunlight and cannot form chlorophyll, so the whole plant's leaves turn yellow and then fall off. Supplementing light can avoid this problem.
6. Nutrient-deficiency yellowing: It shows as young leaves becoming lighter in color, appearing yellow or pale green, while old leaves are relatively normal or gradually turn from green to yellow. Check the potting soil; if there is dry caking, change the soil. Usually apply thin fertilizer frequently and water with some changed water at the right time.
Freesia propagation methods:
1. Bulb division propagation
Bulb division propagation is the main propagation method for freesia. After the plant dies back and goes dormant, dig out the underground corms. At this time the mother bulb has already died, and 1 new bulb and several daughter bulbs have formed on it. Generally, new bulbs are all over 1 cm in diameter and can bloom after planting. Daughter bulbs with a diameter greater than 1 cm can also serve as flowering mother bulbs with good results, while those smaller than 1 cm need 1 to 2 years of propagation before they can serve as flowering mother bulbs. Daughter bulbs also have the habit of high-temperature dormancy, so after digging them out, store them in a ventilated, dry place.
2. Seed propagation
Cut flower varieties can be propagated by seed. After the seeds mature in May to June, collect them in time, otherwise the capsules will split and the seeds will be lost. Seeds have no dormancy habit and can be sown immediately after collection. The optimum temperature for seed germination is 15 to 20°C, and germination is uniform under dark conditions, taking about 21 d. When seedlings have 5 to 7 leaves, the aboveground part withers and turns yellow, and the underground corm enters a high-temperature dormancy period. After dormancy, plant again and cultivate daughter bulbs for 1 year, and they can serve as flowering mother bulbs.
Using container seedling cultivation can produce flowering bulbs in one year. The specific method is: after harvesting seeds in May to June, sow them immediately in a greenhouse. After emergence, keep cultivating them in containers in the greenhouse, maintain the room temperature at 15 to 18°C, provide good water and fertilizer, and by May to June of the following year, the daughter bulbs can reach more than 10 m in diameter and can be directly used as flowering seed bulbs.
3. Tissue culture propagation
At present, tissue culture propagation of freesia has been applied in production. For example, some developed countries have already mass-produced virus-free freesia seedlings. The explants used are young flower buds. Culture conditions: temperature 20 to 25°C, light intensity 1500 Lux, pH 5.8.
Freesia planting techniques:
Freesia cultivation is mainly based on protected cultivation to supply flowers in winter and spring.
1. Soil preparation
Before cultivation, the cultivation soil should be deeply plowed, fertilized and disinfected. The plowing depth should be at least 20 to 30 cm. The amount of base fertilizer is generally best controlled at 100 g of N, P, K compound fertilizer per sq m, with a ratio of 12:10:18. Soil disinfection methods can use steam disinfection or chemical disinfection. If highly toxic chemicals are used for disinfection, they must be fully aired before use, so as not to cause harm to people and plants. Then make raised beds 10 cm high and 1 to 1.2 cm wide for later use.
2. Planting
The planting time is determined according to the desired flowering time, generally planting 3 to 4 months before the flowers are needed. Generally speaking, corms stored at 31°C or newly purchased corms are still dormant, so they must first be given a temperature treatment of 13 to 17°C for 2 to 3 weeks, and then planted. Only in this way can the emergence period be uniform and the expected flowering goal be achieved. During treatment, the corms can be placed in containers or underground in a thin layer. The treatment room temperature should be controlled at 13 to 17°C, relative humidity 80%, and good ventilation should be maintained. Check every day, and as soon as the corms show slight buds or root protrusions, plant them immediately (if roots or buds have already grown before planting, the roots and buds are easily damaged).
After dormancy, low temperature and high humidity can promote flowering. The treatment temperature is 8 to 10°C, humidity 90%, and the time is 2 to 3 weeks. If planting in summer and autumn, and the greenhouse temperature is too high, the corms can also be placed in moist peat or sawdust and put into a low-temperature cold storage at 8 to 10°C for 30 to 40 d, and planted after the root system grows out. Just be careful not to damage the root system during cultivation. This can save the energy used for cooling a large greenhouse area and can also advance the flowering period.
The planting density varies to some extent depending on variety, corm size, and cultivation season. Narrow-leaved varieties are denser than broad-leaved varieties. The planting density is 80 to 100 plants/sq m, that is, 10 cm x 10 cm or 10 cm x 12 cm.
3. Depth and covering
Generally speaking, the planting depth of freesia should be determined according to climate, soil and corm size, and the covering soil depth is generally twice the size of the corm. In winter, the corm can also be planted into the soil, but the soil should be shallow; in summer it can be slightly deeper to reduce the impact of high temperature on the corm. At the same time, slightly deeper covering soil is beneficial for growth and flowering, and is beneficial for the full development of the lower root system at the base of the mother bulb and the upper root system at the base of the new bulb.
After cultivation, if the temperature is relatively high, a thin layer of peat, pine needles, straw, etc. can be spread on the soil surface to preserve warmth, prevent soil surface crusting, and prevent weeds from growing.
4. Water management
After planting, water thoroughly immediately, and provide sufficient water supply until new buds emerge from the soil. Drip irrigation is preferable. When using sprinkler irrigation, be sure to prevent washing the surface soil and exposing the corms. After rooting, appropriately reduce the water supply and just keep it moist. After flowering, try to keep the soil dry, and only replenish water in the morning, so that the soil surface is slightly dry in the afternoon, thereby reducing air humidity and preventing pests and diseases.
5. Temperature management
Both root system formation and flower bud differentiation of freesia require a relatively cool environment. The root system grows best at 15 to 18°C, flower bud differentiation is best at 12 to 15°C, and inflorescence growth is fastest at 18 to 20°C. Therefore, at the initial stage of planting, maintain the room temperature at 15 to 18°C; at the 5 to 7 leaf stage, induce flower primordia at 12 to 15°C, maintain this temperature for 4 to 6 weeks, and inflorescence development will not reverse; then raise the temperature to 16 to 17°C to make the inflorescence elongate rapidly and enter the flowering period.
6. Nutrition management
If the soil is relatively fertile, topdress at the 4 to 5 leaf stage; otherwise, topdress at the 2 to 3 leaf stage. At the initial stage, only N fertilizer can be applied; at flower bud differentiation, add P and K. The ratio of the three can be 1:1:1, 20 to 30 g/sq m, and fertilize 3 to 5 times in total during the growing period.
7. Light and climate
In areas with higher latitude (above 38N), supplemental lighting is preferable for winter cultivation. Supplemental light intensity is beneficial for photosynthesis and advancing flowering. High-pressure sodium lamps equipped with reflectors have a good effect on supplementing light intensity, but continuous lighting is not beneficial for flower bud differentiation. While supplementing light, pay attention to the carbon dioxide concentration in the greenhouse, try to ventilate to ensure carbon dioxide concentration, or use a carbon dioxide generator to supplement carbon dioxide into the greenhouse. In summer cultivation, shading is needed, with a shading level limited to 30%.
8. Netting
Freesia flower stems are relatively thin and the flowers are numerous, so they easily lodge. Support and netting should be set up before the 3-leaf stage, with 2 to 3 layers in total, and checked frequently to keep one plant per grid. Flower harvesting, handling and marketing harvesting.
When the first small flower on the flower branch is fully colored, it is the suitable harvest time, carried out in the early morning or evening. Sometimes several flower branches grow from one seed bulb. If the lateral branch inflorescences are small and have few flowers, they should be cut off early, leaving only 1 or 2 flower branches. When cutting flowers, if it is for consumptive cultivation, cut from the base. If corms are also to be harvested, then all basal leaves should be retained, and after harvesting strengthen water and fertilizer management of the plant until 2 to 3 weeks before corm harvest, so that the new bulbs and daughter bulbs can grow further.
More information