How to Propagate Lavender? Detailed Introduction to Common Propagation Methods
Lavender is a flower that everyone quite likes. A home decorated with lavender is romantic and full of ambiance, and it is also a flower with a very wide range of uses. I believe everyone would like to grow a few pots at home. Its propagation mainly includes seed sowing, cuttings, layering, root division and other methods, and in production, cutting propagation is mainly used. Let us take a look below at the propagation methods of lavender!
Lavender Division Propagation
Lavender division propagation can be carried out in spring or autumn. Use 3-4 year old plants, and in spring from March to April, divide the old roots of mature plants, with each division carrying bud eyes.
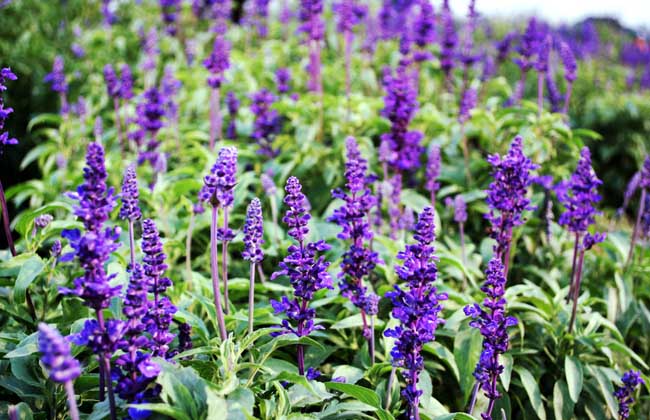
Lavender Seed Propagation
1. Seed collection: Lavender blooms in April, and the seeds can be harvested after they mature in June-July. After picking the spike inflorescences of lavender, spread them indoors or in a greenhouse covered with film. Do not pile them too thickly, and let them dry naturally in the shade. After about 10 days, once the flower stalks and outer fruit skins have lost water and become brittle, rub them, then winnow so that the small nutlets and impurities can be separated. The nutlets of French lavender need further air drying. When their moisture content drops to 12-15%, they can be collected and stored in a ventilated, cool place for later use.
2. Sowing method: Lavender is suitable for spring sowing (March-May) and autumn sowing (September-October). It is better to use a special sowing medium when sowing, or you can prepare one with peat plus a small amount of perlite. Put the medium in a seedling tray, level it, spray a small amount of water to moisten it, and then sow. Either drilling or broadcasting is fine. Sow about 10 seeds per square decimeter. After sowing, cover with a thin layer of coconut coir or vermiculite, then spray water once more. Afterward, spray water appropriately depending on whether the medium is dry or wet.
3. Post-sowing management: After lavender seeds are sown, they will emerge in about one week. The seedlings have strong disease resistance. After emergence, spray 800 times diluted carbendazim once every two weeks to prevent disease. They need a certain amount of light and nutrients, otherwise they tend to grow leggy and form slender seedlings. When lavender grows to 4-6 true leaves, it can be transplanted once to encourage side branch development. Autumn-sown seedlings can be planted out in spring, and spring-sown seedlings can be planted out after 50-60 days.
How to Propagate Lavender by Cuttings, Lavender Cutting Propagation Methods
Lavender is a flower with particularly beautiful flower colors. Lavender can not only be cultivated as an ornamental plant, but can also be used as a medicinal material. Lavender has relatively good growth habits and is also relatively easy to propagate. Lavender can be propagated by seed or by cuttings. Today we will learn about how to propagate lavender by cuttings, and the cutting propagation methods for lavender.
How to Propagate Lavender by Cuttings, Lavender Cutting Propagation Methods
I. Selection of Lavender Cuttings
It is best to use the upper lignified branches grown in the current year. The cutting length is 8-12 cm. Cut the lower end of the cutting into a slanted surface. It is best to leave 6-8 leaves on the upper part of the cutting, which helps the cutting maintain nutrients and accelerate healing and rooting.
II. Lavender Cutting Time
It is best before the soil freezes. In the Dalian area, this is generally from late November to early December.
III. Lavender Cutting Method
Use small flat beds for cuttings. The bed width is 1 m, the plant and row spacing is 5-8 cm, the insertion depth of the cutting is one third of the cutting length, and 3-4 pairs of true leaves are left exposed above the ground.
IV. Lavender Field Management
After lavender cuttings are inserted, cover the bed with plastic film. The edges of the film do not need to be pressed down with soil, which makes it convenient to uncover the film regularly later. Uncover the film every 5-6 d to ventilate. For watering, after autumn cuttings, irrigate once so that the cuttings and soil are closely combined. Afterward, irrigate about once every 15-20 d. In the following spring, as the temperature rises and evaporation increases, begin irrigation management and avoid drought. This period is the key time for the plants to heal and root. During the seedling stage, watering should ensure that seedlings are not flooded, no water accumulates, and leaves do not stick to mud, otherwise the seedlings may suffocate and die. For intertillage and loosening the soil, early spring temperatures are low and soil temperature rises slowly, so loosen the soil and weed in time to raise soil temperature, which helps the cuttings heal and root and cultivates strong seedlings. When loosening the soil, avoid injuring the seedlings, go from shallow to deep, and do not loosen the cuttings, which would affect survival.
In April of the following year, the temperature rises and lavender seedlings grow relatively quickly, so water can be appropriately controlled to avoid leggy growth. Afterward, gradually harden the seedlings, and by mid-April they can be transplanted and planted out in the open field.
How to Propagate Lavender by Cuttings, Lavender Cutting Propagation Methods is introduced here for you. Lavender is heat tolerant, drought tolerant, and especially cold tolerant, making it a very good cultivated flower. Lavender also likes sunlight and needs sufficient light to grow well. Lavender is afraid of moisture, so avoid water accumulation in the potting soil and avoid causing root rot.
How to Select Seeds and Propagate Lavender
Environmental Conditions for Lavender Growth
Soil
Lavender likes loose, fertile soil, and soil rich in humus. A pH value of 7-8.5 is most suitable. Lavender likes a sunny, cool, and well-ventilated environment, and avoids heat and humidity.
Temperature
15-25°C; it can grow at 5-30°C. Growth stops above 35°C, and if it is above 38-40°C for a long time, the top stems and leaves turn yellow and dry. In northern winters, if it is below 0°C for a long time, it begins dormancy, and during dormancy mature seedlings can tolerate low temperatures of -20 to -25°C.
How to Select Seeds and Propagate Lavender
1. Lavender is cross-pollinated and has many mixed varieties. At present, there are 28 species in total.
2. Lavender can be propagated by sowing, cuttings, layering, and root division. Generally, sowing and cuttings are the main methods.
3. For lavender seed propagation, the conventional sowing period is March-June or September-October. Lavender seeds are small and have a relatively long dormancy period. Before sowing, soak the seeds for 12 hours, then soak them with 20-50 mg/kg gibberellin for 2 hours before sowing.
4. During the seedling stage, pay attention to spraying water. When the seedlings are too dense, thin them appropriately. When the seedlings are about 10 cm tall, pot them.
5. Select strong, well-developed mother plants of good varieties. From the mother plants, cut fully developed, non-eared, one-year-old semi-lignified branches, remove the top, with a length of 5-6 cm. After soaking in water for 2 hours, insert them into prepared culture soil. The insertion depth is 1-2 cm. After insertion, water thoroughly.
6. Be careful to shade with a shade net with a light transmittance above 80%, and often keep the potting soil moist. After insertion, roots will develop in about 2-3 weeks. After rooting, shade with a shade net with 50% light transmittance until autumn cools, and pot them one month after insertion.