How to repot and transplant nasturtium? Choose the right time and soil, and provide good aftercare following transplanting
Because nasturtium grows quickly, it easily outgrows its pot, so after a period of time it needs to be given a new pot and soil. Since after repotting nasturtium needs to adapt to the new pot and soil environment, some skill is required during transplanting to ensure it gets through this period smoothly. So how do you repot and transplant nasturtium? Let me tell you the key points of repotting.
What month is best for repotting nasturtium
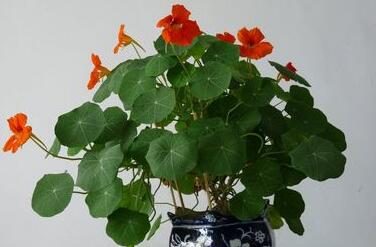
Repotting should avoid periods of high heat and cold, so it is generally done in April-May or September-October. The temperature is suitable at these times, and after repotting nasturtium can resume growth as quickly as possible, so the impact on it is minimal. If you repot in winter without controlling the temperature well, the plant can easily be frostbitten.
How to repot and transplant nasturtium
1. Prepare the soil and pot
You can mix 4 parts leaf mold, 1 part compost soil, 4 parts garden soil and 1 part sand to make the growing medium. This kind of soil is the most suitable in terms of air permeability, drainage and nutrient content. In addition, when repotting, note that the soil moisture should be around 50%. For the pot, a porous plastic or ceramic pot of appropriate size is preferable.
2. Remove from the pot and replant
After preparing the soil and pot, how do you repot and transplant nasturtium? Take the plant out of its previous pot, then clear away the old soil around the roots, and replant it in the prepared pot. Note that at this point it should not be fertilized or watered.
Key points for repotting nasturtium
1. Watering. Before repotting, keep soil moisture at 50%. Do not water immediately after repotting; nasturtium needs a 2-3 day recovery period. After 2-3 days, water appropriately to keep the soil slightly moist. It is best to use a spray method, and be sure to avoid overwatering.
2. Fertilizing. Freshly replaced soil is very rich in nutrients, so there is no need to fertilize frequently. Wait until it resumes growth, then begin normal fertilizing. For the method, you can refer to the detailed description in how to fertilize nasturtium. Focus on phosphorus and potassium fertilizers and nitrogen fertilizer; do not apply only nitrogen fertilizer, otherwise it can easily become leggy.
3. Light. Nasturtium quite likes sunlight, but after repotting it cannot be placed in direct sun right away. It is best to first keep it in a bright place for a few days, and once its leaves remain green and upright, then slowly increase the light. If placed directly in the sun, the leaves may easily wilt.
4. Pruning. When taking nasturtium out of the pot, you can also prune its roots appropriately, for example by cutting off some old, rotten roots. However, during pruning be careful to avoid damaging the roots, otherwise it will affect growth after transplanting.
How to repot and transplant nasturtium
Season for repotting and transplanting nasturtium
Repotting and transplanting nasturtium should be done in spring and autumn. The temperature and humidity in spring and autumn are both very suitable, and it is also nasturtium's growing season, so after repotting it is easy for growth to keep up.
Key points for repotting nasturtium
Potting soil: the moisture of the potting soil for repotting should preferably be 50%. The soil should be fertile, loose, sandy soil.
Temperature: on the day of repotting, 18-25°C is the suitable temperature range. Too cold easily causes frostbite, too hot easily causes drying out.
Aftercare for nasturtium after repotting
After repotting, nasturtium is relatively fragile, and its growth is often not as good as when it stayed in the original pot, so you need to be extra careful with care.
Watering should be done 2-3 days after repotting. The amount of water should not be too much; just moisten the potting soil and spray the leaves.
Fertilizing should be done half a month after repotting, preferably with phosphorus and potassium fertilizers. It is best not to apply nitrogen fertilizer, otherwise it easily causes leggy growth and can also burn the roots.
The stems of a repotted plant are relatively tender and brittle, so it should be moved slowly, otherwise they can easily break.
How to prune nasturtium: the method, timing and technique of pinching nasturtium are key
We know that nasturtium has a twining, trailing growth habit. If it is left to grow unchecked, its branches may become intertwined and look rather messy. Although this is its natural growth state, it is not attractive and also affects light penetration between the branches and leaves, so it needs timely pruning. So how do you prune nasturtium? When do you pinch nasturtium? Let's learn the correct pruning method together.
How to prune nasturtium
When pruning nasturtium, techniques such as pinching, thinning and heading back are generally used. Among these, pinching is the most important, as it can control nasturtium's growth so it does not grow too tall or too fast, while thinning is usually done after the plant matures and can keep nasturtium looking more attractive overall.
When to pinch nasturtium
Pinching is also called tip pruning. It needs to start when nasturtium is a seedling; generally you pinch when it has grown 7-8 leaves, removing the tender buds at the top, then letting it continue growing. During the whole seedling stage, pinching may be done 1-3 times.
Although removing its tender buds during the seedling stage may look like it hinders nasturtium's growth, in fact it can promote growth. It can make nasturtium sprout more side branches and keep the overall plant height from being too tall, otherwise it might not be able to be placed indoors due to space issues.
Pruning methods for nasturtium
How do you prune nasturtium during the mature plant stage? At this time it needs thinning and heading back. Thinning is cutting away part of its dense, messy branches; heading back is using scissors to cut off the vines growing sideways from the nodes, to prevent it from growing too quickly horizontally.
To make the overall plant shape more attractive, you also need to use supports or wire to train it, letting it grow in the intended direction, so it can be even more beautiful while flowering and leafing abundantly. In addition, thinning and heading back may be used many times during nasturtium's growth, depending specifically on the plant's growth and personal aesthetic preference.
Aftercare after pruning
1. After pinching, there is no need to fertilize or water immediately. You can wait until it grows new branches a few centimeters long, then supplement with fertilizer and water. During the seedling stage, when the plant grows to about 15 cm, it is best to set up a support and tie the main vine to the support with wire, so that it can achieve the ideal shape when mature.
2. For pruning during the mature plant stage, you can supplement a certain amount of water after completing the pruning, but try to avoid water splashing onto the cut openings. In addition, when repotting and transplanting nasturtium, you can also prune its roots, but you can only cut off excess fibrous roots; do not damage the main roots.