Sweet alyssum spring transplanting: getting the growing medium right, potting it up, and aftercare
After sweet alyssum (Lobularia maritima) has grown for a while, its pot may become too small and hold back its growth. The solution is to transplant it: take it out of the old pot and soil and replant it in fresh potting mix. So how do you transplant sweet alyssum without setting it back? Let's look at the transplanting method.
How to transplant sweet alyssum
1. When to transplant sweet alyssum
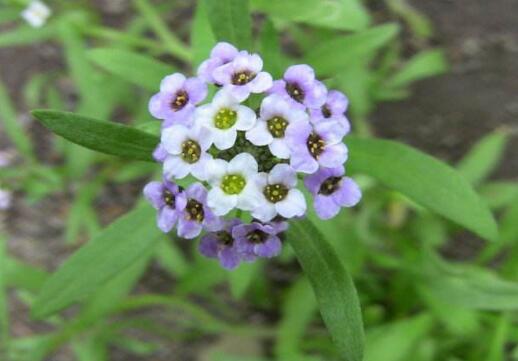
It is best to transplant in spring, for example in March-April, when the temperature is not too high and the leaves will not wilt after transplanting. You can also transplant in September-October. Summer is too hot and winter is too cold, so neither is suitable for transplanting.
2. Choosing the growing medium
Some commonly used medium combinations are: garden soil + furnace slag; garden soil + river sand + sawdust; paddy soil + leaf mold + pond mud; peat + perlite + ceramsite, and so on. They meet sweet alyssum's requirement for loose, airy, well-drained soil and let the roots grow more vigorously.
3. Adding a drainage layer
First put 2-3 cm of ceramsite in the bottom of the pot; it filters water so excess moisture drains out through the drainage holes while the soil in the pot is not lost excessively. Once the drainage layer is in place, you can apply some fully rotted organic fertilizer or livestock manure on top as a base fertilizer, about 1-2 cm thick, and then add the chosen medium.
4. Potting up and planting
Plant the sweet alyssum into the pot, making sure its roots do not touch the base fertilizer directly, otherwise root burn easily occurs. Also, in sweet alyssum growing methods, fertilizer must not be applied directly at the roots. After planting, firm the soil and water it; this watering must be thorough.
How to care for sweet alyssum after transplanting
1. Water and fertilizer
After transplanting, sweet alyssum needs a period to adjust and recover; during this stage no fertilizing or watering is needed. Once it resumes growth, resume water and fertilizer. In spring, water once every 5-7 days; in summer or when the temperature is high, adjust to once every 1-3 days.
2. Temperature
Since transplanting is usually done in spring, by the time it resumes growth summer arrives, and you must keep the temperature below 30°C, otherwise the plant easily dies. The most suitable temperature is 15-25°C, and in summer be sure to cool it down.
3. Light
A freshly transplanted sweet alyssum should be placed in a bright or shady spot, not in too-strong light. After it starts growing again, light can be increased gradually, but note that in summer it must not be kept in the sun. If it is grown outdoors, shade 50% of the sunlight.
How to transplant sweet alyssum
Preparation before transplanting sweet alyssum
Choose a flower pot with good drainage and good air permeability for transplanting.
For the potting soil you can use one of the following: vegetable garden soil : furnace slag = 3:1; or garden soil : medium-coarse river sand : sawdust (mushroom residue) = 4:1:2; or one of paddy soil, pond mud, or leaf mold.
Or peat + perlite + ceramsite = 2 parts + 2 parts + 1 part; vegetable garden soil + furnace slag = 3 parts + 1 part; peat + furnace slag + ceramsite = 2 parts + 2 parts + 1 part; sawdust + vermiculite + medium-coarse river sand = 2 parts + 2 parts + 1 part.
Steps for transplanting sweet alyssum
When potting up sweet alyssum seedlings, first put 2 cm of coarse-grained medium or ceramsite in the bottom of the pot as a drainage layer. Sprinkle a layer of fully rotted organic fertilizer on top as base fertilizer, about 1-2 cm thick, then cover with another layer of medium, about 1-2 cm thick.
After filling in the medium, first dig the planting hole, sprinkle a layer of organic fertilizer in the bottom of the hole as bottom fertilizer, about 4-6 cm thick, cover with a layer of soil and then place the sweet alyssum seedling in, so that the fertilizer and roots are separated and root burn is avoided.
After placing the seedling, fill in the surrounding soil to cover the roots, then press the soil firm with your hands and water thoroughly once.
Management after transplanting sweet alyssum
Sweet alyssum is robust and can withstand light frost; give it protection when overwintering outdoors. It likes sunlight, so place it where it can get sun.
Prune it back hard before the heat of summer and keep it in a cool place over summer, and it will bloom more abundantly after autumn. Generally after flowering, the lower part of the flower cluster is already bare; you can cut the flower cluster off at the stem while collecting seed, so that new flower spikes regrow. Let the cut portions dry a little, then shake out the seeds and store them.
Sweet alyssum has a long flowering period; fertilize and water it at the right times, applying a dilute liquid fertilizer once every half month, and also pay attention to hoeing, weeding and pest and disease control.
As the plant grows, repot sweet alyssum promptly, gradually moving it into larger pots, and finally into a 15 cm diameter clay pot. For those overwintering in a cold frame, cover them with straw curtains at night to protect against the cold, and move them to the flower bed when spring warms up.
Sweet alyssum transplanting steps and its aftercare management
Sweet alyssum has a lovely name: its flowers form a sphere, and when they bloom it is a mass of white, hence the name sweet alyssum. It is an excellent flower for landscaping scenic spots. So, would you like to know what growing techniques there are for sweet alyssum? Do you want to grow sweet alyssum well? Today, we will get to know this plant, sweet alyssum.
Preparation before transplanting sweet alyssum
Choose a flower pot with good drainage and good air permeability for transplanting.
For the potting soil you can use one of the following: vegetable garden soil : furnace slag = 3:1; or garden soil : medium-coarse river sand : sawdust (mushroom residue) = 4:1:2; or one of paddy soil, pond mud, or leaf mold.
Or peat + perlite + ceramsite = 2 parts + 2 parts + 1 part; vegetable garden soil + furnace slag = 3 parts + 1 part; peat + furnace slag + ceramsite = 2 parts + 2 parts + 1 part; sawdust + vermiculite + medium-coarse river sand = 2 parts + 2 parts + 1 part.
Steps for transplanting sweet alyssum
When potting up sweet alyssum seedlings, first put 2 cm of coarse-grained medium or ceramsite in the bottom of the pot as a drainage layer. Sprinkle a layer of fully rotted organic fertilizer on top as base fertilizer, about 1-2 cm thick, then cover with another layer of medium, about 1-2 cm thick.
After filling in the medium, first dig the planting hole, sprinkle a layer of organic fertilizer in the bottom of the hole as bottom fertilizer, about 4-6 cm thick, cover with a layer of soil and then place the sweet alyssum seedling in, so that the fertilizer and roots are separated and root burn is avoided.
After placing the seedling, fill in the surrounding soil to cover the roots, then press the soil firm with your hands and water thoroughly once.
Management after transplanting sweet alyssum
Sweet alyssum is robust and can withstand light frost; give it protection when overwintering outdoors. It likes sunlight, so place it where it can get sun.
Prune it back hard before the heat of summer and keep it in a cool place over summer, and it will bloom more abundantly after autumn. Generally after flowering, the lower part of the flower cluster is already bare; you can cut the flower cluster off at the stem while collecting seed, so that new flower spikes regrow. Let the cut portions dry a little, then shake out the seeds and store them.
Sweet alyssum has a long flowering period; fertilize and water it at the right times, applying a dilute liquid fertilizer once every half month, and also pay attention to hoeing, weeding and pest and disease control.
As the plant grows, repot sweet alyssum promptly, gradually moving it into larger pots, and finally into a 15 cm diameter clay pot. For those overwintering in a cold frame, cover them with straw curtains at night to protect against the cold, and move them to the flower bed when spring warms up.
That is what I have learned about herbaceous plants today. I hope fellow flower growers find this article helpful after reading it. For more knowledge about herbaceous flowers, please keep following our Succulent Garden, and we will bring you more related content as soon as possible!