How to Propagate Red Spider Lilies: Master 4 Points and Turn One Pot into Ten
Red spider lily, also known as manjusaka, does not have the most auspicious meaning, but once it blooms it is truly very beautiful, and many flower lovers are willing to grow it. However, a single pot of red spider lily does look a bit lonely. If you want one to become two, and two to become even more, then we need to master the propagation methods of the red spider lily. Unlike other flowers that are propagated by cuttings, the red spider lily generally has 4 propagation methods, of which the most common is the bulb division method. Let us take a look together.
I. The 4 Propagation Methods of the Red Spider Lily
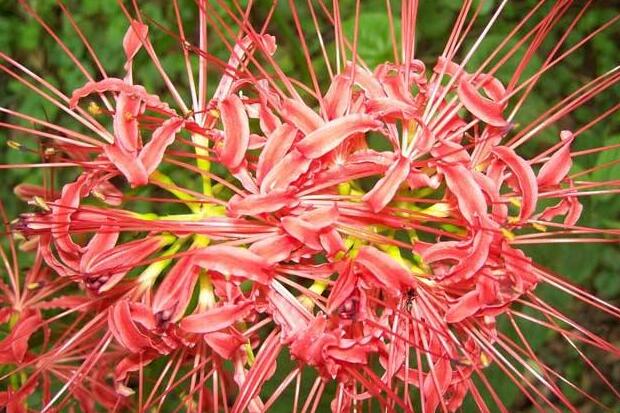
Although in many regions the red spider lily is considered an unlucky flower, its striking red color is still loved by many people, and planting just one pot is not enough to satisfy them, so mastering the propagation methods of the red spider lily is very important. It is understood that the red spider lily has 4 propagation methods, namely bulb division, cutting, tissue culture and sowing. The specific methods are as follows:
(1) Bulb division method
Unlike other flowers that are all propagated by cuttings, the red spider lily is mainly propagated by the bulb division method. During the dormant period or after flowering, dig the plant out of the potting soil, remove the daughter bulbs near the mother bulb and plant them, and they can bloom in about one to two years.
(1) Cutting method
Besides the commonly used bulb division method, the bulb cutting method is also one of the propagation methods of the red spider lily. The specific steps are as follows:
1. Dig the bulb of the red spider lily out of the soil, rinse it clean under running water, and remove the excess soil.
2. Use a knife to cut the cleaned base of the bulb into eight sections in a star shape, with the cutting depth being about one half to two thirds of the bulb's length.
3. Disinfect the cut bulb pieces and place them in a cool environment to air dry.
4. Insert the bulb into a moist substrate such as sand or perlite. After about 3 months, adventitious buds can be seen forming at the junction of the scales and the basal plate, gradually growing into small bulbils, which can become seedlings after being separated and cultivated.
(3) Tissue culture method
Using MS medium, pick flower stalks and ovaries as explant materials. After cultivation, callus tissue will form at the cut. After 1 month, adventitious roots can form, and after 3 to 4 months, adventitious buds can form. Using flower stalks and scales with stems as explant materials can also produce adventitious buds and daughter bulbs.
(4) Sowing method
This propagation method of the red spider lily is used outdoors and is not applicable to home pot cultivation. This is generally mostly used for hybridization between the red spider lily and other varieties. When sown in a natural environment, in the first growth cycle only a few seedlings produce one leaf, the seedlings can be transplanted once during the seedling stage, and the seedlings take about 4—5 years from sowing to flowering.
Notes: 1. Because the seeds are dormant in summer, sowing should be avoided in summer; sowing is possible in all other seasons. 2. Sow immediately after collecting the seeds, keep the temperature at 20°C, and in about 15 days you can see the radicle emerge.
Once you know how to grow the red spider lily and then understand its propagation methods, you will become a little expert at growing red spider lilies. But before growing them, everyone should still think it over, after all, the flower language of the red spider lily is not auspicious, and its blooming looks a bit eerie. However, if you like it and are not superstitious, then you might as well try growing it. Finally, may everyone's red spider lilies bloom into beautiful flowers.
How to propagate the red spider lily? An introduction to the propagation methods of the red spider lily
The red spider lily is a plant of the Amaryllidaceae family. It likes shady and humid environments, fears direct strong light, and is suitable for growing in loose, fertile sandy loam. It is widely cultivated around the world and is an excellent perennial herbaceous flower. It can be propagated by bulb division, sowing, bulb basal cutting and tissue culture, with the bulb division method being the main one. Let us take a look together below!
Propagation by bulb division
Propagation by bulb division is the simplest propagation method. During the dormant period or after flowering, dig up the plant, remove the daughter bulbs attached near the mother bulb and plant them, and they can bloom in about one to two years.
Bulb cutting method
Cut the cleaned base of the bulb into eight sections in a star shape, with the cutting depth being about 1/2 to 2/3 of the bulb's length. After disinfection and air drying, insert it into a moist substrate such as sand or perlite. After 3 months, adventitious buds can be seen forming at the junction of the scales and the basal plate, gradually producing small bulbils, which can become seedlings after being separated and cultivated.
Tissue culture method
Using MS medium, pick flower stalks and ovaries as explant materials. After cultivation, callus tissue can be produced at the cut. After 1 month, adventitious roots can form, and after 3 to 4 months, adventitious buds can form. Using flower stalks and scales with stems as explant materials can also produce adventitious buds and daughter bulbs.
Propagation by sowing
Generally used only for hybrid breeding. Because the seeds have no dormancy, they should be sown immediately after collection, and after 15 days at 20°C the radicle can be seen emerging. When sown in a natural environment, in the first growth cycle only a few seedlings produce one leaf, and the seedlings can be transplanted once during the seedling stage. The seedlings take about 4 to 5 years from sowing to flowering.
Propagation methods of the red spider lily
The red spider lily is very ornamental, but its rhizome is toxic, and accidental ingestion can cause symptoms of poisoning. Although the red spider lily has certain medicinal value, if it is not handled properly it can produce toxicity. Placing a pot of red spider lily in the living room or on the balcony at home can also serve the function of beautifying the environment, so how should the red spider lily be propagated?
Red spider lily
1. Bulb division propagation method: During the dormant period or after flowering, dig up the plant, remove the daughter bulbs attached near the mother bulb and plant them, and they can bloom in about one to two years.
2. Sowing method: Generally used only for hybrid breeding. Because the seeds have no dormancy, they should be sown immediately after collection, and after 15 days at 20°C the radicle can be seen emerging. When sown in a natural environment, in the first growth cycle only a few seedlings produce one leaf, and the seedlings can be transplanted once during the seedling stage. The seedlings take about 4 to 5 years from sowing to flowering.
3. Bulb basal cutting method: Cut the cleaned base of the bulb into eight sections in a star shape, with the cutting depth being about 1/2 to 2/3 of the bulb's length. After disinfection and air drying, insert it into a moist substrate such as sand or perlite. After 3 months, adventitious buds can be seen forming at the junction of the scales and the basal plate, gradually producing small bulbils, which can become seedlings after being separated and cultivated.
4. Tissue culture propagation method: Using MS medium, pick flower stalks and ovaries as explant materials. After cultivation, callus tissue can be produced at the cut. After 1 month, adventitious roots can form, and after 3 to 4 months, adventitious buds can form. Using flower stalks and scales with stems as explant materials can also produce adventitious buds and daughter bulbs.