How to propagate morning glory? Detailed explanation of the cutting propagation method, choose healthy branches
Morning glory, also called trumpet flower, is very common, but after years of cultivation by breeding experts, many varieties have now been hybridized, and the colors have become diverse. At home, does keeping one pot of morning glory feel monotonous? You might as well propagate a few more pots; the scene of them blooming together is what looks good. So how do you propagate morning glory? In daily practice, cuttings are used the most, so let's take a look together at the cutting propagation method for morning glory.
1. How to propagate morning glory: cuttings/sowing
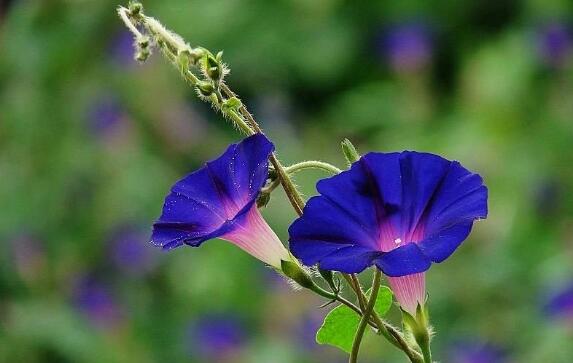
The beauty of morning glory is mainly shown in its flowering. Its flower shape resembles a trumpet, and its colors are bright, looking very cute. If several pots bloom together, there is no need to describe how beautiful the scene is. However, to achieve this goal, we need to master the propagation methods of morning glory. Of course, you can also just spend money to buy them. It is understood that morning glory propagation methods mainly include cuttings and sowing, and the specific methods are as follows:
(1) Morning glory cutting propagation
① Cutting time: spring and autumn
For morning glory propagation, if you want a high survival rate, the choice of time is very important. Generally speaking, it is best to choose spring and autumn. Cuttings carried out in early spring and autumn have a high survival rate, while the survival rate is low in the hot midsummer season, so it should be avoided.
② Selection of cuttings
The quality of the cuttings can be said to directly determine the success rate of morning glory cutting propagation. When collecting cuttings, gardeners had best do so in the early morning before the sun comes out, when the branches have a high water content, which is beneficial for the cuttings to take root.
There is also a method when collecting cuttings. Gardeners can cut healthy branches free of pests and diseases from below the node base, about 10 cm, and the cut should be flat. Leave 2 to 3 leaves on the upper part of the cutting; if the leaves are too large, half a leaf can be cut off.
③ Selection of potting soil
After the time and cuttings are chosen, the potting soil for cuttings is also very important. For morning glory cutting propagation, the ideal potting soil is coarse-structured soil such as coarse sand and perlite, because this has good water permeability and is beneficial for rooting. Of course, other potting soils can also be used. In addition, the pot used for cuttings should not be too large; a diameter of 15 to 20 cm is enough.
④ Start cutting
After completing the above preparations, morning glory cutting propagation can officially begin. At this time, gardeners directly insert the cuttings into the prepared pot, 2 to 3 cm deep, with a plant spacing of 6 cm and a row spacing of 4 to 6 cm, so that the leaves spread out naturally. Different cutting times also require different care methods:
Cutting in a greenhouse in early spring: it should be placed in a place with scattered light. Keep the temperature at 18°C to 20°C, with no less than 12 hours of light, and rooting can occur in about 15 days.
Outdoor cutting in autumn: pay attention to shading, and it is best to cover with plastic film. Make an arched shed 1 m wide, as long as needed according to the number of cuttings, and 0.5 m high for protection. After morning glory planted in the ground has taken root, it can be potted and moved to a greenhouse for care.
⑤ Cutting completed, rooting in 2 weeks
At this point, morning glory cutting propagation has ended, and all that is left is to wait and see whether it survives. Generally speaking, rooting can occur in about 2 weeks. If conditions permit, propagate a few more pots, and then you can enjoy the spectacular scene of a group of morning glories blooming.
(2) Morning glory sowing propagation
How to propagate morning glory? In addition to the cutting propagation introduced above, there is also sowing propagation. Operation method: direct sowing outdoors in late April, or sowing in a greenhouse in March, with a suitable temperature of 25°C, germinating in 1 to 2 weeks. Cultivation and management are simple. When planting in open ground, a frame can be set up to let it climb up. The seeds mature at different times, so pay attention to timely harvesting.
Morning glory has strong vitality. As long as it is operated properly, the survival rate of propagation can be said to be very high. In the morning glory cultivation methods, its requirements for light, temperature, watering, etc. were discussed, so if you want morning glory to bloom beautifully, gardeners still have a lot to learn. That is all for the introduction to the morning glory cutting propagation method, and I hope it can help everyone.
Detailed explanation of petunia (dwarf morning glory) planting methods
Morning glory and petunia are two plants in different families and genera. Morning glory: Convolvulaceae, Ipomoea. An annual climbing flower. Petunia: Solanaceae, Petunia. A perennial herbaceous plant.
1. Sowing: Because petunia seeds are very small, no soil covering is needed for sowing. Scatter the seeds on the surface of fine soil and supply water by misting (do not water directly, so as not to wash the seeds into deeper soil). In this way they can germinate. The most suitable temperature for petunia seed germination is 15-20°C. Below 10°C they generally cannot germinate, and indoors without sunlight germination is also affected. If the temperature is too low, germination is difficult or growth after germination is slow. If the temperature is too high, the sprouts easily rot.
In southern Guangdong, sowing can be done all year round. I sow once about every 2-3 months, because in this way I can keep flowers blooming all year. For plants that have already aged, even if they are still blooming, I still "humanely destroy" them. This keeps the balcony potted flowers ornamental. For sowing and planting, the substrate I use is commercially available culture soil mixed with sandy soil (1:1). Supply water by misting and keep the soil moist, but it must not be too wet, otherwise the seeds in deeper soil will not germinate. Depending on the weather and temperature, germination can occur 5-10 days after sowing.
2. When the seedlings grow 4-5 true leaves, they can be transplanted into a large pot. Use a flower pot with a 20 cm diameter, one plant per pot. The large pot also uses the above soil, but granular organic fertilizer and compound fertilizer are added as base fertilizer. After transplanting, do not expose them to direct sunlight for the first few days; place them in a ventilated and shaded place. After a few days, the seedlings will grow new leaves. Under suitable temperature conditions (15-25°C), they can grow very large in one month.
3. Petunia seedlings are very weak. The water cannot be too wet, otherwise they easily rot, especially when it is too cold or too hot. Petunia likes dryness and fears wetness. During growth, it needs sufficient water, but it must not be watered too much. During the seedling stage, do not water too much, so that the root system develops well. In this way, the plant branches vigorously.
4. In the early stage of planting, add enough base fertilizer to the soil. In the past, during the seedling stage, I once watered too much, which caused root rot. After pulling up the plant, I found that the root system was very underdeveloped. Adopting the method of preferring dryness over waterlogging is very good.
5. At this time, a thin nitrogen fertilizer can be applied. I generally use compound foliar fertilizer and urea diluted and sprayed on the leaves. The base fertilizer I use is an organic mixed fertilizer (produced in Shenzhen), containing chicken manure, bone meal, bean dregs, etc. Each pot uses about 20-30 grams (estimated). I use inorganic mixed fertilizer less often. Slightly yellow leaves are due to lack of fertilizer, so a thin nitrogen fertilizer (urea, etc.) should be applied, preferably by foliar spraying.
6. Once flower buds appear, do not apply nitrogen fertilizer anymore; instead, switch to spraying a monopotassium phosphate solution on the leaves. In this way, the plant will not grow leggy, and there will be many flower buds. After petunias bloom, I spray a mixed solution of monopotassium phosphate and organic amino acid liquid fertilizer on the leaves once every 7-10 days. I found it has a clear effect on extending the flowering period and increasing the vividness of the flowers. You can try it. If the concentration of the liquid is not too high, even if it is sprayed on the flowers there is no effect. The concentration I spray is all below 0.1%, and I have not found any effect on the flowers.
7. About pinching. As long as water and fertilizer application are well controlled during the seedling stage, the plant will branch naturally and well, and pinching is not needed. The petunias I grow are all not pinched. If the plant grows unevenly (for example, one branch grows especially fast while other branches grow more slowly), pinching can also be used to control and adjust the plant shape.
Article source
8. Water: during the growth of petunia, it cannot be watered too wet. Too wet is bad for root growth, and in summer it is even more prone to root rot. Its root regeneration ability is relatively poor. Once root rot occurs, it is very difficult to rescue. Therefore, water cannot be applied too much, especially in summer. The soil should have good water permeability. In this way, the plant will be very lush.
9. Petunia has relatively few diseases. The main pest is whitefly. It can be controlled with pesticides such as deltamethrin or fenitrothion. If not controlled in time, the larvae will suck the leaves dry, and in severe cases the whole plant will die. Supplement: Previously I used many pesticides with little effect. After killing one batch, another batch grew out again. Later, after using imidacloprid wettable powder, the effect was very good. Now the whiteflies have disappeared.
Double-petaled petunias are very difficult to set seed and must be propagated by cuttings. Method: in spring or autumn (cuttings are difficult to survive in summer and winter), cut sturdy branches about 7-8 cm long and insert them into sandy soil or culture soil, with an insertion depth of about 2-3 cm. Keep the soil moist, and rooting can occur in about 20 to 30 days. In about 45 days they can be transplanted into a large pot. (The key is that the soil must have good water permeability.)
Petunias can set seeds, but double-petaled petunias are very difficult to set seed. When the flowers are in full bloom, artificial pollination can result in many more seeds. The seeds form in the flower center after the flower withers. After maturity they can be harvested. It is not difficult; split open the outer shell, and there are dozens of seeds inside. The one in the lower right corner that has turned brown can be harvested. If the seeds are not harvested in time, they will split open and fall into the flower pot. Almost every flower pot has sent up many petunia seedlings, which often need to be pulled out and harvested. If too late, they will split open, and the small seeds will scatter into the flower pot. The root system of petunia grows relatively slowly. If the soil viscosity is too high, it is bad for root development and affects plant growth. If the soil where you are has low viscosity, then it is fine. If the viscosity is too high, it is best to mix in fine sand to increase the permeability of the soil. Petunia grows slowly in summer (when the temperature is above 30°C), and the flowers become smaller.
In summer, if you want petunias to pass through the severe heat smoothly, it is recommended not to let the sun shine directly for a long time. Do not water more because you are afraid it is thirsty, as this will be counterproductive and easily cause root rot. In my experience, it is best to water only once a day, and it should not be watered too much. Watering in the evening after the temperature drops is preferable. Because if you water in the morning, the temperature rises quickly soon after, which will damage the root system and easily cause root rot and death. When the branches and leaves wilt while the soil surface is still moist, the root system may already be damaged.
If at this time you mistakenly think there is not enough watering and continue to increase the amount of watering, it will accelerate the death of the plant. At this time, you can place the plant in a ventilated and shaded place and completely stop watering for 2-3 days. Wait until the soil is completely dry before watering a small amount, once every 1-2 days, and the amount watered should be less rather than more. In this way, perhaps some can be saved. Petunias bloom less in summer, and the flowers are also smaller and the colors are not vivid enough, but if through your careful care they can pass through the severe heat season, then when others have just started autumn sowing, your petunias have already bloomed with lush and gorgeous flowers, and can continue until next spring.
Article source