How to propagate potted honeysuckle? Cutting method illustrated, 100% survival rate
When it comes to honeysuckle, I believe everyone is familiar with it; honeysuckle's unique floral fragrance is deeply loved by people. In nature, every plant has its own propagation method, and honeysuckle is no exception. How does honeysuckle propagate? There are many propagation methods for honeysuckle, the most common being cuttings, sowing, layering propagation, and so on. The simplest and most practical is the cutting method. Below, follow the editor to take a look at the illustrated guide to honeysuckle cutting propagation.
1. How to propagate potted honeysuckle: cuttings and sowing
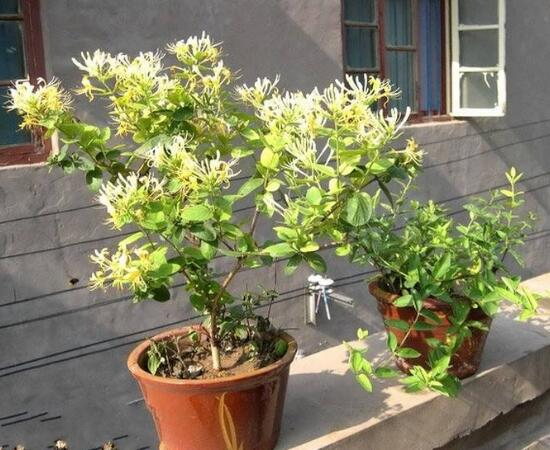
Honeysuckle is often seen on country paths, and quite a few people also grow potted honeysuckle at home. If you want to turn one pot of honeysuckle into many pots, then you must learn how honeysuckle propagates. The most common methods with the highest survival rates are sowing and cuttings. Below we will explain these two methods in detail, and first look at the illustrated guide to honeysuckle cutting propagation.
2. Illustrated guide to honeysuckle cutting propagation
1. Choosing branches
For honeysuckle branches used in cutting propagation, you must choose relatively robust ones, as this makes survival easier. You can choose robust branches of the current year, preferably straight ones, which are easy both to insert and to grow. Cut them into cuttings 15-30 cm long. To improve the cutting survival rate, it is recommended to take several more branches; do not use branches that are too tender.
2. Remove the leaves at the bottom of the branch
Remove the lowest leaves and prepare a flowerpot (or a pot that has previously held plants is also fine). The potting soil can be any kind, as long as it is not all nutrient soil. Nowadays many gardening enthusiasts directly use purchased nutrient soil to grow vegetables and other things, but actually ordinary soil or sand should also be added.
3. Cutting
Insert the cut branch diagonally into the soil, with a depth of 1/2 of the branch, and press it slightly firm. After inserting, water thoroughly, then keep the soil moist, and place it in a ventilated place without direct sunlight. After about half a month it can take root; once rooted, promptly place it outdoors for normal care, and transplant as appropriate.
4. Cutting time
To reduce the risk of failure, you can insert several more branches. Cutting propagation can be carried out in all four seasons, but the best time is spring or autumn. Especially spring, when it is very easy to survive.
5. Fertilizing
Once new leaves have grown, you can fertilize. If the flowerpot is too small, you can change to a larger pot. I believe that in less than two years, if the soil is fertile enough and the pot is large enough, covering the entire railing will not be difficult. And it can also produce fragrant, beautiful flowers.
6. Precautions
If cuttings are taken in spring, new buds will quickly sprout between the leaves, but roots will not have formed yet, so management cannot be relaxed at this time. Some friends like to frequently pull out the cuttings to look at them. If you find a small nodule at the lower part of the cutting (similar to a root nodule; although roots have not formed, such a branch has already survived). Through the above illustrated guide to honeysuckle cutting propagation, I believe everyone now knows how honeysuckle propagates. Below let us look at the sowing propagation method.
3. Sowing propagation method
Around Frost's Descent, when the honeysuckle berries turn black, promptly collect the ripe fruit, place them in clear water and rub them, skim off the fruit skin and impurities, pick out the plump seeds that sink to the bottom, dry them and store them for later use, or sow them immediately after collection.
If sowing in the following spring, take out the seeds 40 days before sowing, soak them in 40 degC warm water for 24 hours, remove them and stratify them with 3 times their volume of wet sand to promote germination. When 50% of the seeds have cracked and shown white, sieve out the seeds and sow them in rows. The above is all the content on the illustrated guide to honeysuckle cutting propagation and how honeysuckle propagates. I hope it can help everyone.
How does Tradescantia pallida propagate? Illustrated guide to Tradescantia pallida propagation methods / 100% cutting survival rate
Tradescantia pallida, named because the whole plant is purple and the flower shape resembles plum blossoms, is a plant that combines ornamental and medicinal value, and is deeply loved by gardening enthusiasts. But does one pot of Tradescantia pallida feel a bit monotonous? It is time to propagate a few more pots. So how does Tradescantia pallida propagate? Below are three propagation methods for Tradescantia pallida, among which cuttings have the highest survival rate. Today the editor will explain them in detail for everyone.
1. How does Tradescantia pallida propagate: cuttings / division / sowing
As a common indoor potted plant, Tradescantia pallida is not difficult to grow; you only need to put in a bit of effort to master it perfectly. But if you want to master the propagation methods of Tradescantia pallida, then you need to put in a bit more effort. As for how Tradescantia pallida propagates, there are mainly three methods: cuttings, division, and sowing.
Ps: Although there are several propagation methods for Tradescantia pallida, division requires digging up the entire Tradescantia pallida plant, which is rather troublesome; after Tradescantia pallida blooms, seeds are relatively hard to obtain, and sowing propagation is not suitable for indoor operation, so the most suitable method for gardening enthusiasts is cuttings. Next, the editor will focus on introducing the cutting method for Tradescantia pallida.
2. Illustrated guide to Tradescantia pallida cutting method
1. Cutting time
It is understood that the optimal temperature for rooting Tradescantia pallida cuttings is 18-25 degC, so the best time for Tradescantia pallida cuttings is spring and autumn.
2. Cutting selection
For Tradescantia pallida cuttings, cuttings are naturally indispensable, namely the Tradescantia pallida branches used for cutting. From a potted Tradescantia pallida, select healthy branches free of pests and diseases, cut them into sections 5-8 cm long, each with more than three leaf nodes; these branches are the cuttings.
3. Cutting substrate
For the cutting substrate for Tradescantia pallida, materials such as river sand and peat soil can be used. In addition, medium-coarse river sand can also be used, but it should be rinsed several times with clear water before use. Before use, however, it is best to disinfect it first, as this can improve the survival rate of Tradescantia pallida cuttings.
4. Starting the cutting
After completing the above preparations, Tradescantia pallida cutting can officially begin: moisten the cutting substrate a little, then insert the dried cuttings into it; a depth of 1/2-2/3 of the cutting is sufficient.
5. Cutting management
After cutting, the most important thing is to maintain relative humidity, so it is best to spray water on the cuttings 1-3 times a day to keep them moist. If it is a sunny day with relatively high temperatures, then spray two more times. In addition, after cutting, 50-80% of sunlight must be shaded out. Overall, Tradescantia pallida cuttings are not difficult; with a little care, the survival rate can reach 100%.
Overall, Tradescantia pallida propagation is not difficult; cuttings, division, and sowing can all take root and survive, but when it comes to survival rate, cuttings are still the best. Of course, methods are fixed while people are flexible; everyone can choose a method to propagate according to actual circumstances. That is all the editor has to introduce about Tradescantia pallida propagation methods. I hope it can be of help to everyone.
How does Podocarpus macrophyllus propagate? Cutting propagation method for Podocarpus macrophyllus / 100% survival rate for early spring cuttings
When growing plants indoors, many people choose Podocarpus macrophyllus. It is evergreen all year round, and no matter where it is placed, it has excellent ornamental value. But is one pot of Podocarpus macrophyllus too monotonous? Multiple pots of Podocarpus macrophyllus together are more beautiful! If you do not want to buy them, you need to propagate them yourself. So how does Podocarpus macrophyllus propagate? Below, follow the editor to take a look at the cutting propagation method for Podocarpus macrophyllus.
1. How does Podocarpus macrophyllus propagate: cuttings
As for the propagation methods of Podocarpus macrophyllus, both cuttings and layering can be used, but the one most suitable for indoors and with a higher survival rate is cuttings. It is also simple to carry out: cut a Podocarpus macrophyllus branch as a cutting, insert it into the growing medium, provide a good environment and care for it carefully, and once it takes root, repot and transplant it.
2. Cutting propagation method for Podocarpus macrophyllus
1. Cutting time
To take Podocarpus macrophyllus cuttings, you must first choose a good time. Generally speaking, Podocarpus macrophyllus can be cut in all four seasons, but if you want a survival rate as high as 100%, it is best to choose early to mid-March, and the second choice is mid-September.
2. Cutting selection
In the cutting propagation method for Podocarpus macrophyllus, the selection of cuttings is undoubtedly the most important step; if it is chosen well, the whole propagation is basically half done. From a potted Podocarpus macrophyllus, select branches of the current year that are robust and free of pests and diseases as cuttings.
3. Cutting treatment
Cut the selected branches into sections about 5-15 cm long, each section needing to have more than 3 leaf nodes; as for leaves, keeping one is enough. After the cuttings are prepared, soak them in potassium permanganate solution for about 3 minutes, then soak the base in LBA solution for 4-5 hours, ready for cutting.
4. Starting the cutting
Before preparing to cut, it is best to use a bamboo stick to make small holes about 3-5 cm deep in the substrate, then insert the cuttings into the small holes, and finally press the base firm with your hand.
Precautions: as for the leaves on each cutting, finally press the base firm with your hand; when inserting, avoid covering the leaves of adjacent cuttings.
5. Care after cutting
After Podocarpus macrophyllus cuttings are completed, water promptly so that the cuttings and substrate can come into close contact. After that, do the shading work well, preferably maintaining a shade level of about 50%-80%, and after Podocarpus macrophyllus has taken root, gradually remove the shade net. When the Podocarpus macrophyllus seedlings have grown to about 25-30 cm tall, they can be repotted and transplanted, and afterward cared for according to Podocarpus macrophyllus cultivation methods.
After reading the whole article, I believe many gardening enthusiasts will know how to propagate Podocarpus macrophyllus! Overall, Podocarpus macrophyllus has strong vitality and a high cutting survival rate, so even beginners can easily succeed. So what are you waiting for? If you have a pot of Podocarpus macrophyllus nearby, then try taking cuttings; the joy after success is a rare experience.