Lavender Propagation Methods: Slanted-Cut Cuttings Rooted in Water Then Grown in Soil, with a Survival Rate as High as 100%
1. Lavender Propagation Methods: Cuttings Have the Highest Survival Rate
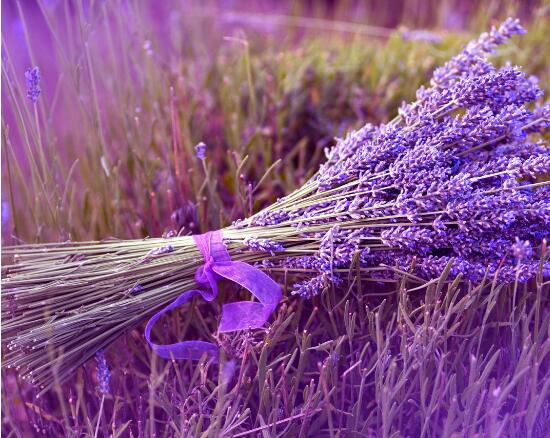
Lavender is deeply loved by young people and is one of the common flowers in everyday life. Previously we introduced how to grow lavender and what lavender is used for, and now let's look at lavender propagation methods. There are many lavender propagation methods, the most common being cutting propagation and seed propagation. Cuttings are the propagation method with the highest survival rate. Below we explain these propagation methods one by one.
2. Lavender Cutting Methods
Among lavender propagation methods, cuttings have the highest survival rate. Cuttings have strong adaptability and can be done in both spring and autumn. Generally, use the terminal buds or relatively tender, non-lignified branches of healthy plants free of pests and diseases for cuttings, with a cutting length of 8-12 cm. Cut the lower end of the cutting into a slanted surface, and it is best to leave 6-8 leaves on the upper part of the cutting, which helps the cutting retain nutrients and accelerate healing and rooting.
The cut of the cutting should be near the stem node, and try to make it smooth, without rupturing the phloem. Remove the leaves from the bottom 2 nodes, place in water for 2 hours, and then insert into soil for cuttings; roots will generally develop in about 2-3 weeks. After cutting, place the seedlings in a ventilated, cool environment. Keep the soil moist for the first three days, and afterward depending on the weather, ensure the branches do not wrinkle or dry out, to improve the survival rate.
Note: Regarding watering, make sure to: do not drown the seedlings, do not allow waterlogging, and do not let leaves stick to mud, otherwise the seedlings will suffocate and die.
3. Seed Propagation Methods
Lavender seeds are tiny, so it is best to raise seedlings and then transplant. The sowing period is generally chosen in spring. In warm regions, it can be done from March to June or from September to November each year; in cold regions, it is best to sow from April to June, and sowing in a greenhouse in winter is also possible. Germination takes about 14-21 days.
Because the seeds have a relatively long dormancy period, before sowing they should be soaked for 12 hours, then soaked in 20-50 ppm gibberellin for 2 hours before sowing. Before sowing, level and finely break up the soil, water thoroughly, and after the water seeps down, evenly sow the seeds, then cover with a layer of fine soil 0.2 cm thick, and cover with grass or plastic film to preserve moisture. This lavender propagation method is commonly used for large-scale propagation.
Note: After germination, appropriate light is needed; weak light easily causes leggy growth. If not treated with gibberellin, it will take one month to germinate. Below 15°C, it takes 1-3 months to germinate. During the seedling stage, pay attention to spraying water. When the seedlings are too dense, thin them appropriately. When the seedlings are about 10 cm tall, they can be transplanted.
Propagation Notes
Lavender cannot tolerate heat and humidity. If waterlogged for a long time, the roots rot and it dies. When planting outdoors, be careful not to let rain fall directly on the plants. After May, it needs to be moved to a place without direct sunlight, and ventilation should be increased to lower the ambient temperature and keep it cool, so it can safely pass the hot summer. Pay attention to sunlight, water, temperature, and patience. The above is all the content on lavender propagation methods brought to you, and we hope it helps you.
Potted Camellia Propagation Methods: Root Cuttings in Water, Then Grow in Soil (the Simplest Propagation Method)
Camellias are very common in everyday life. Every plant has its propagation method, and camellias are no exception. There are many camellia propagation methods: seed propagation, cuttings, approach grafting, leaf cuttings, and so on, but the simplest method among them is cuttings. The survival rate of cutting propagation is very high; with good care, roots can form in two months.
1. Camellia Propagation Methods: Cutting Propagation Has the Highest Survival Rate
The unique floral fragrance of camellias is deeply loved by people. With advances in potted plant techniques, camellias can also be grown at home. Previously we discussed how to grow camellias and what the effects and functions of camellias are, and now let's look at camellia propagation methods. The simplest and highest-survival-rate camellia propagation method is cuttings. Below we look at the propagation steps.
2. Cutting Propagation
For camellia propagation, the cutting method is the simplest. The best time is in September, and spring is also acceptable. Choose well-growing, semi-lignified branches, remove the basal leaves, keep a few upper leaves, cut diagonally with a sharp knife, then soak the cut in 200-500 ppm indolebutyric acid for 5-15 minutes, afterward dry in the sun, then insert into a sand pot or vermiculite pot and wait about 40 days for the wound to heal, watering continuously during this period. Roots generally form in about two months.
You can also, from late June to early July, choose 3-4 year old branches, ring-bark 1-2 cm of stem bark at the lower end, reaching deep to the xylem, and after the callus tissue at the wound swells, cut it off for cuttings. Cuttings should be inserted as soon as they are cut. The insertion depth is best at 1/3-1/2 of the cutting length, with a plant-to-row spacing of 5 cm × 15 cm. After inserting, press the substrate firmly, spray thoroughly with a fine-hole watering can, place in half shade, and spray water 1-2 times daily.
Note: Maintain air humidity and keep the substrate moist (water stored for 2-3 days, such as river water or rainwater, is best). Keep the temperature at 20-25°C, and pay attention to gradually increasing ventilation and exposure to sunlight. In 1-2 months, the cuttings can root. After rooting, transplant into a clay pot with a diameter of 7.5 cm. After settling in, manage normally according to routine care. This is the simplest of the camellia propagation methods.
3. Leaf Cutting Propagation Method
Camellias usually use branch cutting propagation more often, but some precious varieties, due to restrictions on the source of branches, or because taking material would affect their tree shape, can also use the leaf cutting method. This is also one of the camellia propagation methods.
To facilitate aeration and drainage, mountain soil should be used as the cutting substrate. Place the substrate in a clay pot, then perform pot cuttings. In the rainy season, take one-year-old leaves as leaf cutting material (too old makes rooting difficult, too tender makes rotting easy; one-year-old is just right). Insert about 2 cm deep into the soil. After inserting, press the soil firmly, water thoroughly, then place in a cool, ventilated place. Generally, roots can develop after 3 months, and in the spring of the next year it can sprout and send out branches.
4. Grafting Propagation Method
Choose vigorous seedlings or camellia varieties that root easily from cuttings as rootstock. Cut off at about 4-5 cm above the ground, split about 1.5 cm deep through the pith, use 1-2 year old branches as scions, keep 1-2 leaves on the upper part of the scion, cut the lower part into a wedge shape, insert into the split opening of the rootstock, make sure the cambium layers of both sides closely connect, then tie tightly with plastic tape.
Note: After grafting, cover the scion with a plastic bag and tie it below with a string, but not too tightly, so that water droplets form inside the bag and continuously drip onto the rootstock. Then add a paper bag outside the plastic bag to shade it from direct sunlight.
Camellia is a very easy-to-grow potted plant. Keeping it at home is absolutely beneficial and harmless. Friends who like camellias can try growing one at home. The above is all the content on camellia propagation methods, and we hope it helps you.
How Do Camellias Reproduce? Four Camellia Propagation Methods / Cutting Method Survival Rate 100%
Camellia, a very beautiful flower. Its beautiful flower shape and rich flower colors make people love it endlessly. In everyday life, growing a few pots of camellias at home is a choice for many people, and many of them directly buy them from stores. In fact, besides buying existing potted camellias, everyone can also propagate them by hand. The following are four camellia propagation methods. Follow the editor to learn about them.
1. How Do Camellias Reproduce? Cuttings / Approach Grafting / Leaf Cuttings / High Cuttings
As one of China's top ten famous flowers, camellia is an indoor potted plant for many people. However, one pot of camellia looks very monotonous; growing several pots together is what really feels satisfying. If you do not want to go out and buy them, then you need to propagate them yourself. As for how camellias reproduce, there are four methods: cuttings, approach grafting, leaf cuttings, and high cuttings. For the specific operations, let's continue reading below.
2. Four Camellia Propagation Methods
(1) Camellia Cutting Method
There are many camellia propagation methods. Both sexual reproduction and asexual reproduction can be used, but the most commonly used are still cuttings and approach grafting. Among them, the camellia cutting method is relatively simple. Let's introduce it in detail.
① Cutting Time
For how camellias reproduce, the first thing is to choose the right time. For camellia cutting propagation, it is best to choose September, and mid-May in spring is also acceptable.
② Cutting Selection
In the camellia cutting method, the selection of cuttings is especially important. If chosen well, it will directly affect the survival rate of the entire propagation. On a sunny day in September, cut nutrient-rich, vigorous, semi-lignified branches as cuttings.
Cutting treatment: Cut to a length of about 6-10 cm, preferably with 2/3 nodes. Then remove the basal leaves, keep the upper 3 leaves, and cut diagonally with a sharp knife. After that, disinfect the cutting, apply some carbendazim to the wound, then place in a cool, ventilated place to dry.
③ Starting Cuttings
After the cuttings dry, insert them into a sand pot or vermiculite pot. They can also be inserted into a container filled with water. Be careful to keep them moist; roots will generally form in 2 weeks. Overall, cuttings are extremely easy to root. If operated properly, the survival rate of camellia cutting propagation can reach 100%.
(2) Camellia Approach Grafting Method
Approach grafting is one of the most common camellia propagation methods. It is mainly used to propagate precious camellias. Rootstock for approach grafting: generally choose oil tea; approach grafting time: between Qingming Festival and Mid-Autumn Festival.
Approach grafting method: Plant the rootstock in a flower pot. Use a knife to shave off about half at the parts to be joined respectively, and note that the cuts should be smooth. Then, fit the cut surfaces of both sides tightly together, wrap with plastic film, and water the rootstock twice a day.
Care: After 60 days, it will heal. At that time, cut it off and plant it, and place it under tree shade, avoiding direct sunlight. In February of the next year, use a knife to cut off the tail part of the rootstock, then plant it in place, and afterward care for it according to camellia growing methods.
(3) Camellia Leaf Cutting Method
Considering the restrictions on the source of branches of precious camellias, using the leaf cutting method for propagation has become an option. The specific operation is as follows:
Cutting substrate: Mix mountain soil with 1/3 river sand to ensure good aeration and drainage. Then place the substrate in a clay pot.
Cutting selection: One-year-old leaves can be taken as leaf cuttings. Note that the leaves cannot be too old or too tender; too old makes rooting difficult, and too tender makes rotting easy.
Starting cuttings: Insert the selected leaves about 2 cm deep into the soil. After inserting, press the soil firmly, water thoroughly, then place in a cool, ventilated place. Generally, roots can develop in 3 months, and in the spring of the next year it can sprout and send out branches.
(4) Camellia High Cutting Method
In addition to the above three, the high cutting method is also one of the camellia propagation methods. Its characteristic is that it can give all the weak small branches on the camellia that should have been pruned off a new life. More importantly, this method has a high survival rate, quick rejuvenation, and early flowering, making it very suitable for beginners to try. The specific operation is as follows:
On the weak branches that need to be pruned off, perform ring-barking at an appropriate position. The ring-barking length can be between 5-8 mm. Tie on a suitably sized plastic film, add sterilized peat soil or leaf mold into the film, and after 7-10 days, ring-bark another 5-8 mm at the lower part of the plastic film. After that, a new life is born!
Overall, camellias have strong vitality, and all four propagation methods are easy to survive, but when it comes to convenience and survival rate, cuttings and approach grafting are still the best. Of course, methods are fixed, but people are flexible. Everyone can choose a method for propagation according to the actual situation. That is all for the camellia propagation methods introduced by the editor, and we hope it can help everyone.