How to Propagate Oleander? Two Methods with High Survival Rates from Spring Cuttings
Oleander, an ornamental plant, is toxic, yet its beauty and its medicinal value are beyond doubt, which is one of the reasons people plant oleander even knowing it is toxic. Because of oleander's benefits, mass propagation is imperative, so how do you propagate oleander? Below, we bring you two methods for propagating oleander.
I. How to Propagate Oleander: Cuttings/Layering/Division
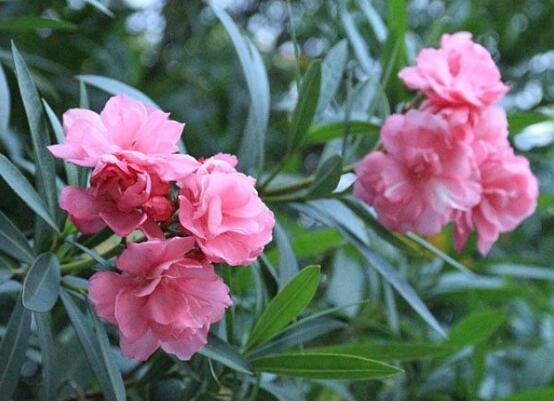
Oleander is highly ornamental and its medicinal properties can treat illness, so it is often propagated in large numbers. As for how to propagate oleander, after years of cultivation, oleander now has three common propagation methods: cuttings, layering and division, among which cuttings are the main method. For the specific steps, read on.
(1) Propagating Oleander from Cuttings
① Cutting season for oleander: spring
In propagating oleander from cuttings, the choice of timing is very important; it determines the final survival rate to a certain extent. According to oleander's growth habits, oleander can be propagated by cuttings in both spring and summer, but spring is best.
② Seedbed selection: sheltered from wind and facing the sun
For outdoor cutting propagation, the seedbed must be chosen well; as far as possible choose land that is sheltered from wind and faces the sun, does not accumulate water, is free of pests, diseases and weeds, and has sufficient fertility and is easy to manage, as shown in the picture above; for indoor cuttings, the potting soil should be placed in a spot sheltered from wind and facing the sun, and the soil should be fertile, slightly acidic soil.
③ Cutting selection
In cutting propagation of flowers, the selection of cuttings is the most important; choose well and the survival rate will be very high. When taking oleander cuttings, you should choose branches of the current year, from the middle and upper parts facing the sun, with thick, sturdy stems and leaves.
Specific steps: on a branch, choose a middle-to-lower section, cut the upper end smooth and the lower end at a slant; the length of the cutting should be 15-20 cm. In addition, oleander cuttings must have two or three buds, with the upper cut about 1.5 cm from a bud, and the lower leaves removed.
④ Treating the cuttings
After the cuttings are selected, they still need corresponding treatment: soak them in rooting powder for 2-8 hours. Note: for oleander cutting propagation, it is best to collect the shoots, cut them short and insert them into the medium right away.
⑤ Starting the cuttings
After completing the preparatory work above, the oleander cutting propagation is about to formally begin. Insert the treated cuttings into the seedbed (potting soil), taking care not to insert them upside down. For insertion depth, it is best to leave one or two buds exposed above the soil; after inserting, make marks and records.
⑥ How long until oleander cuttings bloom
Generally speaking, cuttings taken in early spring can bloom the same year. However, to reach that point, careful aftercare following insertion is also very important.
⑦ Aftercare: light/temperature
Light: oleander loves light, and after cuttings are taken it cannot do without sunlight. But the light must not be too strong; once it is too strong, water evaporates quickly, which is bad for the survival of the cuttings. So after inserting the cuttings, you should shade 50% of the sunlight, and after roots grow, gradually remove the shade net.
Temperature: in our guide to growing oleander, we mentioned that oleander has strong adaptability and can grow as long as the temperature is above 0°C. However, for the cuttings to root quickly, the temperature is best kept between 20-30°C; higher or lower will not do.
(2) Propagating Oleander by Layering
Besides cuttings, oleander can also be propagated by layering. When layering, you can choose a sturdy one-year-old branch, keep the leaves about 30 cm down from the tip, and remove all the leaves below that. Then bend the branch into a loop at a suitable spot, with the tip pointing up, and fix the loop in place with string. After doing this, roots form in about a month.
(3) Propagating Oleander by Division
Oleander produces many roots, so division is also one of the propagation methods for oleander. When repotting in early spring, divide the plant at the same time, and it can bloom the same year. It is worth mentioning that oleander is highly toxic throughout the whole plant, so you must be careful when handling it.
Oleander Propagation Techniques: Cuttings
Oleander propagation techniques by cuttings and layering:Propagation methods include cuttings, layering and others, with cuttings as the main method.
(1) Raising seedlings from cuttings: Carry out hardwood cuttings in spring or early spring. Select thick, sturdy branches about 1-1.5 cm in diameter (sucker shoots can be used), cut cuttings 15-20 cm long, tie dozens of cuttings together in sequence, and soak the lower about 1/3 in water for about 10 days. Change the water frequently so the soaking water does not spoil; when the soaked part of the cuttings turns white and the top becomes sticky, take them out and insert them into the seedbed. Cuttings that have undergone water treatment grow very fast and have a high survival rate; generally they can root 15-20 days after insertion. Oleander can also be rooted in water. Place the lower part of the cuttings in 20°C water for 30-40 days, changing the water often, and they will also root easily. Then plant the rooted cuttings in the seedbed to grow on, but it is best to provide shade.
(2) Raising seedlings by layering: Oleander also roots very easily when propagated by layering. Generally, layer during the rainy season; before layering, wound the branch near the ground, press it into water, and after about 60 days it can be separated from the mother plant to obtain a new plant.
Through the detailed introduction in this article, we hope you have gained something! Welcome to keep following Zuihua Web for more of the latest information on woody flowering plants!
Spring Cutting Techniques for Oleander
Oleander has long leaves like bamboo and flowers like peach blossoms, and its flowering period is very long, lasting from mid-April to mid-September. When in bloom it is a profusion of flowers with dense green branches and leaves, and in winter it braves frost and snow, giving it high ornamental value; it is an excellent landscaping tree species. At the same time, it has strong resistance to sulfur dioxide, so it is also an ideal plant for factory landscaping. Oleander is relatively easy to propagate and can be propagated by layering, suckering, cuttings and other methods. Propagation by layering and suckering is limited by the number of mother plants and is not easy to do on a large scale. The method of spring field cuttings is simple and convenient, with a survival rate of up to 95%, and can produce large numbers of seedlings.1. Making the cutting bed
In a field with medium loam or sandy loam soil, make a flat bed with a bed surface 60 cm wide; when making multiple beds, leave a 30-40 cm wide path between them. The bed body should be loose and level. Spray and disinfect with 0.3% potassium permanganate solution or 0.125% carbendazim solution.
2. Collecting and treating the cuttings
In spring, before flower buds appear, cut 1-2 year old branches from the middle-upper and outer parts of the mother plant, then cut them into cuttings 10-12 cm long with a slanted base, leaving 1 leaf at the top (it does not matter if the middle and lower parts of 2-year-old branches have no leaves). Put the cut cuttings into water with the base 1/3 submerged, soak for 7-10 days, changing the water 3 times during that period. For small quantities, an open plastic basin can be used; for large quantities, a shallow pool can be built specially, with one water inlet and one water outlet, making water changes convenient.
3. Inserting the cuttings
After the cuttings have soaked for 7-10 days, some bases will have white protrusions, and at this point they can be inserted. The insertion density is 5 cm x 5 cm, and the insertion depth is 2/3 of the cutting. After inserting, water once thoroughly; no shading is needed.
4. Aftercare
After insertion, spray water frequently to keep the bed surface moist, and at the same time pay attention to pulling weeds; when pulling weeds, try not to loosen the cuttings. After about 20 days, the cuttings can root. After rooting, topdress with 0.2% urea twice to promote robust growth.
In summer, weeds grow very fast; for large areas, selective herbicides such as Gai Gong Shi Neng or Jing Ke Cao Neng can be sprayed to eliminate most grassy weeds, after which manual pulling can save a great deal of labor without affecting the seedlings. Survived seedlings can be transplanted after 1 month, or left in the bed and transplanted the following spring; seedlings left in the bed can grow to about 50 cm tall in the same year.