How do water lilies reproduce? Introduction to three methods: cuttings, division, and sowing
The water lily, similar in appearance to the lotus, is a relatively precious flower, mostly seen by park lakesides, and often grown by people as a potted plant at home. In daily cultivation, most people only need to know the planting method for water lilies, but for experienced growers, mastering the propagation methods of water lilies is equally important. So how do water lilies reproduce? Follow along with the editor to find out.
I. How do water lilies reproduce: cuttings / division / sowing
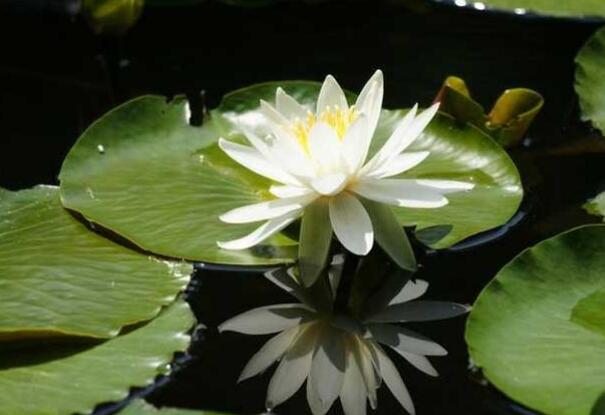
There are many varieties of water lilies, and their flower colors are very rich, so propagating several different water lilies and growing them together makes for a beautiful sight worth looking forward to when they bloom. As for how water lilies reproduce, there are three methods: cuttings, division, and sowing. Let's continue reading for the specific operations.
II. The three propagation methods for water lilies
Cutting propagation, division propagation, sowing propagation
(1) Cutting propagation of water lilies
① Cutting time
Among the propagation methods for water lilies, choosing the time is very important. For water lily cuttings, spring and autumn should be chosen, as this is the period of vigorous growth.
② Selection of cuttings
For the cutting propagation of flowers, the most important thing is the cutting, and a good choice directly affects the survival rate after propagation. When choosing adventitious buds for cutting propagation, growers should select mature, robust leaves of the water lily.
③ Preparation before cutting
Before cutting, growers also need to do some preparation. First, fill the pot with field soil or clayey soil, then water it thoroughly, and then apply a small amount of organic fertilizer.
④ Starting the cutting
Place the cutting into the prepared pot, press the leaf upside down into the water, and press soil around it. The adventitious bud should face upward, and the leaf should be submerged in the water.
⑤ Management after cutting
After completing the above work, the cutting propagation of the water lily is basically done, and what remains is care. Water lilies love strong light, so growers should cultivate them in a place that can receive half a day of sunlight or more. Apply organic fertilizer once a year, and after two to three years the roots can be trimmed and the soil changed.
(2) Division propagation of water lilies
Besides cuttings, water lilies are mainly propagated by division. Depending on the water lily variety, the division time is different:
① Division time
For hardy water lilies, divide in early spring before sprouting, in March to April; for non-hardy water lilies, divide when the climate is warm, generally around mid-May.
② Division method
First, dig out the rhizome of the water lily, select rhizomes with plump new buds, and cut them into root segments 8-10 cm long, with each segment bearing at least 1 bud. Then, bury them in the surface soil with the top bud facing upward. The soil depth in the pot is best such that the bud eye is level with the soil surface.
③ Care and management
After planting, let it sit in the sun for a while before adding shallow water, which helps maintain the water temperature, but the water should not be too deep, otherwise it will affect sprouting. Once the temperature rises and new buds begin to sprout, deepen the water level. Then place it in a well-ventilated spot with plenty of sunlight for care. Note: during high temperatures, keep the water in the pot clean.
(3) Sowing propagation of water lilies
Any flower with seeds can be propagated by sowing, and water lilies also produce fruit after flowering, so sowing can also be used as a propagation method for water lilies. Specific operation: after the water lily seeds are harvested, they must be stored in water. Sowing should be done in March to April, using fertile clay loam as the potting soil. The soil should not be filled too full, preferably 5-6 cm below the pot rim.
After sowing the water lily seeds, cover with 1 cm of soil, press firm, and immerse in water, with the water surface 3-4 cm above the potting soil. Then cover the pot with glass and place it in a sunny, warm spot to raise the temperature inside the pot. The sowing temperature should preferably be 25-30°C. They sprout after about half a month, and can bloom the following year.
How does Alocasia amazonica 'Poly' reproduce
Sample text 1: Shoot tip culture and rapid propagation of Alocasia amazonica 'Poly'
Weipu Information ht
No.
Vol. 2 No. 7 Issue 3
Fujian Agricultural Science and Technology F j
Sni ne & gcn g lfT rp c r l p u ic e c a heoo y o o ai C o
sV .O N7O3 1. 2
22 00
Shoot Tip Culture and Rapid Propagation of Alocasia amazonica 'Poly'
Huang Qing
(Quanzhou Fengze Agricultural Science Research Institute, Jinjiang, Fujian 362100)
Abstract: Using the cut shoot apex of Alocasia amazonica 'Poly' corms as explants, tissue culture and rapid propagation experiments were carried out. The results showed that adding a relatively high concentration to the MS medium promoted
the induction of shoot tips and clustered shoots at 6-BA and their subculture proliferation; the rooting medium could use 1 MS + 6-BA 0.3-0.5 mg/L + NAA 0.08-0.1 mg/L,
with a rooting rate reaching 100%. When rooted seedlings were transplanted into coconut coir mixed with 30%-40% perlite, the survival rate reached over 90%. Under natural fluctuating temperature and light conditions,
culturing favored root growth and development of the in vitro plantlets, improved plantlet quality, and increased transplant survival rate.
Keywords: Alocasia amazonica 'Poly' shoot tip tissue culture rapid propagation
Chinese Library Classification
Number: S 682.36 Q 813.1 Document Identification: A
Article Number: 1006-2327 (2009) 03-0020-03
Alocasia amazonica 'Poly' (scientific name Alocasia x amazonica 'Poly'), also known as "Black Velvet," is a perennial herbaceous plant of the Araceae family, genus Alocasia.
Alocasia amazonica 'Poly' is named for its dark green leaf color and densely hairy surface. Its underground part has a fleshy tuber, the leaves are shield-shaped with relatively small marginal notches, the veins are silvery-white and prominent, the petioles are light green, and the plant is relatively small. This plant is
a small to medium-sized variety of the genus, and is also a recently introduced foreign variety with
based on
MS medium with macronutrients reduced by half (abbreviated as 1/2 MS) as the base,
with NAA 0.03-0.5 mg/L and IBA 0.08-0.1 mg/L added. All the above media were supplemented with 30 g/L sucrose, 5.6 g/L agar, pH 5.9. Among them, the medium for shoot tip and clustered shoot induction was supplemented with sucrose,
1.3 Experimental methods
In
the proliferation and rooting media, white granulated sugar was used to replace sucrose.
The test corms were rinsed clean with tap water, the leaves removed, and the leaf sheaths and scale hairs carefully peeled off, leaving only the white scales tightly wrapping the upper and lower ends. On a clean workbench, they were sterilized with 75% alcohol for 30 s, then disinfected with 1% HgCl2 solution for 10 min, and rinsed with sterile
water 5 times, blotted dry with sterile absorbent paper, and then the outer layer was carefully peeled off
a new variety of indoor foliage plant with a unique style. Plant tissue culture technology has been widely applied in horticultural production, and there are currently many reports on culture and rapid propagation techniques for plants of this genus (Alocasia), but regarding
the tissue culture technique for Alocasia amazonica 'Poly' has not yet been reported. For this reason, this person used
the cut shoot apex segments of Alocasia amazonica 'Poly' corms as explants, successfully inducing shoot tip sprouting and forming clustered shoots, then carrying out proliferation, growth and rooting into plantlets, propagating a large number of seedlings in a relatively short time. 1 Materials and methods
1.1 Test materials
down to the second layer of scales, cutting shoot apex segments of 8-10 mm as explants,
inoculated into shoot tip induction medium for culture. The shoot tip differentiation was observed and recorded 45 d after inoculation. 1.3.2 Clustered shoot induction and proliferation
Corms of Alocasia amazonica 'Poly' 2-year-old mother plants.
2. Culture conditions: culture temperature 25-32°C, light 11 h per day, light intensity 1000-2000 lx. Subculture once every 30-45 d. Using MS as the culture medium, with different 6-BA and NAA added, the composition of the screening media for each stage is as follows
below:
The
small and medium plantlets from the same medium were cut into single buds and inoculated respectively into clustered shoot induction and proliferation media for culture, with
5 single buds inoculated per flask, subcultured once every 30 d, observing the induction, proliferation and
growth of clustered shoots over 50 d.
1.3.3 Rooting culture and transplanting: From the clustered shoots obtained by subculture proliferation, cut about 2 cm tall
12
1 Shoot tip induction medium
Five different concentrations of 6-BA treatments were set up, namely MS +
rooted plantlets and inoculated into rooting medium. The inoculated plantlets were divided into two groups: one group remained in the constant-temperature culture room, and the other group was placed in a shade shed
under naturally fluctuating temperature and light conditions (temperature 10-37°C, midday light intensity 1000-10000 lx) for culture, observing the rooting, growth and transplant survival of the plantlets. Well-rooted and robust plantlets with developed root systems were transplanted into coconut coir mixed with perlite at different ratios, carefully managed, and after new roots sprouted for 3-5 d, began applying 1/2 MS macronutrient nutrient solution, and after 1 month were transplanted into pots.
2 Results and discussion
.
N
In the MS + NAA 0.2 medium, 0.1, 0.2, 0.3, 0.4, 0.5 mg/L of 6-BA were added respectively
and 0.5 mg/L of 6-BA. 1 Clustered shoot
Induction and proliferation medium. 2. In MS + NAA 0.05 mg/L medium, different concentrations of
6-BA were added respectively, namely 0.1, 0.2, 0.4, 0.6, 0.8, 1.0 mg/L, six treatments.
1.2.3 Rooting medium
.9
.
Weipu Information http://www.cqvip.com
Fujian Agricultural Science
and Technology
1.2.1 Shoot tip induction. The explants were inoculated onto the shoot tip induction medium for culture, and after 2 d the scales at the tip were visibly elongated, and the shoot tip began to sprout,
and after 40 d formed a single shoot about 1.5 cm tall.
B
Within the concentration range of 0.4-1.0 mg/L, clustered shoots could all be induced and proliferated, and as the concentration of 6-BA in the medium increased, the rate of clustered shoot induction and the speed of proliferation also increased accordingly. When the concentration of 6-BA in the medium was 0.5 mg/L, the proliferation speed was fastest, reaching 3.4-fold in 30 d, but the proliferated clustered shoots were relatively slender and weak, with a low proportion of large plantlets.
Therefore, we used MS + 6-BA 0.8 mg/L + NAA 0.05
shoot
tip induction and the success of the medium! The 6-BA concentration in the medium
is closely related. Experimental results showed that when the NAA content in the medium
was
0.2 mg/L, while the 6-BA concentration was relatively low (0.1 mg/L), it could not induce shoot tip sprouting: as the 6-BA concentration in the medium increased, the shoot tip induction rate increased significantly, and when the 6-BA concentration in the medium was 0.4 mg/L, the shoot tip induction rate was highest, reaching 97.0%: when the 6-BA concentration in the medium continued to increase, the shoot tip induction rate instead all decreased (see Table 1). It can be seen that the suitable medium for shoot tip induction of Alocasia amazonica 'Poly' corms is MS + 6-BA 0.4 mg/L + NAA 0.2 mg/L. Using corm shoot apex segments as explants to directly induce shoot tip sprouting not only has a high induction success rate, but also, because it does not undergo the process of callus tissue dedifferentiation, is easy to maintain
the characteristics of the mother plant.
Table 1 Effect of different 6-BA concentrations on shoot tip induction
mg/L as the subculture proliferation medium for Alocasia amazonica 'Poly' for expanded propagation, the propagation speed was relatively fast (can proliferate 3.4-fold in 30 d) and the proportion of plantlets was high, with significant results. In addition, during the propagation process, when the 6-BA concentration in the medium was on the high side, it could to a certain extent increase the proliferation multiple, but the slender and weak plantlets needed to be cultured for a period before they could be transplanted, which only
prolongs the cycle
and is not conducive to rapid propagation, and also increases the cost of seedling cultivation. 2
3 Rooting culture. Alocasia amazonica 'Poly' plantlets root easily. Most clustered shoots can grow shoots and root simultaneously during the proliferation process, and rooting-free plantlets
showed good root growth in all rooting media tested after inoculation, and after 7 d of culture
white root points were visible at the base, and after 3 d the plantlets grew to about 0.5
cm, with 4-6 roots, root length 4-5 cm, rooting rate 100%.
Test results
preliminarily showed that after inoculation, rooting-free plantlets placed in a large shade shed
under naturally fluctuating temperature and light conditions (temperature 10-37°C, natural light,
midday
light intensity 7000-10000 lx) for culture, their rooting culture period
could be shortened by 5-7 d compared with culture in the constant-temperature culture room, and the root system was thick and short, the plant was robust and dwarf, and the transplant survival rate correspondingly increased to over 90%, so
Note: In Table 5, all media were supplemented with NAA 0.2 mg/L. The data are statistical results 45 d after inoculation.
above. Carrying out shoot growth and rooting culture under naturally fluctuating temperature and light conditions can both improve plantlet quality and simplify the operation procedure, reduce energy consumption, and lower the cost of seedling cultivation. This has
2.2 Induction and proliferation of clustered shoots.
Single buds were inoculated onto clustered shoot induction and proliferation medium for
culture for 10 d, and nodular protrusions were visible growing at the base, which then gradually enlarged and formed clustered shoots. The induction and proliferation of clustered shoots were closely related to the 6-BA concentration in the medium. From Table 2 it can be seen that when the medium contained NAA = 0.05 mg/L while the 6-BA concentration was relatively low (< 0.2 mg/L), no clustered shoots could be induced, but robust plantlets could grow: the 6-BA in the medium
Table 2 Effect of different 6-BA concentrations on clustered shoot induction and subculture proliferation.
A has
a certain practical significance. The effect of temperature and light conditions on the growth and development of Alocasia amazonica 'Poly' tissue culture plantlets awaits further experimental verification. 2.4 Transplanting.
When the plantlets have a developed root system, 2-3 leaves, and reach a height of 4-5 cm, they can be transplanted. Most of the plantlets proliferated after subculture have developed root systems, and such plantlets do not need rooting culture. Directly cut from the clustered shoots plantlets with intact root systems for transplanting, the weak (turned to page 5 below)
Note: In the table, all media were supplemented with NAA 0.05 mg/L; the data are statistical results 30 d after inoculation.
1 0
Weipu Information th
tp/:ww/w.cqvi.pcm
Fujian
Subtropical Crops Research
Technology Equipment
Note: 0 late season 0 season bean gross price 02/2a0 year early 3 6 season a/ 20 year late season per t element 12 yuan, superphosphate 4 calcium, 0 imported compound J I yuan, 4 0 year 2. yuan k. 1 0. yuan k, 0 urea 200 yuan J1 80 E potassium chloride 0 1; 2 O year dry season per t element 01 yuan, superphosphate calcium 04, imported compound ~16 yuan, potassium chloride 61 yuan. 0401 urea 2 00 yuan 60 0 3
Water
, but the two-season trial results already show the yield trend, and it is basically consistent. The relationship between fertilization level and yield forms a single-peak curve graph
Figure I Relationship between fertilization level and yield
1. When the fertilization level is relatively low, as the fertilization level increases
, the yield also increases accordingly, but after reaching the peak, as the fertilization level increases, the yield instead decreases. 2 Economic benefit analysis
. Calculation of costs in different treatments, excluding fertilizer and picking costs
(bean picking wage per kg 02, increasing with yield increase) gross yuan.
High 1
The remaining costs are all calculated per 66 740. From Table 4, 6 m. 5 yuan can be seen
, the output value of both seasons was highest in treatment 3. Per 6 67 . m6 output value reached 8 1 and 2 8 4. yuan respectively, and the output-to-input ratio was also 1 6 . yuan J 0 50 both in treatment 3, respectively 1 4 3O. But cost was highest in treatment . .6 and 3
3
1 From the trial results it can be seen that under medium fertility conditions, . early
season edamame fertilization level pure N 5~6 7 6 right, yield lk 6/.m left highest, late season N pure k l/6. m, right yield highest, but 4~66 7 left economic benefit is not the highest.
Treatment 4 treatment 5, it is not difficult to see that fertilizer input cost is not proportional to output, that is, high fertilizer input does not necessarily produce high output, so input should be appropriate.
3 Discussion
3
2 The fertilization ratio used in this trial lO60 7 summarized from farmers . : : . is high-yield edamame fertilization amount and our fertilization experience over the years, its ratio correctness and rationality still need to be verified by trials.
(Continued from page 1) and rootless small seedlings used for continued or rooting generation culture. On O small
I
Qiu, Qiang Hao Wang Jing, Zhao Shiwei et al. Foliage plants succulent plants woody
, when transplanting, take out the rooted small seedlings and wash them clean and culture medium, transplant into sterilized substrate, water thoroughly, maintain temperature 2 5, C02 relative
humidity 7% 5-5, 7d new root germination visible, new roots
after germination 8 5-% can 3 0 5 begin watering I3 macroelement nutrient solution, 1 month d/-MS after transplanting into pots. Trials show that suitable for black velvet Guanyin lotus bottle seedling transplanting
Flowers, color spectrum I. Figure Jing: Zhongbei Building Materials Industry Press, I9, M lIj 9 9
4. 5
2
Tan Wencheng Dai, Cegang. Ornamental plant tissue culture technology l 1 Beijing: M . Zhonglin Industry Press, 9I. 9 1 3 Chen Zhenguang. Horticultural plant in vitro culture science I 1 Agriculture Industry Press, edition, . M
Zhong 1 9 5, -1 9 1100 2.
of
The substrate mixed with 3% -0% perlite coconut coir is suitable, its 05% transplanting survival rate reaches 9% or more. 5 References.
, Zhu Genfa, Zhang Neng, Zou Yuanchunping. et al. Sagittaria sagittifolia tissue culture and
rapid propagation [ ] . Plant Physiology Communications, 20 I3 . 0J0 ( ):
85, Liang Guoping. Guanyin lotus bulb culture and rapid propagation I 1 J . Guangxi Subtropical Crops
, Technology 20 ( ) : - 3 I0 04 1 .1
5.
Original address.html
VIP Information htNo.
2 7 Volume Issue 3
Fujian Subtropical Crops Technology F j
Sni ne & gcn g lfT rp c r l p u ic e c a heoo y o o ai C o
sV .O N7O3 1. 2
22 00
Black velvet Guanyin lotus terminal bud culture and rapid propagation
Huang Qing
(Quanzhou Feng Agricultural Science Research Institute Jinjiang 32 1 2 62)
Abstract: Using black velvet Guanyin lotus small bulb apex cut as explant, conduct tissue culture and rapid propagation trials. Results show that in MS medium adding higher concentration
of 6 BA is favorable for terminal bud and cluster bud induction and subculture proliferation; rooting medium can use 1MS 6 03 05 pair /B2 + A. . ^ m . LNAA.~ .m L 0+8 1 0,
rooting rate reaches 1 0. Rooted seedlings transplanted into mixed 3-%0 perlite coconut coir, survival rate reaches 9% or more. Using natural variation temperature and light conditions culture 0% 0-%45
is beneficial for bottle seedling rooting and growth, improving bottle seedling quality and transplanting survival rate.
Keywords: black velvet Guanyin lotus terminal bud tissue culture rapid propagation
Chinese Library Classification
Number: ¥ 8 .6 O 8 3 6 1 3 2 .1 Document code: A
Article number: 1 0-2 2 -0 20 -o(0 - 0 6 03 7 2 ) 3 00 9 3
Black velvet Guanyin lotus ( oa i ' cl l 'e " name AI sc Ba ke V v)r also "black goose" is, Araceae Alocasia perennial herbaceous plant. Black .
Velvet Guanyin lotus is named for its dark green leaf color, surface densely covered with hairs. Its underground part has fleshy tuber, leaves peltate, leaf margin notch relatively small, veins silver-white and obvious, petiole light green, plant relatively small, this plant is
a medium-small variety of this genus, and also in recent years introduced from foreign countries with-
with macro
element halved MS abbreviated 21) medium base (MS culture/
basis, J AAN0 03 5/ and A08I 1mL . Add Jl f . ~ mg.L B.- . 0 groups. Above each medium added sugar 3O , agar O 6 p 7 .% 5 . agar, %H . 59 . Among them terminal bud and cluster bud induction medium added sucrose ,
1. Trial method 3
In
proliferation and rooting culture medium use white granulated sugar to replace sucrose.
Rinse the test bulbs with tap water until clean, remove leaves and carefully peel off leaf sheaths and scale hairs, leaving only the top and bottom tightly wrapped white scales, on ultra-clean workbench use 7% alcohol sterilization 3 s at 50 , then use 1 H0g solution disinfect 1 min sterile
water rinse 5% C. h n, 0 times, sterile absorbent paper blot surface moisture, then carefully peel off the outer one
unique style indoor foliage plant new variety. Plant tissue culture technology has been widely applied in horticultural production, currently there are also many reports on this genus plant (taro) culture and rapid propagation technology H but related Alocasia ,
black velvet Guanyin lotus tissue culture technology has not yet been reported. For this reason, this person
used black velvet Guanyin lotus small bulb terminal cut as explant, successfully induced its terminal bud germination and formed cluster buds, then conducted proliferation, growth and rooting into seedlings, in a relatively short time propagated a large number of seedlings. 1 Materials and methods
1 1 Test materials .
to two scale layers, cut 8 1 mm terminal segment as explant 0-
, inoculate in terminal bud induction medium culture. 4d observe and count 5 after inoculation terminal bud differentiation. 1 . Cluster bud induction and proliferation .2 3
Black velvet Guanyin lotus 2-year-old mother plant divided small bulbs. 1
. Culture conditions 2 Culture temperature 2-5 , daily light 11 h, light intensity 3 C2 5 2 0I . 3 per 5 subculture once. Using MS as culture medium, with 0 x0 45 d different 6 B A NAA, each stage screening medium composition as
follows:
Will
small and medium seedlings from the same medium cut into single buds, respectively inoculate in cluster bud induction and proliferation medium culture, each bottle inoculate
5 single buds, 3 d subculture once, observe cluster bud induction, proliferation and individual
growth 5 conditions.
1 Rooting culture and transplanting .3 3 From subculture proliferation obtained cluster buds cut about 2m tall c
12
1 terminal bud induction medium .
. Five different concentrations of 6 B A treatments set, namely in MS +
rooted small seedlings, inoculate in rooting medium. Divide inoculated bottle seedlings into two groups, one group still remains in warm room culture, another group placed in shade shed
natural variation temperature and light conditions (temperature ~10C noon light intensity 3S7 0 ~ 0 I) 0 for culture, observe bottle seedling rooting, growth 00 0 10x and transplanting survival. Transplant healthy rooted small seedlings into mixed different ratios perlite coconut coir, careful management, after new root germination 3 5 d ~ begin watering 31 macronutrient solution months after transplanting into pots. /M 1 S
2 Results and discussion
.
N
A0A /2 medium respectively added 10 0 2., 4 0.mgL . , .0 3.
and 05/ mg. of 6 L B A. .1 Cluster bud
induction and proliferation medium .2 In 2 MSN AA00 gmL medium r respectively add different + .5 / f 1 concentrations
of 6B 1 namely, 2 004 60 A: 0., ., ,. 8o, 00 1 / . ~ m.gL six 1 treatments.
123 Rooting medium .
.9
.
VIP Information http://www.cqwvi.cpom
Jianfu Subtropical Crops
Technology
I 2 Terminal bud induction. Inoculate explant onto terminal bud induction medium for culture, 2 d later visible terminal scales obviously elongated, terminal bud begins to germinate
0, 4 d form about 1 high 5 m single bud. After 5. c
B
A concentration within 41 mgL range, can induce cluster buds and ~0/ proliferate, and as medium 6 B A concentration increases, cluster bud induction rate and proliferation speed also increase, when medium 6 B A concentration is 0 /5 mgL, its proliferation speed is fastest, 3d can 43 , but cluster buds are slender and weak, large seedling proportion low. . times
For this, we use MS 6B . +/+ A08 mLg ANA 0 0 .5
Terminal
bud induction formation! and culture medium leaf B f6 l5 (1 A concentration has
close relationship trial. Results show that when medium L N fA A content l
is
20/ , 6 B .mgL and A concentration low relatively.m ( g, L can induce 10/ ) not terminal bud germination: as medium, A concentration increase, bud b6B terminal induction rate obviously increases, medium 6B culture A concentration 4 /0, . mL g terminal bud induction rate highest, 9 . : reaches when medium 6 B1 7 0 A6 concentration continues increase, bud induction rate instead all decrease (Table 1. See) It can be seen that black velvet Guanyin lotus bulb terminal bud induction suitable medium is MS 6B .mgL NAA0 2/ + A 04/ +.mgL . Bulb terminal cut as explant directly induce terminal bud germination, not only induction success rate high, and because without callus tissue differentiation dedifferentiation process, easy to maintain
mother plant characteristics.
Table 1 Effect of different 6 B concentrations on terminal bud induction l 1 A
mgL as black velvet Guanyin lotus subculture proliferation medium for expanded / propagation, propagation speed relatively fast (can proliferate 5 3 4 and seedling proportion its d 3. times high) , effect significant. In addition, during propagation process, when medium 6 B A concentration relatively high, can to a certain extent increase proliferation multiple, although weak small seedlings need to grow culture before transplanting, bottle
cycle lengthened
, not conducive to rapid propagation, and seedling cost increases .2
3 Rooting culture - Black velvet Guanyin lotus bottle seedlings easy to root. Most cluster buds during proliferation process, seedling growth and rooting can proceed synchronously, rootless small seedlings in test
each rooting medium showed good root growth, inoculated, cultured 7 d
visible base white root points, 3 d later small seedlings grow to about 05
m, with 4 6 roots, root length 4 m 5, rooting rate, l 0 . Ic ~ ~ c0 I /0
Trial results
initially show that rootless small seedlings placed in shade shed after inoculation
natural variation temperature and light conditions (temperature l ~ O, 5 3 temperature natural C light
, noon
light intensity 7 0~0 0 1) culture, its rooting culture period 0 0 1 00 under
x can be compared to in warm room culture culture shortened 5 7 ~ d, and root system thick short, plant strong dwarf, transplanting survival rate also correspondingly increased reaching 9,%
Note: Table 5 each medium added N mz. data is inoculation 4l A 0A 2 : / 5 ' after statistical results.
. Under natural variation temperature and light conditions for seedling growth and rooting culture, can improve bottle seedling quality, and simplify operation procedures, reduce energy consumption, lower seedling cost. This in seedling mass propagation
2 has 2 cluster bud induction and proliferation .
Single bud inoculated on cluster bud induction and proliferation medium for culture
l culture d, visible base growing nodular protrusions, then gradually grow 0d later and form cluster buds. Cluster bud induction and proliferation and medium II- A concentration l 6 B} closely related. From 2 table can be seen when medium I | contains NAA = can l = 00 / .5 gLm, and 6 B- A concentration relatively low (2 / ) not, < ~ mL g induce formation cluster buds, but can grow into strong small seedlings: medium 6
Table 2 Effect of different 6 B concentrations on cluster bud induction and subculture proliferation.
A has
certain practical significance. Temperature and light conditions effect on black velvet Guanyin lotus tissue culture seedling growth and development needs further trial. 2 4 Transplanting .
When small seedlings have developed root system, 2 3 leaves, reaching 4 5m length ~ plant height c ~ can transplant. After subculture proliferation most seedlings have developed roots, such seedlings without need for rooting culture, directly from cluster buds cut can take complete root system seedlings for transplanting, will weak (turn to page 5 below)
Note: In each culture medium, the amount used was 5 mL per flask; the data are the statistical results for 3 inoculations. After JA A0 |0 I.s.
1 0
Puweixun data th
tp/:ww/w.cqvi.pcm
o Fujian
Horticulture Science
Technology Equipment
Note: In 2002 late season, the price of vegetable soybean was 2.0 yuan/kg; in 2003 early season, 3.6 yuan/kg; in 2004 late season, 2.1 yuan/kg; superphosphate 4.0 yuan/kg; imported compound fertilizer 2.4 yuan/kg; urea 2.0 yuan/kg; potassium chloride 1.8 yuan/kg. In 2004 early season, 1.6 yuan/kg; superphosphate 4.0 yuan/kg; imported compound fertilizer 6.1 yuan/kg; potassium chloride 4.0 yuan/kg; urea 2.0 yuan/kg.
Water
However, the yield trends from the two-season trial results were already reflected and were basically consistent. The relationship between fertilizer application level and yield formed a single-peak curve.
Figure 1 Relationship between fertilizer application level and yield
1. At relatively low fertilizer application levels, as the fertilizer application level increased,
the yield also increased accordingly, but after reaching the peak, as the fertilizer application level increased, the yield instead decreased. 2 Economic benefit analysis
Calculation of costs for different treatments, except for fertilizer and harvesting costs.
In addition (vegetable soybean harvesting labor wage is 2.0 yuan per kg, increasing with yield.
High 1
All other costs were calculated per 667 sq m. From Table 4, it can be seen
that the output value of both seasons was highest in treatment 3. Per 667 sq m, the output value reached 8,116 yuan and 8,240 yuan respectively, and the output-to-input ratio was also highest in treatment 3, being 4.36 and 3.50 respectively. However, the cost was highest in treatment.
3
1. From the trial results, it can be seen that under medium-fertility conditions,
the fertilizer application level for early-season vegetable soybean was pure N 5-6 kg per 667 sq m, with the highest yield; for late season, pure N 4-6 kg per 667 sq m gave the highest yield, but the economic benefit was not the highest.
Treatments 4 and 5, it is not difficult to see that the input of fertilizer cost is not directly proportional to the output, that is, high fertilizer input does not necessarily bring high output; the input should be appropriate.
3 Discussion
3
2. The fertilizer application ratio of 6:7 used in this trial was summarized from farmers' high-yield vegetable soybean fertilization amounts and our fertilization experience over the years; its correctness and rationality still need to be verified by further trials.
(Continued from page 1) and rootless small plantlets were used for continued culture or rooting culture. On the culture medium, small
I
Qiu Qiang, Hao Wang Jing, Zhao Shiwei, et al. Foliage plants, succulent plants, woody plants
When transplanting, take out the rooted small plantlets and wash the culture medium clean, transplant them into sterilized substrate, water thoroughly, maintain temperature 20-25°C, relative
humidity 75%-85%, new roots sprout in 5-7 d, new roots
After sprouting 85%-90%, begin watering and applying 1/3-strength macroelement nutrient solution, after 1 month transplant into pots. The trial showed that black velvet Guanyin lotus bottle plantlets are suitable for transplanting.
Floral color atlas. Beijing: China Building Materials Industry Press, 1999
4. 5
2
Tan Wencheng, Dai Cegang. Ornamental plant tissue culture techniques. Beijing: China Forestry Publishing House, 1991. 3 Chen Zhenguang. Ornamental plant in vitro culture. China Agriculture Press
1995, 110-200.
of
The substrate should preferably be a mixture of 30% perlite and 50% coconut coir and rock wool, with a transplant survival rate of 95% or more. References.
4. Zhu Genfa, Zhang Neng, Zou Yuanchunping, et al. Tissue culture and
rapid propagation of taro [J]. Plant Physiology Communications, 2003, 10(1):
85. Liang Guoping. Culture and rapid propagation of Guanyin lotus bulbils [J]. Guangxi Tropical Agriculture
Technology, 2004(1): 1-3.
5.
Sample Essay 2: Propagation of Water Lilies
Propagation of Water Lilies
I. Diversity of propagation forms in water lilies
Among angiosperms, no other plant has such diversity in propagation methods as the genus Nymphaea. Some species or cultivars reproduce only sexually, such as the hardy water lily Nymphaea tetragona and the tropical water lily Nymphaea capensis, which reproduce only sexually. Some species reproduce only asexually, through division of tubers, such as the species or cultivars with Marliac-type tubers, Nymphaea 'Attraction', Nymphaea 'Chromatella'. Some species and cultivars have both sexual and asexual reproduction, such as the species and cultivars with Odorata and Tuberosa type tubers among hardy water lilies; they have good seed-setting ability and can also divide tubers in large numbers, as do many tropical water lilies. Among the asexual propagation types of water lilies, there is a very special leaf "viviparous" propagation form or the production of plantlets from flowers.
II. Sexual reproduction
Any species or cultivar with seed-setting ability usually produces a large number of seeds. Hardy water lilies usually have fewer fruits, fewer ovaries, and fewer seeds; generally each fruit has 50 to 150 seeds, and the seeds are relatively large. The largest seeds are those of Nymphaea Mexicana, followed by Nymphaea 'Are-en-cial'. The smallest seeds, such as those of Nymphaea 'Ganna Varska', are only 1/3 to 1/5 the size of a sesame seed. Usually tropical water lily seeds are smaller than those of hardy water lilies, but because tropical water lily fruits are large and have many ovaries, and each ovary also contains many seeds, each fruit can contain more than ten thousand seeds. As long as pollination is sufficient, water lily seeds have a relatively high germination rate.
Water lily seeds are released after the fruit matures and splits; the seeds spill out from the fruit along with the gelatinous material of the ovary, and float on the water surface by means of the membranous sac outside the seed, dispersing in all directions. After the membranous sac disintegrates, the seeds sink to the soil surface underwater. Usually in July-August, mature fallen seeds can germinate and grow into small seedlings within 5-7 days under natural conditions, but it is difficult for them to bloom that year. Seeds that mature and fall in September-October, whether hardy water lilies or tropical water lilies, generally cannot germinate and grow seedlings because the water temperature is lower. However, the seeds at this time can overwinter naturally underwater (south of the Yangtze River basin) or under ice (in the north, such as Qingdao), and grow out in May-June of the following year. Seedlings of tropical water lilies can grow into large plants and bloom in the same year, while hardy water lilies do not bloom until the following year.
However, seeds set by natural pollination will show wide segregation in the individual traits of seedlings, making them difficult to use directly. But excellent individual plants can be selected from them as material for breeding new cultivars. Only through directional selfing and selection can pure-line cultivars be bred, and only seeds obtained through artificially controlled self-pollination can produce stable populations with consistent traits.
In the seedling-raising process of sexual reproduction, because water lily seedlings are relatively weak at the early stage, they are easily entangled by filamentous algae and cannot grow, or the small seedlings are seriously damaged when algae are removed manually. During seedling raising, they are also easily harmed by mosquitoes and chironomid larvae, which may even eat all the water lily seedlings. In order to avoid losses during seedling raising and ensure the survival and growth of seedlings, sterile test-tube seedling culture is the most effective method. The basic techniques of test-tube seedling culture are as follows:
Step 1: Wash the seeds clean, soak them in 0.1% mercuric chloride for 10-20 minutes, and after treatment rinse them thoroughly with sterile water.
Step 2: Place the sterilized seeds in a sterile water bottle to promote germination; the germination temperature is in the range of 26-30°C, and the seeds will quickly germinate and grow into seedlings (Figure 6-1).
Step 3: After the small seedlings grow their third true leaf, transplant the small seedlings into bottles with solid culture medium, 3-5 seedlings per bottle, depending on the size of the culture bottle (Figure 6-2).
Step 4: When the small seedlings grow to their seventh to eighth true leaf, the seedlings can be taken out and transplanted into pots for continued culture. At this time the seedlings have grown larger and are not easily harmed by aquatic insects. The seedlings can also be placed into a larger culture bottle and continued to be cultured into sterile seedlings.
III. Asexual reproduction
(1) Tuber division propagation
Tuber division propagation mainly refers to hardy water lilies. Although many cultivars with Odorata and Tuberosa tuber types can set seed and can undergo sexual reproduction, unless necessary (such as selecting new cultivars from seedlings), sexual reproduction is generally not used; instead, asexual reproduction is used to obtain large numbers of clonal uniform individuals without worrying about trait segregation.
For cultivars with Marliac tubers, the tuber tissue is firm, and the connection between the lateral buds and the main stem is tight and not easily separated by hand; a sharp knife is needed for cutting. The separated lateral buds grow quickly and can bloom in the same year.
For cultivars with Odorata and Tuberosa tuber types, the tubers are mostly relatively long rhizomes, and lateral buds grow along the tuber. The former's lateral buds are large and robust, growing quickly and vigorously, and the lateral buds can often grow into second- or third-order branches and bloom in the same year. The latter's lateral buds are relatively small, mostly spherical or oval, and grow more slowly, usually not blooming until the second year. These two types of tubers have soft tissue structure, nearly spongy, especially the latter. Their lateral buds (or lateral branches) are weakly connected to the main stem and separate easily from the main stem, especially the latter.
Because the tuber (rhizome) tissue of these two types of cultivars is soft, it is extremely easy for them to lose water and dry out. The separated lateral bud tubers should not be sealed in cardboard boxes or plastic bags for a long time, as they are also prone to deterioration and rot. Therefore, when transporting over long distances, special attention must be paid to the ventilation of the packaging.
Regardless of the type of cultivar, all separated propagules should be graded. Generally speaking, the cut main stem and large first-order lateral buds can be used for cultivation or sale, while smaller lateral buds should be graded and planted together for management, and cultivated into large seedlings. When there are many, they can be planted in separate field sections to avoid mixing; when there are few, they can be grown separately in pots.
During the annual growth period, seedling division can generally be carried out 2-3 times. This varies with conditions in different regions. For example, in the Qingdao area, seedling division must be carried out twice a year; otherwise growth becomes too dense and affects flowering and landscape effect.
See Figures 2-3, 2-4, 2-5, and 2-6 for the morphology of the 3 different tubers and the attachment of lateral buds.
(2) Leaf viviparous propagation
Among day-blooming tropical water lilies, quite a few cultivars have the characteristic of leaf vivipary; they grow small plantlets on the upper side (at the leaf nose) where the petiole and leaf blade join. When each new leaf has just unfolded, hairy protrusions can already be clearly seen at the leaf nose. As the leaf grows, irregular pointed protrusions appear below the hairs, and small plantlets gradually grow, first young leaves and then roots. The small plantlets obtain nutrients from the mother plant's leaf. After the leaf ages and turns yellow, the small plantlets remain connected to the mother plant by the petiole; the old petiole not only fixes the small plantlet but also, like an infant's umbilical cord, supplies nutrients from the mother plant. After the petiole rots, the small plantlet separates from the mother plant and drifts freely to continue growing; upon encountering suitable conditions, it will settle into the soil and grow into a large plant. Each mother plant can produce 30-40 new plants during the annual growth period, with quite strong natural reproductive capacity. Under artificial propagation conditions, when the leaf ages and is nearly completely rotten, collect the small plantlets and place them in pots for concentrated planting and culture. Small plantlets produced in May-July can bloom and produce new small plantlets by September-October. A few cultivars do not produce small plantlets on early leaves, only on middle and late leaves, such as Nymphaea 'August Koch'. At present, 19 cultivars capable of viviparous propagation have been bred worldwide, and the China Water Lily World has introduced 12. There is only 1 species of water lily in the world capable of viviparous propagation, namely Nymphaea micrantha Guillemin & Perrottet, native to the west coast region of Africa. There are currently more than 20 cultivars bred by artificial hybridization worldwide, mainly in the United States; they are:
N.‘August Koch’,N.‘Bagdad,N.Blue Bird’,N.‘Charles Thomas’,N.‘Daubeniana’,N.‘Edward D.Uber’,N.‘Isabelle Pring’,N.‘Margaret Mary’,N.‘Mrs.Martin’ E.‘Randig’,N.‘Panama Pacific’,N.‘Patricia’,N.‘Paul Stetson’,N.‘Peach Blow’,N.‘Pink Platter’ N.‘Royal Purple’,N.‘Tina,N.Ganna Walska’。
See the overall Figure 2-16 for the situation of viviparous small plantlets on the leaves of the whole plant.
(3) Corm division propagation
Corm division propagation is mainly seen in tropical water lilies. The growth pattern of tropical water lilies is completely different from that of hardy water lilies; the former's tuber is pineapple-shaped and spherical, growing upright, while the latter is a rhizomatous tuber growing horizontally. Night-blooming tropical water lilies, such as Indian red water lily (Nymphaea rubra), Egyptian white water lily (Nymphaea lotus), and some day-blooming tropical water lilies such as Nymphaea colorata, Nymphaea 'Albert Greeburg', and Nymphaea 'Blue Sky', etc., produce several new corms of varying shape and size at the base of the old corm from late summer to early autumn (Figure 6-3). When the plants are moved indoors to overwinter in late autumn and early winter, during the severe winter their leaf clusters all wither and die, the old corms of night-blooming tropical water lilies rot away, and new plants grow from the small corms at the base the following year (upper part of Figure 6-4). For day-blooming tropical water lilies, although the leaf clusters die, the old corm can overwinter, and in the following spring both the old corm and the new corms grow new shoots. According to records, in late summer and early autumn, moving the plants into jars or pots for cultivation or giving intermittent water-deficit conditions can promote the growth of more corms. In the Wuhan area, during the overwintering period of night-blooming tropical water lilies, the small corms left in the field can overwinter safely and grow new shoots the following spring.
(4) Corm seedling division propagation
Among day-blooming tropical water lilies, some species and cultivars, such as Nymphaea india and Nymphaea 'Ganna Warlska', after overwintering, the old corm grows dozens of clustered small plantlets in the bud growth zone in spring (lower part of Figure 6-4). Because there are many small plantlets growing in clusters, it is difficult to separate them early. The whole corm should be planted and cultured separately in a jar or pot, and after the small plantlets grow larger, carefully divide and cultivate them.
(5) Stolon seedling division propagation
Among night-blooming tropical water lilies, some species (such as Nymphaea rubra) produce horizontally growing small rhizomes from the side of the old corm during the vigorous summer growth season. At the ends of these thin stolons, a new plantlet grows, often forming a group around the mother plant, so that some people mistakenly think these small plantlets are seedlings grown from scattered seeds; in fact, Nymphaea rubra rarely has fully developed fruits and seeds. The small plantlets growing from these stolons can be separated, transplanted, and cultivated, and can also bloom in the same year.
IV. Propagation type of Mexican yellow water lily
The propagation form of the Mexican yellow water lily (Nymphaea mexicana) is very special among plants of the genus Nymphaea. It not only has strong sexual reproductive capacity but also strong asexual reproductive capacity. Its seeds are the largest among the seeds of plants in the genus Nymphaea. It not only has strong seed-setting ability but also a high germination rate. In artificial hybridization breeding of water lilies, this species is an important species providing the yellow gene and is often used as a hybrid parent.
The Mexican yellow water lily has two asexual propagation forms. The first is propagation through underground stolons. This species is the only species in the genus Nymphaea with underground runners. It has spongy, soft, robust
underground stems. During the growing season, each node of the underground stem grows a new plant, and each new plant can continue to divide, forming multi-order branches and forming a huge population in a short time. The second way is that on the corm or the node of the underground stolon of each plant, another kind of underground rhizome grows, and at the tip of each rhizome a dormant latent bud body is produced. Each bud body is composed of several pairs of symmetrical vegetative bodies; the vegetative bodies are short club-shaped, rich in starch, and very firm. Between each pair of vegetative bodies there are latent dormant buds. After the rhizome between the bud body and the mother plant's corm rots and dies, each latent bud can remain latent in the soil for many years, and does not sprout new shoots only once each year, making it very difficult to eradicate.
Because the Mexican yellow water lily has 3 strong reproductive capacities at the same time, it multiplies very quickly and has strong invasive power, becoming a dominant species. In ponds where multiple cultivars are planted together, if partition isolation is not carried out, it can quickly become the dominant species, and other cultivars will be crowded out and eliminated. Special attention should be paid during introduction and cultivation to avoid causing a public nuisance.
V. Special propagation method of producing plantlets from flowers
Some water lilies can produce plantlets from flowers; this is a special propagation method of water lilies. Species and cultivars that often produce plantlets from flowers include: the night-blooming tropical water lily Nymphaea lotus (Egyptian white water lily). Among hardy water lilies, cultivars that often produce plantlets from flowers include: Nymphaea 'Colone A.J.Welck', Nymphaea 'Cherokee', Nymphaea 'Perry's Pink Delight', Nymphaea 'Texas Dawn'. In recent years, in the China Water Lily World, N. 'Texas Dawn' has frequently shown the phenomenon of plantlets growing in flowers. Usually there is a single flower with a single plantlet, that is, one more flower bud grows in one flower accompanied by one small plantlet (Figure 6-5); in some cases two flowers are twin-born and one small plantlet grows between the two flowers (Figure 6-6); in others three flowers are twin-born and one small plantlet grows in the middle (Figure 6-7). The small-type cultivar 'Little Baby' bred by the China Water Lily World has flowers with four, five, or eight flowers twin-born, with several small plantlets growing in the middle. These small plantlets, after the flower rots, remain connected to the mother plant through the peduncle and obtain nutrients.
The small plantlets growing from flowers were all planted separately, and no external morphological variation was seen; growth and development were normal, with no difference from the original cultivar.
Sample Essay 3: Propagation and Cultivation Management of Water Lilies
Summer is exactly the season when water lilies bloom. Their flowers are large and beautiful, both flowers and leaves are excellent, and they are fragrant. They are a very good aquatic ornamental plant.
Water lily propagation mainly uses the division method. Hardy species are usually divided in March-April before germination in early spring. Non-hardy species have high requirements for air and water temperature, so this can only be done around mid-May. When dividing, first dig out the rhizome, select rhizomes with plump new buds, cut them into 8-10 cm lengths, with each segment bearing at least 1 bud, and then plant them. Place the terminal bud upward and bury it in the surface soil; the covering depth should preferably be such that the plant's bud eye is level with the soil surface. Plant 5-7 segments per pot. After planting, expose to a little sunlight before adding shallow water to help maintain water temperature, but the water should not be too deep, otherwise germination will be affected. When the temperature rises and new buds begin to move, deepen the water level. Place in a well-ventilated, sunny place for maintenance. The cultivation water depth is 20-40 cm; in summer the water level can be deeper. In hot seasons, attention should be paid to keeping the pot water clean. When growing only a small amount in pots, the water lily that has been planted for 2-5 years can be taken out of the pot, cut into 2-4 pieces, and replanted in pots.
Water lilies can also be propagated by sowing. That is, after the flower closes and turns into the water, before the fruit matures, wrap the flower with a gauze bag so that after the fruit splits the seeds fall into the bag. After the seeds are harvested, they must still be stored in water; dry storage will cause them to lose germination ability. Sowing is carried out in March-April. Use fertile clay loam for the pot soil; do not fill the pot too full, preferably 5-6 cm below the pot rim. After sowing the seeds, cover with 1 cm of soil, press firmly, and immerse in water, with the water surface 3-4 cm above the pot soil. Cover the pot with glass and place it in a sunny, warm place to raise the temperature inside the pot. The sowing temperature is preferably 25-30°C. Germination occurs after about half a month, and flowering can occur the following year.
Water lilies can be planted directly in ponds, or in pots or containers such as baskets and then placed into the water body. The planting depth should be level with the soil surface, and deep burying is not suitable. Generally the cultivation water depth is 20-40 cm; in summer the water level can be deeper, but rapid water flow should be avoided. If the pond water is too deep, a planting platform can be built in the water or the plants can be potted and then placed into the pond. They should be planted in a ventilated and sunny place; otherwise water moss is likely to grow, causing water lilies to grow weakly and fail to bloom. The spacing for pond planting is 65-80 cm; for pot cultivation, large pots with a diameter of 23-27 cm or more are needed. The pot soil should be river mud or paddy field mud rich in humus. First dry the pot soil in the sun and crush it. When potting, cake fertilizer and bone meal should preferably be placed at the bottom of the pot as base fertilizer, or thoroughly decomposed fertilizer can be mixed into the pot soil. After planting the rhizome, initially the water surface can only be slightly higher than the soil surface; only after the petioles continue to elongate can the water depth be increased. During the growing period, maintain a water depth of 40 cm; the final water depth should not exceed 1 m. Before sinking into the water in early spring, cake fertilizer or fish fertilizer should be applied, and topdressing should be done once every 30-40 days. The usual fertilization method is: first mix fertilizer and soil at a 1:1 ratio into mud blocks, then evenly put the mud blocks containing soybean cake fertilizer into the water lily pond or pot. During the growing period, residual leaves and flowers should also be frequently cut off.
The underground stems of water lilies must overwinter in the mud. In winter, the water level must be deepened to more than 1 m to prevent the underground stems from freezing. If the water is shallow and freezing is likely, the rhizomes should be dug out; potted plants can be taken out together with the pot and placed indoors to overwinter. For hardy species, the indoor overwintering temperature must be above 3°C; for non-hardy species, it should preferably be above 15°C; very hardy ones can also overwinter indoors. After water lilies are planted, generally after 2-3 years they can be dug out again and divided and replanted; they do not need to be dug out and replanted every year.
Sample Essay 4: Propagation Methods of Water Lilies
Author: Yu Cheng
Flowers 2008 Issue 07
Water lily, also known as Ziwulian, is a perennial aquatic plant. Its leaves are deep green and its flower colors are brilliant. It has strong cold resistance; in northern regions, only attention to freeze protection is needed for safe overwintering. Flower colors include red, pink, white, yellow, blue, etc., bright and beautiful, with large and fragrant flowers. It is a very good aquatic ornamental plant. Water lilies are mostly propagated by sowing and division.
I. Sowing propagation
Before the water lily fruit matures, wrap the flower with a gauze bag so that after the fruit splits the seeds fall into the bag and will not scatter on the ground. After the seeds are harvested, they must still be stored in water; dry storage will cause them to lose germination ability. Sowing should preferably be carried out in March-April. Use fertile clay soil for the pot soil, but do not fill the soil too full; preferably 5-6 cm below the pot rim. After inserting the seeds, cover with 1 cm of soil, then add water so that the water surface is about 3 cm above the pot soil. Cover the pot with glass or plastic film and place it in a sunny, warm place to raise the soil temperature in the pot. After about half a month, germination and seedling emergence occur. After one year of cultivation, flowering can occur only in the second year.
II. Division propagation
This is usually carried out in March-April before germination in spring, and should not be too late. Some non-hardy cultivars have higher temperature requirements, so sowing can only be done in May. First dig out the rhizome, select rhizomes with plump new buds, cut them into 8-10 cm lengths, with each segment bearing at least one bud, and then plant them. When planting, place the terminal bud upward and bury it in the soil; the covering depth should preferably be such that the plant's bud eye is level with the mud surface. Plant 5-7 segments per pot; for small pots, 3 segments can be planted, preferably at roughly equal spacing. After planting, expose to a little sunlight before adding shallow water to help maintain water temperature, but the water should not be too deep, otherwise germination will be affected. After the temperature rises, add clean water in stages to deepen the water level. Then place in a ventilated and shaded place for maintenance, gradually increasing light for photosynthesis. In hot seasons, attention should be paid to keeping the pot water clean. Once the pot water is found to have turned green or become turbid and odorous, it should be changed immediately.
When cultivating only a small amount, the water lily that has been planted for 2-4 years can be poured out of the pot, cut into 2-4 pieces, and then replanted in pots for maintenance.
Contact phone: 020-****4744
Sample Essay 5: Propagation Methods of Andrographis paniculata
Author: Wu Xiangming
Rural New Newspaper 2003 Issue 24
(1) Sowing and seedling raising
① Seed collection and seed treatment: Every year from September to November, when the fruit of Andrographis paniculata changes from green to yellow and some turn purple, the seeds have matured and should be harvested in stages and batches. Spread the collected fruits out to dry in the sun. After the fruits split, collect the seeds, winnow away the fruit shells and impurities, put them into cloth bags, and store them in a cool, dry place. In order to make the seeds emerge uniformly, before sowing, mix 1 part seeds with several times the amount of river sand and rub them together; the scratched seed coat loses its glossiness. Then wash out the seeds and soak them in 45°C warm water for 24 hours to facilitate germination.
② Sowing: Sowing can usually be carried out in April each year (in cold regions it can be delayed to May) when the temperature rises to 25°C. Mix 1 part seeds with 3 parts plant ash or fine soil, then evenly scatter on the seedbed surface, and then cover with fine soil, just enough so that the seeds are not visible. After sowing, cover the seedbed surface with grass to keep warm. The seeding rate per mu is 6-7 kg.
③ Seedbed management: After sowing, build a shed and water frequently to keep the seedling bed surface moist. Complete seedling emergence can occur in 10-15 days. After emergence, gradually remove the covering grass from the seedbed, then strengthen management, frequently cultivate and weed, and irrigate. When the seedlings grow 2 true leaves, apply 1 topdressing of dilute human and animal manure water to promote robust seedling growth. After about 60 days of seedling raising, when the seedlings are 10 cm tall and have 5-6 true leaves, they can be taken out of the nursery and planted.
(2) Direct sowing
In southern production areas, because the temperature rises early, direct sowing is mostly used. In April-May, on the prepared seedbed surface of the planting site, open holes at a row spacing of 30 cm and a plant spacing of 20-25 cm, then mix the seeds with plant ash, sow them into the holes, and cover with a thin layer of fine soil, just enough so that the seeds are not visible. Cover the seedbed with grass to retain moisture; seedlings can emerge in 7-10 days, then remove the grass from the seedbed. The seeding rate per mu is 250-300 g.
Contact phone: 027-86791957
Sample Essay 6: Propagation and Cultivation Management of Water Lilies
Longyuan Journal Network
Propagation and Cultivation Management of Water Lilies
Author: Xu Chengwen
Source: Flowers and Trees Potted Landscape · Flower Gardening, 2007 Issue 07
Water lily, also known as Ziwulian, is a perennial aquatic plant of the genus Nymphaea in the family Nymphaeaceae. Its leaves are deep green and its flower colors are bright; it is a water surface greening plant with great ornamental value. It has relatively strong cold resistance; in the Northeast region, with a little protection, it can overwinter safely. Its underground rhizome grows horizontally or its tuber grows upright, short and thick. Leaves are clustered, floating on the water surface, thick and glossy, round or oval. The upper side of the leaf is dark green, and the back is dark purple or purplish red. Flower colors vary by cultivar and include white, pink, red, yellow, purple, etc., bright and beautiful. Summer is exactly the season when water lilies bloom. Their flowers are large and beautiful, both flowers and leaves are excellent, and they are fragrant. They are a very good aquatic ornamental plant. If a family has enough space on a balcony or in a courtyard, water lilies can be planted. Based on years of experience, the author briefly discusses how to propagate and cultivate water lilies well.
Water lily propagation mainly uses the division method. Hardy species are usually divided in March-April before germination in early spring. Non-hardy species have high requirements for air and water temperature, so this can only be done around mid-May. When dividing, first dig out the rhizome, select rhizomes with plump new buds, cut them into 8 cm-10 cm lengths, with each segment bearing at least 1 bud, and then plant them. When planting, place the terminal bud upward and bury it in pond mud; the covering depth should preferably be such that the plant's bud eye is level with the mud surface. Plant 5-7 segments per pot. After planting, expose to a little sunlight before adding shallow water to help maintain water temperature, but the water should not be too deep, otherwise germination will be affected. When the temperature rises and new buds begin to move, deepen the water level. Place in a well-ventilated, sunny place for maintenance. The cultivation water depth is 20 cm-40 cm; in summer the water level can be deeper. In hot seasons, attention should be paid to keeping the pot water clean. When growing only a small amount in pots, the water lily that has been planted for 2-5 years can be taken out of the pot, cut into 2-4 pieces, and replanted in pots.
Water lilies can also be propagated by sowing. Before the fruit matures, wrap the flower with a gauze bag so that after the fruit splits the seeds fall into the bag. After the seeds are harvested, they must still be stored in water; dry storage will cause them to lose germination ability. Sowing should preferably be carried out in March-April. Use fertile clay soil for the pot soil; do not fill the soil too full, preferably 5 cm-6 cm below the pot rim. After sowing the seeds, cover with 1 cm of mud, press firmly, and immerse in water, with the water surface 3 cm-4 cm above the pot mud. Cover the pot with glass and place it in a sunny, warm place to raise the temperature inside the pot. The sowing temperature is preferably 25°C-30°C. Germination occurs after about half a month, and flowering can occur the following year.
Water lilies can be planted directly in ponds, or in pots or containers such as baskets and then placed into the water body. For household pot cultivation, the pot should be large; small pots are unfavorable for the growth and flowering of water lilies. The planting depth should be level with the mud surface, and deep burying is not suitable. Generally the cultivation water depth is 20 cm-40 cm; in summer the water level can be deeper, but rapid water flow should be avoided. If the pond water is too deep, a planting platform can be built in the water or the plants can be potted and then placed into the pond. They should be planted in a ventilated and sunny place; otherwise water moss is likely to grow, causing water lilies to grow weakly and fail to bloom. The spacing for pond planting is 65 cm-80 cm; for pot cultivation, large pots with a diameter of 23 cm-27 cm or more are needed. The pot soil should be river mud or paddy field mud rich in humus. First dry the pot soil in the sun and crush it. When potting, cake fertilizer and bone meal should preferably be placed at the bottom of the pot as base fertilizer, or thoroughly decomposed fertilizer can be mixed into the pot soil. After planting the rhizome, initially the water surface can only be slightly higher than the soil surface; only after the petioles continue to elongate can the water depth be increased. During the growing period, maintain a water depth of 40 cm; the final water depth should not exceed 1 m. Before sinking into the water in early spring, cake fertilizer should be applied, and topdressing should be done once every 30 days-40 days. The usual fertilization method is: first mix fertilizer and soil at a 1:1 ratio into mud blocks, then evenly put the mud blocks containing soybean cake fertilizer into the water lily pond or pot. During the growing period, residual leaves and flowers should also be frequently cut off. Longyuan Journal Network
Propagation and Cultivation Management of Water Lilies
Author: Xu Chengwen
Source: Flowers and Trees Potted Landscape · Flower Gardening, 2007 Issue 07
Water lily, also known as Ziwulian, is a perennial aquatic plant of the genus Nymphaea in the family Nymphaeaceae. Its leaves are deep green and its flower colors are bright; it is a water surface greening plant with great ornamental value. It has relatively strong cold resistance; in the Northeast region, with a little protection, it can overwinter safely. Its underground rhizome grows horizontally or its tuber grows upright, short and thick. Leaves are clustered, floating on the water surface, thick and glossy, round or oval. The upper side of the leaf is dark green, and the back is dark purple or purplish red. Flower colors vary by cultivar and include white, pink, red, yellow, purple, etc., bright and beautiful. Summer is exactly the season when water lilies bloom. Their flowers are large and beautiful, both flowers and leaves are excellent, and they are fragrant. They are a very good aquatic ornamental plant. If a family has enough space on a balcony or in a courtyard, water lilies can be planted. Based on years of experience, the author briefly discusses how to propagate and cultivate water lilies well.
Water lily propagation mainly uses the division method. Hardy species are usually divided in March-April before germination in early spring. Non-hardy species have high requirements for air and water temperature, so this can only be done around mid-May. When dividing, first dig out the rhizome, select rhizomes with plump new buds, cut them into 8 cm-10 cm lengths, with each segment bearing at least 1 bud, and then plant them. When planting, place the terminal bud upward and bury it in pond mud; the covering depth should preferably be such that the plant's bud eye is level with the mud surface. Plant 5-7 segments per pot. After planting, expose to a little sunlight before adding shallow water to help maintain water temperature, but the water should not be too deep, otherwise germination will be affected. When the temperature rises and new buds begin to move, deepen the water level. Place in a well-ventilated, sunny place for maintenance. The cultivation water depth is 20 cm-40 cm; in summer the water level can be deeper. In hot seasons, attention should be paid to keeping the pot water clean. When growing only a small amount in pots, the water lily that has been planted for 2-5 years can be taken out of the pot, cut into 2-4 pieces, and replanted in pots.
Water lilies can also be propagated by sowing. Before the fruit matures, wrap the flower with a gauze bag so that after the fruit splits the seeds fall into the bag. After the seeds are harvested, they must still be stored in water; dry storage will cause them to lose germination ability. Sowing should preferably be carried out in March-April. Use fertile clay soil for the pot soil; do not fill the soil too full, preferably 5 cm-6 cm below the pot rim. After sowing the seeds, cover with 1 cm of mud, press firmly, and immerse in water, with the water surface 3 cm-4 cm above the pot mud. Cover the pot with glass and place it in a sunny, warm place to raise the temperature inside the pot. The sowing temperature is preferably 25°C-30°C. Germination occurs after about half a month, and flowering can occur the following year.
Water lilies can be planted directly in ponds, or in pots or containers such as baskets and then placed into the water body. For household pot cultivation, the pot should be large; small pots are unfavorable for the growth and flowering of water lilies. The planting depth should be level with the mud surface, and deep burying is not suitable. Generally the cultivation water depth is 20 cm-40 cm; in summer the water level can be deeper, but rapid water flow should be avoided. If the pond water is too deep, a planting platform can be built in the water or the plants can be potted and then placed into the pond. They should be planted in a ventilated and sunny place; otherwise water moss is likely to grow, causing water lilies to grow weakly and fail to bloom. The spacing for pond planting is 65 cm-80 cm; for pot cultivation, large pots with a diameter of 23 cm-27 cm or more are needed. The pot soil should be river mud or paddy field mud rich in humus. First dry the pot soil in the sun and crush it. When potting, cake fertilizer and bone meal should preferably be placed at the bottom of the pot as base fertilizer, or thoroughly decomposed fertilizer can be mixed into the pot soil. After planting the rhizome, initially the water surface can only be slightly higher than the soil surface; only after the petioles continue to elongate can the water depth be increased. During the growing period, maintain a water depth of 40 cm; the final water depth should not exceed 1 m. Before sinking into the water in early spring, cake fertilizer should be applied, and topdressing should be done once every 30 days-40 days. The usual fertilization method is: first mix fertilizer and soil at a 1:1 ratio into mud blocks, then evenly put the mud blocks containing soybean cake fertilizer into the water lily pond or pot. During the growing period, residual leaves and flowers should also be frequently cut off.
Sample Essay 7: Sowing and Propagation of Crape Myrtle and Bowl Lotus
Key Points for Sowing and Propagation of Crape Myrtle (
0026-070- 10649:
)
-----------------------------------------------------------------------------
Seed propagation is the most economical method for obtaining large numbers of crape myrtle seedlings, but for successful sowing, the following 3 key points must be mastered:
I. Seed collection From late October to mid-November, when the fruits turn deep yellow and a few have cracked slightly open, collect them in batches. Because crape myrtle seeds are very small, collecting them too early means the seeds will shrivel after drying; collect too late and most of the capsules have split open and the seeds have fallen out, leaving only half-ripe seeds. So the key is to grasp the timing and judge the fruit color accurately, collecting at the right time, then drying them after collection. Put the capsules, stalks attached, into a breathable container and hang it in a sunny, windy spot.
II. Raising seedlings From late March to April, prepare the seedbed, spread river sand on the bottom to a depth of 8 to 10 cm, then level it with a bamboo board. Before sowing, soak the seeds together with their capsules in warm water for 1 day, then filter out the water and spread them evenly over the seedbed, about 4 seeds per square cm. Then cover with 2 cm of dry sand, level with a bamboo board, water thoroughly, and cover with a thin film. Note that the temperature must not exceed 40°C; on sunny days at noon, uncover the film to ventilate and lower the temperature, and cover it again at night, keeping it constantly moist.
III
Transplanting. Apply enough basal fertilizer to the planting site; well-rotted farmyard manure plus a little cake fertilizer is even better, making sure the fertilizer is well mixed with the soil and the soil is fine. When transplanting, be gentle, keep a little soil around the roots, and do not damage the root system. Space plants 10 cm apart and rows 15 cm apart. After planting, press the soil firm and water with a watering can. After the surface has absorbed the water, check the plants one by one and water again. For the first half month after planting, provide appropriate shade to prevent sunscald. Afterwards keep it moist and pay attention to weeding. The seedlings are tender; do not fertilize too early or too much, and especially avoid applying urea. With careful tending, most will flower in early autumn.
Crape myrtle
Seed propagation requires care. Because the seeds are small and have wings, if sown too early when the temperature is low and the moisture period is long, they easily rot; if sown too late when the temperature is high, transplanting is difficult and survival is unlikely; and if buried too deep, they do not easily emerge.
In the propagation of bowl lotus, seed sowing and rhizome division are commonly used. Sowing is also called sexual propagation, and rhizome division is also called asexual propagation or vegetative propagation.
1. Sowing
propagation
Sowing of bowl lotus is mainly used for lines that can set seed or for plantings intended for pure-line breeding. If a newly bred line is formed by multiple generations of selfing from existing varieties, or by crossing and selfing, directional selection breeding to produce a stable variety, then an isolated area can be established for large-scale production of homozygous pure seeds.
Bowl lotus sowing propagation can be carried out from March to July; in the middle and lower reaches of the Yangtze River, it is best to sow in mid-to-late April. Soak the seeds in a basin and place them directly in the sunlight to sprout; no heat preservation is needed, and growth is fast. Under normal temperatures, with proper management, they generally bloom in the same year. The specific steps for bowl lotus sowing propagation are as follows:
(1) Breaking the shell
The seed coat of the lotus seed has a thick, hard, special structure. After the seed matures and fully shrinks and dries, water and air cannot easily enter and respiration is very slow, so it is forced into a dormant state. Therefore lotus seeds can be buried in soil for hundreds or even thousands of years without sprouting or rotting; this is why lotus seeds are long-lived. To enable the lotus seed to absorb water and oxygen after sowing and to break the forced dormant state and enter germination and growth, the shell must be broken before sowing and sprouting. To break the shell properly, one should first understand the basic structure of the lotus seed.
The lotus
seed's outer
layer is the fruit coat, developed from the ovary after fertilization, and its main component is cellulose. The highly cutinized epidermis has stomata, and the stomatal chambers reach deep into the fruit coat. The fruit coat contains palisade-like cells arranged densely and tightly; these structures give the seed very good protection. The fruit coat is green when young, leathery, and gradually turns black and brown and becomes hard as it matures.
Inside the fruit coat is the seed. It develops from the fertilized ovule and consists of the seed coat and the embryo. In the early stage after fertilization there is endosperm, which is absorbed and lost by the embryo in the later stage, so the lotus has an endosperm-free seed embryo. The embryo consists of 4 parts: the plumule, the radicle, the embryo axis, and the leaves. The two leaves are white, thick, opposite, and store abundant protein and starch; this is the part people eat. The plumule is green and has a short bud axis (stem), two opposite young leaves, and a terminal bud; the two young leaves, with their petioles folded and rolled into a tube, and the rudimentary leaf blade can already be recognized. Where the base of the plumule joins the two leaves is the embryo axis. At the end of the embryo axis, in the depression at the base of the two leaves, is the radicle. The radicle is very inconspicuous, invisible to the naked eye, but when the seed germinates the radicle immediately develops into a primary root, breaking through the seed coat and the hard fruit coat and emerging.
The lotus has an anatropous ovule and the plumule is borne at the top of the seed; when breaking the shell, one should strike the base end of the seed, that is, the end where the seed was attached to the receptacle, which is also the recessed end of the lotus seed. The simplest way to break the shell is to rub it on a cement surface or rough stone, or to use sharp, new pliers to bite and break the base of the seed. Before sowing, generally only the seed coat (that is, the hard shell of the lotus fruit) needs to be worn through until the brown seed coat is visible; when using pliers, only a 2 to 3 mm crack at the base is enough, and never clamp too deep, lest the embryo be damaged. After soaking the seed for 1 day, once the embryo absorbs water and swells and the fruit coat softens, one can peel off 1/3 of the fruit coat by hand along the broken area to expose the embryo so the plumule can extend and grow.
Note that the shell-breaking area must not be too large; if the hard shell of a lotus seed is removed entirely, the plumule will lose its protection and is very likely to rot and die.
(2) Soaking seeds to sprout Put the shell-broken seeds into water at about 50°C. The soaking water must be clean, free of grease and dirt, and must not be hotter than 50°C, otherwise germination will be affected. As the water temperature drops naturally, keep it at about 30°C; it should not be higher than 40°C or lower than 20°C. If the water temperature is above 40°C, the seeds sprout rapidly on the first day but later growth is inhibited; if the water temperature is below 20°C, the seeds germinate too slowly. For small quantities at home, the soaking seeds can be placed in a thermos to keep warm. At 30°C, soaking to sprout for 3 days generally brings germination, with the plumule extending out from the broken opening.
During this period, change the water 1 to 3 times a day and promptly remove seeds that do not sprout. Generally, seeds that have not sprouted after 7 days will not sprout. Seeds with no sprouting ability float to the surface, the plumule turns yellow, and the cotyledons rot, grow mold, and stink.
(3) Water culture for seedling raising After the seeds sprout, raise the seedlings in water at about 25°C for 5 to 7 days. During water culture, the lotus seedling roots are weak in absorption and growth mainly depends on the nutrients provided by the embryo, so generally no fertilizer is needed. During water culture, keep the water layer about 10 cm deep and give sufficient light;
do not change or stir the water frequently, lest the leaves constantly change their growth direction and become overgrown; keep the petioles in the water and let the leaves lie flat on the water surface. When transplanting, be careful not to break the petioles, so as not to affect growth. After planting, keep the water layer at 3 to 5 cm, but never submerge the leaves in the water. Bowl lotus likes light, so the pot should be placed in a spot with sufficient sunlight. The seedlings are tender; scorching by the sun may burn them, but they will generally sprout and survive. Do not water too much either; raising the water temperature promotes growth. After growing 7 to 13 floating leaves, upright leaves appear. For most flowering varieties, flower buds begin to appear after growing 5 to 7 upright leaves. Budding is early or late depending on the variety; some varieties even bud and bloom before upright leaves grow.
Model Essay Eight: Lotus propagation techniques
Lotus propagation techniques
Lotus is also known as lotus, fuqu, shuizhi, zezhi, shuihua, handan, shuidan, grass hibiscus, water hibiscus, yuhuan, liuyuechun, Chinese lotus, June flower god, lotus root flower, lingcao, yuzhi, etc. It belongs to the family Nelumbonaceae, genus Nelumbo. The lotus originated in China and is found from Vietnam to Afghanistan; it is generally distributed in subtropical and temperate regions such as Central Asia, West Asia, North America, India, China, and Japan. In China it was cultivated as early as more than 3,000 years ago. The lotus is a perennial aquatic plant. Its rhizome (lotus root) is plump with many nodes and grows horizontally in the mud at the bottom of the water. The leaves are peltate and round, dark green on the surface and covered with a waxy white powder, grayish green on the underside, entire and wavy at the margin. The petiole is cylindrical and densely covered with recurved prickles. The flower is solitary at the tip of the pedicel, held high above the water surface, with flower forms such as single, semi-double, double, and double-tiered; flower colors vary among white, pink, deep red, light purple, or intermediate colors; stamens are numerous; the pistils are free and buried in an inverted-cone-shaped spongy receptacle, whose surface has many scattered honeycomb-like holes; after fertilization the receptacle gradually swells and is called the lotus seedpod, and in each hole grows a small nut (lotus seed). The flowering period is from June to September, opening in the morning and closing in the evening each day. The fruit ripening period is from September to October. There are many cultivated varieties of lotus, which by use can be divided into three major groups: rhizome lotus, seed lotus, and flower lotus.
Every part of the whole lotus plant has use value. It has not only ornamental value but also edible and medicinal value.
[Lotus propagation techniques]
1. Division propagation. Division propagation is the main propagation method for water lilies. In spring each year, from March to April, when the buds are just beginning to sprout, dig up the rhizomes and use a sharp knife
to cut them into several pieces. Make sure each rhizome piece bears more than two plump buds, and plant them in the river mud in a pond or vat.
2. Seed propagation. Store plump black oval seeds sealed in clean water until taken out before sowing the following spring. Soak them in water at 25°C to 30°C to sprout, changing the water daily; they germinate after two weeks. When the seedlings grow to 3 to 4 cm, they can be planted in a pond, ensuring sufficient water depth.
[Lotus cultivation and management]
1. Pot culture. Around the spring equinox each year, put well-rotted soybean cake or fertilizers such as bone meal and hoof pieces in the bottom of the flowerpot, and put more than 30 cm of fertile river mud on top. Then plant the rhizome with buds into the river mud, cover with soil so the top bud is buried, and then add water to the pot or vat. In hot seasons, change the water in time to prevent algae growth from affecting its appearance.
2. Pond culture. In early spring, drain the water completely, apply basal fertilizer, add fresh pond mud, and fill with sufficient water for planting. In winter, keep the irrigation depth above 1.1 m so the rhizomes can overwinter safely.
Model Essay Nine: In vitro rapid propagation and cutting propagation of yacon
Author: Luo Linhui
Northern Horticulture 2008, issue 21
Yacon (Smallanthus sonchifolius), also known as yacon potato, jicama, etc., is a perennial herb of the family Asteraceae. It grows on high mountains at an altitude of about 1000 m. Its tuberous roots are the edible part; they resemble sweet potato in shape, and the flesh is like a water pear, juicy and grit-free, crystal clear, sweet and crisp. Yacon roots contain a large amount of water and sugars, mainly fructooligosaccharides, and also contain phenolic acids, flavonoids, terpenoids, volatile oils, amino acid components, and elements such as potassium, calcium, zinc, iron, and magnesium. They can clear the liver and detoxify, cleanse the stomach and intestines, promote detoxification and bowel movements, and beautify the skin, and have pharmacological effects such as lowering blood sugar, lowering blood lipids, lowering blood pressure, inhibiting bacteria, and promoting the absorption of iron and calcium. Yacon is a new type of high-grade medicinal fruit with broad market prospects.
Yacon has good economic benefits, and farmers want to expand planting on a larger scale, but are often limited by the source of planting material. Yacon generally does not set seed; in production it is propagated by tubers (shaped like Jerusalem artichoke tubers, purple-red in color), and the propagation coefficient is low. Using plant tissue culture propagation can greatly increase propagation speed; the cutting propagation method is simple, easy to learn and master, and farmers can do their own cutting propagation to meet their own planting needs.
Yacon has characteristics such as tolerance to strong light, tolerance to medium and low temperatures, and avoidance of water and fear of drought. It generally grows in areas with an annual average temperature below 18°C and a relative humidity of 80% to 85%. The optimum growth temperature is 10 to 20°C, and it is susceptible to freezing below 0°C. Therefore it is suitable for planting in low-latitude, high-altitude cool mountainous areas with year-round mist and clouds.
1 In vitro rapid propagation techniques of yacon
1.1 Preparation of explants
Cut the larger tubers lengthwise into 2 to 4 pieces, and make each piece bear several buds (pieces of 30 to 40 g do not need cutting). Coat the cut surfaces fully with plant ash to prevent rotting. Then bury them in moist fine river sand with the cut side facing down, cover with a plastic bag cut with 2 to 3 small holes about 2 cm in diameter to keep moisture, and place them in the laboratory, keeping the room temperature at 20 to 25°C. Buds emerge one after another after about 10 d, and after 3 weeks they grow into small shoots with 2 to 4 leaves. At this point the small shoots can be cut off with nodes as inoculation material. Do not water for about 15 d before collecting shoots, to reduce the contamination rate. Young shoots can also be taken directly from field plants as explants, but the contamination rate is high.
1.2 Culture conditions
Primary medium: MS; subculture medium: MS + NAA 0.1 mg/L. The above media are all supplemented with 0.7% agar, 3% sucrose (white sugar may be used instead), pH 5.8 to 6.0, culture temperature 20 to 23°C, daily light duration 12 to 13 h, light intensity 2000 to 2500 lx.
1.3 Growth and differentiation
1.3.1 Obtaining sterile material and bud growth Remove the leaves from the young yacon branches, leaving petioles 1 to 2 mm long to protect the axillary buds, cut the young branches into single-node stem segments, then shake-wash the stem segments and buds with detergent solution, rinse with clean water, and rinse under running tap water for more than 30 min. Under sterile conditions, soak in 75% ethanol for 30 s, transfer to 0.1% solution for sterilization for 5 to 6 min, then shake-wash with sterile water 4 to 5 times, and inoculate onto the primary medium, with 1 stem segment or 1 bud per bottle. On this medium, roots and buds begin to grow after 8 to 10 d, and after 35 to 50 d they grow into small shoots with 4 to 5 nodes, 2 to 3 roots, and a shoot height of 5 to 7 cm.
1.3.2 Proliferation culture Cut the small shoots cultured on the primary medium for 35 to 50 d into single-node segments and transfer them to the subculture medium, with 4 to 6 node segments or buds per bottle. After 7 d of inoculation, roots and buds begin to grow; after 35 to 50 d each bud or node again grows into a small shoot with 4 to 5 nodes, 2 to 3 roots, and a shoot height of 5 to 7 cm, and the roots are longer and thicker than those on the primary culture. Subculture can be done once every 35 to 50 d, with a propagation coefficient of 3 to 5.
1.3.3 Transplanting of test-tube plantlets Harden the small shoots cultured in the subculture medium for 30 d with a shoot height of 5 to 7 cm for 3 to 5 d, wash off the medium with clean water, plant them into clean, well-aerated garden soil, water thoroughly, and set up a small arch shed covered with plastic film and shade netting. They survive in 7 to 10 d, with a survival rate above 96%; after 20 d remove the plastic film and shade netting, and after 30 to 40 d they can be planted in the field.
2 Cutting propagation techniques of yacon
2.1 Establishing a shoot collection nursery
From early March to mid-May, cut the larger tubers lengthwise into 2 to 4 pieces, and make each piece bear several buds (pieces of 30 to 40 g are not cut), coat the cut surfaces with a layer of relatively fresh plant ash, then place them cut side down, lying flat in rows in garden soil that is deep, low in miscellaneous bacteria, and well aerated, at a spacing of 20 cm x 20 cm. After arranging, cover the seed pieces with fine soil, water thoroughly, and cover with plastic film. Buds begin to grow one after another after 10 to 20 d, at which point remove the plastic film. After 40 to 60 d, when the buds have grown to a height of 10 to 15 cm, shoots can be collected for cuttings.
2.2 Preparation of the cutting bed
Choose a sunny spot that is convenient to manage for the cutting bed; the soil should be clean, loose, and fairly permeable to water and air, with a pH of 5.6 to 6.8. Before cutting, plow, break up finely, and level the ground, and make beds about 5 to 10 m long and 1 m wide for use.
2.3 Preparation of cuttings
From April to June, when the new buds on the tubers have grown into branches 10 to 15 cm high, leave one node at the base of a thick branch and cut it off. Then cut the branch into cuttings 8 to 14 cm long with 3 to 4 nodes, remove the lower leaves of the cutting, being careful not to damage the stem skin when removing leaves, retain the 2 small leaves at the top or 1/3 of one large leaf and the terminal bud, and make a flat cut 0.5 to 1 cm from the base of the cutting.
2.4 Cutting and management
Using a small stick with a diameter similar to that of the yacon cutting stem, make holes in the seedbed at a plant and row spacing of 15 cm x 15 cm, with a hole depth of 1/3 of the cutting branch length, then insert the lower end of the cutting into the hole to a depth of 1/3 of the cutting branch length, making holes and inserting cuttings at the same time. After cutting, water thoroughly with a watering can, and set up a small arch shed covered with shade netting to reduce the transpiration rate of the cuttings and increase their survival rate. After 8 to 10 d of cutting, rooting and survival begin, with a survival rate above 95%. After survival, remove the shade netting, take down the small arch shed, and carry out weeding, watering, and other work as the seedbed requires. After 30 to 40 d, each plant has 2 to 4 roots, with roots more than 2 cm long; at this point they can be transplanted with soil into the field. Alternatively, when the cutting seedlings grow to a height of 17 to 20 cm, leave 1 to 2 nodes at the base of the shoot and cut off the upper part for further cutting propagation; the upper part of transplanted and surviving tissue-culture seedlings 17 to 20 cm high can also be cut for cuttings. This cutting propagation process can be repeated until the end of June.
Contact phone: 0451-****4276
Author introduction: Luo Linhui Guizhou Zunyi Vocational and Technical College 563006
Model Essay Ten: Asexual propagation methods of lotus root
Authors: Wang Chengye, Tu Wei, Yang Weihong
Shaanxi Science and Technology Daily 2006, issue 19
The propagation method in which underground stems develop into plants and produce new lotus roots is called asexual propagation of lotus root, also known as vegetative propagation. It includes several methods such as whole lotus root propagation, main lotus root propagation, daughter lotus root propagation, lotus root head propagation, lotus root reed propagation, terminal bud propagation, and lotus whip propagation.
I. Whole lotus root propagation The propagation method in which the whole lotus root plant is planted in a field (pond) at a certain plant and row spacing to develop into a plant and produce new lotus roots is called whole lotus root propagation. Whole lotus roots can overwinter in the lotus root field; during overwintering keep a layer of shallow water to prevent drying and freezing cracks. The next year dig them out for planting, and plant them as they are dug. For continuous-cropping lotus root fields, seed can be retained by digging in intervals, that is, when digging lotus roots, leave 0.5 to 1 m undug every 2 to 3 m, to serve as seed lotus roots for propagation the next year. It is the most commonly used propagation method in production.
II. Main lotus root propagation The propagation method using the lotus root body of a whole lotus root after removing the daughter and granddaughter lotus roots is called main lotus root propagation. It is also a relatively commonly used propagation method in production.
III. Daughter lotus root propagation The propagation method in which daughter lotus roots are cut off from the whole lotus root and planted separately as seed is called daughter lotus root propagation. If daughter lotus roots are used as seed, when harvesting commercial lotus roots in late autumn, remove them from the whole lotus root, select undamaged and disease-free ones, and heel them in at a depth of 20 cm in mud. Keep water in winter, and spread a layer of plastic film on the soil surface to help them overwinter safely. After spring begins, when the temperature rises above 15°C, dig them out and plant them. IV. Lotus root head propagation The propagation method in which the frontmost bud node of the main lotus root, daughter lotus root, or granddaughter lotus root is cut off and planted in a field (pond) for propagation is called lotus root head propagation.
V. Lotus root node propagation The propagation method in which a 5 to 6 cm section is cut from both ends of the connection between the nodes of the lotus root body, heeled in for seedling raising, and planted in the field for propagation is called lotus root node propagation.
VI. Terminal bud propagation The propagation method in which the terminal buds of the main lotus root, daughter lotus root, and granddaughter lotus root are cut off from the base, heeled in for seedling raising, and planted in the field for propagation is called terminal bud propagation. When the outside temperature rises above 15°C, heel-in seedling raising can begin. Terminal buds should be cut and heeled in the same day, with a plant spacing of 5 to 10 cm and a row spacing of 10 to 15 cm, with the terminal buds slightly exposed above the water surface and the water depth kept at 3 to 5 cm. After planting, a bamboo frame can be set up outside the seedbed and covered with plastic film to raise the ground temperature and promote sprouting. When the outside temperature stabilizes above 15°C, they can be planted out. When planting out, let the small leaves emerge above the water surface, and both the young lotus whips and the adventitious roots should be buried in the mud. Plant 2 seedlings per hole; the density is basically the same as that for whole lotus roots or main lotus roots.
VII. Lotus whip propagation The method of using the current year's lotus whip as seed for propagation is called lotus whip propagation, also known as pulling and laying the seedlings.
Contact phone: 029-87340420
Propagation methods of money plant
Money plant (Pennywort) likes warmth and moisture. It is best cultivated in half sun or shade, and avoids direct sunlight. It is not particular about the growing soil; loose, well-drained growing soil is best, or it can be grown directly in water. The optimum water temperature is 22 to 28 degrees. It is shade-tolerant, moisture-tolerant, slightly drought-tolerant, highly adaptable, robust in constitution, easy to plant, and fast to propagate, and can grow both in water and on land. Now let us take a look at the propagation methods of money plant!
Propagation methods of money plant
Money plant is mainly propagated by division or cuttings, mostly carried out from March to May each year. It is easy to cultivate; keep the growing soil moist, and roots will form in about 1 to 2 weeks. Seed sowing can also be used for raising seedlings. For the growing medium, a mixed substrate made of leaf mold, river mud, and garden soil can be used, with a ratio by volume of 0.5:2:2. Money plant is moisture-tolerant and an emergent type, so it is also suitable for water basin and pond cultivation. If grown in water, be sure to change the water once a week and add a special nutrient solution for foliage plants.
Money plant seed propagation
1. Method One: Pour the money plant seeds into a small container, add just enough water to cover the seeds. If the temperature is low, wrap it with plastic wrap, change the water frequently, and place it in a cool, ventilated place. After a few days they will sprout; when the sprouts grow to about one centimeter they can be planted.
2. Method Two: Soak the money plant seeds in a small amount of water for half an hour, put soil in a pot, water thoroughly, pour the seeds together with the soaking water into the pot, spreading them as evenly as possible and not piling them together, cover with a thin layer of soil, spray water twice a day, just enough to keep the surface moist. Place in a warm, dark place; they sprout in about three days, and once true leaves grow they can be transplanted for water culture.
Money plant cultivation methods
1. Soil culture of money plant: Potted money plant can be handled once the small seedlings have formed. A medium-sized flowerpot without drainage holes is often used as the planting container. To obtain a better ornamental effect, 1 seedling can be placed in each pot; just add water after the operation is finished. To make it easier for the seedlings to recover, the planting operation is best carried out on a cloudy day.
2. Water culture of money plant: Money plant is not strict about water quality and can be cultivated in soft fresh water; the salinity should not be too high. The pH of the water is best controlled between 6.5 and 7.0, that is, slightly acidic to neutral. It has a relatively high demand for fertilizer; during vigorous growth, topdress once every 2 to 3 weeks. If grown in a pot or container, then a small amount of fertilizer is needed, such as a quick-acting fertilizer - Huabao No. 2, or a slow-release fertilizer - Mofei (which can maintain fertilizer effect in water for a long time).
3. Half-water half-soil cultivation method: For growing money plant, it is best not to use water culture alone; pure water culture generally gives poor results, while half-water half-soil gives better results, just like growing water lilies and lotus. This way it is very easy to grow. If using only water, add water-culture nutrient solution, and also use river sand, ceramsite, or pebbles to press down the bottom. Money plant extremely likes sunlight when growing, so it is best to place the water basin outdoors in sufficient light or by a window. If cultivated indoors, the daily sunlight exposure time should be no less than 4 to 5 hours.