How to propagate peonies? Among the three propagation methods, cuttings are the simplest
Gardeners are all familiar with peonies. They are very beautiful flowers with excellent medicinal benefits. It is precisely because of the benefits and effects of peonies that many people want to propagate peonies themselves, so how do you propagate peonies? After research, there are mainly three propagation methods for peonies: cuttings, division, and sowing. The specific operations will be introduced in detail by the editor below.
1. How to propagate peonies: cuttings/division/sowing
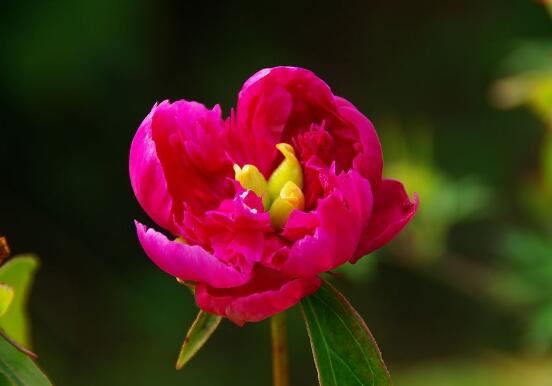
In daily cultivation, although mastering the cultivation methods of peonies is enough, if you want one pot to become ten pots and increase the ornamental value, propagation is what you need to do. So how do you propagate peonies? Simply put, there are three methods: cuttings, division, and sowing, among which cuttings are the most commonly used. For the specifics, let's continue reading below.
2. The three propagation methods of peonies
Cuttings, division, sowing
(1) Peony propagation by cuttings
Because peonies are herbaceous plants, their branches have strong growth ability. It is said that just a few branches can propagate a pot of peonies. However, saying it is simple, we still need to put effort into the cutting time, substrate, and cuttings. The specific operations are as follows:
① Cutting time
For flower cuttings, the choice of time is very important. If you want a high survival rate for peony cuttings, it is best to do it from April to June, when the plant is in a rapid growth period and full of vitality.
② Substrate
Peony cuttings are inserted into soil, so before cutting, you should choose a good substrate, preferably vermiculite or perlite. If it is home pot cutting, ordinary soil plus river sand will do.
Note: Peonies have relatively high requirements for soil, so the soil should be disinfected before cutting. Disinfection method: soak the soil in a 0.5% potassium permanganate solution, take it out after half an hour, then expose it to the sun and let it dry.
③ Cutting selection
Whether peony cuttings succeed is closely related to the quality of the cuttings. Gardeners can cut a 5-8 cm long young branch from the lower part of a peony's tender branch node, keeping 2-4 buds and 2-3 leaves as the cutting.
Cutting treatment: After selecting the cutting, you should also soak it in clean water for 30-60 minutes, dip it in 0.5% IBA rooting powder, or dip it in a 0.010% naphthaleneacetic acid aqueous solution for 5 seconds, and then carry out the cutting.
④ Starting the cuttings
After completing the above work, peony propagation by cuttings should officially begin. Insert the treated cuttings into the prepared pot soil, with an insertion depth of about 5 cm, and the spacing between cuttings should be based on the leaves not touching each other. After cutting, water thoroughly, then cover with plastic film to retain moisture.
⑤ Post-cutting care
After the above steps are completed, peony propagation by cuttings is basically finished, and only post-cutting care remains. Gardeners should place the flowerpot in an environment with a temperature between 20-25°C and a humidity of 80%-90%. Generally, roots can form within 20-30 days. After rooting, remove the plastic film, then reduce the amount of misting and watering. It is worth mentioning that cutting propagation has a high survival rate, so gardeners can try it~
(2) Peony propagation by division
① Division time
Division is one of the propagation methods for peonies. According to the personal practice of gardeners, peony propagation by division must be carried out in September-October, choosing a sunny day.
② Division selection
Dig out a 2-3 year old peony, shake off the soil, then place the root tips upward to dry until the rhizome naturally wilts. Next is division. Use both hands to split along the natural gaps of the root cluster. If it is difficult to split, a small knife can be used. After division, it is best to have 3-6 new buds and a certain number of thick roots.
③ Starting division
After splitting, use plant ash to disinfect the wounds, then plant them in pre-prepared large earthenware flowerpots, making sure all roots spread out naturally, and after that water thoroughly once. The above is peony propagation by division. Practice has proved that peonies must be divided once every 5-6 years. If they are not divided for 10 years, the roots will become knotted and decayed, turning toward decline.
(3) Peony propagation by sowing
If there are seeds, they can be sown, so sowing is also one of the propagation methods for peonies. Note that the seeds should be sown immediately after being collected. The best sowing time is the period before White Dew. Before sowing, soak the seeds in 50°C warm boiled water for 24 hours. After sowing, water the seedbed thoroughly once, then cover it with a plastic bag. After that, water at any time according to the soil moisture, keeping it moist.
How to propagate flowers by cuttings
Cutting propagation is the use of the regenerative ability of plant roots, stems, leaves, and buds, so that under suitable conditions they take root and sprout to form new plants. The advantages are: maintaining the characteristics of each plant; flowering earlier than seed propagation; simple propagation method, easy access to materials, and high survival rate; can be carried out in all four seasons when conditions are available; and this method can be used for species that cannot set seed. The disadvantages are: cuttings have shallow root systems and a relatively short growth lifespan. Stem cuttings include hardwood cuttings and softwood cuttings.
1. Hardwood cuttings: deciduous flowers and trees such as pomegranate, hibiscus, cotton rose, crape myrtle, winter jasmine, and poinsettia mostly use this method. It is carried out in early spring before the sap flows. Select robust and full 1-2 year old branches, take the middle section, and cut them into 10-15 cm long branches as cuttings. They need to have 2-3 buds, and the top bud of the cutting should be plump and intact. At the upper end, cut into a flat cut 0.5-1 cm above the bud; at the lower end, cut into a slanted cut 0.5-1 cm below the bud, with the bud on the side of the tip of the slanted cut. Insert it into the cutting substrate to a depth of 1/2 of the cutting. For most tree species, hardwood cuttings are stored in sand in the ground before winter and inserted again in spring. Some tropical and subtropical flowers and trees can also be cut in advance in a greenhouse.
Propagation of Chinese roses by cuttings
2. Softwood cuttings: greenhouse flowers such as fuchsia, geranium, and begonia; open-field herbaceous flowers such as scarlet sage, dahlia, and verbena; evergreen broad-leaved flowers and trees such as jasmine, azalea, banana shrub, camellia, and osmanthus mostly use this method. It is carried out from late May to September. Select semi-lignified branches with leaves from the current year as cuttings; for example, semi-lignified branches near the lower part of the shoot after flowering are best. The cuttings are about 6-10 cm long and must have 2-3 buds. The cutting method is the same as for hardwood cuttings, and the lower leaves should be cut off. The upper leaves can each have a portion cut off as appropriate to reduce evaporation. The survival rate is highest when cuttings are inserted immediately after being cut. When cutting poinsettia, geranium, oleander, and other cuttings, a large amount of sap often flows from the cut. Be sure to wait until the cut is dry before inserting, otherwise the cut is prone to rot after insertion and difficult to survive.
3. Leaf cuttings: species such as four-season begonia, chrysanthemum, echeveria, and snake plant that can grow adventitious roots and adventitious buds at leaf veins or petioles can be propagated by leaf cuttings to grow into new plants. When cutting leaves, for those with petioles, keep the petiole about 3 cm and cut off part of the thin tender leaf edges, then insert the petiole into the substrate; for those without petioles, cut at the intersections of leaf veins with a knife and lay the leaf flat on the substrate so that it is in close contact with the substrate, or use a bamboo skewer to fix the leaf veins in the substrate, so that roots can develop at the leaf veins and grow into new plants. Snake plant has fleshy sword-shaped leaves, which can be cut horizontally into leaf sections about 5 cm long as cuttings and inserted upright into sand. When inserting, do not reverse the top and bottom. New roots can develop at the base to form new plants.
4. Leaf-bud cuttings: rubber tree, hydrangea, jasmine, hibiscus, and others, when leaf cuttings are used, although their petioles and leaf axils can take root, they cannot sprout, so they cannot grow into new plants. Therefore, it is necessary to choose leaves with an axillary bud at the base for cutting so that they can develop into new plants.
5. Root cuttings: species such as Chaenomeles speciosa, peony, Chinese trumpet creeper, kiwifruit, Hypericum, wintersweet, creeping phlox, and Dutchman's breeches, whose roots can grow adventitious buds, can be propagated using roots as cuttings. When repotting flowers and trees, cut 5-10 cm root segments and insert them straight or obliquely into the soil, without reversing top and bottom, with the upper end level with the soil surface. After new buds grow, appropriately earth up.
No matter which cutting method is used, after insertion it must be watered thoroughly, then cover the cutting pot with glass or plastic film to maintain a certain temperature and greater humidity, place it in semi-shade, strengthen management, and after rooting, transplant and cultivate. To achieve a high survival rate for cuttings, in addition to selecting good cuttings, the substrate is also very important. The substrate must both drain well and have a certain water-holding capacity. Vermiculite, perlite, furnace slag, and rice husk ash are better cutting substrates. The substrate should be maintained at a temperature above 20°C, that is, the atmospheric temperature should be above 25°C, so that the cut ends of the cuttings can heal and take root more easily.
The complete guide to peony propagation methods: teaching you how to propagate peonies correctly
Peony is a very famous ornamental flower variety, with large and brilliantly colored flowers that are very eye-catching. Many people like to place it in their homes to beautify the home environment. Peony is a very popular flower, so there is also relatively more cultivation and planting. Today the editor will tell everyone about peony propagation methods:
Click for more>> Peony pictures
Peony propagation methods:
Peony propagation methods: 1. Division method
Division is the most commonly used propagation method for peonies. Seedling production in peony-producing areas basically uses this method for propagation. It has three advantages: first, it flowers earlier than the sowing method. Seedlings from sowing flower in 4-5 years, while divided seedlings can flower the next year; second, division is simple and easy to perform, saves labor in management, and is conducive to widespread application; third, it can maintain the excellent traits of the original variety. The disadvantages are that the propagation coefficient is low. A three-year-old mother plant can only be divided into 3-5 daughter plants, which makes it difficult to adapt to and meet the needs of modern large-scale production and the continuously rapidly growing domestic and international flower market. This has always been a major problem troubling peony seedling production.
Peony propagation methods: 2. Sowing method
Seeds should preferably be sown immediately after collection. As the sowing time is delayed, the seed moisture content decreases and the germination rate declines. The seeds have a double dormancy characteristic of the upper and lower hypocotyls. After sowing, the autumn soil temperature causes the lower hypocotyl of the seeds to break dormancy, and the radicle develops and takes root. The better the rooting in the current year, the more vigorous the growth in the following year; if sowing is too late, the ground temperature cannot break the dormancy of the lower hypocotyl, rooting cannot occur, and then the germination rate in the following spring is greatly reduced. After rooting from autumn sowing, through the long low temperatures of winter, the dormancy of the upper hypocotyl can be broken. When the temperature rises in the following spring and the humidity is suitable, the embryo bud emerges from the soil.
Peony propagation methods: 3. Cutting method
Choose a nursery site with higher terrain and good drainage as the cutting bed. After loosening the bed soil, spread a 15 cm thick layer of river sand. The river sand should be disinfected with 0.5% potassium permanganate. The cutting substrate can also use vermiculite or perlite. Build a 1.5 m high shade shed over the bed. According to experience in Changchun and other places, cuttings taken in mid-July have the best cutting effect. The cuttings are 10-15 cm long, with two nodes, one upper compound leaf with a few leaflets retained, and the lower compound leaf cut off together with the petiole. After quickly dipping in a 500×10-1000×10 naphthaleneacetic acid or indoleacetic acid solution, insert them for cutting, with a insertion depth of about 5 cm, and spacing based on leaves not overlapping each other. After insertion, water thoroughly, then cover with a plastic shed. According to observation, the rooting effect is best when the substrate temperature is 28-30°C and the humidity is 50%. Keep the temperature inside the cutting shed at 20-25°C and the humidity at 80%-90%, then roots can form 20-30 days after insertion, and dormant buds are also formed. After rooting, reduce misting and watering, and gradually remove the plastic shed and shade shed. Cutting seedlings grow relatively slowly and need to be covered with soil in the bed to overwinter, then moved to open-field planting in the following spring.
Peony propagation methods: 4. Root cutting method
Use the broken roots from autumn division of peonies, cut them into 5-10 cm root segments, and insert them into a deeply plowed and leveled furrow. The furrow is 10-15 cm deep. Cover with 5-10 cm of fine soil and water thoroughly.
Peony propagation methods: 5. Layering method
In spring, pass the tender buds that have just emerged from the soil through the drainage hole of a flowerpot and lead them into a flowerpot with a diameter of 15-20 cm. As they grow, gradually fill with soil and keep the pot soil moist. By summer they can take root. Before winter, cut off the stem below the pot, and a potted peony is formed.
Peony propagation methods: 6. Modern tissue culture method
Plant tissue culture, namely plant aseptic culture technology, is based on the theory that plant cells have totipotency. It uses isolated organs, tissues, or cells of peonies (such as roots, stems, leaves, etc.) under aseptic conditions and suitable artificial culture medium, light, temperature, and other conditions to induce callus, adventitious buds, and adventitious roots, and finally form a complete plant with the same heredity as the mother body. This technology is also called cloning technology. It achieves the purpose of rapid propagation and has broad application value.
There are mainly six propagation methods for peonies, among which division is the most commonly used. It can maintain the excellent qualities of the variety and is also relatively simple. If everyone wants to propagate peonies in their homes, this method is relatively good.