Can rosemary be propagated by cuttings? A detailed guide to propagation methods
Rosemary is a plant with a very long history. It already existed in China as early as the Cao Wei period, when it was introduced from Europe, and today many plant enthusiasts in China grow it too. Can rosemary be propagated by cuttings? The answer is yes, and not only by cuttings, but also by layering and by seed. So what exactly are rosemary's propagation methods? Let's take a look below.
1. Can rosemary be propagated by cuttings? Yes
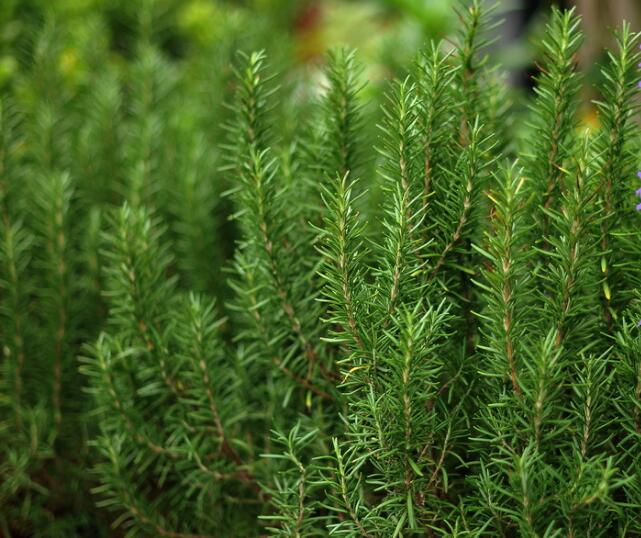
Rosemary's propagation methods can be roughly divided into three types: seed propagation, layering propagation and cutting propagation. So the answer to the question of whether rosemary can be propagated by cuttings is yes. So how exactly are these three propagation methods carried out? Let's continue reading.
2. Rosemary's propagation methods
1. Seed propagation
Among rosemary's propagation methods, seed propagation is the most common. This method is generally best carried out in early spring, usually indoors. With this method, the seedbed must first be prepared. The seedbed can be a flat bed or a small raised bed; the bed soil should be broken up and raked level as a whole, with plenty of fermented base fertilizer applied and enough bottom water. Broadcasting or drilling are both fine. But sow the seeds as thinly as possible, or mix them evenly with fine dry soil and sow them on the seedbed, then water lightly so the seeds make full contact with the soil.
The seeds are positively photoblastic, so sow them directly on the medium without covering. Build a small hoop house over the bed, which both maintains soil temperature and keeps the soil surface from crusting easily. The seeds develop using the seedbed's bottom water, but the soil surface must be kept moist at all times. Water again once the sprouts emerge from the soil, following the principle of light, frequent watering. When the seedlings grow to about 10 cm, they can be planted out.
2. Cutting propagation
To propagate rosemary by cuttings, you first need to find a mother plant with fairly good growth. Spring and autumn are the seasons when rosemary grows most vigorously, so cuttings can generally be taken in these two seasons. It is usually best to pick relatively vigorous branches. After picking them, choose a small container - a cup, a small flower pot or the like will do - and fill it with soil.
Once the above is done, insert the picked branches. Judging by the space in one cup, inserting three branches is usually best. After all this, put the cup in a place with less sunlight and wait.
3. Layering propagation
Layering propagation is the easiest of rosemary's propagation methods to succeed with. This method takes advantage of rosemary's ability to produce adventitious roots on its stems: bend a branch that is fairly close to the ground, cover it with a layer of soil, leaving only the top exposed to the air. Once it has grown new roots, cut it from the mother plant to form a new individual, and plant it out in the open ground.
Rosemary can be propagated in three ways: cuttings, layering and sowing. After reading the above, I believe everyone now has some understanding of these three methods. As long as you master these three methods well, they will be of great help when you propagate rosemary in the future. That is all for today's introduction to rosemary's propagation methods, and I wish everyone's rosemary vigorous growth.
How to take rosemary cuttings: an illustrated guide to rosemary cutting propagation
How rosemary is propagated is a question many flower lovers care about, because they all hope the rosemary they grow will turn one pot into many, which gives a sense of achievement. Rosemary's propagation methods include sowing, layering and cuttings. Flower lovers who master any one of them can propagate rosemary and turn one pot into many. The three rosemary propagation methods are introduced separately below.
Rosemary's propagation methodsRosemary is propagated mainly by sowing seeds, layering branches and taking branch cuttings, explained separately below.
1. Sowing rosemary seedsSeedlings are raised in a greenhouse in early spring. Two methods can be used: traditional soil seedling raising and plug tray seedling raising.
a. Traditional soil seedling raising requires preparing the seedbed first. The seedbed can be made into a flat bed or a small raised bed, and the bed soil raked level and broken up. Water thoroughly with bottom water and apply enough fermented base fertilizer. The seeds can be broadcast or drilled; sow them as thinly as possible, or mix them evenly with fine dry soil and sow them on the seedbed, then water lightly so the soil and seeds make full contact. The suitable temperature for seed germination is 15—20°C. They will sprout in about 2—3 weeks. When the seedlings grow to about 10 cm they can be planted out, which helps improve the survival rate.
b. Plug tray seedling raising requires mixing peat and vermiculite in a 3:1 ratio, after which sowing can begin. Cover with a thin layer of vermiculite and water thoroughly once. Build a small hoop house and water lightly and frequently. After rosemary seedlings emerge, move the plug trays often, so that rosemary roots do not follow the holes at the bottom of the trays and grow down into the ground. But if the trays are placed on a rack, this is unnecessary. Rosemary's germination rate is very low, generally only 10%—20%. In the first year of growing rosemary, the growth rate is extremely slow; even by autumn the plant is not very large, so to form large-scale yields takes 2—3 years or more.
2. Rosemary layering propagation methodFirst bend a branch of the rosemary plant that is close to the ground and cover it with soil, leaving the top of the plant exposed to the air. Once new roots have grown, it can be cut from the mother plant to form a new individual, and can then be planted out in the open.
3. Rosemary cutting propagationFirst select healthy branches for cutting propagation. This is mostly done from winter to early spring. Cut off a branch about 10—15 cm from the top of the rosemary, then remove about one third of the leaves from the lower part of the branch. Then insert the branch directly into a moist medium. The minimum nighttime temperature for cuttings is 13°C. Roots will appear in about 3—4 weeks, and after 7 weeks they can be planted out in the open.
Illustrated guide to rosemary cutting propagation1. Fill a small pot about eight-tenths full with potting soil, and press it down lightly and firmly.
2. Cut a branch of about 15 cm from the top of the rosemary. Press your fingers on the branch about 3 cm from the bottom end and, moving downward, remove the leaves.
3. Once the leaves at the bottom end are removed, it can be inserted directly. Or it can first be dipped in rooting hormone to promote root formation and growth.
4. Insert the rosemary upright into the pot's soil.
Rosemary cuttings can be taken in soil, or by the water propagation method and then planted in soil after rooting. Flower lovers can choose whichever cutting method they prefer.
5. Key points for rosemary cuttingsRemove the leaves from the lower 1/3 of the branch. Fill the flower pot with loose fine soil, press the potting soil firm and level with your hands, but not too tight, and water thoroughly. Insert the prepared cuttings directly into the loose fine soil, at least 4 cm apart, and place in a spot with plenty of sunlight.
Water thoroughly the first time, then water thoroughly once a week afterward, keeping the soil moist on ordinary days. If the local climate is dry, be sure to insert a stick or chopstick taller than the rosemary cuttings into the pot, then cover with a perforated plastic bag, making sure the bag does not touch the cuttings.
Rosemary's cutting method
Materials to prepare for rosemary cuttings
An established healthy rosemary, pruning shears, water, a flower pot, soil.
Rosemary cutting method
1. Use clean scissors to cut a section of branch from a healthy rosemary, with the cut right below where the leaf joins the branch, and the cut surface clean and neat.
2. Fill the flower pot with loose fine soil, and press the soil firm with your hands, but not too tight.
3. Water thoroughly
4. Insert the prepared branches directly into the loose soil, about 4 cm apart, and place in a spot with plenty of sunlight.
5. After cutting, put a plastic bag over the plant. About 6~7 of them will take root; after rooting, remove the plastic bag and take the branches out with their roots, without pulling them out carelessly, so as not to damage the roots.
6. Then plant them in separate flower pots, water thoroughly, and supplement with nutrient solution as appropriate.