How to propagate clematis? Detailed explanation of seed sowing, cuttings and division methods
Clematis is a fairly common plant in people's daily lives, and it is loved by many for its gorgeous appearance. Because so many people like it, how to propagate clematis has also become a question people care about. What are the propagation methods for clematis? Let's take a look below.
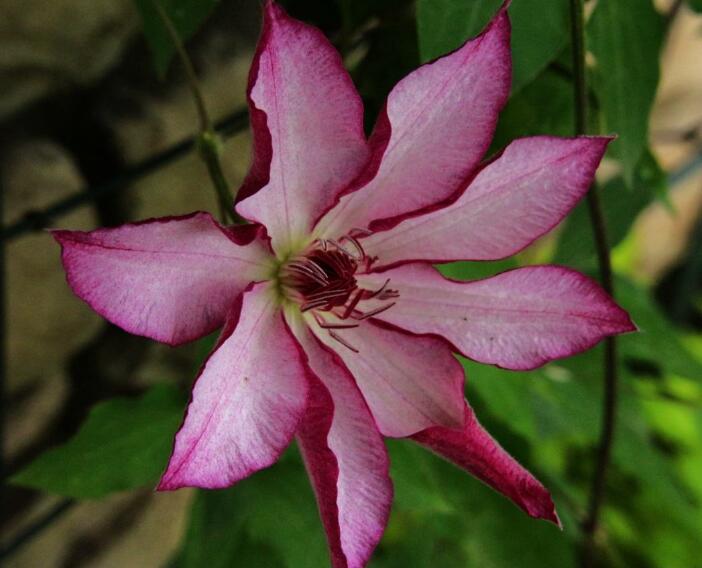
How to propagate clematis / 5 propagation methods
1. Cutting propagation
Cutting propagation is used in the cultivation of hybrid clematis, usually carried out in autumn. We can choose semi-mature branches to do this; for the medium we can choose perlite and vermiculite; the cutting depth is generally such that the bud on the node is just showing above the soil surface.
2. Seed propagation
Among the propagation methods for clematis, seed propagation is the most common. This method is generally carried out in spring. After sowing, cover the seeds with about 2cm of soil. Remember to water promptly after sowing, then leave them to stand for 3-4 weeks and they will germinate.
3. Layering propagation
Layering propagation is generally best carried out around March each year, and at this time we can choose branches that matured in the previous year. This method takes root relatively slowly, and rooting generally occurs in about one year.
4. Grafting propagation
When propagating hybrid varieties of clematis, the grafting propagation method can be chosen. Generally, a single-node scion is grafted onto the rootstock using the cleft grafting method, with 1—2 buds on the node and 5-10cm below the node. It is generally easier to survive in a sealed environment.
5. Division propagation
Division propagation is one of the less commonly used propagation methods for clematis. It is generally used on clematis that has grown for about 3-4 years, and the method is the same as ordinary conventional division propagation.
Methods for clematis cutting propagation (example operation steps)
Clematis has only gradually become popular in the last two years. Indeed, its flowers are very beautiful, and it deserves the title of “Queen of Climbing Flowers.”
At present, the main way to propagate clematis is still by cuttings. However, because its internodes are relatively long, there are not many cuttings that can be cut from one clematis plant. Therefore, the survival rate is especially important for clematis cuttings! Because there is not much material!
Methods for clematis cuttingsPropagation and cultivation of clematis. Propagation methods: seed sowing, layering, grafting, division or cuttings are all acceptable.
1. Selection of cuttingsThis step is the most critical point for the survival of clematis cuttings. First, of course, you need healthy and robust branches, with at least one node. Second, choose semi-lignified new shoots from this year; they should be neither too tender nor too old. Finally, the cut should be smooth, the knife should be sharp, and do not crush the cut.
2. Selection of substrateClematis generally prefers a fertile substrate with good drainage. You can use a substrate mixed with peat and perlite at a ratio of 3:1 or 2:1. Water thoroughly before cutting.
3. Before cuttingThe cuttings can be soaked in rooting solution for half an hour. Make holes with a wooden stick, place the cuttings in, and firm them with your hand. Insert them 2-3cm deep, or you can just leave the node above. After inserting, water thoroughly.
4. Avoid sunlightNote that they should not be placed in strong light, but they need diffused light and good ventilation. In addition, maintain humidity, and it is best to keep the temperature at 20 to 30°C. You can cover them with a plastic bag to retain moisture. Generally after about 15 days, the cut will swell and begin to show signs of rooting, and the buds above will also sprout and grow leaves. In about one month they can root.
Introduction to clematis propagation methods - layering, cuttings and division propagation
The propagation of clematis mainly relies on asexual propagation methods such as cuttings, layering and division, while hybridization and seed sowing are mostly used for variety breeding. In recent years, due to the maturity of tissue culture technology, tissue-cultured clematis has also become a method of large-scale propagation. At the same time, during the tissue culture process, new varieties can also be selected through artificial induction of variation. For home growing, if you want to propagate a small number of clematis seedlings to share with friends, cuttings, layering and division are mostly used.1. Clematis layering propagation method
Layering is a simple, natural, asexual propagation method. From late spring to early summer, or from late summer to early autumn, are both good times to try layering clematis. Press the branch directly to the ground, dig a small trench of 7.5cm beside the plant, and fix the stem in the small trench. The length of the small trench depends on the number of branches you need to propagate. Put some organic soil, or peat, into the small trench and mix it with the surrounding soil. Add a few handfuls of horticultural grit or sharp sand, and slowly mix it in as well. Choose a strong, flexible branch that bends easily to the soil position. Trim the leaves. Take two to three leaf joints (nodes) and place them into the small trench. Using a sharp knife, make a small, diagonal cut at the leaf node and 1.25CM below it, cutting the node but not severing it. Apply rooting powder to the cut at the node. Treat another one to two nodes in the same way, then fix the stem in the small trench and cover the surface with soil.
Insert a pole into the soil to support the growing shoot tip, and fix it to the pole at 45cm at the top. Water the layering trench, and if necessary, water the mother plant as well. Finally, to prevent some unwelcome things, such as cats and dogs, from digging up the layering trench, cover it with some slender cap-shaped wire mesh, or something hard.
Water the layering trench frequently to keep the stem below moist. If there is a long dry season, water the mother plant as well. After 12 months, the layering can succeed. By that time, cut the stem at the part connecting it to the mother plant, carefully dig out the new plant, and transplant it into a pot filled with soil.
Clematis can also be layered in a seedling pot filled with soil. The reason for layering with a seedling pot is that the roots of the new plant can grow directly in it, and in the end it can be removed from the soil without damaging the roots. The new plant can also be easily transplanted into a larger potted container. At the beginning, you can use a 10cm seedling pot. Fill it with soil and bury it near the mother plant. Fix the leaf node in the seedling pot. Check the seedling pot frequently and keep the soil in the pot moist. In order to get two to three new plants, use two to three seedling pots and fix the nodes separately in the corresponding seedling pots. New plants obtained through layering are the same as cuttings (see below), and are transplanted into seedling pots before final planting.
2. Clematis cutting propagation method
Clematis can be propagated by cuttings from soft-wood stems or semi-mature branches. Soft-wood stems refer to the youngest part, where the stem is darkest green. Cuttings are generally taken from mid-spring to early summer, and need 4-8 weeks to root. Cuttings from semi-mature branches use partially matured lignified branches. These can be taken from mid-summer to early autumn, and need 8-12 weeks to root. Cutting propagation is generally carried out at the node, that is, making the basic cut at the node of 2 leaves. The materials needed are a sharp knife, or blade, a small plate, horticultural coarse sand or sharp grit of a tall variety, cutting soil mixed from peat or the equivalent of peat, grit or sharp grit, a general-purpose fungicide, fresh rooting powder (optional for soft-wood stem cuttings), a propagation bag or a clean plastic bag. Beginners can first choose stems of the Montana group for cuttings, as this type is relatively easy to propagate by cuttings, and then gradually choose large-flowered and small-flowered clematis for cuttings. The process must be kept clean and hygienic.
To begin, fill a small pot with cutting soil, firm it, and spread a layer of horticultural grit, or sharp grit, on the surface. Water with a general-purpose fungicide and allow the water to flow out. Choose 2-3 branches from the mother plant, each about 30-90cm long, and cut above the leaf node. Immediately place the branches in a clean plastic bag and seal the bag to prevent moisture loss.
Use one branch at a time, and start cutting from the middle of the stem, because the tip is too soft and the base is too lignified. Cut the stem directly above a node, and make a second cut 2.5-5Cm below the same node. To prevent moisture loss, remove the leaf on one side from the node, and cut the leaf on the other side in half. Keep the stem to be used for cutting clean and healthy to prevent fungal infection. Place the stem to be used for cutting into the fungicide solution and allow the water to flow out. If you are using semi-mature lignified stems, dip the bottom 1Cm of the stem entirely into rooting powder to promote root formation. Soft-wood stems root relatively easily, so rooting powder is not needed. Place the prepared cutting into the soil until the node is at the grit level and the lowest leaf is at the soil surface. Insert a label with the cutting date written on it.
Add some general-purpose fungicide to a small watering can, and use a sprayer to spray the cuttings so that air bubbles form in the soil. Place the cutting pot into a cultivation container, or invert a polyethylene bag over it and secure it with a rubber band. This can provide a humid environment for the cuttings. Bottom heat can promote the rooting process, though it is actually not necessary. Place the cuttings in a bright place, but not in direct light. Check regularly and remove dead cuttings or infected parts. The soil must never dry out completely.
Rooting basically takes 4-8 weeks. Gently pull a leaf to check whether the cutting has rooted. If it moves, wait another 1-2 weeks until the cutting's root system is strong enough before transplanting.
If the cutting's root system has grown well, take a few days to gradually open the cover so that the cutting adapts to cold air.
Using good-quality loam, plant the cuttings individually in 20Cm tall pots. Bury the node part of the cutting below the soil surface. This allows the node part to sprout new roots. When the cutting grows to 30Cm in height, prune it at the first pair of leaves to encourage more young shoots to sprout from the axillary buds. Allow the plant to grow to 45Cm, then prune above the second pair of leaves. This repeated pruning can encourage the cutting to grow into a strong, dense plant. Maintain watering and fertilizing during the growing period. Continue to let the cutting grow in its original pot, and it can be transplanted in the spring of the following year. If it is in a glasshouse, under a porch, or in a well-lit indoor area, or on a kitchen windowsill, before the cutting is planted outdoors, it must frequently be taken outside to adapt to the cold outdoor air.
3. 3. Clematis division propagation method
Herbaceous clematis can be propagated by dividing large, well-grown plants into small parts. Late winter to early spring is the best time for division. Cut off all the old stems at the top, and dig the plant out of the soil with a fork. Use a sharp spade or a large meat knife to divide the large clump into 3-4 parts, being careful not to damage the fine fibrous roots. Replant each part to become a new plant.