What to do when oleander leaves get bugs? 2 pests, 4 diseases and their control methods
Growing plants indoors is a modern trend, but there is one plant everyone must be careful with: oleander, a highly ornamental yet toxic plant. Precisely because it is toxic, many flower growers are very careless in caring for it, which invites pests and diseases. So what should you do when oleander leaves get bugs? Below is the pest and disease control for oleander; if you love flowers, you really should take a look~
1. When oleander leaves get bugs, spray with insecticide
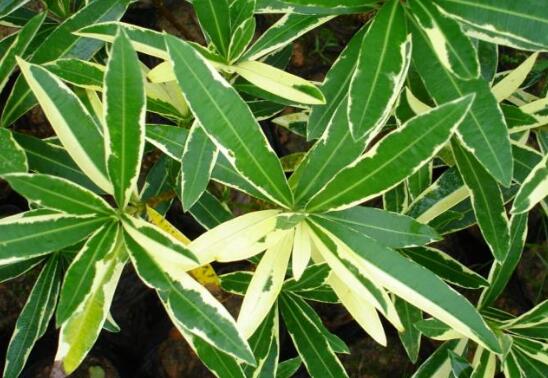
Oleander is a highly ornamental plant, but if you do not follow oleander cultivation methods, it will get bugs and fall ill, and flower growers must be very anxious! As for what to do when oleander gets bugs, we should first determine which insect it is, then address it specifically. For oleander pest and disease control, we will discuss pests and diseases separately.
(1) Oleander pests: aphids / mealybugs (Planococcus citri)
1. Aphids
One of the main pests of plants, it also harms the health of oleander. It is understood that aphids generally gather on the tender branches and leaves of oleander, sucking sap. Symptoms of infestation: leaves become stiff, and after flowering the flowers are very small, or flowering is abnormal.
Control method: when there are few aphids, you can pick them off with a toothpick and kill them; when there are many aphids, spray 10% imidacloprid ultra-micro wettable powder at 3000-5000 times dilution, or derris extract at 1000-2000 times dilution for control.
2. Mealybugs (Planococcus citri)
Besides aphids, mealybugs are also one of the pests of oleander. They mainly gather on the tender leaves, leaf axils and leaf bases of oleander, sucking sap. Symptoms of infestation: branches and leaves become distorted, and leaves shrivel.
Control method: when there are few of these insects, you can pull the insects out with tweezers and kill them; when mealybugs are severe, spray 40% omethoate emulsifiable concentrate at 1500 times dilution, or jiemanling at 80 times dilution, or 1.2% nicotine anabasine emulsifiable concentrate at 1000 times dilution for control.
(2) Oleander pests and diseases: 3 diseases
Regarding oleander leaves getting bugs, after reading the above I believe everyone knows how to handle it! But besides being attacked by insects, diseases also constantly threaten oleander. It is understood that the main diseases of oleander are 3 kinds: brown spot disease, witches' broom disease and black spot disease. The specific symptoms and control methods are as follows:
1. Brown spot disease
Brown spot disease, one of the main diseases of oleander, mostly invades from the leaf tip and leaf margin of oleander. Symptoms: purple-red spots appear on oleander leaves, then gradually expand into round, semicircular or irregular patches, with raised concentric rings on them.
Control method: when the above symptoms are found, spray 40% sulfur-multi suspension at 600 times dilution, or 30% copper oxychloride at 500-800 times dilution, or 50% carbendazim wettable powder at 800-1000 times dilution, once every 10 days or so, for 2-3 sprays in total; if conditions allow, spray them in rotation to prevent resistance.
2. Witches' broom disease
One of the main diseases of oleander, it mainly harms small branches. Symptoms: the base of diseased small branches swells and takes on a pale red color, often clustering into clumps, and in severe cases it can even cause the plant to die.
Control method: when the above symptoms are found, promptly prune out and destroy the affected parts; in the early stage of the disease, antibiotics such as tetracycline can be used for control.
3. Black spot disease
One of the pests and diseases of oleander, it mainly harms the plant's leaves. Symptoms: lesions appear on the leaves and merge into a single patch in a wavy pattern, the lesions being gray-white or gray-brown; in the later stage of the disease, the lesions produce a black powdery mold layer.
Control method: when the above symptoms are found, spray 50% carbendazim at 500 times dilution or thiophanate-methyl at 600 times dilution; after a few times there will be a good effect.
That is all for oleander pest and disease control. I believe that when you encounter the above symptoms in the future, you will know what to do! Overall, during oleander's growth, pests and diseases are unavoidable, so to avoid unnecessary trouble, flower growers should remember the control methods above.
What to do when bugs appear in the water of bowl lotus? Methods for clearing bugs from bowl lotus water
Bowl lotus is a perennial aquatic herbaceous flower of the lotus family. The underground stem is long and thick, with long nodes, and the leaves are shield-shaped and round. The flowering period is from June to September, with flowers borne singly at the top of the pedicel; the petals are numerous, embedded in the receptacle cavities, and come in red, pink, white, purple and other colors, or with colored patterns and borders. The nut is elliptical and the seed is ovate. Previously, many flower growers found small bugs in the water where they kept bowl lotus, and clearing them was rather troublesome. Below is a collection of methods for clearing bugs from bowl lotus water, for flower growers' reference.
NO.1 Mosquito larvae
Mosquito larvae, the larvae of mosquitoes. This is probably the most common bug in outdoor bowl lotus cultivation. Because there is water, female mosquitoes will come to the water to lay eggs, and then a whole bunch of mosquito larvae will grow in your pot.
Movement: wriggling left and right
Color: said to be white.
Solutions:
1. Put in a few small fish
Koi are not recommended; small tropical fish such as guppies are recommended. Koi are cold-water fish, and bowl lotus must be sunned every day, which is not good for koi growth (if your goal is to collect dried fish, then it is fine; if you use a nested pot and the outer pot is large enough, then of course it is also fine). Those preparing to keep guppies should note: from my observation, guppies generally jump out of the pot when startled, so when keeping guppies do not move the flower pot casually, do not knock on the flower pot, and so on, otherwise you will probably be waiting to collect dried fish, especially when you have just added the fish.
Pros: natural ecosystem. Cons: if the water is shallow, you can only wait to collect dried fish.
2. Soak oleander leaves
Get some oleander leaves and soak them in the water; it is said that chopping them up works better, and grinding them into juice works even better. Oleander sap is highly toxic, so you must be careful!!! When handling it, you must wear gloves (impermeable to sap), wash your hands after handling, and properly dispose of the tools used, so as to avoid poisoning.
Pros: being able to kill the bugs is the pro. Cons: oleander sap is highly toxic; for safety's sake, the lotus leaves and lotus root treated this way cannot be eaten.
3. Soak mosquito coil
It is said that soaking an electric mosquito coil tablet in the water also works.
Pros: kills mosquitoes. Cons: think about it yourselves, I can't come up with any = =. Not ecological?
4. Spray pesticide
When spraying pesticide, lightly spray a little into the water, and be careful not to spray it on the leaves. Pyrethroid insecticides decompose after a few hours, and even if two or three leaves are damaged, it will not affect the overall health of the bowl lotus. There is also something called "Huahuashen"; I do not know whether it counts as pesticide. When spraying, it is best to wear a mask to avoid poisoning and protect your own health. (Seen in a forum)
Pros: being able to kill the bugs is a pro. Cons: burns leaves; dosage is hard to control
5. Syringe
This method is to suck them out with a syringe...
Summary: among the above methods, keeping fish is still the most recommended, natural ecosystem.
Attached picture (my own pot has never grown them; the picture is from Baidu):
NO.2 Chironomid larvae.
Cylindrical worm-like, with a slender body, total length 2-30 mm, also called red mosquito larvae. It has the effect of purifying water quality and is excellent fish bait (so you know the solution).
Color: red
Solutions:
1. The same various methods for killing mosquito larvae.
2. Mash ginger and garlic, wrap them in gauze, throw them into the pot and let them soak for a while. (Seems to also apply to mosquito larvae)
Pros: effective. Cons: strong smell.
NO.3 Water fleas
Total body length about 1-3 mm, pale flesh-red (Baidu says this color), oval-shaped, flattened on the left and right sides, with the rear end extending into a long spine (carapace spine). Parthenogenetic reproduction = =. So, one female can give birth to a whole bunch. I will not explain the swimming principle; the specific form of movement is like jumping in the water. Excellent fish bait (so everyone again knows how to remove them).
Solutions:
Actually, not many people manage to grow water fleas; they are relatively rare. Moreover, water fleas are generally used as live fish food, and everyone is trying to figure out how to keep them alive, so the solution is... ahem, I can only recommend using fish, which is the most reliable and the most ecological.
In addition, water fleas will die if they do not float to the surface to breathe. Based on the phototaxis of water fleas, if you block the light for a day, perhaps some of them will die. But this is only a theoretical method; after all, no one would abuse the bowl lotus just to kill water fleas.
Attached picture: (still thanks to Baidu)
NO.4 Water scorpions or dragonfly nymphs
This thing, everyone should not be familiar with it. If it was not dug pond mud, if it was not dug pond mud and also scalded, if it was not dug pond mud and also scalded and still grown indoors, then I would extremely admire you for being able to grow this thing (in fact it is impossible, forgive me for making a joke) = =.
It is extremely rare to find this insect when growing lotus; it generally appears in outdoor cultivation. (As far as I can see, no one in the forum has mentioned this insect growing in their pot.) Calling it by its scientific name may make everyone feel unfamiliar, so let me tell you, this thing is commonly known as dragonfly larvae. Some people will go "oh", and some will still be confused. What do dragonfly larvae look like? I will attach pictures.
This insect is brown or dark green, and likes to stay in places with dense aquatic plants, or under decayed fallen leaves. When it is small, if you do not look carefully, I once thought it was a spider living in the water (do not laugh at me).
Solutions:
Why solve it? When growing lotus, you can just treat it as raising dragonflies for fun. Moreover, this thing is carnivorous and will eat other insects in the water (such as mosquito larvae. = =. A destined mortal enemy!), tadpoles, and so on.
Special reminder!! If you find this thing in a bowl lotus pot, be sure not to put fish in! Otherwise you will not even be able to collect dried fish; it will not even leave you ashes. A dragonfly larva close to adulthood can eat one hundred loach fry a day (I am not scaring you). Dragonfly larvae are absolutely ferocious!
Attached picture (for more pictures, Baidu will give them to you):
NO.5 Various snails
As everyone knows, snails eat green algae and are good helpers for removing algae. But those who want to remove filamentous algae should note that not all snails eat filamentous algae. As far as I know, ramshorn snails, zebra snails and nerite snails eat filamentous algae, while mystery snails eat filamentous algae and also eat aquatic plants.
The reason I list this is that a population explosion is too terrifying, too terrifying, too terrifying (20,000 words omitted here)...
In addition, if pond mud is not properly treated after being dug up, it will mostly grow snails = =. After pond mud is dug up, it must be sun-dried (do not add water) and scalded with boiling water; the snails will naturally die once they lose water. You ask how I know?
Solutions:
1. Tear down the setup and start over, re-sun the soil and scald the soil. In this way, the other bugs will basically die too.
Pros: effective. Cons: troublesome.
2. Keep fish while keeping snails. It is said that fish will eat snail eggs that have just been laid.
Pros: simple, ecological. Cons: fish and snails must be kept together, which is probably difficult in shallow water.
3. After keeping snails, always observe whether there is something sticky or jelly-like on the back of the floating leaves; if there is, immediately rinse it off with water into another place. These things are baby snails. (This item thanks forum friend Li Shenhao for sharing~~)
Pros: prevention first. Cons: you always have to turn over the lotus leaves.
Summary: keeping snails must be done with caution, you know what I mean...
Once this thing is kept, it is very hard to eradicate. Do not keep snails that easily explode in population such as ramshorn snails; zebra snails and nerite snails reproduce somewhat more slowly, and some fish shops sell them. One per pot is enough, remember! Otherwise you will definitely regret it, regret it, regret it... You ask again how I know?
NO.6 Red worm
Red worm, namely aquatic earthworm, is thin and long, up to 100 mm at most, looks very disgusting, and is a live fish food that goldfish and koi love to eat very much. When startled it quickly shrinks into the soil, and many are sold in fish markets. However, if red worms appear in your water, you should pay attention to whether it is time to change the water; the breeding of red worms means the water has been organically polluted.
Color: red
Movement: wriggling
Solutions:
1. Keep fish. I have always advocated natural ecosystem and no pollution; keeping fish is the best plan.
Pros: not repeating. Cons: many limitations, also not repeating.
2. Keep shrimp. Shrimp also eat red worms, except that when there are many red worms, an army is needed to fight.
Pros: same as fish. Cons: none (does anyone's shrimp also jump out of the pot? You can share, ahem).
3. Use pesticide, not repeating.
4. Oleander leaves, also not repeating.
After red worms appear, you must change the water, otherwise the water may quickly become foul. Those with other methods to remove red worms must share them~!
Having talked about pests above, let us now talk about common diseases of bowl lotus:
Disease control:
1. Spot blight
Symptoms: in the early stage, chlorotic spots appear on the leaves, and the surrounding tissue necroses into irregular lesions, pale brown to dark brown; floating leaves on the water surface are dark to deep gray, with large concentric-ring patches on which small black granular points form.
Pathogen: Phyllosticta thermophila. Pycnidia nearly spherical, flattened spherical, initially buried in the leaf epidermis then slightly raised, brown, 136-195 μm in diameter. Conidia elliptical or spindle-shaped, slightly curved, with slightly pointed ends, colorless, single-celled, 6-9 x 2-3 μm, containing 1-2 oil globules.
Control: remove diseased leaves, clear diseased residues and burn them. Spray 0.5% Bordeaux mixture or 70% thiophanate at 1000 times dilution.
2. Bowl lotus anthracnose
Symptoms: the disease occurs on leaves, initially small brown spots, then the spots expand into nearly circular lesions over 10 mm, and the lesion edges are darker in color.
Pathogen: the pathogen is Gloeosporium nyrmphaeae Hemmi et Kawase, a deuteromycete fungus. Hyphae diameter 2.5-6.0 μm. Conidia size (8.0-12.0) μm x (3.0-5.0) μm.
Transmission route: the pathogen overwinters on the tissue of affected plants as a conidial layer, and spreads through the air.
Control methods: 1. During the growing season, collect diseased residues and bury them deeply or burn them. 2. Apply sufficient decomposed organic fertilizer, and topdress timely and appropriately, combining organic fertilizer with chemical fertilizer, and nitrogen fertilizer with phosphorus and potassium fertilizer. 3. Promptly pull out diseased plants, then spray 50% carbendazim wettable powder at 600 times dilution, 75% chlorothalonil wettable powder at 600 times dilution, 36% thiophanate-methyl suspension at 500 times dilution, 50% benomyl wettable powder at 1500 times dilution or 80% anthracnose fumei wettable powder at 800 times dilution, once every 10 days or so, for 2-3 consecutive treatments.
Summary: the above is the introduction about bugs growing in bowl lotus water. I hope it is helpful to flower growers planting bowl lotus.
Complete guide to home flower growing, home flower growing techniques and tips knowledge
Growing and keeping flowers is one of the ways modern people entertain themselves; growing flowers nourishes the spirit, and keeping flowers focuses the mind. Through the ages there have been countless famous poems and lines praising flowers, and without having planted and grown them one cannot understand this natural pleasure. However, what needs attention when growing and keeping flowers?
First, you should grow suitable flowers. Some flowers are not only beautiful in appearance but can also absorb harmful indoor gases. For example, spider plants and aloe can absorb formaldehyde in newly decorated houses; plum blossoms and Chinese pinks can absorb sulfur dioxide in the air; narcissus and chrysanthemums can absorb nitrogen oxides. Most flowers carry out photosynthesis during the day and release oxygen, while cactus is just the opposite; if they are planted together, the oxygen output can be maintained, which is good for body and mind.
Second, do not keep flowers with a strong fragrance or irritating or even toxic odors. Roses, lilies and others have a rich fragrance, but if too many are placed, they easily stimulate the brain and cause sleeplessness at night; the fragrance of tulips can cause diseases such as skin allergies; the stems, leaves and petals of oleander are toxic, and if accidentally eaten, they cause poisoning. Also, if there are too many flowers, they release a lot of carbon dioxide at night, which is also bad for the human body.
Finally, the mindset for keeping flowers should be well adjusted. Flowers are also life; they need water and sunlight, so do not miss watering times, and do not leave them without sunlight for long periods; fertilize appropriately, and do not let the flowers be bitten by insects. At the same time, do not care for them too much, watering now and then and fiddling with them constantly; flowers need rest, and frequent disturbance easily makes them tired. There are also some people who will not keep anything but rare and expensive flower varieties; most of these flowers have harsh cultivation conditions, and if these people themselves have no time or energy, it can only end in disappointment.
Complete guide to home flower growing knowledge 1. Watering1.1 Choice of water quality
Home flower watering mostly uses tap water, but tap water contains disinfectant bleaching powder, and the chloride ions in it easily damage the tender root hairs of potted flowers. It must be stored for 1-2 days, until the chlorine has volatilized and the water temperature is close to the soil temperature, before it can be used to water flowers. Because the natural arrangement of water molecules in magnetized water has been disrupted by the magnetic field, it is similar to the water molecules in plant cells and is easily absorbed and used by plants, so potted flowers are best watered with magnetized water.
1.2 Watering amount
1.2.1 Watering principles
The principle of watering is “water thoroughly when you water, water thoroughly but do not let it leak”, that is, each time water until water seeps out from the saucer under the pot. In addition, it should also be determined according to the size, depth and texture of the flower pot. Small pots are shallow, so water less and more frequently; clay pots have good water permeability and the potting soil dries easily, so water frequently; stone pots and glazed pots do not easily seep water, and with long-term water accumulation, flowers will rot at the roots.
1.2.2 Watering periods
Different flowers and trees have different watering periods. First, the "prefer wet over dry" type, referring to flowers and trees that will be damaged and die once the potting soil is completely dry; these flowers and trees should be watered sufficiently when the potting soil is slightly dry, such as maidenhair fern and spider brake; second, the "prefer dry over wet" type, referring to flowers and trees that are watered after the potting soil has dried through, such as cactus and aloe; third, the "alternating dry and wet" type, referring to flowers and trees that are watered immediately when the surface of the potting soil is dry to about 3 cm, such as monstera and pothos.
1.2.3 Watering seasons
In spring, when cold turns to warmth, the weather is changeable; at this time potted flowers begin to sprout and take root, need a large amount of water, and the potting soil should be kept moist; summer is dry and evaporation is fast, so watering must be doubled; in autumn, watering should be appropriately reduced to avoid rampant growth of flower branches and affect flowering the next year; in winter, most flowers and trees are in a dormant state, and keeping the potting soil slightly dry is enough.
1.3 Watering Time
The daily watering time for flowers differs across spring, summer, autumn and winter. As the gardening proverb aptly says, "Morning water is sweet dew, midday water is arsenic, evening water is a life-saving soup." This means that in spring and autumn, around 10 a.m. and after 4 p.m. are suitable times to water flowers, while in summer one must never water at noon. At the height of summer, noon has the highest temperature and the greatest difference between soil and water temperature; watering at this time easily blocks the normal physiological activity of the roots, weakens the roots' absorption of water, causes physiological drought, and makes the branches and leaves wilt. By the same reasoning, in winter it is best to water at noon. In short, "water at noon in spring, in the morning and evening in summer, every other day in autumn, and check frequently in winter."
1.4 Watering Methods
Before watering potted flowers, the compacted potting soil must be loosened so that the water applied is absorbed promptly and does not run off over the rim of the pot. It is best to use a fine-spout watering can to water evenly and thoroughly. For flowers in small pots, the pot-soaking method is best: place the flowerpot in a larger basin of water so that water seeps into the potting soil through the drainage holes, and take it out once the surface of the soil is slightly moist. This prevents the potting soil from compacting due to watering and benefits the root respiration of the potted flowers. Generally, shade-loving foliage potted flowers, under the special conditions of a dry room and covered with dust, often find it hard to show their bright natural colors; besides regular watering, one should also adopt leaf-surface spraying to wash off dust and moisten the leaves. This method can also cool and refresh potted flowers during the high midday heat of summer, and help flowers that are semi-dormant in midsummer break dormancy and continue to bloom well.
2. Fertilization2.1 Types of Fertilizer
2.1.1 Organic Fertilizer
Organic fertilizer is fertilizer formed from the seeds, organs, residues or excrement of various plants and animals after processing and decomposition, such as human feces and urine, livestock and poultry manure, oilseed cakes, distiller's grains and lees, and green manure from weeds. Organic fertilizer is a slow-release fertilizer with complete nutrients and long-lasting effects; it must be fermented and thoroughly decomposed before use.
2.1.2 Inorganic Fertilizer
Inorganic fertilizer is fertilizer made by chemical synthesis or processing of natural ores, such as urea, superphosphate, and potassium dihydrogen phosphate. Inorganic fertilizers act quickly, but their nutrients are simple and their effects do not last long. Their nutrient content is single, and long-term use alone will compact the potting soil, so it is best to use them together with organic fertilizers.
2.2 Rational Fertilization
2.2.1 Principles of Fertilization
The principle of fertilization is to apply at the right time and in the right amount. "At the right time" means applying only when the flowers need it; for example, fertilizing when the leaves of the flowers turn pale or the plants grow thin and weak is applying at the right time. Whatever the time, the amount must be appropriate; excessive fertilization will affect the growth and development of the flowers. Too much nitrogen fertilizer makes plants prone to leggy growth, with tender stems and leaves, affecting flowering and fruiting and making them susceptible to pests and diseases; too much phosphorus fertilizer hinders the growth of the flowers and affects flowering and fruiting; too much potassium fertilizer makes plants short, with wrinkled brown leaves, or even withered.
2.2.2 Fertilization Period
During the seedling stage, growth is rapid, so more nitrogen and potassium fertilizer should be applied to make the stems and branches sturdy and the root system well developed; before flowering and at bud formation, apply more phosphorus fertilizer to promote large, beautifully colored flowers and plump buds; spraying potassium dihydrogen phosphate at color change and after flowers fade can prevent flower and bud drop; during the flowering period and the early fruit-setting stage, fertilizer and water should be controlled, otherwise flowers and fruit are easily dropped.
2.2.3 Fertilization Season
In winter, temperatures are low and plant growth is slow; most flowers are in a dormant or semi-dormant state, so generally no fertilizer is applied. Spring and autumn are the peak growing seasons, so extra fertilizer should be applied as a top dressing. In summer, temperatures are high, water evaporates quickly, and flowers grow vigorously, so adhere to the principle of applying thin fertilizer frequently. Organic fertilizer must be fully decomposed before use. The concentration of chemical fertilizer must not be too high, to prevent the flowers from being "burned to death."
2.2.4 Fertilization Time
The fertilization time differs from season to season. Generally, in summer it is best to fertilize in the evening, and in winter around noon. In general, fertilize on clear days when the climate is dry or before rain; do not fertilize after rain or during consecutive overcast and rainy days; apply more when the climate is warm and suitable for growth, and none when the climate is hot or cold and the plants are semi-dormant or dormant; apply when the potting soil is dry, not when it is wet; apply more to old potting soil and less to newly changed potting soil; apply less when base fertilizer is sufficient, and more when there is no base fertilizer or it is insufficient.
2.2.5 Fertilizing According to the Characteristics of the Flowers
For foliage-oriented flowers, such as pine, bamboo and spider plant, nitrogen fertilizer is the main type, which promotes the growth of branches and leaves and gives a deep green color. For flowers grown mainly for their blossoms and fruit, somewhat more fertilizer is needed; during the growth of branches and leaves, apply 1 to 2 applications of nitrogen-based fertilizer; at the growth stages of flower bud differentiation, bud formation and before flowering, apply phosphorus-based fertilizer, which enables abundant flowers and fruit. Generally, for diseased or newly transplanted flowers, do not fertilize for the time being; for flowers in the flowering period, it is best not to fertilize, so as to avoid bud and flower drop.
2.3 Fertilization Methods
2.3.1 Base Fertilizer
Base fertilizer is generally applied in 2 ways. First, mix the fertilizer evenly with the growing medium in a certain proportion (about 1:9) before planting the flowers; this both improves the physical properties of the soil and supplies the nutrients needed throughout the flowers' growth. Second, put a small amount of fertilizer in the bottom of the pot when potting, repotting or changing the soil, generally no more than 1/10 of the potting soil, cover it with 1 layer of soil, and then plant the flowers.
2.3.2 Top Dressing
Top dressing is generally applied in 2 ways. First, soil application, that is, applying the fertilizer directly into the soil. For liquid top dressing, first dilute it and spray it onto the potting soil; for solid top dressing, spread it evenly on the surface of the potting soil and cover it with 1 layer of soil. Note that after fertilizing, water to aid absorption. Second, foliar spraying, also called feeding through the leaves, which has the advantages of saving fertilizer and acting quickly. It is usually used during the vigorous growth period of the flowers or when some element is lacking. Generally, inorganic fertilizers are made up to a concentration of 0.1% to 0.5% and sprayed in the morning or evening when there is no wind, just enough to moisten the leaf surface; the most commonly used are urea, potassium dihydrogen phosphate, superphosphate, ferrous sulfate, etc.
3. Prevention and Control of Common Pests and Diseases3.1 Diseases
3.1.1 Diagnosis and Damage
① Powdery mildew. Diagnosis of powdery mildew: small yellow transparent spots appear on the leaf surface, then gradually spread over the whole leaf, white powdery patches appear, and in the later stage the diseased spots turn gray. It mainly harms many flowers such as Chinese rose, rose, dahlia, chrysanthemum, tree peony, cineraria, garden balsam, and banksia rose.
② Anthracnose. Diagnosis of anthracnose: yellow-brown sunken spots appear on the leaves and spread outward into dark brown round spots, or irregular patches appear on the leaves, with the leaf tips drying up and continuously spreading downward. In the later stage, small black dots form on the diseased spots, often arranged in concentric rings, and in severe cases the leaves wither and die. It mainly harms many flowers such as orchids, rubber tree, Rosa species, cacti, tree peony, jasmine, dianthus, and fishtail palm.
③ Black spot. Diagnosis of black spot: nearly round or irregular black diseased spots appear on the affected leaves and gradually enlarge; in severe cases the leaves turn yellow and drop, or even cause the plant to die. It mainly harms flowers such as Chinese rose, azalea, camellia, cherry, and elm-leaved spirea.
3.1.2 Prevention and Control
① Agricultural control. Strengthen cultivation management, appropriately apply more phosphorus and potassium fertilizer to enhance the disease resistance of the plants, and promptly remove diseased and fallen leaves and burn them, clean the environment, and reduce the means of spread; pay attention to ventilation and light transmission.
② Chemical control. At the early stage of the disease, spray 1:1:100 Bordeaux mixture for protection to stop the occurrence and development of the disease; at the early stage of the disease, spray fungicides such as 50% carbendazim, 50% tuijunte, 65% zineb, 75% chlorothalonil, 50% thiophanate 500-fold solution, and 50% benlate 1,000-fold solution.
3.2 Pests
3.2.1 Aphids
Aphids, also known as greasy bugs, can occur in all four seasons and mainly harm bougainvillea, chrysanthemum, pomegranate, etc. On affected plants the leaves curl, and the branches and leaves turn yellow, causing a large number of leaves and flowers to drop, and in severe cases causing the plant to die quickly.
Control method: soak 50 g of red chili pepper in 30 to 50 g of water for 24 hours and spray the filtrate on the affected plants; the control effect is very good. Alternatively, spray 40% dimethoate emulsifiable concentrate 2,000 to 3,000-fold solution, 50% menazon emulsifiable concentrate 1,000 to 1,500-fold solution, or 80% dichlorvos emulsifiable concentrate 3,000-fold solution.
3.2.2 Red Spider Mites
Red spider mites, also called fire dragon bugs, produce multiple generations a year. They mainly harm the leaves and petals of wild elm, Japanese sweet plum, five-needle pine, etc. The body of the red spider mite is about the size of a needle tip, dark red or purple, and with the naked eye one can only see small red dots. On affected plants the leaves lose their green color and the leaf margins curl upward, so that they scorch and drop, causing the flower buds to shrink early, and in severe cases the plant dies.
Control method: soak 50 g of citrus peel in 0.5 kg of water for 24 hours, filter, and spray the plants; or spray dicofol 1,500-fold solution or 40% omethoate 2,000-fold solution for control. When spraying, spray the upper and lower leaf surfaces together for a better effect.