How to Propagate Asparagus Fern? A Simple Guide to Cutting Propagation
Because asparagus fern has so many uses and benefits, many people try to propagate it at home, but a lot of them are not really sure how to propagate asparagus fern, so today we will introduce in detail several common propagation methods for asparagus fern.
How to Propagate Asparagus Fern
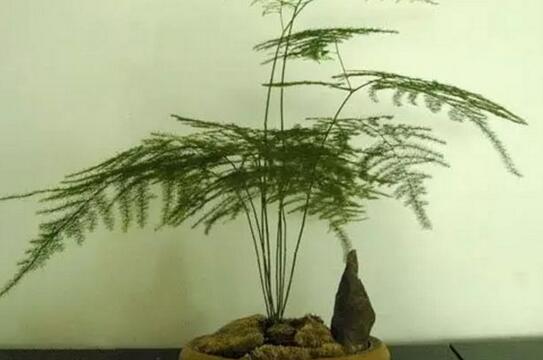
Usually, propagating asparagus fern is not difficult. The methods people commonly use are seed sowing and division, though botanists believe these two methods are fairly limited, they are relatively simpler, so non-professionals can use these two methods.
Propagation Methods for Asparagus Fern
I. How to Propagate Asparagus Fern by Sowing Seeds
1. Selecting Seeds
When using seed propagation, seed selection is very important; healthy, plump seeds lay a good foundation. When selecting seeds, choose ones whose outer skin has turned black and has already softened, because these are the mature seeds. After picking them, remove the fruit skin, then rinse with clean water, dry them, and store them.
2. Sowing Time ⟧11⟧Asparagus fern is generally sown in early April, when the temperature is more suitable. Use a wooden pot filled with some sandy soil, then bury the seeds in the sandy soil, usually placing three seeds per pot, and do not cover with too thick a layer of sandy soil, 2-3 cm is enough.
The best time to sow asparagus fern is generally in early April, when the temperature is fairly suitable. Fill a wooden pot with some sandy soil, then bury the seeds in the sandy soil, usually placing three seeds per pot. Do not cover them with too thick a layer of sandy soil; 2-3 cm is enough.
3. Care
From sowing to new seedlings emerging usually takes about 20-25 days. During this period, care is needed: water moderately, just keep the soil moist, then cover with plastic wrap and place in a cool spot, keeping the temperature at around 25 degrees.
II. How to Propagate Asparagus Fern by Division
1. Selecting Branches
If using the division method, then how do you propagate asparagus fern? First select good branches. Usually, plants that have already grown for 2-3 years are used for division, and you should also make sure they have not previously been troubled by pests or diseases.
2. Division
Take the selected plant out of the pot, clear away the soil from the roots, then separate the roots. When separating, be careful not to seriously damage the roots; slight damage is fine and the asparagus fern can still survive.
3. Applying Base Fertilizer
Before propagating, apply enough base fertilizer at the bottom of the pot. You can use horse hoof slices or chicken manure as a layer at the bottom of the pot, and the soil chosen should also be the relatively loose kind. You can also put some mud taken from a pond at the bottom of the pot.
4. Care
After division, pay attention to watering and keep the ambient temperature moderate. Place the asparagus fern in a cool, ventilated spot for care, which will make propagation more successful.
III. Can Asparagus Fern Be Propagated by Cuttings?
Asparagus fern can be propagated by cuttings, and this method has the advantages of forming quickly and being able to propagate several plants at once, but relatively speaking it has certain technical requirements. So how do you propagate asparagus fern by cuttings? The method is as follows:
1. Selecting Branches
For branches used in cutting propagation, choose the kind with relatively vigorous growth and more branches and leaves. Gently push aside the potting soil to see where the branch meets the root, use a tool to make a small cut 0.5 cm above the root-stem junction, and after half a day apply washed fresh moss over the wound.
2. Cutting Time
The most suitable time for cutting propagation is spring and autumn, but as long as the temperature can stay between 20-30 degrees, cuttings can be taken year-round.
3. Taking Cuttings
After 10 days, remove the fresh moss covering the selected branch; by then a tumor-like node will appear at the wound. Cut off the branch, then keep two side branches and cut off all the others.
Make your own cloth bag with a diameter of 6 cm and a height of 10 cm, put some loose, moist soil inside, and poke some small holes on the outside. Insert the cut branch tip for rooting about 2 cm into the small holes.
4. Filling with Soil
Fill the cutting pot with soil so that the mouth of the glass bottle is slightly higher than the soil surface, spray once thoroughly with water, and fill the glass bottle with water. After that, as long as the glass bottle is kept filled with water, the cutting will be supplied with water normally and moderately. Then place the pot in a cool spot; after 20 days new roots generally grow, and after 30 days it can be potted up.
Cutting Propagation Method for Asparagus Fern
The Right Timing for Asparagus Fern Cuttings
Cuttings can be taken year-round, but the temperature must be between 20-30°C.
Selecting Branches for Asparagus Fern Cuttings
When taking cuttings, choose an asparagus fern with many branches and vigorous growth, gently push aside the surrounding potting soil to expose the junction between the branch and the root, and above the root-stem junction of the branch to be used as a cutting, make a small cut with a sharp knife half a centimeter above it. Let the cut be exposed for half a day, then apply a layer of washed fresh moss and keep it moist at all times.
Pruning Branches for Asparagus Fern Cuttings
After 10 days, remove the fresh moss. When you see tumor-like healing tissue at the wound, cut it off close to the root, keep two side branches and shorten them by one third, and cut off all the rest.
Inserting Cuttings for Asparagus Fern
Use a bamboo stick to make a hole in the center of the cloth bag (the cloth bag is 8-10 cm tall and 6 cm in diameter, filled with moist sandy soil), insert the cutting 2 cm into the hole, and press firm. Arrange the bags with cuttings one by one along the inner wall of the cutting pot, place a wide-mouthed glass bottle of moderate height in the center of the pot, wrap a 60-70 cm gauze strip once around the outside of each cloth bag, with both ends of the strip reaching down to the bottom of the glass bottle.
Filling with Soil for Asparagus Fern Cuttings
Finally, fill the cutting pot with soil so that the mouth of the glass bottle is slightly higher than the soil surface, spray once thoroughly with water, and fill the glass bottle with water. After that, as long as the glass bottle is kept filled with water, the cutting will be supplied with water normally and moderately.
Place the cutting pot in a sheltered, cool spot; in about 20 days new roots will emerge, and after 1 month it can be potted up and planted in place.
Now that you understand the cutting method for asparagus fern, let us learn about the value of asparagus fern.
How to Propagate Dwarf Asparagus Fern: Propagation Methods for Dwarf Asparagus Fern (Cuttings/Sowing/Division)
Dwarf asparagus fern is a beautiful foliage plant. It has a short, sturdy form and feather-like leaves that look both graceful and delicate, and it is deeply loved by flower enthusiasts. In daily life, many people want to grow dwarf asparagus fern, but rather than buying one to grow, it is better to propagate it yourself and raise it step by step. So how do you propagate dwarf asparagus fern? Below are three propagation methods for dwarf asparagus fern; let us take a look!
I. How to Propagate Dwarf Asparagus Fern: Cuttings/Sowing/Division
There are generally three methods for propagating dwarf asparagus fern: cuttings, sowing, and division. Among them, cuttings involve selecting a vigorously growing dwarf asparagus fern branch, treating it, and inserting it into soil, then potting it up once it roots; sowing means scattering dwarf asparagus fern seeds on the soil and transplanting them into pots once the seedlings reach a certain height; and division is done together with repotting, dividing the plant into several parts and planting them in separate pots.
II. Three Propagation Methods for Dwarf Asparagus Fern
(1) Cutting Propagation of Dwarf Asparagus Fern
1. Cutting time: Generally speaking, dwarf asparagus fern cuttings can be taken year-round, but the most suitable time is when the temperature is between 20-30°C.
2. Selecting cuttings: On a healthy growing dwarf asparagus fern in a pot, select a vigorously growing branch, push aside the surrounding potting soil below it to expose the junction between the branch and the root, and make a small cut with a small knife half a centimeter from the soil. Then apply a layer of washed fresh moss over the wound and keep it moist at all times.
3. Taking the cutting: After about 10 days, you can remove the fresh moss; by then the wound has healed. Then cut off the selected branch close to the root, keep two side branches and shorten them by one third, and cut off all the rest; what you finally get is the dwarf asparagus fern cutting.
4. Preparing the cutting bed: Choose a cloth bag 8-10 cm tall and 6 cm in diameter, and fill it with moist sandy soil as the cutting bed. Then use a bamboo stick to make a hole in the center of the cloth bag so the cutting can be inserted easily.
5. Starting the cuttings: Insert the prepared cutting into the prepared cutting bed to a depth of 2 cm, and press firm. After inserting, arrange the bags one by one along the inner wall of the cutting pot, place a wide-mouthed glass bottle of moderate height in the center of the pot, wrap a 60-70 cm gauze strip once around the outside of each cloth bag, with both ends of the strip reaching down to the bottom of the glass bottle.
6. Filling with soil after inserting: After completing the steps above, fill the cutting pot with soil so that the mouth of the glass bottle is slightly higher than the soil surface. Then spray the soil once thoroughly with water, and fill the glass bottle with water. After that, keep the glass bottle filled with water, then place the cutting pot in a sheltered, cool spot; in about 20 days new roots will emerge, and after 1 month it can be potted up and planted in place.
(2) Seed Propagation of Dwarf Asparagus Fern
Besides cuttings, the most commonly used propagation method for dwarf asparagus fern is sowing. Choose the time in March-April, soak the dwarf asparagus fern seeds in water, then scatter them in a seedling bed of fine soil, covering with about 1 cm of soil. Then cover the sowing pot with plastic film to keep it moist; after about one month they will germinate, and when the seedlings are 5-10 cm tall, transplant them into pots.
(3) Division Propagation of Dwarf Asparagus Fern
Besides cuttings and sowing, dwarf asparagus fern can also be propagated by division. The specific operation: cut the roots of the dwarf asparagus fern plant into several pieces, apply plant ash to the wounds to disinfect them, and after dividing, place it in a shaded spot. Then care for it according to the cultivation methods for dwarf asparagus fern, and before long you will have several beautiful pots of dwarf asparagus fern.
Overall, when propagating dwarf asparagus fern, whether by cuttings, sowing, or division, all can survive, but the most suitable for home propagation are still sowing and division. Of course, methods are fixed while people are flexible; everyone can choose a method to propagate according to the actual situation. That is all the editor has to introduce about dwarf asparagus fern propagation methods, and I hope it can be helpful to everyone.