How to Propagate Irises: A Detailed Guide to Two Methods, Seed Sowing and Division
Irises are a fairly common flowering plant in people's daily lives, and many households in our country grow them, so the question of how to propagate them is also something people care about quite a bit. How do you propagate irises, and what propagation methods are there for irises? Below, the editor will walk you through it.
I. How to Propagate Irises / Seed Sowing / Division
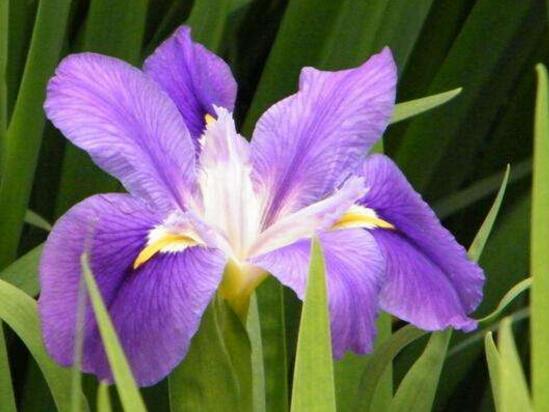
The question of how to propagate irises can be answered with two methods, seed sowing and division, and both have high survival rates, provided of course that you master the technique. The details of iris propagation methods are given below, and those interested can take a look.
II. Iris Propagation Methods
Seed Sowing Propagation
1. Sowing Time
Among iris propagation methods, seed sowing is one of the more commonly used. This kind of propagation is generally best carried out in spring and autumn each year, because the environment is more suitable and more favorable for the growth of irises.
2. Choosing Soil
Choosing the soil is a fairly important part of seed sowing propagation, and choosing the right soil is of great help to irises. The choice of soil is described in detail in the article on iris growing methods, which you can refer to.
3. Sowing Method
When sowing, we must first press the soil flat, then mix the seeds with fine sand and scatter them, after which we cover them with about 2cm of soil. Once these steps are done, we can water; it is best to use a spray bottle for watering, because watering directly can easily wash the seeds away. After watering is done, leave it to sit and wait for germination, and once sprouted, just care for it normally.
Division Propagation
1. Division Time
Division propagation is generally a method used on old plants that have grown for 2-5 years. When carrying out this kind of propagation, remember to avoid the plum rain season, otherwise survival is not easy.
2. Division Method
When selecting divisions, generally choose tubers with 3-4 buds, then cut them apart with a knife, and afterward plant them. After planting, water once, watering thoroughly is enough, then leave them to sit for 15-20 days, after which normal care can begin.
Yellow Flag Iris Propagation Methods: Division, Seed Sowing, Bulbs
The yellow flag iris is a perennial herbaceous plant with yellow flowers that are very beautiful when in bloom. Each flower cluster contains 2 blooms, and the flowering period is May-June. We can usually see yellow flag irises on hillside grasslands and forest-edge meadows. It has high horticultural value, and below is a look at the propagation methods for the yellow flag iris.
Yellow Flag Iris Propagation Method 1: Division of Yellow Flag IrisDivision propagation is generally carried out once every 2 to 4 years, in spring, autumn, or after flowering. Irises are divided after flowering (avoiding the plum rain season), and before winter arrives the flower buds can differentiate sufficiently, so they will bloom the following year. When dividing the rhizomes, 3 to 4 buds is best. If the divisions are too small, it will affect flowering the next year. When carrying out division propagation, the upper leaves of the plant should be cut off, leaving about 20cm for planting. Most iris varieties are suitable for shallow planting. Planting spacing varies by type: robust species are 50×50cm, while general varieties are around 20×20cm.
a. Apply enough base fertilizer, and keep the soil fairly moist during the growing period, especially at flowering time; the roots need to grow in water, with a water depth of 5-7cm being suitable.
b. The soil pH is best below 6.5, otherwise the plant grows slowly and yellowing may also occur.
c. Fertilize 3-4 times during the growing period, and take care to remove weeds and withered yellow leaves. In summer, when temperatures are high, spray water on the leaves often to increase air humidity so the seedlings stay strong and the leaves stay green.
2. Sowing Yellow Flag IrisIf seed propagation is used, it should be carried out immediately after the seeds mature, as this makes the seeds easier to germinate, and they will bloom in 2 to 3 years. Sow in pots from March to April, with an optimum germination temperature of 18-21°C; they germinate 15-20 days after sowing, and are transplanted when the seedlings are 5-6cm tall.
3. Yellow Flag Iris BulbsAfter a bulb is planted and blooms for a year, its nutrients will be used up and new roots will form, and many bulblets will appear around the new bulb. Through 1 to 2 years of planting, the bulblets can develop into flowering bulbs again. Flower-planting experts around the world have carried out tissue culture on different organs of bulbous irises such as axillary buds, bulbs, stem plates, and flower stems to make them grow new bulbs, which provides a new way to speed up propagation and cultivate disease-free, robust mother bulbs.
The Division Propagation Method for Irises
Irises are also known as grass magnolia, blue butterfly, and so on. Because irises have outstanding grace and soft colors, and their rich, large flowers look very much like dancing butterflies, their ornamental value is very high. Iris propagation can use division and seed sowing, and generally, irises more commonly use the division method.
Iris
Usually in October to November, divide the rhizomes so that each piece has 2-3 buds. After dividing, dip or coat the wounds with sulfur powder or plant ash, and once slightly dry, plant them in clay pots. The potting soil can be made by mixing 6 parts humus soil, 3 parts compost, and 1 part river sand, with an appropriate amount of decomposed organic fertilizer added as base fertilizer. Place broken tile pieces at the bottom of the pot to aid drainage. Bulbous irises are suitable for deep planting; when planting, face the buds upward and set the bulb into the soil, then cover with 6-8cm of soil. Rhizomatous irises are suitable for shallow planting, with a soil cover of 3-4cm. After planting, water thoroughly, then cover the soil surface with a layer of dry grass and place it in a semi-shady, ventilated spot, which is good for bulb growth. During the growing period, pay attention to watering to keep the soil moist. But it must not become waterlogged; water is indispensable when the flower stems are emerging, and watering should be strictly controlled in early autumn. Apply a dilute phosphorus and potassium liquid fertilizer once every 14 days. To make the new bulbs grow strong, fertilizer is also needed after the flowers fade. In summer, take care to avoid exposure to the scorching sun, and place them in a well-ventilated, semi-shady spot, otherwise the leaf tips will become scorched and the ornamental value will suffer.