Camellia sasanqua cutting propagation method: cuttings taken in May can root in 30 days
Camellia sasanqua, a very beautiful flowering plant, has small and gorgeous flowers, diverse flower colors, and a long flowering period. It is very suitable for growing at home and also has many benefits for the human body. Such a good plant is naturally propagated in large quantities, so how is Camellia sasanqua propagated? Instead of buying it from a flower shop, it is better to do it yourself. The main propagation methods of Camellia sasanqua are cutting, grafting, layering, and sowing, among which cutting is the most practical. Below, the editor will focus on the cutting propagation method of Camellia sasanqua.
I. How to propagate Camellia sasanqua: cutting is the most practical
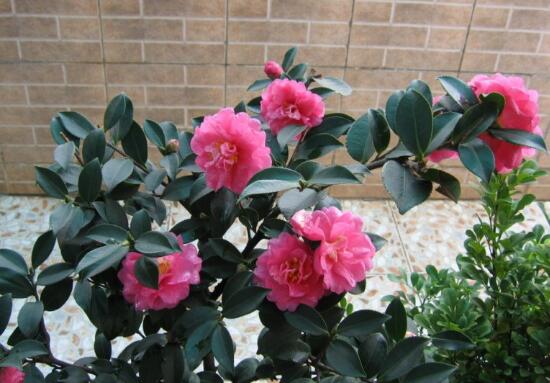
As a flowering plant that combines the advantages of camellia and plum blossom, Camellia sasanqua is very suitable for pot cultivation at home. However, when propagating new seedlings, attention must be paid to the method so that the survival rate is high. How to propagate Camellia sasanqua? Generally speaking, it can be propagated by cutting, grafting, layering, and sowing, and cutting propagation is usually most commonly used. The following is the cutting propagation method of Camellia sasanqua. Let us continue reading.
II. Cutting propagation method of Camellia sasanqua
1. Cutting time
How to propagate Camellia sasanqua? First, choose the right time. For cutting propagation of camellia, it is best to choose late May to August. If outdoors: generally carry out open-field cuttings after rain; during long droughts without rain, carry out cuttings before eight o'clock in the morning. If indoors: choose a place with good air circulation, good drainage, and a relatively spacious terrain.
2. Selection of cuttings
In the cutting propagation method of Camellia sasanqua, the selection of cuttings is especially important. If they are chosen well, it will directly affect the survival rate of the entire propagation. On a sunny day in May, select a mother plant more than five years old, cut healthy and strong branches as cuttings, and use scissors to remove excess leaves, keeping only two or three leaves.
3. Starting the cuttings
The cuttings can be inserted as soon as they are cut. Insert them into a sand pot or vermiculite pot. Note that the cutting seedbed should be shaded, with gradual light exposure in the morning and evening. After cutting, they can root in about 20-30 days, and the seedlings can be potted or transplanted in the second year.
4. Cutting care
With the above steps, the cutting propagation of Camellia sasanqua is basically complete, and the next step is care. After cutting Camellia sasanqua, we need to care for it carefully, and light, temperature, water, and fertilizer all need to be suitable. It should be noted that too intense summer sunlight will scorch its leaves, but at the same time it also needs appropriate light to ensure healthy growth.
Cutting technique for Camellia sasanqua (tested by netizens / very simple)
The cutting propagation method of Camellia sasanqua is not complicated, and flower lovers can proceed according to the above introduction. If it still feels troublesome, the editor will recommend another cutting method that is simpler. According to flower lovers' personal testing, the survival rate is extremely high. The specific operation is as follows:
In May, prepare a relatively shallow flower pot and fill it with yellow soil mixed with river sand. Then, in combination with pruning the old plant, cut off new branches and insert them into the pot. After that, use a small spray bottle to slowly spray water until thoroughly watered. Do not expose it to the sun for one and a half months. Move it to the balcony at night to receive dew, and move it back indoors during the day, keeping the leaves moist frequently.
After one and a half months, let Camellia sasanqua see sunlight every morning, and still move it back indoors after eight o'clock. After October, place Camellia sasanqua in a shady place, preferably under the flower shade of other large plants, and then manage it according to the cultivation methods for Camellia sasanqua. It is said that with this method, netizens have propagated it for several consecutive years and succeeded every time, so everyone can try this method.
Overall, Camellia sasanqua has relatively strong vitality and can be propagated by cutting, grafting, layering, and sowing, but cutting propagation is still the most suitable for ordinary flower lovers. Of course, methods are fixed, but people are flexible, and everyone can propagate according to the actual situation. Regarding the propagation methods of Camellia sasanqua, the editor will introduce them here, hoping to be helpful to everyone.
How to propagate Ardisia crenata: propagation methods of Ardisia crenata / cuttings taken in April root in 40 days
As a plant with both ornamental fruit and foliage, Ardisia crenata has small bright red fruits that look very beautiful and festive against the green leaves. But is one pot of Ardisia crenata too monotonous? In this regard, some people choose to buy another pot, while others plan to propagate it themselves. So how is Ardisia crenata propagated? The following are two propagation methods for Ardisia crenata. Follow the editor to learn about them.
I. How to propagate Ardisia crenata: cutting / sowing
When it comes to propagating Ardisia crenata, the most common methods are undoubtedly cutting and sowing. Among them, cutting is the most common. This propagation method is generally carried out in spring, using hard branches of Ardisia crenata as cuttings and inserting them into the soil to wait for rooting. Sowing propagation is also very simple: take plump Ardisia crenata seeds, remove the shells, scatter them on the soil, and transplant them after they sprout.
II. Two propagation methods of Ardisia crenata
(1) Cutting propagation of Ardisia crenata
1. Cutting time
Ardisia crenata likes a warm environment. Spring and autumn are its growing seasons, especially April-May, when the plant has the highest activity and the survival rate of cuttings is extremely high.
2. Selection of cuttings
In the cutting propagation of Ardisia crenata, the selection of cuttings is particularly important. If they are chosen well, most of the entire cutting process is basically successful. You can select one-year-old hard branches from a potted Ardisia crenata and cut them into 15-20 cm pieces as cuttings. The cuttings should preferably have 2-3 leaves, and then treat the wounds with rooting powder, ready for cutting.
3. Starting the cuttings
Insert the cuttings into the soil to a depth of 1/2-2/3 of the branch. After inserting, place the flower pot in a well-shaded place, water appropriately, and keep the potting soil moist. They generally root in 40-50 days, and after 70 days they are transplanted into pots for cultivation. After that, care for them according to the cultivation methods for Ardisia crenata, and they will bloom and bear fruit the following year.
(2) Sowing propagation of Ardisia crenata
How to propagate Ardisia crenata? Besides cutting, sowing can also be used. In this method, seed selection is especially key. For this, everyone should choose seeds that are large and plump, bright red in color, and free of pests and diseases. Because the seed shell of Ardisia crenata is very hard, it is not easy for it to absorb water and germinate. Therefore, before sowing, everyone should remove the seed shells and then soak the seeds in warm water at 25-30°C for one day.
Sowing method: After selecting Ardisia crenata seeds, prepare a flower pot, fill it with a loose, breathable, and well-drained growing medium, then scatter the seeds on top, with covering soil not exceeding 0.5 cm. After that, keep the potting soil moist, and it is best to block 90% of the light. After the seedlings grow true leaves, apply a light fertilizer once. When the seedlings grow to have 4 to 5 true leaves, they should be transplanted.
Regarding the propagation methods of Ardisia crenata, after reading the full article everyone should know what to do. If you buy this plant Ardisia crenata, one pot costs at least more than ten yuan, and money is money after all, so save it if you can. Moreover, cutting and sowing of Ardisia crenata are both very simple, and the survival rate is high, so flower lovers who are tempted may as well try it themselves.
Propagation methods of Bougainvillea: How is Bougainvillea propagated? How are Bougainvillea cuttings done?
When it comes to Bougainvillea, I believe everyone is familiar with it. Many flower lovers have also had the experience of growing Bougainvillea at home. So, do you know how Bougainvillea is propagated? What propagation methods does it have? Today, the editor will introduce them to everyone in detail. Let us learn together.
Propagation methods of Bougainvillea
Bougainvillea likes to grow in a warm and humid environment and is a short-day plant. Its optimum growth temperature is 15-30°C. In the process of cultivating Bougainvillea, attention should be paid to giving it enough light. There are mainly three propagation methods for Bougainvillea: cutting, air layering, and grafting, among which cutting propagation is the most important. The cutting time is preferably March-June. Air layering propagation takes about one month to root, and spring is the best time for transplanting. During the growing period, pinch off the tips to promote flower bud differentiation and the sprouting of side branches.
Bougainvillea cuttings
1. The best cutting time is spring and summer-autumn. In spring (March-April), after moving outdoors, one-year-old branches cut during pruning can be used for cuttings (also called old-branch cuttings), but the survival rate is not very high, only about 70%. Summer and autumn are the peak growing seasons for Bougainvillea. Selecting semi-lignified branches of the current year for softwood cuttings can achieve a survival rate of more than 90%. As long as management is strengthened, they can bloom in the same year.
2. The cutting substrate is relatively flexible, and flower lovers can use local materials. The substrate can be coarse sand, fine sand, sandy loam with good permeability, or loose but not too fertile loam, or crushed burned coal balls, coal cinders, etc. Then add 0.1% carbendazim for disinfection treatment, pile up the soil, and cover it with plastic film for 7-10 days. The cutting bed is 1 m to 1.2 m wide, 15-20 cm high, and unlimited in length.
3. For cutting treatment, select one-year-old branches with short internodes and thick growth, cut them into 8-10 cm lengths, and keep only 2-3 leaves on each cutting. Before cutting, treat them with rooting hormone to promote earlier rooting and more roots.
4. The cutting depth should preferably be 3-4 cm (equivalent to 1/3 or 2/5 of the cutting). Before inserting, first make holes with a guiding stick, then insert the cuttings, and lightly press the substrate at the base of each cutting so that the cutting is in close contact with the substrate. Then water thoroughly once, and cover it with film to keep warm.
Notes:
1. Try to reduce the bacterial content of the cutting substrate (sand, coal cinders, soil, etc.) as much as possible. Various methods can be used to disinfect sand, such as sun exposure, pouring boiling water, sterilizing with potassium permanganate or carbendazim, etc. Coal cinders should be fresh. When cutting around the edge of the pot, try to reduce the application of unfermented organic fertilizer and high-concentration chemical fertilizer to reduce the chance of carrying bacteria and damaging roots.
2. Pay attention to placing it in a cool place to reduce water evaporation.
3. Pay attention to keeping it moist, but do not use too much water. Too much water easily breeds mold and is not conducive to rooting.
4. Bougainvillea is a southern flower and is suitable for growth in a soil environment with a pH value of 6.0 to 7.0. In the north, where water and soil are more alkaline, apply ferrous sulfate solution once a month.
The above is all the content I have learned about Bougainvillea today. I hope flower lovers will find it helpful after reading this article. If you want to learn more about Bougainvillea, please continue to follow Duorou Huapu, and we will provide you with more related knowledge.