What fertilizer is best for variegated spider plant? Fertilizing methods and natural fertilizer recommendations
"A crop thrives on fertilizer," as the saying goes. Although the variegated spider plant is a foliage plant whose beauty lies not in its flowers, if you want its leaves to develop golden edges, proper fertilizing is crucial. As for how to fertilize variegated spider plant, I will introduce the fertilizing methods for variegated spider plant from the aspects of fertilizer types and fertilizing intervals, very comprehensively. Those who do not know how to fertilize must take a look~
I. How to fertilize variegated spider plant: fertilizers/methods
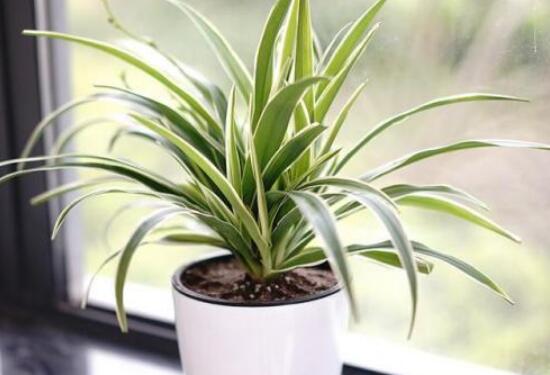
Variegated spider plant, a very popular foliage plant, with its slender leaves edged in gold, makes people want to take one home at first sight. But to achieve the effect shown in the picture above, we need to master the cultivation methods for variegated spider plant, especially fertilizing, which requires special attention. As for how to fertilize variegated spider plant, the key lies in controlling the amount and the fertilizing intervals. I will introduce these in detail below, so let us continue reading.
II. Fertilizing methods for variegated spider plant
(1) What fertilizer to apply to variegated spider plant
1. Natural fertilizer
For fertilizing variegated spider plant, the best fertilizer is of course nutrient-rich natural fertilizer, such as fermented cake fertilizer water, human and animal manure, etc. If you find them too dirty, you can also use sesame paste residue. After diluting these fertilizers with water, applying them to variegated spider plant can make it grow very well.
2. Compound fertilizer
The natural fertilizers mentioned above cannot provide trace elements to variegated spider plant, so compound fertilizer should also be used as a supplement. For fertilizing variegated spider plant, some phosphorus fertilizer and nitrogen fertilizer can generally be added appropriately. However, growers should note that nitrogen fertilizer should not be excessive, as this will cause the golden edges of variegated spider plant to disappear.
For phosphorus fertilizer, bone meal can be purchased from the market. If you want something natural, you can use the fish scales, fish innards, and fish heads left after meals as nutrient material. Of course, if you find that troublesome, you can directly water with milk diluted in water or with rice-washing water, generally once a month.
(2) When to fertilize variegated spider plant
It is understood that the golden-centered spider plant is a foliage plant relatively tolerant of fertilizer. When first cultivated, it must be given sufficient fertilizer water. During the growing season, compound fertilizer can be applied once every 10—15 days. If grown outdoors, diluted rotted cake fertilizer water, human waste, etc. can be applied.
(3) Precautions
Variegated spider plant cannot lack fertilizer. Once fertilized too little, it easily scorches and ages, leading to symptoms of dry tips on the leaves of golden-centered spider plant. But over-fertilizing is also not acceptable, as this can cause symptoms such as root rot in golden-centered spider plant and soft leaves.
That is all for the fertilizing methods for variegated spider plant. After reading this, everyone should be more confident about growing variegated spider plant! Overall, variegated spider plant is not difficult to grow; the difficulty lies in some details. Whether watering or fertilizing, it must be done in the right amount, neither too much nor too little. Only then can you grow a beautiful variegated spider plant!
Cultivation methods for several flowering plants
Oncidium
[Propagation methods] Commonly propagated by division and tissue culture.
Division propagation: Can be carried out in spring and autumn. It is best to divide in spring before new shoots sprout, combined with repotting. Cut off pseudobulbs with 2 buds and plant them directly in a pot with sphagnum moss, maintaining high air humidity, and they will soon recover, sprout new shoots and grow new roots.
Tissue culture propagation: Select young shoots sprouting from the base of Oncidium as explants, disinfect the surface with 70% alcohol, rinse with sterile water after sterilization, cut into stem tip slices 1-1.5 mm thick, and inoculate them on prepared culture medium. Maintain temperature at (26±2)°C, light intensity at 500 lux, and illumination time of 16 hours. On MS medium supplemented with 1 mg/L 6-benzylaminoadenine, protocorm formation is fastest, requiring only 45 days. Continue culturing the formed protocorms in proliferation medium using solid culture. After more than 20 days, buds form at the top of the protocorms, and roots differentiate at the base of the buds. After about 100 days, the differentiated plantlets grow 2-3 leaves and become complete seedlings.
[Cultivation management] Potted Oncidium commonly uses 15 cm pots, and can also be grown on fern boards or fern columns. The common substrate is 40% broken fern roots, 10% peat soil, 20% broken charcoal, 20% vermiculite, and 10% sphagnum moss. Place more broken tiles and broken bricks at the bottom of the pot to facilitate ventilation and drainage. It is best to plant flowering plants after the flowers fade, and plant non-flowering plants before budding, which is beneficial for the growth of new roots in Oncidium. Oncidium prefers humid and semi-shaded environments. In addition to watering to increase substrate moisture, spraying water on leaves and the ground is more important. Increasing air humidity is more beneficial for the growth of leaves and flower stems. Hard-leaved varieties have strong drought tolerance; not watering for a long time in winter did not cause drying death, showing strong tolerance. Large-scale production requires shade nets, with a shading rate of 40%-50% being suitable. In winter, sufficient sunlight is needed, and shade nets are generally not used, which benefits flowering.
From May to October is the vigorous growth period of Oncidium, fertilize once every half month. During the winter dormant period, stop fertilizing and watering, increase water spraying, and raise air humidity. Liquid fertilizer runoff is serious, so every half month, 0.05%-0.1% compound fertilizer can be sprayed on the leaves as a supplement. After flowering, promptly remove faded flower stems and dead leaves.
[Pest and disease control] Soft rot and scale insects sometimes occur. For soft rot, spray with 800 times dilution of 70% thiophanate-methyl wettable powder. For scale insects, spray with 1000 times dilution of 80% dichlorvos emulsifiable concentrate.
[Post-production handling] Oncidium has abundant flowers and leaves. One flower stem bears dozens to hundreds of flowers, extremely charming, and with a long flowering period, it is deeply loved by people. It is widely used for potted flowers and cut flowers. Placed in living rooms, windowsills, and balconies as potted plants, it is like a group of dancing girls stretching their long sleeves and dancing among the green foliage, truly delightful to view. If Oncidium is used as the main material, paired with American trumpet vine, hanging lobster claw, asparagus fern, green anthurium, and wood lily for wall arrangements, it is rich and colorful, presenting a joyful festive atmosphere. Using Oncidium as the main flower, arranged in a basket, paired with red anthurium, lilies, delphinium, and asparagus fern, it is an excellent holiday gift basket, decorating the room, elegant and luxurious, eye-catching.
Snake plant
[Habits] Snake plant leaves are firm and upright, with gray-white and dark green tiger-tail-like horizontal banded patterns on the leaf surface, with a resolute and peculiar posture. It has many varieties, with great variation in plant shape and leaf color, exquisite and unique. It has strong adaptability to the environment and is a tenacious plant, widely cultivated and used as a common indoor potted foliage plant. Suitable for decorating studies, living rooms, and office spaces, and can be enjoyed for a long time. Snake plant has strong adaptability, prefers warm and humid conditions, is drought-tolerant, likes light and also tolerates shade. It has low soil requirements, with well-drained sandy loam being better. Its optimum growth temperature is 20-30°C, and the overwintering temperature is 10°C.
[Propagation methods] Snake plant can be propagated by division and cuttings. After temperatures rise in spring each year, divide the plant combined with repotting. Remove the entire plant from the pot, remove old potting soil, expose the rhizome, and cut it along its direction into several plants, each containing at least 3—4 mature leaves, then pot them separately with new potting soil. The cutting propagation material is leaves (leaf cuttings), which can be done when the temperature is above 15°C. Cut mature leaves horizontally into 7—8 cm segments as cuttings, let them dry slightly, then insert into river sand. When cutting, be careful not to insert upside down; maintain a certain humidity but not too wet to avoid rot. After about a month, adventitious buds and adventitious roots grow from the cut end, forming new plants. Small plants propagated by leaf cuttings of golden-edged and spotted-leaf varieties are green seedlings, and the golden edges and spots disappear, reducing ornamental value, so these varieties are not suitable for leaf cutting propagation and can only be propagated by division.
[Cultivation management] For potted snake plant, use equal parts leaf mold and garden soil mixed with a small amount of rotted base fertilizer as substrate. It grows well under sufficient light conditions. Except in midsummer when direct sunlight must be avoided, it should receive more sunlight in other seasons. If placed in a too dark indoor location for too long, the leaves will darken and lack vitality. In addition, if it has been placed indoors for a long time, do not suddenly move it directly into sunlight; first move it to a brighter location to let it adapt, then expose it to sunlight to avoid leaf scorch. Watering should be moderate, following the principle of preferring dry over wet. Usually wipe dust off the leaf surface with clean water to keep the leaves clean and shiny. In spring, when new plants sprout at the root crown, water appropriately more to keep the potting soil moist. In the high-temperature summer season, also keep the potting soil moist regularly. After late autumn, control watering, keeping the potting soil relatively dry to enhance cold resistance. It has low fertilizer requirements; during the growing season, apply 1—2 times a month of diluted liquid fertilizer to ensure the leaves are verdant and thick.
Radermachera
Also called “cai dou shu” (Radermachera sinica), it prefers high temperature, high humidity, and sunny environments. It tolerates high temperatures, fears cold, prefers moisture, and avoids dryness. For cultivation, use loose, fertile, well-drained, organic-rich loam and sandy loam. The flowering period is from May to September, and the fruiting period is from October to December.
Q: Why do plants placed indoors shed a large number of leaves?
A: This is because the indoor light is too dim and ventilation is poor. If it is not the cold winter, move it to a balcony to let it get ventilation and light, and it will quickly grow new leaves. In winter, place it in a south-facing balcony or in front of a floor-to-ceiling window with sufficient light.
Q: Why do the leaf tips of plants placed indoors in northern regions turn yellow and dry?
A: The main reason is dry indoor air. Spray clean water on the leaves 2 to 3 times a day, which can effectively prevent the leaf tips of newly grown leaves from turning yellow and drying.
Q: Is growing Radermachera indoors harmful to human health?
A: The roots, leaves, and fruits of Radermachera are used medicinally, with effects of cooling blood, reducing swelling, and reducing fever. They can treat bruises, venomous snake bites, etc. As an indoor display, it is not only harmless to the human body but also beneficial to human health.
1. Temperature: Radermachera prefers warm and hot environments, with an optimum growth temperature of 20°C to 30°C. During the midsummer heat, when the ambient temperature reaches above 30°C, appropriate shade should be provided with a canopy, and water spraying on the environment and leaf surface should be increased, or it can be moved to a ventilated, cool place with filtered shade to spend the summer. When late autumn arrives and the ambient temperature drops to around 10°C, it should be promptly moved into a shed or indoors. During the overwintering period, it is best to maintain a shed or indoor temperature of no less than 8°C, and the minimum must not be lower than 5°C, to avoid cold damage to leaves or leaf drop. For home potted plants, move them to a room with air conditioning or an electric heater to ensure the room temperature is not lower than 8°C, so they can safely pass the winter.
2. Light: Radermachera is a light-loving plant, and also slightly shade-tolerant. Full sun and semi-shade environments are both acceptable. Its seedlings are relatively shade-tolerant, and in summer, shade should be provided with a canopy. For potted plants, during indoor display, place them in front of a window with sufficient light or indoors. If placed in a dim indoor location for a long time, it easily causes leaf drop. For home potted plants, during the overwintering period, place them on a higher position in front of a window or balcony to let them receive more light.
3. Water: Cultivating Radermachera requires a relatively moist soil and display environment. During the seedling period, keep the seedbed moist. In the high-temperature and dry season after summer begins, more attention should be paid to water supply. For potted Radermachera, to prevent it from growing too tall, when new shoots emerge in spring, watering can be appropriately controlled, keeping the potting soil relatively moist. For potted plants displayed indoors, in addition to keeping the potting soil moist, spray water on the plants 2 to 3 times a day during the high-temperature season. For plants placed outdoors for maintenance in summer and autumn, be sure to strengthen water spraying on the plants and the surrounding micro-environment to create a cool and moist suitable environment for them. For plants placed indoors in winter, since indoor temperatures are generally below 10°C, the plants enter a dormant state. Do not water too much to avoid water accumulation and root rot. Every 2 to 3 days, around noon on clear days, spray the plants once with slightly warm clean water to maintain their fresh appearance and also increase environmental humidity. In addition, Radermachera can also be grown hydroponically.
4. Soil: For potted Radermachera, use loose, fertile, well-drained and aerated, organic-rich potting soil. Usually mix 5 parts garden soil, 3 parts leaf mold, 1 part rotted organic fertilizer, and 1 part river sand. During the growing season, loosen the soil once a month to ensure the root area is always in a well-aerated state. During the plum rain season, for potted plants placed in open-air environments, check the potting soil promptly after each heavy rain. If water accumulation is found in the pot, drain it as soon as possible, and after the potting soil dries, repot and change the soil. Generally, for small and medium-sized home potted plants, repot once a year in early April when they are moved out, to meet their soil fertility requirements for the whole year's growth.
5. Fertilizer: For potted Radermachera, in addition to adding an appropriate amount of rotted cake fertilizer and 3% multi-element compound fertilizer to the potting soil, continuous topdressing should also be given. During the growing season, apply a quick-acting liquid fertilizer once a month, usually rotted cake fertilizer water. For a small number of home potted plants, or for large potted plants displayed in public places for a long time, a small amount of multi-element slow-release compound fertilizer granules can be buried regularly, or a mixed solution of 0.2% urea plus 0.1% potassium dihydrogen phosphate can be applied. For potted plants in northern regions, after the Mid-Autumn Festival, apply 0.3% potassium dihydrogen phosphate solution 2 to 3 times consecutively to increase the plant's cold resistance, which is beneficial for safely overwintering. When the summer temperature is above 32°C or the temperature in late autumn and early winter is below 12°C, topdressing should be stopped.
Spider plant
[Proper light] Spider plant prefers semi-shaded environments. In spring and autumn, avoid direct strong sunlight. In summer, when sunlight is particularly strong, it can only receive some slanted light in the morning and evening. During the day, 50%-70% of sunlight needs to be blocked, otherwise the leaf tips will dry up. Variegated varieties are especially afraid of strong sunlight. Variegated spider plant grows more beautifully in low-light locations, with the yellow edges more pronounced and the leaves more glossy. But in winter, it should receive more sunlight to keep the leaves tender and fresh green. Household potted spider plants should be placed in front of a south-facing window, otherwise the leaves will lose their luster or even wither.
[Proper fertilizing] Spider plant is a foliage plant relatively tolerant of fertilizer. If fertilizer and water are insufficient, it easily scorches and ages, with leaves turning yellow and losing ornamental value. From late spring to early autumn, apply organic fertilizer liquid once every 7—10 days. But for variegated varieties such as golden-edged and golden-centered types, apply less nitrogen fertilizer to avoid the variegation color fading or even disappearing, affecting appearance. Appropriately apply organic fertilizer made from bone meal, eggshells, etc. After full fermentation, take an appropriate amount of diluted liquid and apply once every 10—15 days, which can make the variegated leaves bright and colorful.
[Proper watering] Spider plant prefers humid environments. Keep the potting soil moist regularly. In summer, watering should be sufficient. Around noon and in the evening, spray water on the branches and leaves to prevent leaf drying. Indoors often has a lot of dust. If spider plant accumulates too much dust, it not only affects its growth but also damages the fresh, bright appearance of the branches and leaves. Therefore, frequently spray and wash the branches and leaves to keep them bright and beautiful. Remove dead and yellow leaves at the bottom promptly. Normally maintain normal humidity, neither too dry nor too wet.
Mosquito repellent plant
1. Nutrient soil preparation. Mosquito net geranium (mosquito repellent plant) seedlings grow extremely fast, so during the seedling stage, repotting is frequent. Within six months, use a special self-mixed nutrient soil of 6 parts peat soil, 1.5 parts vermiculite, 1.5 parts perlite, and 1 part coal ash, with a slightly acidic to neutral pH. You can also buy ready-made commercial foliage substrate soil (pH 5.5-7) from flower markets. After six months, the plant has extremely strong adaptability and can use any soil. Two-year-old plants have lignified main stems and can be pruned and shaped freely according to personal preference.
2. Temperature control. The most suitable growth temperature for mosquito net geranium (mosquito repellent plant) is 10-25°C. It can safely overwinter above 0°C, and can normally release lemon fragrance above 15°C. The higher the temperature, the stronger the fragrance. Spraying an appropriate amount of water mist on the plant leaves can cause citronellal substances to be released continuously, making the mosquito repellent effect even better.
3. Light regulation. Mosquito net geranium (mosquito repellent plant) prefers shade and is not tolerant of strong light during growth, especially in summer when shading should be strengthened.
String of Pearls String of Pearls illustrated guide: how to grow String of Pearls / how to propagate String of Pearls
String of Pearls profileString of Pearls
Aliases: Lover's Tears, Buddha Beads String of Pearls, Green Bell, Green Bell, Buddha Beads String, Buddha Beads, Green Grapes, Emerald Beads
Classification: Succulent plants
Family and genus: Plantae, Angiosperms, Monocotyledons, Asparagales, Agavaceae, Chlorophytum genus
Full blooming period: Winter
String of Pearls is also called Emerald Beads, Lover's Tears, Buddha Beads String of Pearls, Emerald Beads, Green Bell, and Green Bell because it is composed of strings of plump, full, emerald-green oval small leaves. String of Pearls is not only an excellent hanging foliage plant for indoor rooms, but also a good indoor air-purifying flowering plant. The flowering period of String of Pearls is generally from December of the current year to January of the following year.
String of Pearls cultivation methods and precautions, introduction to String of Pearls
String of Pearls is also called Emerald Beads, Lover's Tears, Buddha Beads String of Pearls, Emerald Beads, Green Bell, and Green Bell because it is composed of strings of plump, full, emerald-green oval small leaves.
String of Pearls is not only an excellent hanging foliage plant for indoor rooms, but also a good indoor air-purifying flowering plant.
The flowering period of String of Pearls is generally from December of the current year to January of the following year.
Morphological characteristics of String of Pearls
String of Pearls has round, plump, heart-shaped leaves, like strings of wind chimes swaying in the wind. Because the leaves are alternate, relatively sparse, heart-shaped, dark green, thick and juicy, and extremely bead-like, it has the beautiful names of Buddha Beads String, Buddha Beads, Green Grapes, and Green Bell. Some also call it Buddha Beads String of Pearls and Lover's Tears.
The scientific name of String of Pearls is Senecio rowleyanus, a perennial evergreen creeping succulent herbaceous plant in the Asteraceae family, Senecio genus. The stems are slender, and the whole plant is covered with white powder. The flower heads are terminal, 3-4 cm long, curved-hook shaped, with white to light brown flowers.
String of Pearls flowering period: December to January of the following year.
Ecological habits of String of Pearls
When cultivating String of Pearls, watering should prefer dry over wet; this is one of the keys to success. When the weather is dry, spray more water on the leaves and vines to make up for the lack of moisture and keep the beads green and plump.
String of Pearls relatively prefers semi-shade. Scorching sun may burn the beads, while too weak light results in poor growth.
Cultivation techniques for String of Pearls
String of Pearls prefers organic-rich, loose, fertile soil. It grows best in warm, relatively humid air with strong scattered light. In summer, avoid high temperature and high humidity, otherwise the stems easily rot and the plant dies. Potted plants can be placed in a rain-proof shaded area for cultivation. After autumn begins, the plant resumes growth, so increase light and apply liquid fertilizer.
For the potting soil for cultivating String of Pearls, use rotted cow manure and coconut coir mixed at 4:6, or loose leaf mold is also acceptable. In summer, avoid high temperature and high humidity, otherwise the stems easily rot and the plant dies. Potted plants can be placed in a rain-proof shaded area for cultivation. After autumn begins, the plant resumes growth, so increase light and apply liquid fertilizer.
Maintenance methods
String of Pearls inherits the characteristics of the Asteraceae family. During the spring and autumn growing seasons, its water demand is huge. With sufficient water, it grows rapidly. In summer, it is particularly sensitive to stuffy, humid environments, so measures such as ventilation, shading, and water control should be relied upon to get through the summer.
If rotting and withering are found on the stems at the soil surface, do not hesitate to cut them off immediately. After lightly pruning healthy branches, replant them as cuttings. Basically, direct sunlight is not needed, especially in summer, absolutely do not expose it to the sun. As for watering, besides paying attention in summer and winter, water generously in spring and autumn! In terms of soil ratio, more granular material is better, which is more conducive to root respiration and growth. The root system grows very fast, so it is best to use a deeper container, preferably about 15 cm deep.
Cultivation and maintenance
Repot once every two years in March. When repotting, remove part of the old soil, lightly prune excess roots, and cut off dead roots and withered yellow leaves, then remake the potting soil. Replace with potting soil mixed from 3 parts leaf mold and 7 parts sandy soil. Place 2-3 pieces of broken bone at the bottom of the pot. During the growing season, apply diluted fertilizer liquid once every 10-14 days, mainly nitrogen fertilizer. However, golden-centered and golden-edged varieties should not be given excessive nitrogen fertilizer, otherwise the linear markings on the leaves will become less obvious. When fertilizing, lift the leaves to avoid staining them, as tender leaves and leaf tips are easily damaged. After each fertilizing, it is best to spray and clean the leaf surface with clean water.
Spider plant prefers moisture. Its fleshy roots have well-developed water-storing tissue and relatively strong drought resistance, but from March to September during the vigorous growth period, water demand is relatively large. Water frequently and spray the leaf surface to increase humidity. After autumn, gradually reduce watering to improve the plant's cold resistance. In summer, water once each morning and evening. In spring and autumn, water once a day. In winter, moisture is taboo; water once every 4-5 days, and the amount should not be too much. Spider plant is suitable for growing in humid air. If the air is dry, growth is poor, with small leaves and yellow, dry tips. Therefore, during the vigorous growth period, spray water on the leaf surface 1-2 times a day to increase air humidity.
Cultivation methods for String of Pearls
String of Pearls will grow well if the following points are noted during cultivation:
1. Because the leaves are fleshy and juicy, it is drought-tolerant. When cultivating, watering should prefer dry over wet; this is one of the keys to success. When the weather is dry, spray more water on the leaves and vines to make up for the lack of moisture and keep the beads green and plump. It relatively prefers semi-shade. Scorching sun may burn the beads, while too weak light results in poor growth.
2. The plant's root system is very shallow, so it can be planted in a shallow pot. Generally, use a tile to cover the bottom hole and spread a layer of coal cinders or coarse sand to increase aeration and drainage (especially when using the commonly available plastic pots). The soil is best leaf mold (fallen leaves from trees in autumn and winter mixed with a certain amount of broken soil and left exposed to rain and sun for a year, then mixed with a certain amount of sand; soil-to-sand ratio about 1:3).
3. It prefers warm and humid conditions, is relatively cold-tolerant (can tolerate low temperatures of 0°C when cultivated in the Jianghuai region), and is heat-tolerant. The optimum temperature is about 20°C~28°C. Growth is slow at both high and low temperatures, especially in high-temperature environments above 30°C when it is almost dormant. Water and fertilize less, otherwise root rot easily occurs -- this is also one of the keys to successful cultivation.
4. In spring and autumn during vigorous growth, "apply thin fertilizer frequently." Often spraying 1-3‰ nitrogen fertilizer and potassium dihydrogen phosphate on the leaf surface helps make the beads more emerald green and plump, improving ornamental value.
Potting soil ratios
In potted flowers, the preparation ratios of potting soil are as follows. General herbaceous flowers: 30% humus soil, 50% garden soil, 20% river sand; woody flowers: 40% humus soil, 50% garden soil, 10% river sand; sowing soil: 50% humus soil, 30% garden soil, 20% river sand; greenhouse flowers: 40% humus soil, 40% garden soil, 20% river sand, etc.
Potting soil is generally made mainly from humus soil and vegetable garden soil as basic materials, combined with other substances. Other substances mainly include mountain soil or pond mud, chaff ash, yellow sand, fire ash, manure, etc. In addition, there are tiles and broken pot pieces, used to cover the bottom hole of the pot to facilitate drainage and ventilation. The method for making humus soil is relatively simple. Generally, according to how many potted flowers you grow, prepare clay pots, jars, or dig a pit in outdoor soil. Place a layer of vegetable garden soil at the bottom, then place daily household waste such as vegetable peelings, fruit peels, bean and wheat husks, and various fresh tender grass, leaves, and other plant residues on top of the garden soil. At the same time, add poultry manure such as chicken and duck manure, pour some rice-washing water, fishy water, or human and animal manure water, then add some more vegetable garden soil on top. In this way, stack multiple layers of soil and fertilizer water, cover the pot mouth or pit mouth (soil is also acceptable) and seal it. After 2 to 3 months of fermentation and decomposition, take it out and expose it to the sun, and it becomes good humus soil. Generally, this soil must be fully decomposed before use. Humus soil is the main soil used for potting and repotting most potted flowers. Vegetable garden soil is ordinary cultivation soil. Because it is often fertilized and cultivated, it has relatively high fertility, is rich in organic matter, and has good granular structure, making it a main component of potting soil. It works well for cultivating Chinese roses, pomegranates, and herbaceous flowers. The disadvantage is that the surface layer easily hardens and has poor ventilation and water permeability, so it is not easy to use alone; instead, it should be mixed with some other ingredients before use.
Making compost soil
When a large amount of potting soil is needed for cultivating flowers, making compost soil is also a practical method. It uses dead branches, fallen leaves, green grass, fruit peels, manure, hair and bones, etc. as raw materials, plus old soil from repotting, stove ash, and garden soil, piled together. Pour human and animal manure water on top, and finally cover the surroundings and top with garden soil. After 4 to 5 months of storage for fermentation and decomposition, crush and sift it to obtain fertile soil. Compost soil mixed with half sandy soil is both fertile and good for drainage. For example, using compost mixed with peat soil to grow orchids, mountain lotus, clivia, Milan, azaleas, and other flowering plants has very good results.
Potting soil formulas
Common potting soil formulas for potted flowers are introduced below. For potting soil used for asparagus fern and spider plant, good drainage and aeration are required; it is suitable to prepare with 60% garden soil or pond mud, 10% sand, and 30% chaff ash. For potting soil used for plum blossoms, crabapple, pomegranate, and other flowering plants, prepare with 35% humus soil, 35% pond mud, 15% sand, and 15% chaff ash, then add a small amount of bone meal. For potting soil used for camellias, Michelia figo, azaleas, etc., you can choose humus soil or mountain soil, coked mud ash, and sand, preparing 40% humus soil, 30% mountain soil, 10% coked mud ash, and 20% sand, then add a small amount of bone meal, etc. For potting soil used for chrysanthemums, dahlias, and general greenhouse herbaceous flowers, prepare with 30% humus soil, 40% pond mud, and 30% garden soil, then take 70% of the above mixture and add 30% chaff ash, plus a small amount of bone meal, lime, etc., to make the soil acidity and alkalinity moderate. For potting soil used for cypress, nandina, and similar plants, prepare with 45% mountain soil, 35% humus soil and coked mud ash, and 20% sand. For indoor foliage plant potting soil, use 2 parts peat, 1 part vermiculite, 1 part perlite, or use 1 part peat, 1 part perlite, and 1 part bark.
Propagation methods for String of Pearls
String of Pearls is propagated by cuttings.
The vines easily produce aerial roots. In spring and autumn, cut off several nodes, bury half into sand or loose soil, keep moist but not waterlogged, and they will soon take root for planting (about half a month in spring and autumn, while rooting is difficult in winter and summer. When potted plants are not uniform and full enough but have grown too long, this measure can be used to compensate.)
Cut the vines into 8-10 cm segments, lay them flat and half-bury them in the potting soil. Initially maintain 50%-60% humidity, and after half a month they will take root and survive. After survival, control watering and keep the potting soil alternately dry and wet, which is beneficial for plant growth. When taking cuttings, choose a position above the aerial roots of String of Pearls and cut from there, and rooting will be a bit faster. After shallowly burying the cut branches, remember to cover them with a layer of soil or small stones. Without direct sunlight, water thoroughly immediately after drying.
Another new propagation method: shallowly bury the branches, then cover the surface with a layer of soil. Water immediately, and before long many new shoots will sprout from the soil. This method is very suitable when there are not too many branches. It is very slow at first, but once the small shoots grow out, growth becomes rapid. After another three months of growth, the String of Pearls had completely filled the pot. In half a year, many more were propagated. During this period, due to lack of management during business trips, the String of Pearls was infected with root mealybugs, and it happened to be summer, so many showed rotting. Fortunately, adjustments were made promptly after returning home. All were replanted as cuttings and regained vitality, and the quantity became even greater.
Disease and pest control for String of Pearls
String of Pearls has few pests and diseases. If leaf tips turn yellow, strengthen fertilizer and water management. String of Pearls is mainly harmed by snails, aphids, cottony cushion scale, sooty mold, and stem rot. Check frequently and promptly remove scale insects, whiteflies, etc. on the leaves. Spider plant is not prone to pests and diseases, but if the potting soil is waterlogged and ventilation is poor, in addition to causing root rot, root rot disease may also occur, so attention should be paid to spraying for prevention and control.
There are rarely pests and diseases. Aphids in spring are one; promptly wipe them off or spray 1500 times omethoate to kill them. Mites in summer and autumn are another; use 1000 times dicofol to kill them. Pay attention to ventilation and increase leaf surface humidity, which can reduce mite infection.
Variety classification of String of Pearls
There are currently two common types of String of Pearls.
One has round beads and is often called "Buddha Beads" or "String of Pearls."
The other is teardrop-shaped and is generally called "Lover's Tears." There is also a variegated type with more beautiful colors.
Uses of String of Pearls: potted uses
String of Pearls grown in a small hanging pot is full of charm. The plump, round leaves, like strings of wind chimes swaying in the wind, make it an ideal flower for home hanging cultivation.
If you want to hang it up, Alice pots are the most suitable: lightweight, just the right depth, and with enough internal volume. Alternatively, you can choose some waterfall-style containers, which also pair very well.
Moreover, String of Pearls flowers smell so, so fragrant~ Every day when you open the door at home, a fresh fragrance drifts over. After the flowers fade, there is no need to bother~ The flowers will wither on their own. Pick one up and look, and it is similar to a dandelion.
Landscape uses of String of Pearls
String of Pearls is a common landscaping plant, often used for potted landscapes in parks.
Cultural background of String of Pearls: origin of the name
String of Pearls is also called Emerald Beads, Lover's Tears, Buddha Beads String of Pearls, Emerald Beads, Green Bell, and Green Bell because it is composed of strings of plump, full, emerald-green oval small leaves.
Flower language of String of Pearls
Flower language of String of Pearls: Lover's Tears.
String of Pearls pictures