What to Do When Periwinkle Gets Bugs? 2 Pest and 3 Disease Control Methods
In the process of growing periwinkle, the last thing people want to encounter is the problem of pests and diseases. When this kind of problem appears, it must be dealt with immediately. If it drags on, it will directly cause the periwinkle to wither and die. So what should be done when periwinkle gets bugs? How should pest and disease control for periwinkle be carried out? Below, the editor will guide everyone through it.
I. What to Do When Periwinkle Gets Bugs
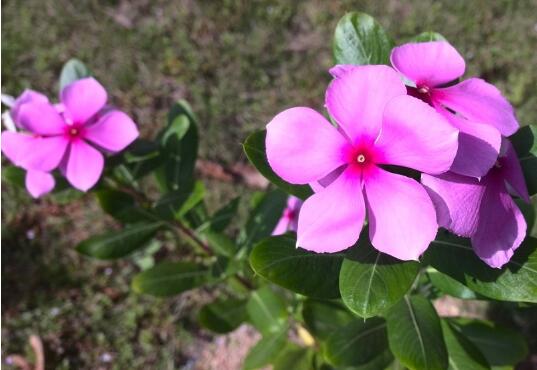
To know what to do when periwinkle gets bugs, we first need to understand what kind of bug it is, and then carry out targeted treatment according to the different pests and diseases. In the pest and disease control for periwinkle below, there are the symptoms and control methods for various pests and diseases, which everyone can take a look at.
II. Pest and Disease Control for Periwinkle
Pests
1. Red spider mite
The red spider mite is a very small pest. Its peak period is around July to August every year, so special attention must be paid during this time. This pest mainly feeds on the leaves of periwinkle, causing many small raised spots to appear on the leaves, which greatly affects their appearance. If left untreated for a long time, it can also cause the leaves to turn yellow and fall off.
Control method: When dealing with the red spider mite, the most direct method is to use a 2000-fold dilution of 20% clofentezine wettable powder to spray and kill it.
2. Aphids
In the pest and disease control for periwinkle, aphids are a relatively common pest. This pest mainly sucks the sap from the plant, which will gradually cause the periwinkle to lose nutrients and wither.
Control method: When dealing with aphids, we can use a 3000-fold dilution of 2.5% fenpropathrin emulsion to spray and kill them directly.
Diseases
1. Base rot
Base rot is a disease caused by fungi. It mainly harms the base of the periwinkle, causing the roots and stems and other parts to gradually turn dark brown, and it will gradually cause the plant to wither and die starting from the upper part.
Control method: When dealing with this pest, it must be done in time. If the matter drags on, it will be very difficult to cure completely. During treatment, we can use a 1000-fold dilution of 30% hymexazol water solution for root drenching.
2. Black spot
In the pest and disease control for periwinkle, black spot is an extremely harmful disease. It mainly harms the leaves and stems of the periwinkle. Just like its name, when the disease occurs, many irregular black spots appear on the leaves, and as time goes on they gradually spread, finally causing the plant to wither and die.
Control method: When dealing with black spot, we can use a 600-fold dilution of 70.5% mancozeb to spray the diseased plants. When spraying, note that both the front and back of the leaves need to be sprayed.
3. Yellowing disease
Yellowing disease is a fungal disease. When it occurs, it causes the leaves of the periwinkle to turn yellow. If left untreated for a long time, it will cause the periwinkle leaves to fall off early.
Control method: When controlling this disease, we can use a 1000-fold dilution of 50% dichlorvos to spray the plant, generally once every 7-10 days, and after 2-3 times it can basically be cured completely.
When Is the Blooming Season of Periwinkle? A Flower Lover Teaches You a Few Points of Flower-Growing Knowledge
Periwinkle, also called golden marigold and four-season spring, is a small, elegant and unique flower. Although it does not have the grace of the peony, the brilliance of the rose, or the fragrance of the osmanthus. But it is simple and elegant, with diverse colors, and is a flower deeply loved by people. Its leaves are fresh green, full, and have fine veins. The leaf stalks are relatively thin, hairless or with a small amount of hair, and relatively smooth.
The periwinkle is so lovely. Do you know when its blooming season is? Looking at its name, you can guess that periwinkle can bloom all year round. One flower can bloom for three to five days, a single branch can bear three flowers, and a single plant can have many branches. So you can see clusters of periwinkle filling flower pots or gardens. If you want periwinkle to bloom well, you also need to pay attention to the following aspects.
The first is sunlight. Periwinkle is originally a plant that grows in the tropics and along the Mediterranean coast, and it likes light and high temperatures. So growing periwinkle first requires ensuring sufficient light. Rainy areas and areas with insufficient light are not suitable for growing it. If periwinkle is potted, it should be moved to the balcony every day to receive about 8 hours of sunlight, and on cloudy and rainy days it should be placed in a dry place indoors.
Because it cannot tolerate cold, attention must be paid to keeping it warm in winter and when the weather turns cool. After noon, the periwinkle should be moved to a warm place indoors, and it must not be exposed to cold wind, otherwise it is very easy to damage it, or even kill it. Although it is relatively tolerant of high temperatures, it cannot be exposed to strong sun in summer. Because this easily causes water shortage, making the leaves wilt and the flowers fade. It is best to place it in a semi-shaded spot.
The second is water. Because periwinkle is relatively tolerant of high temperatures and likes dryness, it should not be watered too much. As long as the soil is not too hard or powdery, you do not need to water it. When the weather is hot in summer, you can water a bit more, but pay attention to the amount and do not let it become waterlogged. Flower pots should be chosen for good drainage, and outdoor planting should also pay attention to drainage. In spring, autumn, and winter, depending on how the plant looks, watering once or twice a week is enough.
The third is soil. Periwinkle is suitable for relatively fertile soil with good drainage and aeration. With this kind of soil, the flowers bloom more and larger, and are very beautiful. But it is also relatively tolerant of poor soil, as long as the soil is not alkaline. Unsuitable soil will cause poor plant growth, thin and yellow leaves, and even failure to bloom.
The fourth is fertilizing. Although periwinkle is relatively small, if you want it to grow well and bloom abundantly, it needs regular fertilizing. For potted periwinkle, you can choose liquid fertilizer, which ensures nutrients without causing root burn. For large-scale outdoor planting, you can appropriately apply some compound fertilizer to increase the nutrients and energy needed for growth, so the plant grows lushly and blooms more and better.
The fifth is the problem of pests. Because periwinkle itself has a certain toxicity, insects generally do not dare to approach it. But periwinkle seedlings need prevention and control of various common diseases. For example, damping-off and gray mold during the seedling stage. Spraying chemicals has a certain effect on preventing and controlling such diseases, but be careful not to spray too much, as it will harm the plant. You should also often help the periwinkle catch bugs to prevent the leaves and flowers from being bitten and damaged.
Finally, there is pruning. If the branches and leaves of periwinkle grow too tall, it will also affect the blooming effect. Especially for potted periwinkle, it will also affect the appearance. So it should be pinched back regularly to let the branches produce more new side branches and more flowers. For those withered or leftover flowers, they should also be removed in time so as not to affect the appearance.
[Detailed Guide to Growing Vegetables and Flowers on the Balcony] Seed selection, breeding, soil cultivation, pest control~
Balcony Vegetable Growing Complete Guide One: What Vegetables to Grow on the Balcony?"Growing flowers is good, growing vegetables is even better." If flowers are grown well, they can be enjoyed; if vegetables are grown well, you not only get to eat your own pollution-free vegetables, but the green branches and leaves and abundant fruits can also become a beautiful scene. Below is an introduction to the knowledge, methods, and tips of balcony vegetable growing one by one. First, an introduction to what vegetables are suitable for growing on the balcony.
Choosing vegetables according to orientation
The orientation determines the balcony's sunlight opportunities, while whether the balcony is enclosed determines its temperature conditions.
A fully enclosed balcony also has a relatively high temperature in winter and is less restricted by temperature, so the range of vegetables that can be chosen is also very wide, and vegetables can be planted all year round. A semi-enclosed or unenclosed balcony has a lower temperature in winter, so it is usually not easy to grow vegetables in winter. In summer, direct sunlight can make the temperature too high, so care must also be taken to shade and protect the vegetables.
More importantly, it is the orientation of the balcony. When temperature allows, vegetables are usually chosen according to the balcony's orientation.
A south-facing balcony has full sun, sufficient sunlight, and particularly good ventilation, making it the most ideal balcony for growing vegetables. Almost all vegetables grow best under full-sun conditions. For this reason, vegetables can usually be grown all year round on a south-facing balcony, such as cucumber, bitter melon, tomato, kidney bean, daylily, New Zealand spinach, mustard greens, zucchini, green pepper, lettuce, Chinese chives, and so on. In addition, aquatic vegetables such as lotus root, water chestnut, and water caltrop can also be grown on a south-facing balcony. In winter, most places on a south-facing balcony can receive direct sunlight. By also setting up simple insulation equipment, it can create a particularly good environment for producing vegetables in winter.
East-facing and west-facing balconies have half-day sun, and can grow light-loving, shade-tolerant vegetables, such as onion, leaf lettuce, baby bok choy, Chinese chives, loofah, cilantro, radish, and so on. But a west-facing balcony has a relatively high temperature during the west sun in summer, causing some vegetables to suffer sunscald, with light cases dropping leaves and severe cases dying. For this reason, it is best to plant vining, heat-tolerant vegetables in the corners of the balcony. In summer, efforts should also be made to defend against strong light and radiation reflected from the buildings behind.
A north-facing balcony has almost no sunlight all day, so the range of vegetables to choose from is the smallest. Shade-tolerant vegetables should be chosen for planting, such as lettuce, Chinese chives, asparagus, Chinese toon, dandelion, water spinach, Malabar spinach, and so on. In summer, efforts should also be made to defend against strong light and radiation reflected from the buildings behind.
Which vegetables are most suitable for growing on the balcony?
Short-cycle fast-growing vegetables: baby bok choy, green garlic, sprouting vegetables, mustard greens, bok choy, leaf lettuce
Vegetables with a long harvest period: tomato, chili pepper, Chinese chives, coriander, cilantro, scallion, etc.
Space-saving vegetables: carrot, radish, lettuce, scallion, ginger, cilantro
Easy-to-grow vegetables: bitter melon, carrot, ginger, scallion, lettuce, baby bok choy
Vegetables not prone to bugs: scallion, Chinese chives, sweet potato leaves, ginseng herb, aloe, corner vegetable
What vegetables should beginners choose?
Beginners can choose easy-to-grow vegetables or fast-growing vegetables. For example, bok choy and leaf lettuce are two fast-growing vegetables that can be planted all year round and grow relatively quickly, taking about five or six weeks to harvest. Bitter melon, scallion, ginger, and so on have strong adaptability and a special taste of their own. For this reason, insects do not like to approach them, and they can grow quite well without pesticides or chemical fertilizers.
Where to buy seeds and seedlings?
Usually, the seeds or seedlings you need can be found at farm households, garden stores, flower markets, vegetable markets, horticultural markets, seed sales departments, and other places.
Balcony Vegetable Growing Complete Guide Two: What Containers to Use for Growing Vegetables?
Almost any type of container can be used to grow vegetables, as long as it is sturdy enough and can provide sufficient space and drainage channels. In addition to conventional containers such as flower pots and flower troughs, many household items can be used after modification, such as plastic basins, buckets, flower boxes, flower troughs, wooden boxes, aluminum boxes, galvanized iron boxes, plastic boxes, jars, food cans, and even bathtubs, tires, burlap sacks, barbecue pans, and so on. No matter what container is chosen, make sure there are drainage holes at the bottom.
Household items such as basins, buckets, boxes, jars, baskets, and pots can all be used to grow vegetables
Tuber vegetables such as potatoes can be grown in bags
Scallions, Chinese chives, garlic sprouts, and so on can be grown in baking pans
Tires, burlap sacks, and so on are also good containers for growing vegetables
Drainage holes
No matter what kind of container is chosen for growing vegetables, it is necessary to ensure there are drainage holes at the bottom to ensure smooth drainage. Container drainage is very important. Poor drainage causes plant roots to suffocate and rot; drainage that is too fast can also cause plants to lack water and die. Professionally made containers such as flower pots and flower troughs bought on the market all have drainage holes at the bottom. For containers modified from household items, you have to drill a few drainage holes yourself. Usually, you can evenly drill a few drainage holes with a diameter of 0.5-25px near the bottom.
To avoid soil loss when watering, you can "cushion the pot," that is, use broken flower pot pieces, tiles, or window screen to cover the drainage holes, so as to block the drainage holes. To promote drainage, you can place some coarse sand or small stones on top of the cushioning material to keep drainage smooth.
For vining plants such as cucumber and kidney bean, you can install a "cage" on the flower pot as support
Material
Generally speaking, ceramic and wooden containers drain faster than plastic containers and need more watering. Do not place plastic containers by the window, because plastic vessels are lightweight and easily blown over by wind. Do not use wooden containers that have undergone high-pressure treatment. Chemical preservatives are added during the high-pressure treatment process. Although this method enables the treated wood to avoid termites, rot, and other harmful factors for a very long period, the wood itself also contains toxic substances that can poison plants. If making your own wooden containers, it is best to use rot-resistant wood, such as pine, Chinese fir, and so on.
Color
Use black containers with caution, because black absorbs heat and may damage plant roots. If a black container is chosen, it is best to apply a layer of lighter-colored paint, or simply cover the container to avoid direct sunlight.
Size
Container size is very important. When growing vegetables, choose larger rather than smaller. A larger container not only has ample space for fertilizer, but also holds more water, so it will not dry out too quickly in summer. Tomatoes, chili peppers, kidney beans, and so on need larger containers, and usually a container of about 15-20 liters is enough. When buying seeds and seedlings, it is best to ask the seller what size container is needed, how to water and fertilize, and so on.
Balcony Vegetable Growing Complete Guide Three: Soil and Fertilizer
Soilless cultivation
Soilless cultivation means using no soil, but instead using a substrate (including rock wool, peat, vermiculite, perlite, tree bark, sawdust, water, etc.) and nutrient solution to grow plants. Soilless cultivation not only grows fast, has high yield, and good quality, but also has fewer pests and diseases, is clean and tidy, and only needs nutrient solution watering, making management very convenient.
Use culture soil for soil cultivation
Household vegetable growing can also use the soil cultivation method. Soil cultivation is relative to soilless cultivation and also has its advantages, such as a stronger buffering capacity for pH, very good fertilizer and water retention capacity, and the activity of various beneficial bacteria being beneficial to plant growth. Household vegetable growing usually uses organically cultivated culture soil. These culture soils can be bought at horticultural markets, and special culture soil can be chosen according to the type of vegetable.
What is culture soil? What types of culture soil are there?
In order to meet the growth and development needs of flowers, especially potted flowers, and according to the different soil requirements of various varieties, artificially specially prepared soil that contains rich nutrients, has particularly good drainage and aeration (air permeability) performance, can retain moisture and fertilizer, does not crack when dry, does not stick together when wet, and does not form a crust after watering is called culture soil.
There are many types of culture soil, and the commonly used ones include the following:
Leaf mold
It is made by piling up fallen leaves, dry grass, vegetable peelings, and so on for fermentation and decomposition. These raw materials are piled into a pit, layer by layer with one layer of leaves (or dry grass, vegetable peelings), one layer of garden soil, and some livestock or poultry manure and urine sprinkled on, repeated for several layers, then covered with soil on top. After more than half a year, the rotted leaves and so on are mixed with the garden soil, then sieved, sun-dried, and stored for later use. This culture soil has rich humus, excellent physical properties, is beneficial for fertilizer retention and drainage, and is loose and acidic.
Barnyard manure soil
Barnyard manure is made by piling up cow dung, horse dung, pig dung, sheep dung, poultry manure, soil, weeds, and so on for fermentation and decomposition. After decomposition, it also needs to be sun-dried and sieved before use. It contains nutrients and humus.
Garden soil and field mud
Garden soil and field mud refer to the surface soil in gardens or large fields. They are also mature soil from cultivated crops that has been piled up, sun-exposed, and then placed indoors for later use.
Pond mud
Pond mud is used more in the south. It is made by digging pond mud out and forming it into thin blocks. After drying in the sun, it is stored for later use. When used, the thin blocks are broken up. Its advantages are that it is rich in fertilizer and has good drainage performance, and it is neutral or slightly alkaline.
Rice hull ash
Rice hull ash is mainly the ash from burning rice husks or rice straw. It is also called plant ash. It loosens the soil and helps drainage. It contains potassium fertilizer and is slightly alkaline.
Yellow sand
Usually river sand is used as culture soil to help drainage and aeration. Before use, it needs to be rinsed with clean water to remove salt before use.
Sawdust
After sawdust is piled for fermentation and decomposition, it is blended with soil to make the culture soil loose and give it particularly good water retention. It is a newly developed culture soil material in recent years.
Brick residue
Crushing tiles or bricks helps drainage and aeration, but it lacks nutrients.
Garbage soil
Garbage soil is called "returned-soul soil." It is made by using the waste soil after repotting and then adding manure and piling it up. After this soil is decomposed, it is sieved and sun-dried for later use.
How to prepare culture soil?
Because various plants have different requirements for nutrient needs, acid and alkali tolerance, drainage and aeration, and so on, the mixing ratios also differ. The basic requirements for culture soil should be understood according to the following principles:
① It has a suitable proportion of nutrients, including trace elements such as nitrogen, phosphorus, and potassium.
② It is required to be loose, with good aeration and drainage.
③ It has no pests, diseases, or other harmful substances that harm the growth of flowers and trees, such as insect pupae.
④ Remove impurities such as grass roots and gravel, sieve, and carry out routine disinfection, such as exposure to sunlight or heating and steaming.
Several culture soil preparation methods suitable for the potted needs of different plants are as follows:
? Soil for sowing and seedlings
2 parts leaf mold, 1 part garden soil, a small amount of barnyard manure, a small amount of sand. Or 1 part leaf mold, 1 part garden soil, 1 part rice hull ash, a small amount of barnyard manure.
Soil commonly used for potted flowers
1 part leaf mold, 1 part garden soil, 0.5 part rice hull ash, 0.5 part barnyard manure soil. Or 1 part leaf mold, 1.5 parts garden soil, 0.5 part barnyard manure soil
Soil for shade- and moisture-tolerant plants
0.5 part leaf mold, 2 parts garden soil, 1 part barnyard manure soil, 0.5 part rice hull ash.
Soil for cuttings
Because cuttings do not need nutrients before rooting, yellow sand or vermiculite is often used. For example, 1 part garden soil and 1 part rice hull ash; or 1 part garden soil and 1 part leaf mold are also fine. For some flowers, cuttings can also be taken using rice hull ash alone.
Soil for acid-loving plants
Use mountain soil or leaf mold and garden soil plus a small amount of yellow sand, and that is enough.
Soil for succulent plants
You can use 0.5 part yellow sand, 0.5 part garden soil, 1 part leaf mold. Or 1 part brick residue and 1 part garden soil.
Soil for camellia, azalea, and banana shrub
2 parts leaf mold, 1.5 parts yellow mud, 0.5 part burnt soil ash, 1 part sand, plus a small amount of bone meal, etc.
Soil for orchids
At present, black mountain soil is mostly used, that is, leaf mold naturally accumulated from fallen leaves in mountain forests, or a small amount of yellow sand can be added to the leaf mold.
In addition, there are also the following preparation methods for several soil types:
Loose soil
2 parts garden soil, 1 part rice husk ash. Suitable for cuttings.
Light fertile soil
1 part garden soil, 2 parts leaf mold, 1 part barnyard manure soil. Suitable for plants with weaker root development and for tiny seeds.
Heavy fertile soil
2 parts garden soil, 1 part leaf mold, 1 part barnyard manure. Can be used for general flower cultivation.
Clay fertile soil
2 parts garden soil, 1 part barnyard manure soil. Suitable for cultivating palms, cycads and other plants with thick roots, as well as rhizomatous plants.
What fertilizer should be used for growing vegetables at home?
Fertilizing vegetables in soilless culture is the easiest - just irrigate with nutrient solution. The nutrient solution for soilless culture must be formulated with many elements such as nitrogen, phosphorus, potassium, calcium, magnesium and sulfur, as well as trace elements such as iron, manganese, boron, zinc, copper and molybdenum. There are nutrient solution formulas dedicated to specific plants, and some that are general-purpose for many plants. They can all be bought on the agricultural market, and you can irrigate according to the instructions on the label after preparing the solution based on experience.
Irrigating with nutrient solution is the main practice in soilless culture. The principle of standard nutrient solution irrigation is to irrigate on sunny days and not on cloudy or rainy days; irrigate less in the early growth stage and more during the fruiting stage. The nutrient solution can be recovered and reused in a cycle. Generally, the nutrient solution should be completely replaced once about every 20 days.
For soil cultivation, conventional fertilizers can be used, and nutrient solution can also be used. If conventional fertilizers are used, it is best to choose organic fertilizers, including plant-based fertilizers and animal manure, and try not to use chemical fertilizers, because chemical fertilizers can leave acid radicals or salt radicals, and the potting soil can become acidic or alkaline, hindering plant growth. Various dedicated organic fertilizers are available on the agricultural market, and you can choose a suitable organic fertilizer according to the type of vegetable.
Making your own organic compost from kitchen scraps
The method for making your own organic compost is very simple: first line the bottom of the planting container with broken tiles or window screening to create a drainage layer, then cover with about 50px of soil, then place the drained kitchen scraps in the container (about 75px), then cover with a layer of thick soil (about 6-225px). The compost is then ready, and you can sow and plant directly in this container.
Fertilizing tips
1. If the vegetables need transplanting, wait until after transplanting before irrigating with nutrient solution.
2. If the vegetables are directly sown and do not need transplanting, then first water with tap water to keep the soil moist, and only use nutrient solution after the seeds germinate and the seedlings emerge.
3. Although different plants have different water requirements, essentially irrigating once a day with nutrient solution is very suitable. If they are leafy vegetables, you can irrigate with nutrient solution twice a day.
4. Irrigate less with nutrient solution in the early growth stage and more during the fruiting stage.
5. It is recommended to thoroughly rinse the planting container with tap water only at least once a week to remove unused fertilizer that has accumulated in the container. The specific method is to pour a sufficient amount of water into the container so that free drainage forms at the bottom. This measure can prevent the accumulation of harmful substances in the growing medium.
6. Sometimes, vegetables can be irrigated with nutrient solution supplemented with trace elements. You can choose water-soluble fertilizers containing iron, zinc, boron and manganese, and follow the instructions on the label.
Caution: Abusing nutrient solution may carry the risk of causing vegetables to exceed the nitrate limit.
Complete Guide to Balcony Vegetable Growing Part Four: Sowing and Transplanting
There are two ways to plant vegetables: one is to raise seedlings first and then transplant, and the other is direct sowing. Beginners often prefer to buy seedlings directly from the agricultural market and take them home to transplant, which is a quick and easy method, but it may limit your planting range. This is because some vegetables, such as beans and radishes, are not convenient to transplant and can only be direct-sown - transplanting can damage normal root development, so they cannot be transplanted. Some vegetables, however, must be transplanted, such as cabbage, cauliflower, mustard greens and eggplant.
Vegetable growing can basically be divided into four stages: seed pre-treatment, sowing, transplanting and harvesting. The table below shows growth information for vegetables commonly grown at home. Because vegetable varieties differ and regions differ, the table below may differ from your actual practice; for this reason it is only for reference. What matters is that during the process you observe keenly and figure out the patterns of the vegetables. First time awkward, second time skilled - trust that you will surely become an excellent "vegetable grower"!
Cultivation information for vegetables commonly grown at home
Vegetable / Germination time (days) / Best transplanting period (weeks) / Container size / Light amount* / Harvest time (days)
Green beans 5-8 - Medium Full sun 45-65
Cucumber 5-8 3-4 Large Full sun 50-70
Eggplant 8-12 6-8 Large Full sun 90-120
Leaf lettuce 6-8 3-4 Medium Partial sun 45-60
Onion 6-8 6-8 Small Partial sun 80-100
Green pepper 10-14 6-8 Large Full sun 90-120
Radish 4-6 - Small Partial sun 20-60
Pumpkin 5-7 3-4 Large Full sun 50-70
Tomato 7-10 5-6 Large Full sun 90-130
Chinese chives 9-12 6-8 Medium Partial sun 90-120
Cilantro 5-7 3-4 Small Partial sun 40-50
Baby bok choy 4-6 3-4 Medium Partial sun 40-50
Caution: All vegetables grow best under full sun. "Partial sun" means the vegetable can also grow quite well under partial sun.
Seed pre-treatment
Disinfection
Seeds often carry bacteria. To reduce seedling-stage diseases, ensure the vegetable seedlings grow strong and healthy, let yourself and your family eat healthy vegetables, and avoid having your efforts wasted halfway, it is best to carry out a simple disinfection treatment on the seeds before sowing. For seeds usually bought from the market, the warm water soaking method is sufficient. Place the seeds in hot water at 60°C and soak for 10-15 minutes, then lower the water temperature to 30°C and continue soaking for 3-4 hours, then remove and dry them. For seeds with unclean surfaces, those stored for a very long time, or those already contaminated, the chemical liquid soaking method can be used. Usually use a 100-fold formalin solution: first soak the seeds in clean water for 3-4 hours, then place them in the chemical liquid and soak for 20 minutes, then remove and rinse clean with clean water.
Germination promotion
Whether seeds need germination promotion depends on the situation. Seeds of fruit vegetables such as tomato, pepper, eggplant and cucumber germinate relatively slowly and can be given germination promotion. Before germination promotion, the seeds must be soaked, but the soaking time should not be too long. Tests have shown that soaking cucumber for 1-2 hours and pepper, eggplant and tomato for 3-4 hours is relatively suitable (including the soaking time during seed disinfection treatment). , line the bottom of the seedling tray with several layers of gauze, filter paper or absorbent paper towels, moisten with clean water, drain the soaked seeds, place them in the seedling tray, and keep them in an environment of 28-30°C for 1-5 days until the seeds germinate and show white, then they can be sown. During germination promotion, if the seeds dry out, add water to the seedling tray to keep the gauze and other bedding materials moist and keep the seeds moist.
Sowing
For direct sowing, simply sow the seeds directly into a suitably sized planting container. For those that need transplanting, first choose a suitably sized plastic tray, glass tray or other container as a "seedling tray". Put culture soil with a moderate pH into the container (available at garden stores or the agricultural market), scatter the vegetable seeds into the container, then cover with soil 0.5-25px deep. Remember that seeds that are too deep will not germinate.
Suitable temperature, sufficient water and oxygen are the three essential elements for seed germination. Place the container in a relatively warm and well-ventilated place, and water appropriately (for most vegetable seeds, watering once a day is the right amount).
Before sowing, it is best to disinfect the sowing tray with 50% bleach or another disinfectant to reduce the chance of contaminating the seeds.
Transplanting
When the seedlings reach a certain size, they must be moved to another container for planting in time. For example, tomato and eggplant are usually transplanted when they have 4-5 true leaves, cucurbits when they have no more than 2-3 true leaves, and cabbage and Chinese cabbage when they have 4-6 true leaves.
When transplanting, be careful not to damage the tender roots of the seedlings. Before digging up the vegetable seedlings, water the soil or medium sufficiently so that the roots carry more soil or medium. This not only reduces damage to the roots but also increases water absorption and helps them survive quickly after transplanting. For leafy vegetables, the planting depth should generally not bury the lowest leaves, otherwise it can easily cause rot.
Vegetables can be grown in soil or by soilless culture. For these two different growing media, the methods of fertilizing and watering are largely the same. See "Complete Guide to Balcony Vegetable Growing Part Three: Soil and Fertilizer".
Harvesting
The happiest moment is harvest time, when you find that the vegetables you carefully watered have grown from seedlings into lush green leaves and abundant fruits. Picking the fruits of your own hard work lets you enjoy green, eco-friendly delicious food!
When harvesting, be careful to judge whether the vegetables are mature and at the best picking moment by characteristics such as color, texture and firmness. Some vegetables such as tomato, pepper and fruits should be harvested when the fruit reaches a certain firmness, as they become soft when overripe; while cucumber, green beans, etc. should be harvested when young and tender, when the flavor is better.
It is best to harvest vegetables in the evening, because in the evening the nitrate nitrogen content in the vegetables is at its lowest.
For harvesting bok choy, Chinese chives, etc., you can pick the leaves to eat without pulling up the whole plant, and after a period of time tender new leaves will still grow.
When harvesting scallions, leave two or three in the soil and do not pull up the whole plant, so that they can continue to tiller and grow.
Complete Guide to Balcony Vegetable Growing Part Five: Diagnosis and Control of Common Diseases and Pests
Vegetables grown in containers, like vegetables grown in the ground, may also be attacked by various diseases and pests. Carefully observe whether the leaves, stems and other organs of the vegetables are growing well and whether pests appear. Once a problem is found, first determine whether it is an environmental issue such as water, light or temperature, or a medium fertility problem. After ruling out these factors, then determine whether it is a disease or a pest.
Common problems in container vegetable growing and their control measures
Symptoms, causes, measures
Plants grow leggy, thin and spindly, and do not bear fruit: 1) Insufficient light - move the container to a place with sufficient light. 2) Excess nitrogen - reduce the nutrient content in the nutrient solution.
Plants turn yellow starting from the bottom, lack vigor, and have dull color: 1) Overwatering - reduce watering frequency and check whether the container drains smoothly. 2) Insufficient fertility - increase the nutrient content in the nutrient solution.
Plants still wilt despite sufficient watering: 1) Poor drainage and ventilation - add more drainage holes to the container; 2) increase the organic matter content in the growing medium.
Scorched leaf edges: the medium has high salt content - regularly wash the container with tap water.
Plants grow slowly, have weak resistance, and appear slightly purple: 1) Low temperature - move the container to a warmer place. 2) Low phosphate - increase the phosphate content in the nutrient solution.
Leaves distorted or with notches: pest damage - spray eco-friendly insecticide.
Yellow spots, blight spots, powdery spots or rust spots on leaves: disease - remove the affected parts and spray an eco-friendly fungicide.
After confirming that the vegetables have a disease or pest problem, you can continue to refer to the text below to diagnose which disease or pest it is, then go to a garden store to buy the corresponding insecticide or fungicide, and then treat the problem accordingly.
Methods for diagnosing vegetable pests
Vegetable pests and diseases can be diagnosed by identifying the morphological characteristics of the pests at each stage, or by diagnosing from the remains left by the pests. Pest remains include egg shells, pupal cases, molted skins, residual body hairs and dead pest bodies, as well as pest excrement such as feces, honeydew substances, silk webs and frothy substances.
1. Leaves are eaten, forming notches. Mostly eaten by lepidopteran larvae and coleopteran pests with chewing mouthparts.
2. There are linear stripes or grayish-white or grayish-yellow spots on the leaves. This symptom is mostly caused by piercing-sucking mouthpart pests such as leaf miners or stink bugs.
3. Vegetable seedlings are bitten off or cut through. Mostly done by crickets or leaf moths.
4. Honeydew is secreted and sooty mold develops. Such pests, through their feeding, cause honeydew-like excrement to cover the vegetable surface and form black spots. They are often mainly sap-sucking, liquid-excreting pests such as various aphids.
5. The heart leaves shrink and thicken. This type of symptom mostly appears on sweet peppers and chili peppers, and is related to mite pests.
6. The interior of the vegetable is damaged. Such pests usually enter the interior of the vegetable and are very difficult to find from the outside. If fresh pest droppings are found on or near the vegetable plant and there are fresh pest entrance holes on the plant, it can be judged that the pest is damaging the plant from inside the vegetable. Sometimes although there are droppings and eggs, if the droppings and eggs have already dried up, it indicates that the pest has already moved elsewhere. Such pests are mostly moth pests and larvae.
7. The upper part of the vegetable seedling wilts and dies. This indicates that the vegetable roots have been damaged, mostly by soil-dwelling pests such as mole crickets, root mites and root-knot nematodes.
8. Bulbous fruits are bored into and rot. For example, the underground tubers of potato, onion and garlic rot or are bored into during growth and storage. These are mostly caused by weevils, root mites and the like.
Use these characteristics to determine the pest and take corresponding control measures. First rule out the influence of other factors, such as excessive fertilizer or water causing the upper part of vegetable seedlings to wilt and die.
Cultivating children's interest in planting
When children grow flowers and plants, the flowers and plants can also educate them. Growing flowers and vegetables can help children understand that plants, like people, also need food and water to grow and stay healthy. Caring for plants not only helps cultivate children's sense of responsibility, but also stimulates their curiosity and imagination. Let children immerse themselves in the wonders of nature such as seeds sprouting, flowers blooming, bees gathering nectar and insects pollinating, and guide your children to explore the mysteries of nature.
Create a little "planting plot" for your child
Set aside a small piece of land in the garden for your child as his or her planting plot, and make it clear that this is his or her own territory and cannot be occupied. This helps cultivate the child's sense of responsibility and independence. Usually for children under 10 years old, one square meter is enough. If there is no garden, you can prepare several flower pots or other growing containers and place them on the balcony or windowsill, which can equally become a "planting plot" the child loves.
Discuss with your child where the "planting plot" should be built
Discuss with your child where the "planting plot" should be located. This process is a good opportunity to let the child understand that plant growth needs sunlight, water and fertile soil! Then choose a suitable location together with your child.
Choose gardening tools specially for children
Choose gardening tools sized for children to use, to ensure safety and convenience during the child's gardening activities.
Carefully choose plants that are easy to grow, easy to keep alive and interesting
Children get discouraged very easily, so it is very important to ensure that their first planting experience is successful and fruitful. First choose some plants that are easy to grow, easy to keep alive and grow very fast. Large-seeded plants such as sunflower, zinnia, pea and pumpkin are the easiest to grow and grow very fast. Although radish seeds are not large, they grow very fast and are also favored by children. On the basis of being easy to grow, you can choose some interesting plants to attract the child's attention and maintain their enthusiasm for planting.
?Choose bright, eye-catching flowers.
Children like things that are good-looking and vivid. For this reason, you can choose those bright and colorful flowers, such as impatiens, moss rose, dahlia, pot marigold, black-eyed Susan, autumn chrysanthemum, periwinkle, begonia, cockscomb, five-pointed star flower, morning glory, ageratum, sweet alyssum, phlox, etc.
Choose fruits and vegetables that children like.
If the things they grow can finally be eaten, this is also very attractive to children. You can choose to grow some fruits and vegetables, such as carrot, radish, cucumber, potato, pepper, tomato, cauliflower, cherry, apricot, strawberry, etc.
Choose aromatic plants.
Plants release fragrance to attract insects for pollination or to prevent pests from eating their leaves. These fragrances may also attract your child. You can also grow some aromatic plants such as lavender, mint, vanilla and basil.
Endless fun
Besides growing flowers and vegetables, there is also a lot of fun. For example, you can teach children to make insect specimens, make leaf specimens, collect seeds, and even make fertilizer themselves. These processes are all good opportunities for children to understand nature, develop hands-on skills and stimulate their imagination.
Xiliangxiang mainly deals in:
Selenium-enriched multigrain formula porridge (health-preserving, low-sugar, beauty-nourishing, liver-nourishing and heart-nourishing types); selenium-enriched breakfast companion (soy milk type); selenium-enriched single products (rice, millet, fruit, local specialties); selenium-enriched therapeutic-diet private customization.
Health knowledge Weibo: @Dr. Selenium Grain
Customer service hotline: 400-****8915
Room 1611, Building B, International Enterprise Center, No. 72 Nongye Road, Zhengzhou City