African jasmine (Chinese gloriosa lily, Fagraea ceilanica) cutting propagation method, survival rate can reach 80%
African jasmine is one of the plants very well suited to indoor growing. Its foliage color is beautiful, and its cultivation method is simple and easy to learn, so many flower lovers plan to grow several more pots at home. So how do you propagate African jasmine? Follow along below as we take a look at the propagation methods for African jasmine.
How to propagate African jasmine
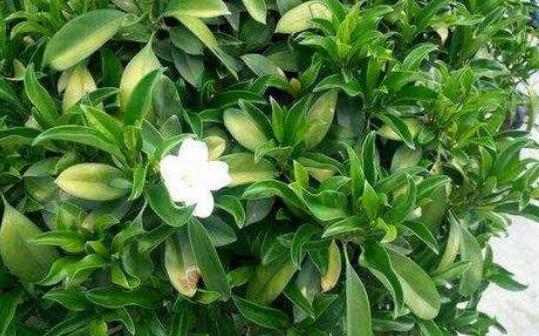
After years of research and experience summed up by many flower lovers, it is believed that there are mainly four propagation methods for African jasmine: sowing, cuttings, layering, and division. Because each method has its own characteristics, flower lovers can choose the appropriate method according to their own conditions after reading the introduction below.
Propagation methods for African jasmine
I. African jasmine cutting method
1. Timing selection
If grown in a greenhouse, cuttings can be taken throughout the year; if grown at home, the cutting time should be chosen between April and October, though the best time is June to July, when rainfall is relatively abundant and rooting speed is fastest and most ideal.
2. Selection of substrate
The substrate used for cuttings must be chosen well. Generally there are two commonly used approaches. One is water propagation for rooting, which means soaking the cuttings in water to cultivate them; the other is the common soil culture, where the substrate is best an acidic, fertile soil, preferably made from peat soil, sandy loam, vermiculite, or yellow subsoil.
3. Making cuttings
Making cuttings is a key step in cutting propagation. Take relatively robust branches 1-2 years old, cut off a section, then cut it into segments of 12-15 cm each, leaving 2-3 leaves on each cutting segment and cutting off all the remaining leaves, with the cut position best located 0.3 cm below a node.
4. Cutting
Insert the prepared cuttings into the prepared substrate, then cover with plastic film to retain moisture, and place it in a shady spot for care and management. Do not let direct sunlight hit it.
5. Later management
Be careful to keep the temperature between 20-30 degrees, and keep the soil moist. If it is on the dry side, replenish water in time. No fertilizer is needed. Generally roots will form after 1-2 months. According to statistics, the survival rate of this method is over 80 percent.
II. African jasmine layering propagation
1. Ordinary layering
(1) Timing. The time is generally chosen in April.
(2) Method. Dig a trench in the potting soil, then choose robust branches 2-3 years old at the base of the African jasmine, perform ring-barking on the middle-lower part of the branch, then press the separated part down and bury it in the dug trench, and cover with sandy soil.
(3) Management. Roots generally form after 40-50 days, but you need to wait until July-August to separate it from the mother plant and then transplant it elsewhere. During the layering process, be careful to provide appropriate shade.
2. Air layering
(1) Timing. Usually chosen in late April or early May.
(2) Method. Choose robust branches 2 years old on the upper part of the plant, perform ring-barking 0.5 cm below a node, with a width about 3 times the diameter of the branch. Wrap peat in plastic film and bind it around the barked area, and leave a water inlet at the upper end of the soil ball for later watering.
(3) Management. Be careful to keep the soil ball moist. If it is on the dry side, water moderately from the water inlet, just enough to make the soil ball slightly moist. Do not water too much. Then wait 2-3 months for roots to form, and after another 40 days it can be separated from the mother plant.
III. Division propagation
1. Timing. Among the propagation methods for African jasmine, division is the simplest to carry out. Its timing is generally chosen in March-April.
2. Method. Take the entire African jasmine plant out of the flower pot together with the soil, then shake off all the old soil, use a tool to cut apart from the base fertilizer where the root system connection is relatively weak, dividing the plant into several clumps, with each clump retaining 2-3 stems and ensuring the root system is intact without damage, then plant them separately.
3. Care. After division, water immediately once, making sure to water thoroughly. Be careful to keep the soil moist, and keep it in a shady place for care. No fertilizer is needed during this process. Generally the plant will resume growth in about 3 weeks.
IV. Seed propagation
1. Timing. Since African jasmine fruit ripens in July, the time for collecting seeds is generally October-December. After collecting the ripe fruit, extract the seeds, then store them in sand.
2. Method. Take out the seeds and soak them in warm water for 5 minutes, then evenly sow them on a sandy loam seedbed, cover with soil at a thickness of 2-3 cm, and add rice straw or plastic film for insulation.
3. Care. Be careful to keep the soil moist. Seedlings will only emerge in the spring of the following year. After emergence, promptly remove the rice straw or plastic film, then strengthen fertilizer and water management, and provide appropriate shade so the plants can grow smoothly.
How to propagate African jasmine, propagation methods for African jasmine
African jasmine, originally named: Fagraea ceilanica or Chinese gloriosa lily. It is produced in southern China and Southeast Asian countries. For convenience in sales, florists gave it a new name, "African jasmine." African jasmine is a common indoor foliage plant. Its leaves are slightly fleshy, elliptical, ovate, obovate, or oblong, sometimes oblong-lanceolate. We all know that indoor plant growing places great emphasis on planting techniques and propagation methods. As a type of indoor plant, African jasmine also has its own particular requirements for propagation methods. So how do you propagate African jasmine? Let us learn about the propagation methods for African jasmine together below.
How to propagate African jasmine, propagation methods for African jasmine
Sowing: It is suitable to collect ripe fruit between October and December. After extracting the seeds, sow the African jasmine seeds by broadcasting or in rows on a loose, fertile sandy loam seedbed, with a soil covering thickness of 2 to 3 cm, and add rice straw or plastic film for insulation and cold protection, or store the seeds in sand until the seeds crack and show white before sowing. Seeds sown in late autumn and early winter will only emerge in the following spring. After emergence, promptly remove the covering grass and strengthen water and fertilizer management; after summer begins, set up a shade frame. This can be expected to produce tall African jasmine with a good trunk form.
Cuttings: African jasmine cutting propagation can be carried out from the end of April to October, but it is best to take cuttings during the plum rain period from June to July, when the rooting effect is relatively ideal. Cut robust branches 1 to 2 years old as cuttings, with a length of 12 to 15 cm, carrying 2 to 3 half-leaves, with the lower cut best located 0.2 to 0.3 cm below a node. Insert them into peat soil, sandy loam, vermiculite, or yellow subsoil, but peat soil gives the best rooting effect. Cover with plastic film to retain moisture, and on clear days be careful to set up shade. After 1 to 2 months, African jasmine can root, and the survival rate can reach over 80%.
Division: Between March and April, when African jasmine just begins to sprout, take the clumped plant out of the flower pot, or dig up clustered ground-planted plants from the soil, shake off part of the old soil, and at the weak connection points of the root system, cut them apart with a sharp knife, so that each clump has at least 2 to 3 stems and a portion of intact roots, and plant them separately in the ground or in pots. In addition, many suckers will grow on the roots of African jasmine near the ground. They can be cut off from the roots together with the suckers and planted separately, which is also very simple and convenient.
Layering:
(1) Ground layering. In southern regions in April, perform ring-barking or scoring on the middle-lower part of robust branches 2 to 3 years old growing from the base of the African jasmine, then forcibly press and bury them into a pre-dug trench in the ground, covering with thick soil. Roots will form after about 40 to 50 days. By July to August, cut and separate them from the mother plant, and plant them separately in the ground or in pots. This method is relatively commonly used in African jasmine production.
(2) Air layering. For potted African jasmine in northern regions, after it is brought out in late April, perform ring-barking 0.5 cm below a node on robust branches 2 years old, with the barked width about 3 times the thickness of the branch, then use plastic film to wrap wet mud moss or peat around the ring-barked area, leaving a water inlet at the upper end of the soil ball to keep the soil ball moist. After 2 to 3 months, African jasmine can root. African jasmine enthusiasts can use this method to propagate a small number as gifts for flower friends.
How to propagate African jasmine, and the propagation methods for African jasmine are introduced here. In summary, African jasmine likes warmth, enjoys sunlight, and prefers an environment with high air humidity and good ventilation. In loose, fertile, well-drained loam, African jasmine grows quickly and with high quality. At the same time, the flowering period of African jasmine is from April to August, so you should seize the opportunity to sow, take cuttings, divide, and layer.
How to propagate African jasmine by cuttings
Cutting time
From April to October, African jasmine can be propagated by cuttings, but choosing to take cuttings during the plum rain season gives the best rooting effect.
Cutting container and substrate
Generally speaking, the substrate needed for African jasmine cuttings should be sterile, breathable, permeable, free of fertilizer content, not prone to rot or deterioration, and able to support the cuttings. For example, yellow sand, perlite, vermiculite, and so on. Loose soil, sawdust, and plant ash can also be used for cuttings. At the same time, the cuttings can also be soaked in water for cultivation, that is, water propagation.
Cutting method
Cut robust branches 1~2 years old and free of pests and diseases as cuttings. The cuttings must not be too old. The length of the cuttings should be about 12~15 cm, carrying 2~3 half-leaves, with half of each leaf needing to be cut off. The position of the lower cut is best 0.2~0.3 cm below a node. Insert them into sandy loam, peat soil, vermiculite, or yellow subsoil, among which peat soil gives the best rooting effect. Cover with plastic film to retain moisture, and on clear days be careful to set up shade. After 1~2 months, roots can form, and the survival rate can reach over 80%.