White orchid (Michelia alba) cutting propagation method: select strong branches to increase the survival rate
Cutting propagation is a method of plant reproduction. Regarding the question of whether white orchid can be propagated by cuttings, the answer is yes, but if you want the cutting to succeed, you must master the correct operating method. So what exactly is the cutting method and survival rate for white orchid? Below, the editor will guide everyone through it.
1. Can white orchid be propagated by cuttings? Yes, it can.
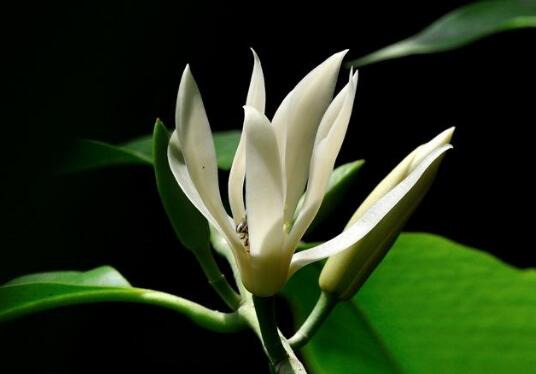
2. Cutting method for white orchid
1. Cutting time
When preparing to propagate white orchid by cuttings, choosing the right time period is very important. Generally, it is best to choose spring and autumn, because the climate in these two seasons is more suitable for its growth, and the success rate of cuttings will also be greatly improved, so everyone should remember this point.
2. Soil selection
In the cutting process of white orchid, first we need to choose the soil. This is the first step and also the step of laying a good foundation. It is best to choose humus soil with relatively high looseness, because this kind of soil has good drainage and aeration, which can allow white orchid to better absorb nutrients and can also speed up its rooting.
3. Soil disinfection
After choosing the soil, we need to disinfect the soil first, so as to prevent pests and diseases in it from infecting the white orchid. There are two disinfection methods. One is to break it up and spread it flat under the scorching sun for sun disinfection; the other is to put it into a pot and stir-fry it for disinfection. This can effectively eliminate pests and diseases.
4. Selection of cuttings
In the cutting process of white orchid, the selection of cuttings is also a very important step. It is best to choose branches that grow relatively robustly and are free of pests and diseases, so the survival rate will be very high. If you choose branches that look very thin and weak, then the cutting can basically be declared a failure, and the survival rate will not be very high.
5. Cutting method
Speaking of the cutting method for white orchid, it is actually very simple. First, we need to apply an appropriate amount of base fertilizer into the soil. After fertilizing, use chopsticks to poke a hole in the soil, then trim off the leaves at the bottom of the cutting and insert it into the soil. Generally, after inserting two-thirds of it, we can water. Be sure to water thoroughly, and remember that there must be no waterlogging. After that, it can take root in about 30 days.
6. Follow-up management
After the cutting takes root, the cutting can be declared successful, and then we can carry out follow-up care. There are also many points to pay attention to in terms of care, such as watering and fertilizing, all of which require particular attention. If you do not know how to care for it, you can refer to the article on white orchid cultivation methods, which contains detailed instruction.
Summary: Among the propagation methods of white orchid, cutting propagation is one with a fairly high survival rate. As long as everyone carries out cuttings according to the above method, it will generally succeed. The editor has introduced the cutting method for white orchid here, hoping to bring everyone some help.
How to propagate white orchid, propagation methods of white orchid / layering and grafting are more commonly used
White orchid is an ornamental flower plant with high ornamental value, and it can be seen in many gardens in our country. As more people cultivate it, people are also more concerned about issues related to its propagation. So how is white orchid propagated? What are the propagation methods of white orchid? Below, the editor will guide everyone through it.
1. How to propagate white orchid
2. Propagation methods of white orchid
Layering propagation
1. Ordinary layering
Among the propagation methods of white orchid, layering propagation is one of the more commonly used. This propagation method is generally best carried out in February to March. We need to cut halfway through the base of the selected branch, then cut upward for a section. We insert a piece of tile in the middle, then press it into the soil. After pressing it in, fix it with iron wire, and then wait for it to take root before separating the branch.
2. Air layering
Generally, it is best to choose robust growing branches, cut a slit in the lower part of the white orchid, then cover it with a bamboo tube, put culture soil inside, and tie it tightly with string. During this period, it needs to be sprayed with water frequently, but the amount of water must not be too much; just maintain a certain humidity. In this way, by May of the following year, new roots will have grown. At that time, we can remove it and plant it in place.
Grafting propagation
1. Approach grafting
For approach grafting, this propagation method of white orchid, it is generally best to carry it out from April to July. The specific approach grafting height is best at 70 cm from the ground. After tying it, we need to wrap it with mud, then wrap leaves on the outside. This can prevent erosion by rainwater. After about 60 days, we can cut it off and cultivate it separately.
2. Cut grafting
When carrying out cut grafting, it is best to choose around September. We need to select relatively robust white orchid scions, then combine the cut surfaces of the rootstock and scion and tie them with plastic film strips. After tying, bury them with soil, then water regularly. Wait until the following spring to remove the covering materials. After sprouting, keep only 4-5 buds and prune off all the rest.
Seed propagation
When carrying out seed propagation, it is best to choose the time point of September to October. This propagation method of white orchid is also relatively simple. When sowing, we need to mix the seeds with fine sand and scatter them, then cover with 1-2 cm of soil and water. Be sure to water thoroughly at one time. After that, seedlings can emerge in about 20 days.
Cutting propagation
Before carrying out cutting propagation, we must first select cuttings. Generally, it is best to choose relatively robust cuttings, so the survival rate will be higher. When cutting, we can use chopsticks to poke a hole in the soil, then insert the cutting and water. After watering, the cutting can take root in about 30 days.
Summary: After reading the above content, I believe everyone has gained a certain understanding of how to propagate white orchid. After successful propagation, we can carry out follow-up care. If you do not know how to care for it, you can refer to the article on white orchid cultivation methods, which contains a detailed introduction. The editor has introduced the propagation methods of white orchid here, hoping to bring everyone some help.
Application of full-light mist cutting seedling technology on different varieties of flowers
The application of full-light mist cutting seedling technology on flowers is the issue we will focus on today. We will not only talk about herbaceous flowers, but also woody flowers. Let us learn together what the benefits of full-light mist cutting seedling technology are for flowers.
1 Overview of full-light mist cutting seedling technology
Full-light mist cutting seedling technology is different from traditional cutting propagation seedling technology. This technology uses leafy cuttings and uses an automatic misting device for intermittent misting to increase the relative humidity on the surface of the cutting bed, keeping a film of water on the leaf surface at all times. Through the evaporation and heat absorption of the water film, the leaf surface temperature is lowered, ensuring the smooth progress of plant photosynthesis, and assimilation is not interrupted. This prevents the cuttings from losing water before rooting, thereby increasing the possibility of rooting in the cuttings. It can be said to be a method of cutting seedling propagation on a full-light cutting bed. Full-light mist softwood cutting technology can not only greatly reduce seedling costs, but also has the characteristics of easy cutting collection, fast rooting after cutting, abundant sources of cuttings, large root volume, short seedling cycle, and high seedling output. This has led to the wide application of this technology in the cutting propagation of flowers and nursery stock. Especially for superior flower varieties with high value and difficult rooting, using traditional cutting seedling methods is not only cumbersome to operate and consumes a large amount of manpower and material resources, but also has poor survival rate and high cost. Using full-light mist cutting seedling technology effectively solves the problems of difficult rooting, poor survival rate, and cumbersome operation in flower varieties, enabling the survival rate of flower seedlings to reach more than 95%, accelerating the flower cultivation cycle, and achieving good economic benefits.
2 Key points of full-light mist cutting seedling technology for woody and herbaceous flowers
2.1 Establishment of seedbed and equipment installation
The seedbed should be set up in a place with flat land, good ventilation, shelter from wind and facing the sun, smooth drainage, and close to water and power sources. After leveling the land, the seedbed should be made into a circular cutting bed with the center 40 cm higher than the edge, a radius of 0.6 m, and high in the middle and low around the sides. The surroundings should be built 30-40 cm high with single bricks, and a drainage outlet should be set at the bottom every 1.5 m. For the convenience of operation, brick-paved ring-shaped or radial walkways can be used in the seedbed. The full-light automatic intermittent misting device is installed at the center of the seedbed. This device consists of a leaf moisture digital controller, a symmetrical double-long-arm rotating misting pipe, and micro-sprinklers. First, lay 15 cm thick small stones inside the seedbed, usually cobblestones; next, lay 10 cm thick furnace ash slag on top; on the surface lay 20-25 cm thick clean river sand; finally, disinfect with 0.4% potassium permanganate solution or 0.01% carbendazim solution. This device has the advantages of convenient installation, small size, and light weight, and can also be controlled arbitrarily according to water demand with high precision.
2.2 Cutting varieties
The cutting varieties are mainly woody and herbaceous flowers. Woody flowers include Chinese rose, redbud, camellia, plum blossom, hibiscus mutabilis, peony, crabapple, magnolia, forsythia, golden bells, lilac, wisteria, azalea, pomegranate flower, banana shrub, white orchid, wintersweet, free-tooth red, and silver bud willow, etc. Herbaceous flowers include sweet violet, arrowhead, rabbit flower, hyacinth, tulip, stock, evergreen chrysanthemum, cineraria, sweet pea, summer orchid, dianthus, lycoris, firecracker flower, lotus, aster, water lily, cineraria, peony, phlox, tuberose, baby's breath, marigold, calendula, globe amaranth, cymbidium, lily of the valley, sweet violet, gloxinia, small grass orchid, calceolaria, cymbidium, geranium, pansy, cosmos, African impatiens, African daisy, ornamental bromeliads, blackberry lily, African violet, bird of paradise, chrysanthemum, and bougainvillea, etc.
2.3 Cutting seedling propagation
The suitable time period for cuttings is from late May to mid-September, and it should be carried out on cloudy days or in the morning or evening. When cutting woody flowers, use current-year semi-lignified young branches with leaves as cuttings; when cutting herbaceous flowers, use young stems with leaves as cuttings. When cutting the cuttings, first cut off the overly tender part at the top of the new shoot, and cut it into 8-10 cm long cuttings, keeping more than 2 buds at the top, then trim the leaves on the cuttings. For large leaves, only 1 leaf can be kept; for very small leaves, two or three leaves need to be kept. During the cutting process, be sure to keep the upper cut flat and the lower cut slightly slanted, in bundles of 50 each. Before cutting, soak the cuttings or their bases in 0.01%-0.125% carbendazim solution, and finally quickly dip the base in ABT rooting powder.
During the cutting process, the cutting depth should preferably be 2-3 cm, and it is better to be shallow than deep, so that the cuttings do not lodge. This allows the base to breathe and drain water, and can avoid rot caused by high temperature and high humidity or by poor water and air permeability due to too deep cutting. The general cutting density is 600-800 plants per sq m. After cutting is completed, spray thoroughly with water in time. At the same time, in order to avoid infection and disease, spray 0.01% carbendazim solution again in the morning or evening of the second day, and then spray this solution once every 7 d. When rooting begins, spray 0.1% potassium dihydrogen phosphate, and after rooting, spray 1% potassium dihydrogen phosphate.
Using full-light mist cutting seedling technology for woody and herbaceous flowers has a very good rooting rate effect. For example, the rooting rate of rubber tree, Chinese hibiscus, Chinese rose, and Dutch crabapple reaches more than 95%, the rooting rate of bougainvillea, jasmine, and milan reaches more than 90%, and the rooting rate of chrysanthemum, scarlet sage, marigold, and snapdragon reaches more than 98%.
2.4 Management of seedbed after cutting
The success or failure of cutting propagation depends on the one hand on whether the treatment of the cuttings and substrate before cutting is scientific and whether the cutting period and cutting method are reasonable; on the other hand, it depends on scientific management after cutting. First, after cutting is completed, the misting device needs to be started in time and connected to the controller. And misting should be carried out according to sunlight intensity, temperature changes, and the water demand of plant cuttings. The stronger the light intensity, the shorter the misting interval and the more frequent the misting. In the early morning and evening each day when light is weaker, the misting time and frequency need to be reduced, and at night the misting should automatically stop. On hot nights, in order to ensure that the cuttings do not lose water at night, the controller's timed misting switch can be started, so that misting lasts about 25 s every 0.5 h. After rooting, the number of misting times should be slowly reduced. In order to prevent the cuttings from rotting, carbendazim 800-fold solution should also be sprayed once every 7 d in the evening after misting stops.
2.5 Transplanting
After the cutting seedlings generally grow lateral roots, they need to be transplanted in time. The transplanting time should usually be chosen after 17:00 or before 10:00. In special time periods, it can be chosen throughout the day, such as on cloudy days. In order to improve the survival rate of transplanting, when lifting seedlings, ensure the root system is complete, and plant, transplant, and water immediately. After transplanting, place the flower pots under a shade net for shading. After that, according to weather conditions and soil moisture, spray water once or twice a day. After 10-15 d, when new shoots emerge, move them into the sun for daily management. According to the needs of the plants, spray diluted decomposed organic fertilizer water to promote the recovery of plant growth.
That is all for today on the application of full-light mist cutting seedling technology on different varieties of flowers. Flower growers in need can refer to it for learning!