How to propagate Pilea cadierei? Detailed guide to cutting and division methods
Pilea cadierei is a plant with a very wide range of uses. It is not only ornamental but also has extremely high medicinal value, with good therapeutic effects on many ailments. It is precisely because of its high usefulness that it is propagated in large quantities. So how do you propagate Pilea cadierei? What are the propagation methods for Pilea cadierei? Let's take a look below.
1. How to propagate Pilea cadierei: cuttings / division
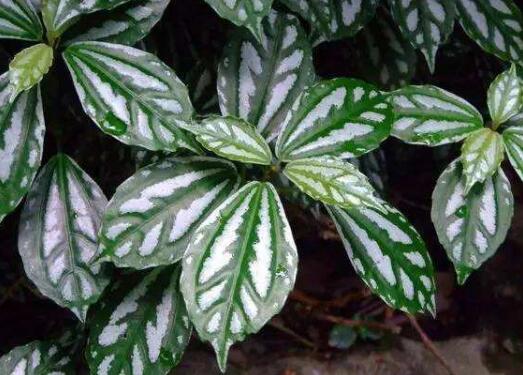
When it comes to how to propagate Pilea cadierei, it is mainly divided into two methods: cutting propagation and division propagation, with cutting propagation being the main one. More people use this propagation method, and the survival rate is relatively high. As for the specific propagation steps, they are described in detail below. Let's take a look.
2. Propagation methods for Pilea cadierei
Cutting propagation
1. Cutting time: either spring or autumn
When preparing to propagate Pilea cadierei by cuttings, choosing the right time period is very important. Generally, it is best to choose spring or autumn, because the climate in these two seasons is more suitable for its growth, and the success rate of cuttings will be greatly improved, so everyone should remember this point.
2. Soil selection: sandy soil
Before carrying out cutting propagation, we first need to choose the soil. This is the step that lays the foundation, so it must be chosen carefully. Pilea cadierei prefers sandy soil with relatively high looseness. This kind of soil has good drainage and aeration, allowing Pilea cadierei to absorb nutrients better, so the survival rate will also be somewhat higher.
3. Soil disinfection: high-temperature disinfection
After choosing the soil, we also need to disinfect it to prevent problems such as pests and diseases in it from infecting Pilea cadierei. There are two disinfection methods. One is to break it up and spread it flat under the hot sun for solar disinfection. The other is to put it in a pot and stir-fry it for disinfection. This can effectively eliminate pests and diseases.
4. Cutting selection: choose healthy branches
During the cutting process of Pilea cadierei, selecting the cuttings is also a very important step. It is best to choose branches that grow relatively robustly and are free of pests and diseases, as this will give a high survival rate. If you choose thin, weak-looking branches, then the cutting can basically be declared a failure.
5. Cutting method: roots in 10 days
The cutting method for Pilea cadierei is relatively simple, but before inserting the cuttings, it is best to use a chopstick to poke a hole in the soil, then insert the cutting into it. This makes it less likely to damage the roots. After inserting the cuttings, we need to water thoroughly, then place them in a shady spot. After about 10 days, once they have rooted, normal care can begin.
Division propagation
In addition to cutting propagation, Pilea cadierei can also be propagated by division. Although not many people use this method, the survival rate is by no means low. For division propagation, we can do it when repotting and changing the soil. When repotting, we need to take the plant out of the pot soil, then divide it into several layers. At the same time, shorten the old stems, keeping 2-3 nodes on the stem portion. After that, plant them separately in pots. Once they survive, new shoots and buds will quickly sprout.
Division and cutting propagation methods for Pilea cadierei
Pilea cadierei is a relatively popular small foliage plant nowadays. Because Pilea cadierei has strong adaptability and is relatively easy to propagate, many friends can keep it alive, and it is also very popular. Generally, Pilea cadierei is commonly propagated by cuttings, and division propagation can also be used. Because propagation is relatively easy, the survival rate is relatively high. The editor will introduce some precautions to note during the propagation process of Pilea cadierei.
Pilea cadierei
1. Cutting propagation:Cuttings can be taken in both spring and summer. The high-temperature summer season is not suitable for cuttings, and cuttings in winter grow relatively slowly. Select fully grown branches, cut the tip of the stem to 5-8 cm long as the cutting, retain a few leaves at the tip, and insert directly into a sand bed with vermiculite or plain sand as the substrate, or insert into pot soil mixed with peat and soil. The insertion depth should not exceed 2 cm. Place in a semi-shady spot, keep the soil temperature at 18-20°C, and when dry, spray water with a watering can. Roots will form in about 2-3 weeks, and after 1-2 months they can be transplanted or potted.
2. Division propagation:Pilea cadierei has a very strong clumping habit. When repotting and changing the soil, the entire clump can be divided into several portions and potted separately. At the same time, shorten the old stems, keeping 2-3 nodes at the base of the stems. After survival, axillary buds will quickly sprout and produce new side branches.
Water: Likes moisture. In summer, keep the pot soil moist, and spray and water the leaves every day to keep the leaf color bright.
Fertilizer: From April to September, fertilize once every half month.
Soil: Likes loose, well-drained soil. Can be prepared by mixing loam, river sand, and leaf mold.
Temperature: Likes warmth. The suitable growth temperature is 15-25°C. In winter, overwinter indoors at a temperature of around 5°C.
Light: Relatively shade-tolerant, avoids strong sunlight, likes scattered light.
Propagation methods for Pilea cadierei
Cutting propagation
Cutting time:
Cuttings can be taken in both spring and summer. When the summer temperature is relatively high, it is not suitable for cuttings. Cuttings can also be taken in winter, but the indoor temperature is relatively low and growth is relatively slow. Usually, cuttings can be taken at temperatures between 18-20°C.
Cutting soil:
For home cuttings, it is difficult to find the soil you want, so it is recommended to buy soil that has already been prepared and disinfected. Or go to the mountains to dig some coarse sand and rinse it several times with clean water before use. Do not use soil dug from saline-alkali land, as it is not conducive to flower rooting and will instead affect flower growth.
Cutting branches:
Select healthy, robust branches of Pilea cadierei, cut the front stem and leaves to 5-8 cm, retain a few leaves at the front, and insert directly into a sand bed with vermiculite or plain sand as the substrate, or insert into pot soil mixed with peat and soil. The insertion depth should not exceed 2 cm. Place in a semi-shady spot, keep the soil temperature at 18-20°C, and when dry, spray water with a watering can. Roots will form in about 2-3 weeks, and after 1-2 months they can be transplanted or potted.
Division propagation
Pilea cadierei has a very strong clumping habit. When repotting and changing the soil, take the plant out of the pot, divide it into several layers, and at the same time shorten the old stems, keeping 2-3 nodes on the stem portion, then plant them separately in pots. After survival, new shoots and buds will quickly sprout.