How to propagate nerve plants? Cuttings are the most commonly used method, with an illustrated guide to propagation methods
One of the reasons many plant lovers enjoy growing nerve plants is that they are very easy to propagate. You only need one healthy nerve plant, cut off part of its top stems and leaves, insert them into fertile substrate, and after some time they will take root and sprout. So how do you propagate a nerve plant? Let's look at the illustrated guide to nerve plant propagation methods.
How to propagate nerve plants
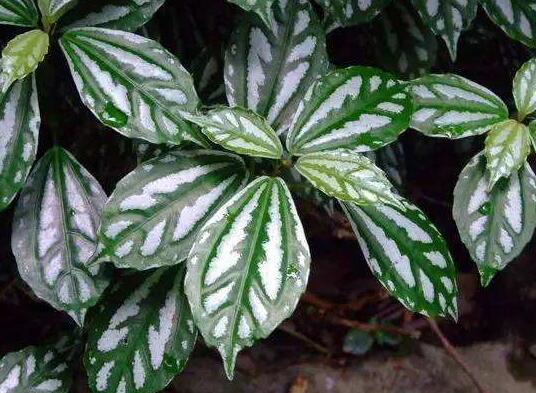
Based on the growing experience of plant lovers and botanists, we have found that the main propagation methods for nerve plants are cuttings, division, and tissue culture. Tissue culture is generally used to research new varieties, so ordinary plant lovers can use the first two methods when growing nerve plants.
Illustrated guide to nerve plant propagation methods
I. How to take cuttings of nerve plants
1. Cutting time
Nerve plants grown from cuttings are very easy to propagate. Even if you don't have one at home, you can just pick a few stems from a friend. As for timing, spring or autumn is generally chosen; as long as the temperature is above 15 degrees, success is very easy.
2. Selecting stems
Any healthy nerve plant without withered or yellow leaves can be used for cuttings. Select a section of stem from the upper part of the plant, cut it off together with buds and leaves, then cut it into sections of about 5 cm each, preferably keeping 3-5 leaves on top.
3. Inserting into soil
After selecting the stems, how do you propagate a nerve plant? Here I want to tell everyone a trick: soak the stems in carbendazim solution for 5 minutes. It has a good sterilizing effect and makes rooting after cutting easier. After soaking, take them out, let them dry naturally, and insert them into the prepared soil.
4. Care and management
Place the pot in a cool place, ideally where it can receive some scattered light. Keep the soil moist and the temperature at 15-20 degrees; roots usually form in 2-3 weeks. After rooting, do not fertilize immediately. Wait until it grows small tender leaves, then fertilize lightly, and afterward care for it according to nerve plant growing methods.
II. Division propagation of nerve plants
1. Division time
Normally, division of nerve plants is suitable in spring, from March to April. Division is generally done together with repotting and pruning to avoid taking the nerve plant out of the pot multiple times and damaging the roots.
2. Division method
In the illustrated guide to nerve plant propagation methods, division can be said to be very simple. The creeping stems of nerve plants easily grow adventitious roots. Cut off these creeping stems together with their roots, keeping them at a length of 10 cm, then pot them directly and care for them in a cool place. In 1-2 weeks they will survive and can be moved to normal care and management.
III. Tissue culture propagation
Although tissue culture is not commonly used by ordinary plant lovers, it is one of the best propagation methods. Generally, leaves and stem tips are used as explants. After disinfecting the leaves, cut them into sections, then inoculate them onto culture medium. After 30 days the leaves bend, and after another 20 days clustered shoots grow. After cutting the clustered shoots and transferring them to culture medium, adventitious roots can grow in 1-2 weeks.
How to propagate nerve plants, nerve plant propagation methods
How to propagate nerve plantsThe propagation methods for nerve plants are usually division propagation, cutting propagation, and tissue culture.
1. Nerve plant division propagation methodFor plants with relatively dense stem and leaf growth, many creeping stem nodes have already grown adventitious roots. As long as the creeping stems are more than 10 cm and are cut off with roots, they can all be potted directly. After recovering in semi-shade for 1-2 weeks, they can be moved to normal care.
2. Nerve plant tissue culture propagation methodLeaves and stem tips are often used as explants. After disinfection and sterilization, the leaves are cut into 8-10 mm lengths and inoculated onto MS medium supplemented with 6-benzylaminopurine 2 mg/L, naphthaleneacetic acid 2 mg/L, and 2,4-D 1 mg/L. After 30 days the leaves bend, and after another 20 days clustered shoots grow. After cutting the clustered shoots and transferring them to 1/2 MS medium supplemented with naphthaleneacetic acid 0.1 mg/L, adventitious roots grow in about 1-2 weeks, forming complete plants.
3. Nerve plant cutting propagation methodUnder suitable temperature conditions, nerve plants can be propagated by cuttings all year round, with the best results from May to September when temperatures are slightly higher. Cut cuttings from creeping stems that have grown out of the pot surface, about 10 cm long, generally needing 3-4 stem nodes. Remove the lower leaves, let them dry slightly, and insert them into a sand bed. If the cutting medium temperature is 24-30°C, roots can form 7-14 days after insertion. If the temperature is too low, rooting of cuttings is more difficult. Generally, they can be transplanted into pots 1 month after cutting.
Example of nerve plant propagation method operation 1. Cutting substrateThis refers to nutrient soil, river sand, peat soil, and other materials used for cuttings. For home cuttings, due to limited conditions, it is difficult to obtain an ideal cutting substrate. It is recommended to use a pre-mixed and sterilized cutting substrate; medium-coarse river sand can also be used, but it should be rinsed several times with clean water before use. Do not use sea sand or river sand from saline-alkali areas; they are not suitable for the growth of flowers and plants.
2. Selection of cutting stemsThe stems used for cuttings are called cuttings. Cut the stem into sections 5-8 cm long, each with more than three leaf nodes. The top shoot can also be used as a cutting.
3. Temperature after cuttingThe optimal growth temperature is 18°C-30°C. It fears cold and frost, and the overwintering temperature needs to be kept above 10°C. When the winter temperature drops below 4°C, it enters a dormant state. If the ambient temperature approaches 0°C, it will die from frost damage. The optimal temperature for cutting rooting is 18°C-25°C. Below 18°C, rooting is difficult and slow; above 25°C, the cut surface of the cutting is easily infected by pathogens and rots, and the higher the temperature, the greater the proportion of rot. When low temperatures are encountered after cutting, the main measure for insulation is to wrap the pot or container used for cutting with plastic film; when the temperature after cutting is too high, the main cooling measure is to shade the cuttings, blocking 50-80% of sunlight, and at the same time mist the cuttings 3-5 times a day. On sunny days with higher temperatures, mist more often; on cloudy and rainy days with lower temperatures and higher humidity, mist less often or not at all.
4. Humidity after cuttingIt likes a moist climate environment and requires the relative air humidity of the growing environment to be 60-75%. After cutting, the relative air humidity must be kept at 75-85%. Humidity can be increased by misting the cuttings 1-3 times a day. On sunny days, the higher the temperature, the more frequent the misting; on cloudy and rainy days, the lower the temperature, the less frequent the misting or no misting. However, excessive misting makes cuttings easily infected by pathogens and rot, because many kinds of pathogens exist in water.
5. Light after cuttingIt fears direct strong light and needs to be kept in semi-shade, or shaded by 70%. If kept indoors, place it in a bright spot as much as possible, and every one or two months move it outdoors to a semi-shaded place or keep it shaded for a month, so it can accumulate nutrients and recover its growth. Cutting propagation cannot do without sunlight, but the stronger the light, the higher the temperature inside the cutting, the more vigorous the transpiration of the cutting, and the more water consumed, which is not conducive to the survival of the cutting. Therefore, after cutting, 50-80% of sunlight must be blocked.
Nerve plant cutting propagation method, when to sow nerve plants
Many people are certainly familiar with nerve plants, and they are currently very popular on the market. Because of their high ornamental value, many people like to buy them. Precisely because of this, many people now grow them. Before planting, everyone is probably most concerned about its growing techniques and timing!
Nerve plant cutting propagation method
1. The best cutting time is spring and autumn. First choose a robust mother plant; not just any one will do. The selected nerve plant is best when its stems spread out and grow densely. Then select stems with terminal buds, about 5 cm long, with 3-5 stem nodes. Remove the leaves from the stem sections that will be inserted into the soil, or cut off half of the leaves, to reduce nutrient consumption.
2. Insert the prepared stems into the pot. A pot of about 10 cm needs 8-10 cuttings, then cultivate them in a small pot. After cutting, place in a cool, ventilated place and give appropriate light. Roots can form in 2-3 weeks. When the leaves gradually revive and grow small tender leaves, apply a small amount of slow-release fertilizer and carry out appropriate pruning and pinching. You should know that sufficient sunlight and nutrients can make cutting seedlings grow quickly.
3. Nerve plants need sufficient sunlight for growth; otherwise, the stems and leaves easily become leggy and lose their ornamental value. Once a nerve plant becomes leggy, it is very difficult to recover. In addition, nerve plants are afraid of cold, and leaf drop easily occurs when the temperature is too low. If you managed to take cuttings in spring or autumn, do not be caught unprepared in winter.
When to sow nerve plants
Under suitable temperature conditions, nerve plants can be sown all year round, with the best results from May to September when temperatures are slightly higher.
How to grow nerve plants
1. When choosing a pot for growing nerve plants, we should consciously choose a relatively shallow pot. It is best to place a waterproof layer at the bottom of the pot, which can make drainage better. After preparing the pot, we need to prepare the soil.
2. The soil can be mixed by yourself; it should have good drainage and sufficient fertility. To achieve this effect, we generally mix peat soil, leaf mold, and river sand.
3. After preparing these, the nerve plant cuttings can be potted. When transplanting, be careful not to damage the roots of the nerve plant. Contact with fertilizer easily burns the roots, so when transplanting nerve plants, be sure to avoid fertilizer.
4. After planting the nerve plant into the soil, water immediately and water thoroughly, so that the roots of the newly transplanted nerve plant blend with the new soil. After that, normal care can be carried out.
Management after planting nerve plants
1. Light: Nerve plants like medium-intensity light and dislike direct sunlight, but they also have fairly strong shade tolerance. Indoors, it is best to place them by a bright window.
2. Watering: You must be careful when watering nerve plants. If the potting soil is allowed to dry out completely, the leaves will curl and fall off. If it is too wet, the stems easily rot.
3. Fertilizing: For vigorously growing nerve plants, apply a nitrogen-based compound fertilizer at half the normal concentration once every half month.
4. Temperature: Nerve plants like warmth, with an optimal growth temperature of 18-25°C. Nerve plants have poor cold tolerance; when the temperature is below 12°C, the leaves will suffer cold damage, and at about 8°C the plant may die.
5. Diseases: Common diseases of nerve plants include leaf rot and root rot. For leaf rot, spray with 25% carbendazim wettable powder at 1000 times dilution for prevention and control. For root rot, soak the roots with streptomycin at 1000 times dilution to sterilize.
6. Pests: Pests of nerve plants include scale insects, red spider mites, and snails. For scale insects and red spider mites, spray with 40% omethoate emulsifiable concentrate at 1000 times dilution. Snails can be caught by hand or trapped with metaldehyde.
The planting time for nerve plants can be determined according to the local temperature. When planting, first do a good job of preparing the soil ratio, then choose an appropriate time to plant. If you want it to grow better, you can choose the cutting method for propagation, and after that just strengthen management.