Golden Camellia can be propagated by two methods: cuttings and sowing.
Golden Camellia, also known as yellow camellia, lives up to its name with its golden-yellow flowers, crystal clear and truly beautiful to look at. Because of its beauty and its powerful benefits, Golden Camellia is propagated on a large scale. So how is Golden Camellia propagated? According to our research, there are two common propagation methods for Golden Camellia: one is cuttings, and the other is sowing. Let's take a look together.
I. How is Golden Camellia propagated: cuttings / sowing
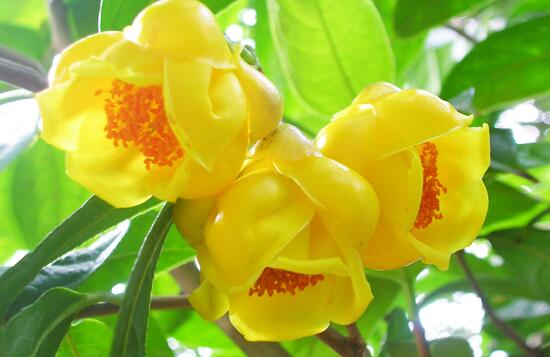
As a beginner, mastering how to grow Golden Camellia is enough, but if you are experienced, understanding its propagation methods is necessary, because only then is growing it truly enjoyable. As for how Golden Camellia is propagated, there are mainly two methods: propagation by cuttings and propagation by sowing. Let's continue below to see exactly how to do it.
II. Two propagation methods for Golden Camellia
(1) Propagation of Golden Camellia by cuttings
As a precious plant, Golden Camellia has many varieties, but no matter the variety, all Golden Camellias can be propagated by cuttings, and this method is widely used by flower enthusiasts. As for how to do it, the details are as follows:
1. Timing of cuttings
Propagation of Golden Camellia by cuttings is generally carried out in spring (April to early May) or autumn (mid to late September), when Golden Camellia is in its rapid growth period, with strong vitality and a high survival rate for cuttings.
2. Selection of cuttings
In the cutting method for Golden Camellia, the most important thing is good cuttings. If they are chosen well, the overall success rate of cutting will be very high. You can select current-year semi-ripened branches from the outer part of the canopy that are firm in tissue, have complete leaves, plump leaf buds, and no pests or diseases as cuttings.
Cutting preparation: Cut off the top shoot and buds from the selected branch, then cut each section into branches 8-10 cm long, keep a few leaves on each branch, and cut the base into a horseshoe-shaped slant.
3. Starting the cuttings
Insert the prepared cuttings into a pot of silica stone, with a depth of 1/3 of the branch, then press the sand and stone firm with your hands.
4. Care after cutting
After cutting, water thoroughly, and move it to a well-ventilated place, strictly avoid direct sunlight, and keep the temperature at around 25°C; this way it will root more easily. After 1 month, once new roots have grown, gradually increase sunlight to speed up the lignification of the tea seedlings.
(2) Propagation of Golden Camellia by sowing
Golden Camellia bears fruit after flowering, and by late October the fruit matures and splits open. After the seeds mature, there is no after-ripening dormant period. Place the harvested fruit in a ventilated indoor spot to dry in the shade, and once the capsule splits and the seeds are removed, sow them immediately. If autumn sowing is not possible, store the seeds in wet sand and carry out spring sowing in February of the following year.
Overall, whether by cutting propagation or sowing propagation, Golden Camellia can survive. If you have a Golden Camellia at home and happen to want to grow one more, then why not try it yourself. That is all for the propagation methods of Golden Camellia; we hope it helps you.
Propagation methods for Golden Camellia
Golden Camellia can be propagated by grafting, cuttings, layering, and tissue culture. Seeds can be sown once mature, but seedlings take about 7-8 years to bloom; cuttings are mostly taken from one-year-old branches in spring, grafting is best done in autumn, and layering can be done during its growth period.1. Cuttings
Golden Camellia cuttings are generally taken in the dry season from May to June. Select a young mother tree, cut a one-year-old young shoot about 10 cm long from the top, remove the lower leaves, trim flat below the node with a blade, keep one terminal bud and one lateral bud at the top, along with 2-3 leaves, and insert into a medium of river sand or gravel, with an insertion depth of 1/3 to 2/3.
After cutting, cover with straw curtains for shade, increase misting on the leaves, and maintain air humidity in the cutting bed to encourage rooting. To improve the survival rate of cuttings, soak the cuttings in a 50-100 ppm ABT rooting powder solution for 8-12 hours.
2. Grafting
Choose vigorously growing seedlings or camellia species that root easily from cuttings as rootstock, cut it off 4-5 cm above ground level, split it through the pith to a depth of about 1.5 cm, use 1-2 year old branches as scions, keep 1-2 leaves on the upper part of the scion, cut the lower part into a wedge shape, insert it into the split in the rootstock, making sure the cambium layers on both sides fit closely together, then bind tightly with plastic tape.
Aftercare after grafting: cover the scion with a plastic bag and tie it below with a string, but not too tightly, so that water droplets form inside the bag and drip onto the rootstock from time to time. Then add a paper bag over the outside of the plastic bag to shade against direct sunlight.
3. Bud cuttings
Take each bud node as a section, keep one leaf, about 1.5 cm long, cut diagonally at the lower part, then insert into the medium, with the depth just covering the branch. This method makes full use of branches and is suitable for large propagation needs.
4. Camellias grow slowly and should not be heavily pruned; the canopy develops evenly and does not require special pruning either. Simply cut out diseased and pest-infested branches, overly dense branches, weak branches, and leggy branches. For newly planted seedlings, moderate pruning may also be done to ensure survival.
Bud removal is an important part of cultivation and management. Generally, keep at most 3 flower buds per branch and maintain a certain spacing; this reduces excessive nutrient consumption by the plant and prevents it from affecting flowering. The flowering period of camellias lasts as long as half a year. Promptly removing wilted flowers is greatly beneficial for reducing nutrient consumption and strengthening the tree's vigor.
Propagation techniques for Golden Camellia
Golden Camellia has a special color genetic gene DNA, and its reproduction is difficult to replicate. High-tech methods are used to rapidly propagate a variety of excellent Golden Camellia seedlings with survival genes, overcoming the difficult problem of its very low survival rate. Today we will introduce the propagation techniques of Golden Camellia.
Propagation techniques for Golden Camellia:
Propagation by sowing: Golden Camellia fruit generally matures in early to mid-October and splits open in late October. After the seeds mature, there is no after-ripening dormant period. Seed propagation is best done by autumn sowing. In early to mid-October, place the harvested fruit in a ventilated indoor spot to dry in the shade, and once the capsule splits and the seeds are removed, sow immediately. If autumn sowing is not possible, store the seeds in wet sand and carry out spring sowing in February of the following year.
Propagation by cuttings: The suitable period for propagating Golden Camellia by cuttings is from April to early May, and it can also be done in mid to late September. Select current-year semi-ripened branches from the outer part of the canopy that are firm in tissue, have complete leaves, plump leaf buds, and no pests or diseases as cuttings. The cuttings are generally 15 cm long, with 2 leaves kept at the tip and a heel at the base. After treating the branches with IBA 300 ppm for 5 hours, insert them into the seedbed at a spacing of 10-14 cm x 3-4 cm, with the cuttings inserted about 3 cm deep. The key to the survival of camellia cuttings is maintaining sufficient humidity in the early stage of raising seedlings, strictly avoiding direct sunlight, and keeping the temperature at around 25°C. Mist frequently so that the seedlings are often covered with a thin film of water. After 1 month, once new roots have grown, gradually increase sunlight to speed up the lignification of the tea seedlings.
Propagation by grafting: Golden Camellia grafting is divided into seedling rootstock grafting and semi-ripened branch grafting. Seedling rootstock grafting: Common single-petal camellia and oil tea camellia can be used as rootstock. First sow the rootstock seeds in a sand bed, and grafting can be done when the seedlings grow to 4-5 cm. Before grafting, dig up the rootstock seedlings, remove all sand grains, cut them short 1-1.5 cm above the cotyledons, and also trim off the root tip portion so that the total length is 6-7 cm; select well-growing semi-lignified branches as scions, cut them into a wedge shape, and place them in a wet towel to keep moist. When grafting, split the stem of the seedling vertically along the cotyledon suture line with one cut, to a depth matching the slanted surface cut on the scion, quickly insert the prepared scion into the split in the rootstock, align the cambium on one side of the rootstock and scion, and tie tightly with plastic film tape. Then plant the grafted seedlings in a fertile, loose sandy soil seedbed at a spacing of 8 x 2 cm. After planting, build a frame over the seedbed and cover with plastic film to keep warm. Generally, the graft union begins to heal in 10-15 days, and after about 20-25 days the film can be lifted at night. After that, gradually increase ventilation and light, and once new buds sprout, remove the film entirely.
That is all for the propagation techniques of Golden Camellia. The discovery of Golden Camellia filled the gap of the tea family having no golden-yellow flowers.