How to Propagate Freesia? A Detailed Guide to Two Methods: Sowing and Bulb Division
Freesia is certainly familiar to flower lovers. It gets its name because its flowers are pure white like snow and its fragrance is delicate like an orchid, making it a highly ornamental flower. In daily life, many people keep a pot of freesia at home. Some buy ready-made potted plants directly, while others propagate them themselves. So how do you propagate freesia? Below are two propagation methods for freesia. Follow along with the editor to take a look.
I. How to Propagate Freesia: Sowing / Division
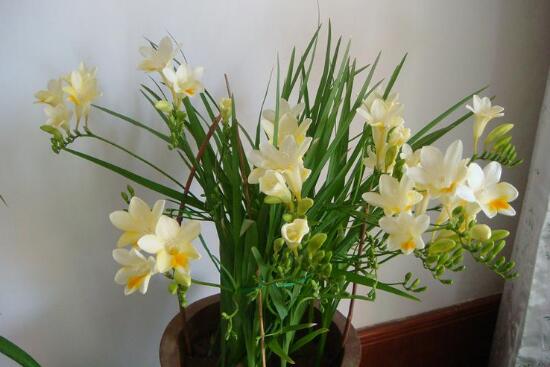
As a common excellent choice for indoor cultivation, freesia is fairly easy to grow, and with care it will produce beautiful flowers. However, propagating freesia yourself is not so easy. According to research, there are mainly two propagation methods for freesia: sowing and bulb division. Let us take a look at the specific operations below.
II. Two Propagation Methods for Freesia
(1) Propagating Freesia by Sowing
The flowering period of freesia is easy to regulate, making it a common cut flower variety, and cut flower varieties are generally propagated by sowing. Freesia sowing propagation can be approached from two aspects: timing and method, as follows:
1. Sowing time: May to June
The fruit ripening period of freesia is from May to June. At this time, the seeds can be collected, and the collected seeds are best sown immediately, as this gives better results. Therefore, the best sowing time for freesia is May to June.
2. Sowing method
From May to June, after collecting freesia seeds, sow them immediately in flower pots in a greenhouse (the pots should preferably be a bit larger), then water thoroughly, maintaining a room temperature of 15-20°C.
3. Care after sowing
One month after sowing, freesia seeds will gradually germinate and emerge. At this point, the temperature should be controlled at 15-18°C, then sufficient water and fertilizer should be applied. With proper care, by May of the following year, the daughter bulbs of freesia can grow to more than 1 cm in diameter, at which point they can be directly transplanted and planted, and they can bloom that same year!
(2) Propagating Freesia by Bulb Division
1. Timing for bulb division
Besides sowing, another propagation method for freesia is bulb division. Freesia bulb division is generally chosen in summer, when freesia is in its dormant period. We can dig out the bulbs, directly break off the daughter bulbs by hand, store the mother bulbs and daughter bulbs separately, and wait until autumn to plant.
2. Bulb division method
In autumn, specifically in early August, plant the stored freesia bulbs in flower pots, apply sufficient base fertilizer, and cover the daughter bulbs with 1-1.5 cm of soil. Water thoroughly, and after 10 days, freesia will germinate and grow, and by May of the following year it can be cultivated into bulbs.
Overall, when propagating freesia, whether by sowing or bulb division, both can survive, but the most suitable method for flower lovers, and the one with the highest survival rate, is bulb division. Of course, methods are fixed while people are flexible. Everyone can choose a method to propagate according to actual conditions. That is all from the editor on freesia propagation methods, and I hope it can be helpful to everyone.
How to Propagate Freesia (Freesia): Sowing / Bulb Division Propagation Methods
How to propagate freesia (Freesia)? Generally, freesia is propagated by seed sowing or bulb division. Both propagation methods work, and flower lovers can choose a suitable propagation method based on their own conditions. Next, the methods for freesia seed sowing and freesia bulb division are introduced separately.
Freesia propagation method 1: Sowing propagation methodFreesia (Freesia) usually has its seeds mature in May to June, and the seeds should be collected promptly, otherwise the capsules will split and the seeds will be lost. The seeds have no dormancy habit and can be sown immediately after collection.
Specific operation method:
Sowing temperature: During sowing, control the temperature at 15-20°C. Sow the current-year seeds collected in May to June immediately in a greenhouse, maintain the temperature at 15-20°C, and water thoroughly. Keep the environment shaded, and generally after more than 20 days they will germinate.
Seed germination: Generally after about 20 days, freesia seeds will gradually germinate and emerge. Control the temperature at 15-18°C and apply sufficient water and fertilizer. In the second year, the daughter bulbs can reach more than 1 cm in diameter and can be directly transplanted and planted. With generally good care, freesia can bloom in the same year.
2. Bulb division propagation methodFreesia (Freesia) generally can form 4-6 daughter bulbs around the mother bulb. Dig them up during the summer dormant period, separate the daughter bulbs from the mother bulb, store them, and plant in autumn.
Specific operation steps:
Preparation for bulb division: During the summer dormant period, dig out the bulbs, directly break off the daughter bulbs by hand, store the mother bulb and daughter bulbs separately, and wait until autumn to plant.
Bulb division planting: Generally in early August, plant the bulbs in flower pots, apply sufficient base fertilizer, and when planting, cover the daughter bulbs with 1-1.5 cm of soil. Water thoroughly, and after 10 days they will germinate and grow.
In May of the second year, the daughter bulbs grow larger and develop into bulbs. If cultivated as a cut flower variety, the bulbs should directly grow to more than 8 cm to ensure the quality of the cut flowers.
Freesia Propagation Methods
Freesia propagation generally uses sowing or dividing the corms. Sowing is mostly done in autumn, germinating in about 2 weeks, and seedlings take about 3 to 4 years to bloom. The corms can be separated from the stem after flowering, are white, and are "teardrop" shaped.[Corm Division Method]
Indoor pot cultivation usually involves planting corms in early September. Flower pots should preferably be breathable clay pots with a diameter of about 20 cm. The planting bulbs should be robust large bulbs. Before planting, soak the corms in a 500-fold to 800-fold carbendazim or thiophanate-methyl solution for 1 hour to 2 hours. Each pot can be planted with 5 to 7 bulbs of different varieties to improve the ornamental effect. You can have one variety per pot, or multiple varieties per pot.
After planting, cover with 2 cm to 3 cm of soil, water, and place in a cool place. After about 15 days, seedlings begin to emerge. After emergence, the pot can be moved into sunlight for care, and before frost, move the pot to a sunny indoor area, with room temperature controlled at 10°C to 18°C. During the growing period, keep the pot soil moist and apply dilute soybean cake water once every half month. Freesia is relatively tolerant of fertilizer. If fertilizer and water are appropriate, the flowers will be large and the fragrance strong. It can bloom in about 10 to 12 weeks. During this period, the temperature should preferably be controlled at 8°C to 10°C, watering should be appropriately controlled, and fertilizing should be stopped to extend the flowering period. After flowering, it goes dormant. After the leaves dry up, the corms should be taken out promptly for storage. For 3 months after harvest, store at 25°C, then move to 13°C for 1 month until sowing.
The corms of freesia are similar to lily bulbs and can be stored long-term at a low temperature of -2°C, and can be planted in greenhouses at any time. Generally, it takes 40 days to 50 days from planting the corms to flowering. It can be planted at appropriate times according to the needs of the flower market, supplying fresh cut flowers for a long period. If you want it to bloom for the Spring Festival, pot it in early December. If you need it to bloom for "May Day", plant it in pots in early March. Freesia stems are slender and weak, and tend to lodge, so supports need to be set up for pot cultivation. After the flowers fade, gradually reduce watering. When the stems and leaves wither, stop watering, dig out the corms, dry them briefly, and then store them at low temperature.