What to Do When Calendula Gets Pests? A Guide to Controlling 2 Pests and 2 Diseases
When growing calendula, the last thing we want to encounter is problems like pests and diseases, because these problems are extremely harmful to the plants, not only affecting their appearance but in severe cases causing the plants to wither and die. So what should you do when calendula gets pests? And how should pest and disease control for calendula be carried out? Let's take a look together below.
I. What to Do When Calendula Gets Pests: Spray with Pesticides
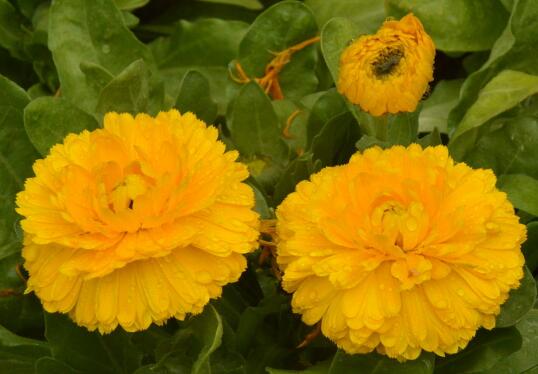
When it comes to what to do when calendula gets pests, the most direct method is actually to spray with pesticides, though the pesticide used for each pest and disease is different. The specific details are covered in the pest and disease control section for calendula below. Those troubled by these problems can take a look, and of course those who haven't encountered such problems can also read on, since prevention is better than cure.
II. Pest and Disease Control for Calendula (Pests)
1. Aphids
Among the pests and diseases of calendula, aphids are one of the most harmful. They mainly attack the leaves, stems, tender tips and tender spikes of calendula, gradually sucking out the sap, which causes the plant to lose a large amount of nutrients and gradually wither and die.
Control method: When aphids are discovered, we can wash the plant with clean water or soap to achieve control. If there are many aphids, we can directly spray with a 1000-fold dilution of 50% malathion emulsion.
2. Red Spider Mites
Red spider mites are arachnids of the family Tetranychidae. Their peak occurrence is every summer, so everyone must pay special attention at this time. When this pest appears, the leaves of calendula will gradually turn yellow and white, and if left untreated for a long time, the plant will wither.
Control method: When controlling this pest and disease of calendula, we can spray with a 1000-fold dilution of 80% dichlorvos.
III. Pest and Disease Control for Calendula (Diseases)
1. Downy Mildew
Downy mildew is a plant disease caused by fungi. This disease mainly threatens the leaves of calendula. In the early stages of the disease, many light yellow spots appear on the leaves, and as time goes on they gradually spread, eventually causing the leaves to wither, yellow and fall.
Control method: When controlling this pest and disease of calendula, we can use a 400-600 fold dilution of HILOT Kaisuang for spray application on the diseased plants, generally spraying once every 5-7 days, and after 2-3 times they can recover.
2. Rust
Rust is one of the more common pests and diseases of calendula. This disease mainly threatens the leaves, stems and fruits of the plant. When it occurs, many small blister-like spots appear on the affected parts, and in severe cases the spots densely merge into patches, causing the plant to wither and die rapidly.
Control method: When rust appears on calendula, we can spray with a 2000-fold dilution of 50% carboxin wettable powder, generally spraying once every 7-10 days, and after 1-2 times they can recover.
The Complete Guide to Growing Vegetables on a Balcony [I will often search for seasonal news to share with everyone]
Besides the traditional decoration of growing flowers on a balcony, there is now a more fashionable and healthier decorative method - growing vegetables on a balcony. In fact, growing vegetables on a balcony not only beautifies your balcony but also lets you get hands-on and eat fresh green vegetables, killing two birds with one stone. So how do you go about growing vegetables on a balcony? Today I will introduce the complete guide to growing vegetables on a balcony, home balcony vegetable-growing equipment, and also share pictures of home balcony vegetable gardens for everyone to enjoy!Why grow vegetables on a balcony?
1. Growing vegetables on a balcony is about a healthy lifestyle. Normally the vegetables we buy from farmers' markets and supermarkets inevitably contain some pesticides and chemical fertilizers, which are harmful to our bodies, whereas balcony-grown vegetables generally do not use pesticides or chemical fertilizers, instead using organic fertilizer made by fermenting materials commonly found in daily life such as rice-washing water, fruit peels and kitchen scraps, so what we eat is healthy, pollution-free food.
2. Vegetables from the market are often transported over long distances before reaching consumers, so their freshness is limited. Vegetables stored in the freezer not only produce harmful substances but also lose nutrients. Vegetables grown by your own hands on the balcony are not only fresh but can be picked and eaten at any time, and contain more nutrients. 3. The process of growing vegetables on a balcony not only serves the purpose of ornamentation and food but also purifies indoor air, breaks down indoor harmful substances, absorbs indoor formaldehyde, and regulates air humidity, making the indoor environment more comfortable.
4. Balcony vegetable growing promotes environmental protection and a low-carbon lifestyle. In our reinforced concrete city, air quality is polluted by car exhaust and air-conditioning heat. If everyone grows green vegetables at home, it not only helps improve air quality to some extent but also reduces carbon monoxide emissions, letting us breathe fresh air every day.
5. Balcony vegetable growing can relieve the work stress of office workers and relax the mood. After work, returning home, you can enjoy the fun of rural life with your family.
6. For families with children, growing vegetables on a balcony lets children learn about nature and the biology of plant growth, and cultivates their hands-on ability, sense of responsibility and love. What should be noted when growing vegetables on a balcony?
What vegetables to grow on a balcony should take two aspects into account:
On one hand, it should be decided according to personal preferences and needs; on the other hand, you should consider which vegetables suit the environmental conditions of your own balcony. Generally speaking, if space allows, most vegetables and melons can be grown on a balcony. The so-called environmental conditions of the balcony mainly refer to the balcony's orientation and whether it is enclosed. Orientation determines the balcony's light conditions, while whether the balcony is enclosed determines its temperature conditions. A fully enclosed balcony is also warmer in winter, is less limited by temperature, and offers a wider range of vegetables to choose from, basically allowing vegetables to be grown all year round. A semi-enclosed or unenclosed balcony is colder in winter, generally making it difficult to grow vegetables in winter, and in summer direct sunlight causes temperatures to be too high, so you should also pay attention to shading to protect the vegetables.
More importantly, the balcony's orientation. Under permitted temperature conditions, vegetables should generally be chosen according to the balcony's orientation. A south-facing balcony has full sun, abundant sunlight and good ventilation, making it the most ideal vegetable-growing balcony. Almost all vegetables grow best under full sun, so general vegetables can be grown all year round on a south-facing balcony, such as cucumber, bitter melon, tomato, common bean, daylily, New Zealand spinach, mustard greens, zucchini, green pepper, lettuce, Chinese chives, etc. In addition, aquatic vegetables such as lotus root, water chestnut and water caltrop are also suitable for growing on a south-facing balcony. In winter, most areas of a south-facing balcony receive direct sunlight, and by setting up simple insulation equipment you can also create a good environment for producing vegetables in winter. East- and west-facing balconies have half-day sun and are suitable for growing sun-loving, shade-tolerant vegetables, such as onion, leaf lettuce, baby bok choy, Chinese chives, loofah, cilantro, radish, etc. But a west-facing balcony has higher temperatures during the summer western sun, causing some vegetables to suffer sunscald, with mild cases dropping leaves and severe cases dying, so it is best to plant vining, heat-tolerant vegetables in the corners of the balcony. In summer, you should also try to defend against the strong light and radiation reflected from the buildings behind. A north-facing balcony has almost no sunlight all day, offering the smallest range of vegetable choices. You should choose shade-tolerant vegetables to grow, such as lettuce, Chinese chives, asparagus, Chinese toon, dandelion, water spinach, Malabar spinach, etc. In summer, you should also try to defend against the strong light and radiation reflected from the buildings behind. Which vegetables should be grown on a balcony?
Short-cycle fast-growing vegetables: baby bok choy, green garlic, sprouting vegetables, mustard greens, bok choy, leaf lettuce. Long-harvest vegetables: tomato, chili, Chinese chives, coriander, cilantro, scallion, etc. Space-saving vegetables: carrot, radish, lettuce, scallion, ginger, cilantro. Easy-to-grow vegetables: bitter melon, carrot, ginger, scallion, lettuce, baby bok choy. Pest-resistant vegetables: scallion, Chinese chives, sweet potato leaves, ginseng herb, aloe, corner vegetable
What vegetables should beginners choose?
Beginners can choose easy-to-grow vegetables or fast-growing vegetables. For example, bok choy and leaf lettuce are two fast-growing vegetables that can be grown all year round and grow relatively quickly, ready to harvest in about five or six weeks. Bitter melon, scallion, ginger, etc. are highly adaptable and have a distinctive smell of their own, so insects dislike approaching them, and they can grow well without pesticides or chemical fertilizers. Before growing vegetables on a balcony, where should you buy seeds and seedlings?
Usually the needed seeds or seedlings can be found at farm households, garden shops, flower markets, vegetable markets, horticultural markets, seed stores and other places. Foreign seed companies noticed the home vegetable-growing market long ago and have continuously bred dwarf and mini varieties of various vegetables to suit growing in small spaces. In our country's market, such dwarf and mini varieties are still few, but it is believed that as more and more people like growing vegetables at home, such vegetable seeds on the market will also increase, for us to choose from. Almost any type of container can be used for growing vegetables on a balcony, as long as it is sturdy enough and can provide enough space and drainage channels. Besides traditional professional containers such as flower pots and flower troughs, many household items can be used after modification, such as plastic basins, buckets, flower boxes, flower troughs, wooden boxes, aluminum boxes, galvanized iron boxes, plastic boxes, jars, food cans, and even bathtubs, tires, burlap sacks, barbecue grills and so on. But no matter what container is chosen, you must ensure there are drainage holes at the bottom.
What equipment is there for home balcony vegetable growing?
Household items such as basins, buckets, boxes, jars, baskets and pots can all be used for growing vegetables. Tuber vegetables like potatoes can be grown in bags. Scallions, Chinese chives, garlic sprouts, etc. can be grown in roasting pans. Tires, burlap sacks and the like are also good containers for growing vegetables
Complete Guide to Balcony Vegetable Growing Part One: What Vegetables to Grow on a Balcony?
"Growing flowers is good, growing vegetables is even better." If flowers are grown well, they can be admired; if vegetables are grown well, you not only get to eat pollution-free vegetables you grew yourself, but the green branches and lush leaves and abundant fruits can also form a beautiful scene. But we city people living in a concrete jungle have no large plots of land, so how do we grow vegetables? No worries - a small balcony is actually a great place to grow vegetables. Below I will introduce the knowledge, methods and tips of balcony vegetable growing one by one, starting with what vegetables are suitable for growing on a balcony.
Choosing vegetables according to orientation?
What vegetables to grow on a balcony should be decided on one hand according to personal preferences and needs, and on the other hand by considering which vegetables suit the environmental conditions of your own balcony. Generally speaking, if space allows, most vegetables and melons can be grown on a balcony. The so-called environmental conditions of the balcony mainly refer to the balcony's orientation and whether it is enclosed. Orientation determines the balcony's light conditions, while whether the balcony is enclosed determines its temperature conditions. A fully enclosed balcony is also warmer in winter, is less limited by temperature, and offers a wider range of vegetables to choose from, basically allowing vegetables to be grown all year round. A semi-enclosed or unenclosed balcony is colder in winter, generally making it difficult to grow vegetables in winter, and in summer direct sunlight causes temperatures to be too high, so you should also pay attention to shading to protect the vegetables.
More importantly, the balcony's orientation. Under permitted temperature conditions, vegetables should generally be chosen according to the balcony's orientation.
A south-facing balcony has full sun, abundant sunlight and good ventilation, making it the most ideal vegetable-growing balcony. Almost all vegetables grow best under full sun, so general vegetables can be grown all year round on a south-facing balcony, such as cucumber, bitter melon, tomato, common bean, daylily, New Zealand spinach, mustard greens, zucchini, green pepper, lettuce, Chinese chives, etc. In addition, aquatic vegetables such as lotus root, water chestnut and water caltrop are also suitable for growing on a south-facing balcony. In winter, most areas of a south-facing balcony receive direct sunlight, and by setting up simple insulation equipment you can also create a good environment for producing vegetables in winter.
East- and west-facing balconies have half-day sun and are suitable for growing sun-loving, shade-tolerant vegetables, such as onion, leaf lettuce, baby bok choy, Chinese chives, loofah, cilantro, radish, etc. But a west-facing balcony has higher temperatures during the summer western sun, causing some vegetables to suffer sunscald, with mild cases dropping leaves and severe cases dying, so it is best to plant vining, heat-tolerant vegetables in the corners of the balcony. In summer, you should also try to defend against the strong light and radiation reflected from the buildings behind.
A north-facing balcony has almost no sunlight all day, offering the smallest range of vegetable choices. You should choose shade-tolerant vegetables to grow, such as lettuce, Chinese chives, asparagus, Chinese toon, dandelion, water spinach, Malabar spinach, etc. In summer, you should also try to defend against the strong light and radiation reflected from the buildings behind.
Which vegetables are most suitable for growing on a balcony?
Short-cycle fast-growing vegetables: baby bok choy, green garlic, sprouting vegetables, mustard greens, bok choy, leaf lettuce
Long-harvest vegetables: tomato, chili, Chinese chives, coriander, cilantro, scallion, etc.
Space-saving vegetables: carrot, radish, lettuce, scallion, ginger, cilantro
Easy-to-grow vegetables: bitter melon, carrot, ginger, scallion, lettuce, baby bok choy
Pest-resistant vegetables: scallion, Chinese chives, sweet potato leaves, ginseng herb, aloe, corner vegetable
What vegetables should beginners choose?
Beginners can choose easy-to-grow vegetables or fast-growing vegetables. For example, bok choy and leaf lettuce are two fast-growing vegetables that can be grown all year round and grow relatively quickly, ready to harvest in about five or six weeks. Bitter melon, scallion, ginger, etc. are highly adaptable and have a distinctive smell of their own, so insects dislike approaching them, and they can grow well without pesticides or chemical fertilizers.
Where to buy seeds and seedlings?
Usually the needed seeds or seedlings can be found at farm households, garden shops, flower markets, vegetable markets, horticultural markets, seed stores and other places.
Foreign seed companies noticed the home vegetable-growing market long ago and have continuously bred dwarf and mini varieties of various vegetables to suit growing in small spaces. In our country's market, such dwarf and mini varieties are still few, but it is believed that as more and more people like growing vegetables at home, such vegetable seeds on the market will also increase, for us to choose from.
Complete Guide to Balcony Vegetable Growing Part Two: What Containers to Use for Growing Vegetables?
Almost any type of container can be used for growing vegetables, as long as it is sturdy enough and can provide enough space and drainage channels. Besides traditional professional containers such as flower pots and flower troughs, many household items can be used after modification, such as plastic basins, buckets, flower boxes, flower troughs, wooden boxes, aluminum boxes, galvanized iron boxes, plastic boxes, jars, food cans, and even bathtubs, tires, burlap sacks, barbecue grills and so on. But no matter what container is chosen, you must ensure there are drainage holes at the bottom. Household items such as basins, buckets, boxes, jars, baskets and pots can all be used for growing vegetables. Tuber vegetables like potatoes can be grown in bags, scallions, Chinese chives, garlic sprouts, etc. can be grown in roasting pans, and tires, burlap sacks and the like are also good containers for growing vegetables
Drainage holes
No matter what kind of container is chosen for growing vegetables, you must ensure there are drainage holes at the bottom to ensure smooth drainage. Container drainage is crucial. Poor drainage causes plant roots to suffocate and rot; drainage that is too fast causes plants to lack water and wither. Professional containers such as flower pots and flower troughs bought from the market all have drainage holes at the bottom. For containers modified from household items, you need to drill a few drainage holes yourself, generally drilling a few drainage holes with a diameter of 0.5-1 cm evenly around the bottom.
To avoid soil loss when watering, you can "cushion the pot," that is, cover the drainage holes with broken pot shards, tiles or window screen, so as to block the drainage holes. To promote drainage, you can place some coarse gravel or small stones on top of the cushioning material to keep drainage smooth.
For vining plants like cucumber and common bean, you can fit the flower pot with a "cage" as support
Material
Generally speaking, ceramic and wooden containers drain faster than plastic containers and need more watering. Do not place plastic containers by the window, because plastic vessels are light and easily blown over by wind. Do not use pressure-treated wooden containers; chemical preservatives are added during the pressure treatment process, and although this method allows the treated wood to be protected from termites, decay and other harmful factors for a long time, the wood itself also contains toxic substances that will poison the plants. If making your own wooden containers, it is best to use rot-resistant wood such as pine and fir.
About the material and selection of flower pots
Color
Use black containers with caution, because black absorbs heat and may damage plant roots. If you choose a black container, it is best to coat it with a lighter-colored paint, or just shade the container to avoid direct sunlight.
Size
The size of the container is very important. For growing vegetables, choose larger rather than smaller; a larger container not only has ample room for fertilizer but also holds more water, so it won't dry out quickly in summer. Tomatoes, chili peppers, common beans, etc. need larger containers; generally a container of about 15-20 liters is enough. When buying seeds and seedlings, it is best to ask the seller what size container is needed, how to water and fertilize, and so on.
Complete Guide to Balcony Vegetable Growing Part Three: Soil and Fertilizer
Soilless cultivation
So-called soilless cultivation means not using soil, but instead using a substrate (including rock wool, peat, vermiculite, perlite, bark, sawdust, water, etc.) and nutrient solution to grow plants. Soilless cultivation not only grows fast, with high yield and good quality, but also has fewer pests and diseases, is clean and tidy, and only requires watering with nutrient solution, making management very convenient.
Soil cultivation using potting soil
Home vegetable growing can also use soil cultivation. Soil cultivation, as opposed to soilless cultivation, also has its advantages, such as strong buffering capacity for pH, good ability to retain fertilizer and water, and the activity of various beneficial bacteria being beneficial to plant growth. Home vegetable growing usually uses organically cultivated potting soil, which can be bought at horticultural markets, and specialized potting soil can be chosen according to the vegetable type.
Some people find that soil bought from the market does not grow plants well, and some people like DIY, so you can also mix your own potting soil. For the composition and preparation methods of potting soil, you can refer to the following articles:
What is potting soil? What types of potting soil are there?
In order to meet the growth and development needs of flowers, especially potted flowers, and according to the different soil requirements of various varieties, soil specially prepared artificially that is rich in nutrients, has good drainage and permeability (air permeability), can retain moisture and fertilizer, does not crack when dry, does not clump when wet, and does not form a crust after watering is called potting soil.
There are many types of potting soil; the commonly used ones are as follows:
Leaf mold
Made by piling up and fermenting fallen leaves, dry grass, vegetable peelings, etc. until decomposed. These materials are piled into a pit, layer by layer - one layer of leaves (or dry grass, vegetable peelings), one layer of garden soil, sprinkled with some livestock or poultry manure and urine, repeated for several layers, then covered with soil on top. After more than half a year, the rotted leaves and so on are mixed with the garden soil, then sifted, sun-dried, and stored for later use. This potting soil is rich in humus, has excellent physical properties, is good for retaining fertilizer and drainage, and is loose and acidic.
Barnyard manure soil
Barnyard manure is made by piling up and fermenting cow dung, horse dung, pig dung, sheep dung, poultry dung together with soil and weeds until decomposed. After decomposition it must also be sun-dried and sifted before use, and it contains nutrients and humus.
Garden soil and field mud
Garden soil and field mud refer to the topsoil of a garden or field, that is, the cultivated soil of grown crops, which after piling up and sun exposure is stored indoors for later use.
Pond mud
Pond mud is used more in the south. It is made by digging mud out of ponds, forming it into thin blocks, sun-drying them and storing them for later use; when using, break the thin blocks apart. Its advantages are that it is rich in fertilizer and drains well, and it is neutral or slightly alkaline.
Rice husk ash
Rice husk ash is mainly the ash from burning rice husks or rice straw, also called plant ash. It loosens the soil, aids drainage, contains potassium fertilizer, and is slightly alkaline.
Yellow sand
Generally, using river sand as potting soil aids drainage and aeration; before use it must be rinsed with clean water to remove salts.
Sawdust
After sawdust is piled up and fermented until decomposed, it is mixed with soil to make the potting soil loose and good at retaining water. It is a newly developed potting soil material in recent years.
Brick residue
Breaking up tiles or bricks aids drainage and aeration, but lacks nutrients.
Garbage soil
Garbage soil is called "revived soil"; it is made from the waste soil after repotting, supplemented with manure and piled up. After this soil is decomposed, it is sifted and sun-dried for later use.
How to prepare potting soil?
Since various plants have different nutrient requirements, degrees of acid and alkali tolerance, and drainage and aeration requirements, the mixing ratios also differ. The basic requirements for potting soil should follow these principles:
① Have an appropriate proportion of nutrients, including trace elements such as nitrogen, phosphorus and potassium.
② Be loose, well aerated and well drained.
③ Be free of pests, diseases and other harmful substances that harm the growth of flowers and trees, such as insect pupae.
④ Remove impurities such as grass roots and stones, sift, and carry out general disinfection, such as sun exposure or heating and steaming.
Several potting soil preparation methods suited to the needs of different potted plants are as follows:
Soil for sowing and seedlings
2 parts leaf mold, 1 part garden soil, a small amount of barnyard manure, a small amount of sand. Or 1 part leaf mold, 1 part garden soil, 1 part rice husk ash, a small amount of barnyard manure.
Soil for general potted flowers
1 part leaf mold, 1 part garden soil, 0.5 part rice husk ash, 0.5 part barnyard manure soil. Or 1 part leaf mold, 1.5 parts garden soil, 0.5 part barnyard manure soil
Soil for shade- and moisture-tolerant plants
0.5 part leaf mold, 2 parts garden soil, 1 part barnyard manure soil, 0.5 part rice husk ash.
Soil for cuttings
Since cuttings do not need nutrients before rooting, yellow sand or vermiculite is often used. For example, 1 part garden soil, 1 part rice husk ash; or 1 part garden soil, 1 part leaf mold also works. For certain flowers, using rice husk ash alone for cuttings is also fine.
Soil for acid-loving plants
Use mountain soil or leaf mold, garden soil plus a small amount of yellow sand.
Soil for succulents
You can use 0.5 part yellow sand, 0.5 part garden soil, 1 part leaf mold. Or 1 part brick residue, 1 part garden soil.
Soil for camellia, azalea and banana shrub
2 parts leaf mold, 1.5 parts yellow mud, 0.5 part charred mud ash, 1 part sand, plus a small amount of bone meal, etc.
Soil for orchids
Nowadays most people use black mountain soil, that is, leaf mold naturally accumulated from fallen leaves in mountain forests, or leaf mold with a small amount of yellow sand added.
In addition, there are the following soil type preparation methods:
Loose soil
2 parts garden soil, 1 part rice hull ash. Suitable for cuttings.
Light fertile soil
1 part garden soil, 2 parts leaf mold, 1 part barnyard manure soil. Suitable for plants with weaker root development and for fine seeds.
Heavy fertile soil
2 parts garden soil, 1 part leaf mold, 1 part barnyard manure. Suitable for growing general flowers.
Clay fertile soil
2 parts garden soil, 1 part barnyard manure soil. Suitable for growing palms, cycads (Cycas) and other plants with thick roots, as well as rhizomatous plants.
What fertilizer should be used for growing vegetables at home?
Fertilizing vegetables in soilless culture is the simplest: just water them with a nutrient solution. The nutrient solution for soilless culture must be formulated with major elements such as nitrogen, phosphorus, potassium, calcium, magnesium and sulfur, and trace elements such as iron, manganese, boron, zinc, copper and molybdenum. There are nutrient solution formulas specially made for different plants, as well as some general-purpose ones for various plants; all can be bought in agronomy markets. Just mix them properly according to the instructions on the label and then water the plants.
Watering with nutrient solution is the key to soilless culture. The principle of standard nutrient solution watering is: water on sunny days, do not water on cloudy and rainy days; water less in the early growth stage, and more during the fruiting stage. The nutrient solution can be recovered and reused in a cycle; generally the nutrient solution should be completely replaced once about every 20 days.
For soil culture, traditional fertilizers can be used, and nutrient solutions can also be used. If traditional fertilizers are used, it is best to choose organic fertilizers, including plant-based fertilizers and animal manure, and avoid chemical fertilizers as much as possible, because chemical fertilizers leave acid or salt radicals, and the potting soil will become acidic or alkaline, hindering plant growth. Various special organic fertilizers are available in agronomy markets; you can choose a suitable organic fertilizer according to the type of vegetable.
Make your own organic compost from kitchen scraps
If you like DIY, you can also make your own organic compost from kitchen scraps. This not only reduces the amount of garbage and makes full use of waste, but is also economical and environmentally friendly. The method of making your own organic compost is very simple: first spread broken tiles or window screening at the bottom of the planting container to line the pot, then cover with about 2 cm of soil, then put the drained kitchen scraps into the container (about 3 cm), then cover with a layer of thick soil (about 6-9 cm). The compost is then ready, and you can sow and plant directly in this container.
Fertilizing tips
1. If the vegetables need transplanting, wait until after transplanting before watering with nutrient solution.
2. If the vegetables are sown directly and do not need transplanting, then first water with tap water to keep the soil moist; only after the seeds germinate and the seedlings emerge can the nutrient solution be used.
3. Although different plants have different water requirements, basically watering once a day with nutrient solution is more appropriate. For leafy vegetables, you can water with nutrient solution twice a day.
4. Water less with nutrient solution in the early growth stage, and more during the fruiting stage.
5. It is recommended to thoroughly rinse the planting container with tap water only at least once a week to remove unused fertilizer that has accumulated in the container. The specific method is to pour enough water into the container so that free drainage forms at the bottom. This measure can prevent the accumulation of harmful substances in the growing medium.
6. Sometimes, vegetables can be watered with a nutrient solution supplemented with trace elements. You can choose water-soluble fertilizers containing iron, zinc, boron and manganese, and operate according to the instructions on the label. Note: abusing nutrient solution may carry the risk of causing excessive nitrate levels in vegetables.
The Complete Guide to Balcony Vegetable Growing Part Four: Sowing and Transplanting
There are two ways to plant vegetables: one is to raise seedlings first and then transplant, and the other is direct sowing. Beginners often prefer to buy seedlings directly from agronomy markets and take them home to transplant. This is a simple and quick method, but it will narrow your planting range, because some vegetables such as beans and radishes are not convenient to transplant and can only be direct-sown -- transplanting will damage normal root development, so they cannot be transplanted. Some vegetables, however, must be transplanted, such as cabbage, cauliflower, mustard greens, and eggplant.
Vegetable growing can basically be divided into four processes: seed pre-treatment, sowing, transplanting, and harvesting. The table below shows growth information for common home-grown vegetables. Because vegetable varieties differ and regions differ, the table below may differ from your actual practice, so it is for reference only. What matters is to be flexible during the process, understand the patterns of the vegetables, and as you gain experience, you will surely become an excellent "vegetable grower"!
Cultivation information for common home-grown vegetables
Vegetable Germination time (days) Best transplanting stage (weeks) Container size Light amount* Harvest time (days) Bush bean 5-8 - Medium Full sun 45-65 Cucumber 5-8 3-4 Large Full sun 50-70 Eggplant 8-12 6-8 Large Full sun 90-120 Leaf lettuce 6-8 3-4 Medium Partial sun 45-60 Onion 6-8 6-8 Small Partial sun 80-100 Green pepper 10-14 6-8 Large Full sun 90-120 Radish 4-6 - Small Partial sun 20-60 Pumpkin 5-7 3-4 Large Full sun 50-70 Tomato 7-10 5-6 Large Full sun 90-130 Chinese chives 9-12 6-8 Medium Partial sun 90-120 Cilantro 5-7 3-4 Small Partial sun 40-50 Baby bok choy 4-6 3-4 Medium Partial sun 40-50
Note: All vegetables grow best in full sun. "Partial sun" means the vegetable can also grow well under partial sun conditions.
Seed pre-treatment
Disinfection:
Seeds often carry bacteria. To reduce seedling-stage diseases, ensure that the seedlings grow strong, let yourself and your family eat healthy vegetables, and avoid giving up halfway through your efforts, it is best to give the seeds a simple disinfection treatment before sowing. For seeds generally bought from the market, soaking in warm water is enough. Put the seeds in hot water at 60°C and soak for 10-15 minutes, then lower the water temperature to 30°C and continue soaking for 3-4 hours. Take them out and let them dry. For seeds with unclean surfaces, those stored for a long time, or those already contaminated, the chemical liquid soaking method can be used. Generally, a 1:100 formalin solution is commonly used: first soak the seeds in clean water for 3-4 hours, then put them into the chemical liquid and soak for 20 minutes, take them out and rinse clean with clean water.
Germination promotion:
Whether seeds need germination promotion depends on the situation. Seeds of fruiting vegetables such as tomato, pepper, eggplant and cucumber germinate relatively slowly, so germination can be promoted. Before promoting germination, the seeds must be soaked, but the soaking time should not be too long. Tests have shown that soaking cucumber for 1-2 hours, and pepper, eggplant and tomato for 3-4 hours is more suitable (including the soaking time during seed disinfection). Line the bottom of a seedling tray with several layers of gauze, filter paper or absorbent paper towel, moisten it with clean water, drain the soaked seeds, place them in the seedling tray, and keep them in an environment of 28-30°C for 1-5 days, until the seeds germinate and show white, then they can be sown. During germination promotion, if the seeds dry out, add water to the seedling tray to keep the gauze and other bedding material moist, so as to keep the seeds moist.
Sowing: For direct sowing, simply sow the seeds directly into a planting container of appropriate size. For those that need transplanting, first choose a moderately sized plastic tray, glass tray or other container as a "seedling tray." Put culture soil with a moderate pH into the container (available at garden stores or agronomy markets), scatter the vegetable seeds into the container, then cover with 0.5-1 cm of soil. Remember that seeds buried too deep will not germinate. Suitable temperature, sufficient water and oxygen are the three essential factors for seed germination. Place the container in a relatively warm, well-ventilated place, and water appropriately (for most vegetable seeds, watering once a day is appropriate). Before sowing, it is best to disinfect the sowing tray with 50% bleach or another disinfectant to reduce the chance of contaminating the seeds.
Transplanting: When the seedlings reach a certain size, they must be moved promptly to other containers for planting. For example, tomato and eggplant generally should be transplanted when they have 4-5 true leaves, melons when they have no more than 2-3 true leaves, and cabbage and Chinese cabbage when they have 4-6 true leaves.
When transplanting, be careful not to damage the tender roots of the seedlings. Before digging up the seedlings, water the soil or medium thoroughly so that more soil or medium clings to the roots. This not only reduces damage to the roots, but also increases water absorption, so they establish faster after transplanting. Generally, leafy vegetables should be planted at a depth that does not bury the lowest leaves, otherwise they are prone to rot.
Vegetables can be grown in soil or by soilless culture. For these two different growing media, the methods of fertilizing and watering are largely the same; see "The Complete Guide to Balcony Vegetable Growing Part Three: Soil and Fertilizer" for details.
Harvesting: The happiest moment is harvest time. Seeing the vegetables you carefully watered grow from seedlings into lush green leaves and abundant fruits, you can pick the fruits of your hard work and enjoy green, eco-friendly food!
When harvesting, pay attention to judging whether the vegetables are mature and at the best picking moment by their color, texture, firmness and other characteristics. Some vegetables such as tomatoes, peppers and fruits should be harvested when the fruit reaches a certain firmness; if overripe they become soft. Cucumbers, bush beans and the like should be harvested when young and tender, for better flavor.
It is best to harvest vegetables in the evening, because at that time the nitrate nitrogen content in the vegetables is lowest.
For harvesting bok choy, Chinese chives and the like, you can pick the leaves to eat without pulling up the whole plant; after a while, tender new leaves will grow again.
When harvesting scallions, leave two or three in the soil instead of pulling up the whole plant, so that they will continue to tiller and grow.
The Complete Guide to Balcony Vegetable Growing Part Five: Diagnosis and Prevention of Common Pests and Diseases
Vegetables grown in containers, like vegetables grown in the field, may also be attacked by various diseases and insect pests. Pay attention to observing whether the leaves, stems and other organs of the vegetables are growing well and whether pests appear. Once a problem is found, first determine whether it is caused by environmental conditions such as water, light or temperature, or by medium fertility. After ruling out these factors, then determine whether it is a disease or a pest.
Common problems in container vegetable growing and their prevention and control measures
Symptom Cause Measure Spindly, elongated plants that do not bear fruit Insufficient light Move the container to a place with sufficient light Excessive nitrogen Reduce the nutrient content in the nutrient solution Plants turn yellow from the bottom, lack vigor, and look dull Overwatering Reduce watering frequency and check whether the container drains well Insufficient fertility Increase the nutrient content in the nutrient solution Plants still wilt despite sufficient watering Poor drainage and ventilation Add more drainage holes to the container and increase the organic matter content in the growing medium Leaves have scorched edges High salt content in the medium Regularly rinse the container with tap water Plants grow slowly, have weak resistance, and appear slightly purple Low temperature Move the container to a warmer place Low phosphate Increase the phosphate content in the nutrient solution Leaves are twisted or notched Pests Spray eco-friendly insecticide Yellow spots, blight spots, powdery spots or rust spots on leaves Diseases Remove the affected parts and spray an eco-friendly fungicide
After confirming that the vegetables have a pest or disease problem, you can refer to the following articles to diagnose which disease or pest it is, then buy the corresponding insecticide or fungicide from a garden store and apply the right remedy.
Methods for diagnosing vegetable pests
Vegetable pests and diseases can be diagnosed by identifying the morphological characteristics of the pests at each stage, or by the remains left behind by the pests. Pest remains include egg shells, pupal cases, shed skins, residual hairs on the insect body and dead insect corpses, as well as pest excrement such as feces, honeydew substances, silk webs, and foamy substances.
1. Leaves are eaten, forming notches. These are mostly eaten by lepidopteran larvae and coleopteran pests with chewing mouthparts.
2. There are linear streaks or grayish-white or grayish-yellow spots on the leaves. This symptom is mostly caused by pests with piercing-sucking mouthparts, such as leafminers or stink bugs.
3. Seedlings are bitten off or cut through. This is mostly done by crickets or leaf moths.
4. Honeydew secretion and sooty mold. Such pests cause black spots by producing honeydew-like excrement that covers the surface of the vegetables. They are often mainly sap-sucking, liquid-excreting pests, such as various aphids.
5. The heart leaves shrink and thicken. This symptom mostly appears on sweet peppers and chili peppers, and is related to mite pests. 6. The interior of the vegetable is damaged. Such pests generally enter the interior of the vegetable and are difficult to see from the outside. If fresh pest droppings are found on or around the plant and there are fresh entry holes on the plant, it can be judged that the pests are far inside the vegetable causing damage. Sometimes, although there are droppings and entry holes, the droppings and entry holes have already dried up, indicating that the pests have moved elsewhere. Such pests are mostly moth pests and larvae.
7. The upper part of the seedling wilts and dies. This indicates that the roots of the vegetable have been damaged. This is mostly caused by underground pests, such as mole crickets, root mites, and root-knot nematodes.
8. Block-like fruits are bored into and rot. For example, the underground tubers of potato, onion and garlic rot or are bored into during growth and storage. These are mostly caused by weevils, root mites and the like.
Use these characteristics to identify the pests and take corresponding prevention and control measures. First rule out the influence of other factors, such as excessive fertilizer or water causing the upper part of the vegetable seedlings to wilt and die.
Cultivate children's joy of growing plants
When children grow flowers and plants, the plants also educate the children. Growing flowers and vegetables can help children understand that plants, like people, also need food and water to grow and stay healthy. Caring for plants not only helps cultivate a child's sense of responsibility, but also stimulates a child's curiosity and imagination. Let children immerse themselves in the wonders of nature, such as seeds sprouting, flowers blooming, bees gathering nectar and insects pollinating, and lead your children to explore the mysteries of nature.
Create a little "garden" for your child
Set aside a small patch of the garden for your child as his or her own garden, and make it clear that this is his or her own territory and will not be occupied. This helps cultivate the child's sense of responsibility and independence. Generally, for children under 10 years old, one square meter is enough. If there is no garden, you can prepare several flower pots or other growing containers and place them on a balcony or windowsill, and they can likewise become a "garden" that the child loves.
Discuss with your child where to build the "garden." Discuss with your child where the "garden" should be located. This process is a good opportunity to help the child understand that plant growth needs sunlight, water and fertile soil! Then choose a suitable location together with your child.
Choose gardening tools specially for children
Choose gardening tools in a size suitable for children to use, to ensure safety and convenience when the child carries out gardening activities.
Carefully choose plants that are easy to grow, easy to keep alive and interesting
Children get discouraged easily, so it is very important to ensure that his or her first growing experience is successful and fruitful. First choose some plants that are easy to grow, easy to keep alive and fast-growing. Large-seeded plants such as sunflower, zinnia, pea and pumpkin are the easiest to grow and grow quickly. Although radish seeds are not large, they grow very fast and are also favored by children. On the basis of being easy to grow, you can choose some interesting plants to attract the child's attention and maintain their enthusiasm for growing.
Choose bright, eye-catching flowers. Children like beautiful and lively things. Therefore, you can choose bright, eye-catching flowers such as garden balsam, moss rose, dahlia, pot marigold, black-eyed Susan, autumn chrysanthemum, periwinkle, begonia, cockscomb, five-pointed star flower, morning glory, ageratum, sweet alyssum, phlox and so on.
Choose fruits and vegetables that children like. If what they grow can ultimately be eaten, this is also very attractive to children. You can choose to grow some melons, fruits and vegetables, such as carrot, radish, cucumber, potato, pepper, tomato, cauliflower, cherry, apricot, strawberry and so on.
Choose aromatic plants. Plants release fragrance to attract pollinating insects or to stop pests from eating their leaves. These fragrances may also attract your child. You can also grow some aromatic plants such as lavender, mint, vanilla and basil.
Drink a little less alcohol, and it is good for the liver
Smoke a little less, and it is good for the lungs
Earn a little more money, and it is good for life
Exercise a little more, and it is good for the body
Husband and wife, think of each other a little more, and it is good for the family
Couples, be a little more clingy, and it is good for love
Mood, let go a little more, and it is good for the emotions
Mind, keep it a little cleaner, and it is good for thinking and the mind
Positive energy, share it a little more diligently, and it is good for your connections.
The text and images all come from the internet. If this goes against the original author's wishes, please contact us promptly so that we can delete it in time and protect your rights.
The Complete Guide to Balcony Vegetable Growing~~!!
Click the blue words "Network Entrepreneurship Alliance" above to subscribe for freeFollowing this platform means following wealth, health, confidence and beauty!
-23264163) A successful internet entrepreneurship platform; helping ordinary people with dreams improve their quality of life and change their destiny through entrepreneurship!
The Complete Guide to Balcony Vegetable Growing Part One: What vegetables to grow on a balcony?
"Growing flowers is good, but growing vegetables is even better." If flowers are grown well, they can be enjoyed; if vegetables are grown well, you can not only eat the pollution-free vegetables you grew yourself, but the green branches and leaves and abundant fruits can also become a beautiful scene. But we city dwellers living in a jungle of reinforced concrete do not have large tracts of land, so how can we grow vegetables? No worries, a small balcony is actually also a good place to grow vegetables. Below we introduce the knowledge, methods and tips of balcony vegetable growing one by one. First, we introduce what vegetables are suitable for growing on a balcony.
Choose vegetables according to orientation
What vegetables to grow on a balcony depends, on the one hand, on personal preferences and needs, and on the other hand, on which vegetables suit the environmental conditions of your balcony. Generally speaking, if space allows, most vegetables and fruits can be grown on a balcony. The so-called environmental conditions of the balcony mainly refer to the balcony's orientation and whether it is enclosed. Orientation determines the lighting conditions of the balcony, while whether the balcony is enclosed determines its temperature conditions. A fully enclosed balcony also has a higher temperature in winter and is less restricted by temperature, so the range of vegetables that can be chosen is also relatively wide, and basically vegetables can be grown all year round. A semi-enclosed or unenclosed balcony has a lower temperature in winter, so it is generally not easy to grow vegetables in winter, and in summer direct sunlight causes the temperature to be too high, so attention must also be paid to shading to protect the vegetables.
More importantly, consider the balcony's orientation. Under conditions where temperature allows, vegetables should generally be chosen according to the balcony's orientation.
A south-facing balcony has full sun, sufficient sunlight and good ventilation, and is the most ideal balcony for growing vegetables. Almost all vegetables grow best under full sun, so general vegetables can be grown all year round on a south-facing balcony, such as cucumber, bitter melon, tomato, bush bean, daylily, New Zealand spinach, mustard greens, zucchini, green pepper, lettuce, Chinese chives and so on. In addition, aquatic vegetables such as lotus root, water chestnut and water caltrop are also suitable for growing on a south-facing balcony. In winter, most places on a south-facing balcony can receive direct sunlight, and by setting up simple insulation equipment, a good environment can also be created for producing vegetables in winter.
East-facing and west-facing balconies have partial sun and are suitable for growing sun-loving, shade-tolerant vegetables, such as onion, leaf lettuce, baby bok choy, Chinese chives, loofah, cilantro, radish and so on. But a west-facing balcony has a higher temperature in summer during the west sun, causing some vegetables to suffer sunscald, with mild cases losing leaves and severe cases dying. Therefore, it is best to plant climbing, heat-tolerant vegetables in the corners of the balcony. In summer, measures should also be taken to defend against the strong light and reflected radiation coming from buildings behind.
A north-facing balcony has almost no sunlight all day, and the range of vegetables to choose from is the smallest. Shade-tolerant vegetables should be chosen, such as lettuce, Chinese chives, asparagus, Chinese toon, dandelion, water spinach, Ceylon spinach and so on. In summer, measures should also be taken to defend against the strong light and reflected radiation coming from buildings behind.
Which vegetables are most suitable for growing on a balcony?
Short-cycle, fast-growing vegetables: baby bok choy, green garlic, sprouting vegetables, mustard greens, bok choy, leaf lettuce
Vegetables with a long harvest period: tomato, pepper, Chinese chives, coriander, cilantro, scallion, etc.
Space-saving vegetables: carrot, radish, lettuce, scallion, ginger, cilantro
Easy-to-grow vegetables: bitter melon, carrot, ginger, scallion, lettuce, baby bok choy
Vegetables less prone to pests: scallion, Chinese chives, sweet potato leaves, ginseng herb, aloe, corner vegetable
What vegetables should beginners choose? Beginners can choose vegetables that are easy to grow or fast-growing vegetables. For example, bok choy and leaf lettuce, these two fast-growing vegetables, can be grown all year round and grow relatively quickly, and can be harvested in about five or six weeks. Bitter melon, scallion, ginger and the like have strong adaptability and have a special odor themselves, so insects do not like to approach them, and they can grow well without pesticides or chemical fertilizers.
Where to buy seeds and seedlings? Usually, the needed seeds or seedlings can be found at farm households, garden stores, flower markets, vegetable markets, agronomy markets, seed sales outlets and other places.
Foreign seed companies noticed the home vegetable-growing market long ago and have continuously bred dwarf and mini varieties of various vegetables to suit growing in small spaces. Such dwarf and mini varieties are still rare in our market, but it is believed that as more and more people like growing vegetables at home, such vegetable seeds on the market will also increase, for us to choose from.
The Complete Guide to Balcony Vegetable Growing Part Two: What containers to use for growing vegetables?
Almost any type of container can be used to grow vegetables, as long as it is sturdy enough and can provide enough space and drainage channels. In addition to traditional flower pots, flower troughs and other specialized containers, many household items can be used after modification, such as plastic basins, buckets, flower boxes, flower troughs, wooden boxes, aluminum boxes, galvanized iron boxes, plastic boxes, jars, food cans, and even bathtubs, tires, burlap sacks, barbecue trays and so on. But no matter what container is chosen, make sure there are drainage holes at the bottom.
Household items such as basins, buckets, boxes, jars, baskets and pots can all be used to grow vegetables
Tuberous vegetables such as potatoes can be grown in bags
Scallions, Chinese chives, garlic sprouts and the like can be grown in barbecue trays
Tires, burlap sacks and the like are also good containers for growing vegetables. Drainage holes: No matter what kind of container is chosen to grow vegetables, it is essential to ensure there are drainage holes at the bottom to ensure smooth drainage. Container drainage is very critical. Poor drainage causes plant roots to suffocate and rot; too-fast drainage will cause plants to lack water and wither and die. Professional containers such as flower pots and flower troughs bought on the market all have drainage holes at the bottom. For containers modified from household items, you need to drill several drainage holes yourself. Generally, you can evenly drill several drainage holes with a diameter of 0.5-1 cm around the bottom.
To avoid soil loss when watering, you can "line the pot," that is, cover the drainage holes with broken flower pot pieces, tiles or window screening. The requirement is to block the drainage holes while still allowing drainage. To promote drainage, you can put some coarse gravel or small stones on top of the pot-lining material to keep drainage smooth.
When growing climbing plants such as cucumber and bush bean, you can install a "cage" on the flower pot as support
Material: Generally speaking, pottery and wooden containers drain faster than plastic containers and need more watering. Do not place plastic containers by the window, because plastic utensils are light and easily blown over by the wind. Do not use wood containers that have undergone high-pressure treatment. Chemical preservatives are added during high-pressure treatment. Although this method enables the treated wood to be protected from termites, decay and other harmful factors for a long time, the wood itself also contains toxic substances that will poison plants. If making wooden containers yourself, it is best to use rot-resistant wood such as pine and fir.
For the material and selection of flower pots, please refer to "Home Gardening: How to Choose Flower Pots?"
Color: Use black containers with caution, because black absorbs heat and may damage plant roots. If a black container is chosen, it is best to coat it with a lighter-colored paint, or just shade the container to avoid direct sunlight.
Size: The size of the container is very important. When choosing containers for growing vegetables, it is better to err on the larger side. A larger container not only has ample room for fertilizer, but also holds more water and will not dry out quickly in summer. Tomato, pepper, bush bean and the like need larger containers; generally a container of about 15-20 liters is enough. When buying seeds and seedlings, it is best to ask the seller what size container is needed, how to water and fertilize, and so on.
The Complete Guide to Balcony Vegetable Growing Part Three: Soil and Fertilizer
Soilless culture: So-called soilless culture is the technique of growing plants without soil, using a medium (including rock wool, peat, vermiculite, perlite, bark, sawdust, water, etc.) and nutrient solution. Soilless culture not only grows fast, yields high and has good quality, but also has fewer pests and diseases and is clean and tidy. It only needs watering with nutrient solution, and management is very convenient.
Soil culture with culture soil: Home vegetable growing can also use the soil culture method. Soil culture is relative to soilless culture and also has its advantages, such as a strong buffering capacity for pH, good fertilizer and water retention, and the activities of various beneficial bacteria being beneficial to plant growth. Home vegetable growing usually uses organically cultivated culture soil. These culture soils can all be bought in agronomy markets, and special culture soil can be chosen according to the type of vegetable.
Some people dislike the poor planting results of soil bought from the market, and some people like DIY, so you can also mix your own culture soil. For the ingredients and preparation methods of culture soil, please refer to the following article:
What is culture soil? What types of culture soil are there?
In order to meet the needs of the growth and development of flowers, especially potted flowers, according to the different soil requirements of various varieties, soil specially prepared artificially that contains rich nutrients, has good drainage and permeability (air permeability) performance, can retain moisture and fertilizer, does not crack when dry, does not stick together when moist, and does not form a crust after watering is called culture soil.
There are many types of culture soil. The commonly used ones are the following:
Leaf mold is made by piling up fallen leaves, dry grass, vegetable peelings and the like to ferment and decompose. Put these materials into a pit, layer by layer with one layer of leaves (or dry grass, vegetable peelings), one layer of garden soil, sprinkle some livestock or poultry manure and urine, repeat for several layers, cover with soil and seal the top. After more than half a year, mix the rotted leaves and the like with the garden soil, then sift, dry in the sun, and store for later use. This kind of culture soil has rich humus and excellent physical properties, is good for fertilizer retention and drainage, and is loose and acidic.
Barnyard manure soil: Barnyard manure is made by piling up cow manure, horse manure, pig manure, sheep manure, poultry manure with soil and weeds to ferment and decompose. After decomposition, it should also be dried in the sun and sifted before use. It contains nutrients and humus.
Garden soil and field mud: Garden soil and field mud refer to the topsoil in a garden or field, that is, the mature soil for cultivating crops, which is piled up, sun-exposed, and then placed indoors for later use.
Pond mud Pond mud is used more often in the south. It is made by digging mud out of ponds, forming it into thin blocks, drying them in the sun and storing them for later use; when needed, break up the thin blocks. Its advantages are that it is rich in nutrients and has good drainage, and it is neutral or slightly alkaline.
Rice husk ash Rice husk ash is mainly the ash from burning rice husks or rice straw, also called plant ash. It loosens the soil, aids drainage, contains potassium fertilizer and is slightly alkaline.
Yellow sand Generally, river sand used as a growing medium helps drainage and aeration. Before use it must be rinsed with clean water to remove salts.
Sawdust After sawdust is piled up, fermented and decomposed, it is blended with soil to make the growing medium loose and to give it good water retention. It is a newly developed growing medium material in recent years.
Brick residue Crushing tiles or bricks helps drainage and aeration, but it lacks nutrients.
Garbage soil Garbage soil is called "returned-soul soil". It is made from the waste soil left after repotting, supplemented with manure and piled up. After this soil is decomposed, sift it and dry it in the sun for later use.
How do you mix a growing medium?
Because different plants have different nutrient requirements, different degrees of tolerance to acidity and alkalinity, and different requirements for drainage and aeration, the mixing ratios also differ. For the basic requirements of a growing medium, the following principles should be grasped:
① It should have nutrients in appropriate proportions, including trace elements such as nitrogen, phosphorus and potassium.
② It should be loose, well aerated and well drained.
③ It should be free of pests, diseases and other harmful substances that endanger the growth of flowers and trees, such as insect pupae.
④ Remove impurities such as grass roots and gravel, sift it and carry out general disinfection, such as exposure to sunlight or heating and steaming.
Several growing medium formulas suited to the needs of different potted plants are as follows:
Soil for sowing and seedlings 2 parts leaf mold, 1 part garden soil, a small amount of barnyard manure, a small amount of sand. Or 1 part leaf mold, 1 part garden soil, 1 part rice husk ash, a small amount of barnyard manure.
Soil for general potted flowers 1 part leaf mold, 1 part garden soil, 0.5 part rice husk ash, 0.5 part manure soil. Or 1 part leaf mold, 1.5 parts garden soil, 0.5 part manure soil.
Soil for shade- and moisture-tolerant plants 0.5 part leaf mold, 2 parts garden soil, 1 part manure soil, 0.5 part rice husk ash.
Soil for cuttings Because cuttings do not need nutrients before rooting, yellow sand or vermiculite is often used. For example, 1 part garden soil and 1 part rice husk ash; or 1 part garden soil and 1 part leaf mold will also do. For some flowers, cuttings can also be rooted in rice husk ash alone.
Soil for acid-loving plants Use mountain soil or leaf mold and garden soil plus a small amount of yellow sand.
Soil for succulents Use 0.5 part yellow sand, 0.5 part garden soil and 1 part leaf mold. Or 1 part brick residue and 1 part garden soil.
Soil for camellias, azaleas and banana shrubs 2 parts leaf mold, 1.5 parts yellow mud, 0.5 part burnt mud ash, 1 part sand, plus a small amount of bone meal, etc.
Soil for orchids At present, black mountain soil is mostly used, that is, leaf mold naturally accumulated from fallen leaves in mountain forests, or leaf mold with a small amount of yellow sand added.
In addition, there are the following soil-type formulas: Loose soil 2 parts garden soil, 1 part rice husk ash. Suitable for cuttings. Light fertile soil 1 part garden soil, 2 parts leaf mold, 1 part manure soil. Suitable for plants with weaker root development and for fine small seeds. Heavy fertile soil 2 parts garden soil, 1 part leaf mold, 1 part barnyard manure. Suitable for the cultivation of general flowers. Clay fertile soil 2 parts garden soil, 1 part manure soil. Suitable for cultivating palms, sago palms and other plants with thick large roots, as well as rhizomatous plants.
What fertilizer should be used for growing vegetables at home? Fertilizing vegetables in soilless culture is the simplest: just water with nutrient solution. The formulation of a soilless culture nutrient solution must contain major elements such as nitrogen, phosphorus, potassium, calcium, magnesium and sulfur, and trace elements such as iron, manganese, boron, zinc, copper and molybdenum. Some nutrient solution formulas are dedicated to specific plants, and some are general-purpose for many plants. They can all be bought in agronomy markets. Mix them reasonably according to the instructions on the label and then water with them.
Watering with nutrient solution is the key to soilless culture. The principle of standard nutrient solution watering is to water on sunny days and not on cloudy or rainy days; water less in the early growth stage and more during the fruiting stage. The nutrient solution can be recovered and reused cyclically; generally, completely replace the nutrient solution once about every 20 days.
For soil cultivation, traditional fertilizers can be used, and nutrient solution can also be used. If traditional fertilizers are used, it is best to choose organic fertilizers, including plant-based fertilizers and animal manures, and to avoid chemical fertilizers as much as possible, because chemical fertilizers leave acid radicals or salt radicals, and the potting soil will become acidic or alkaline, hindering plant growth. There are various special organic fertilizers on the agronomy market; choose a suitable organic fertilizer according to the vegetable type.
Making organic compost from kitchen waste at home If you like DIY, you can also make organic compost from kitchen waste. This not only reduces the amount of garbage and makes full use of waste, but is also economical and environmentally friendly. The method for making homemade organic compost is very simple: first line the bottom of the planting container with broken tiles or window screen for drainage, then cover with about 2 cm of soil, then put the drained kitchen waste into the container (about 3 cm), then cover with a layer of thick soil (about 6-9 cm). The compost is then made, and you can sow and plant in this container.
Fertilizing tips 1. If the vegetables need transplanting, wait until after transplanting before watering with nutrient solution.
2. If the vegetables are sown directly and do not need transplanting, first water with tap water to keep the soil moist; only after the seeds germinate and the seedlings grow can nutrient solution be used. 3. Although different plants have different water requirements, basically watering with nutrient solution once a day is fairly appropriate. For leafy vegetables, you can water with nutrient solution twice a day. 4. Water less nutrient solution in the early growth stage and more during the fruiting stage.
5. It is recommended to thoroughly rinse the planting container with tap water only at least once a week to remove unused fertilizer accumulated in the container. The specific method is to pour enough water into the container so that free drainage forms at the bottom. This measure can prevent the accumulation of harmful substances in the growing medium.
6. Sometimes, vegetables can be watered with nutrient solution supplemented with trace elements. You can choose water-soluble fertilizers containing iron, zinc, boron and manganese and follow the instructions on the label. Note: abusing nutrient solution may carry the risk of causing vegetables to exceed nitrate limits.
The complete guide to growing vegetables on a balcony, part four: sowing and transplanting There are two ways to plant vegetables: one is to raise seedlings first and then transplant, and the other is to sow directly. Beginners often prefer to buy seedlings directly from the agronomy market and take them home to transplant. This is a simple and quick method, but it will narrow your planting range, because some vegetables such as beans and radishes are not convenient to transplant and can only be sown directly -- transplanting will damage normal root development, so they cannot be transplanted. Some vegetables, however, must be transplanted, such as cabbage, cauliflower, mustard greens and eggplant.
Vegetable growing can basically be divided into four processes: pre-sowing seed treatment, sowing, transplanting and harvesting. The table below gives growth information for common home-grown vegetables. Because vegetable varieties differ and regions differ, the table may differ from your actual practice, so it is for reference only. What matters is to be flexible in practice and to understand the patterns of the vegetables. Once unfamiliar, twice familiar; I believe you will certainly become an excellent "vegetable grower"!
Cultivation information for common home-grown vegetables
Vegetable | Germination time (days) | Optimal transplanting stage (weeks) | Container size | Light amount* | Harvest time (days) |
Snap bean | 5-8 | - | Medium | Full sun | 45-65 |
Cucumber | 5-8 | 3-4 | Large | Full sun | 50-70 |
Eggplant | 8-12 | 6-8 | Large | Full sun | 90-120 |
Leaf lettuce | 6-8 | 3-4 | Medium | Partial sun | 45-60 |
Onion | 6-8 | 6-8 | Small | Partial sun | 80-100 |
Green pepper | 10-14 | 6-8 | Large | Full sun | 90-120 |
Radish | 4-6 | - | Small | Partial sun | 20-60 |
Pumpkin | 5-7 | 3-4 | Large | Full sun | 50-70 |
Tomato | 7-10 | 5-6 | Large | Full sun | 90-130 |
Chinese chives | 9-12 | 6-8 | Medium | Partial sun | 90-120 |
Cilantro | 5-7 | 3-4 | Small | Partial sun | 40-50 |
Baby bok choy | 4-6 | 3-4 | Medium | Partial sun | 40-50 |
Note: All vegetables grow best in full sun. "Partial sun" means that the vegetable can also grow well under partial sun.
Pre-sowing seed treatment
Disinfection: Seeds often carry bacteria. To reduce seedling-stage diseases, ensure that vegetable seedlings grow strong, let yourself and your family eat healthy vegetables, and avoid wasting your efforts halfway, it is best to carry out simple disinfection treatment on the seeds before sowing. For seeds generally bought from the market, soaking in warm water is enough. Soak the seeds in hot water at 60°C for 10-15 minutes, then lower the water temperature to 30°C and continue soaking for 3-4 hours; take them out and dry them and they are ready. For seeds with unclean surfaces, that have been stored for a long time, or that have already been contaminated, the chemical soaking method can be used. Generally, formalin at 100 times dilution is commonly used. First soak the seeds in clean water for 3-4 hours, then put them into the chemical solution and soak for 20 minutes, take them out and rinse them clean with clean water.
Germination promotion: Whether seeds need germination promotion depends on the situation. Seeds of fruit vegetables such as tomato, pepper, eggplant and cucumber germinate relatively slowly and can be given germination promotion. Before germination promotion, the seeds must be soaked, but the soaking time should not be too long. Tests have shown that soaking cucumber for 1-2 hours and pepper, eggplant and tomato for 3-4 hours is more suitable (including the soaking time during seed disinfection treatment). Line the bottom of a seedling tray with several layers of gauze, filter paper or absorbent paper towels, moisten them with clean water, drain the soaked seeds, place them in the seedling tray, and keep them in an environment of 28-30°C for 1-5 days until the seeds germinate and show white, then they can be sown. During germination promotion, if the seeds dry out, add water to the seedling tray to keep the gauze and other bedding material moist and keep the seeds moist.
Sowing For direct sowing, simply sow the seeds directly into a planting container of appropriate size. For those that need transplanting, first choose a plastic tray, glass tray or similar container of moderate size as a "seedling tray". Put a growing medium with a moderate pH into the container (available at garden stores or agronomy markets), scatter the vegetable seeds into the container, then cover with 0.5-1 cm of soil. Remember that seeds buried too deep will not germinate. Suitable temperature, sufficient water and oxygen are the three essential factors for seed germination. Place the container in a relatively warm, well-ventilated place and water appropriately (for most vegetable seeds, watering once a day is appropriate). Before sowing, it is best to disinfect the sowing tray with 50% bleach or another disinfectant to reduce the chance of contaminating the seeds.
Transplanting When seedlings reach a certain size, they must be moved promptly to another container for planting. For example, tomato and eggplant generally are transplanted when they have 4-5 true leaves, cucurbits when they have no more than 2-3 true leaves, and cabbage and Chinese cabbage types when they have 4-6 true leaves.
When transplanting, be careful not to damage the tender roots of the seedlings. Before digging up the vegetable seedlings, water the soil or growing medium thoroughly so that more soil or medium clings to the roots. This not only reduces damage to the roots but also increases water absorption, so they establish quickly after transplanting. For leafy vegetables generally, plant them at a depth that does not bury the lowest leaves, otherwise rot is likely.
Vegetables can be grown in soil or by soilless culture. For these two different growing media, the methods of fertilizing and watering are largely the same; see "The complete guide to growing vegetables on a balcony, part three: soil and fertilizer" for details.
Harvesting The happiest moment is harvest time. Seeing the vegetables you carefully watered grow from seedlings into lush green leaves and abundant fruits, you can pick the fruits of your hard work and enjoy green, environmentally friendly food!
When harvesting, pay attention to judging by features such as the vegetable's color, texture and firmness whether it is ripe and at the best picking moment. Some vegetables such as tomato, pepper and fruits should be harvested when the fruit reaches a certain firmness; if overripe they become soft. Cucumber, snap bean and others should be harvested while young and tender, when the flavor is better.
It is best to harvest vegetables in the evening, because in the evening the nitrate nitrogen content in the vegetables is lowest.
For harvesting bok choy, Chinese chives and the like, you can pick the leaves to eat without pulling up the whole plant, and after a while tender new leaves will grow again.
When harvesting scallions, leave two or three in the soil and do not pull up the whole plant, so that they will continue to tiller and grow.
The complete guide to growing vegetables on a balcony, part five: diagnosis and control of common pests and diseases
Vegetables grown in containers, like vegetables grown in the ground, may also be attacked by various diseases and insect pests. Pay attention to observing whether organs such as the leaves and stems of the vegetables are growing well and whether pests appear. Once a problem is found, first distinguish whether it is an environmental condition problem such as water, light or temperature, or a growing medium fertility problem. After ruling out these factors, then determine whether it is disease or insect damage.
Common problems in container vegetable growing and their control measures
Symptom | Cause | Measure |
Plants grow leggy, thin and spindly, and do not fruit | Insufficient light | Move the container to a place with sufficient light |
Excess nitrogen | Reduce the nutrient content in the nutrient solution | |
Plants turn yellow starting from the bottom, lack vigor and look dull | Overwatering | Reduce watering frequency and check whether the container drains well |
Insufficient fertility | Increase the nutrient content in the nutrient solution | |
Plants still wilt despite sufficient watering | Poor drainage and ventilation | Add more drainage holes to the container and increase the organic matter content in the growing medium |
Vegetable leaves have scorched edges | High salt content in the growing medium | Regularly rinse the container with tap water |
Plants grow slowly, have weak resistance and look slightly purple | Low temperature | Move the container to a warmer place |
Low phosphate | Increase the phosphate content in the nutrient solution | |
Leaves are distorted or have notches | Insect damage | Spray with environmentally friendly insecticide |
Leaves have yellow spots, blighted spots, powdery spots or rust spots | Disease | Remove the diseased parts and spray an eco-friendly fungicide |
Once you have confirmed that your vegetables have a pest or disease problem, you can refer to the following article to diagnose which disease or pest it is, then go to a garden center to buy the corresponding insecticide or fungicide and treat the problem accordingly.
How to diagnose vegetable pests
Vegetable pests and diseases can be diagnosed by identifying the morphological features of the pests at each stage, or by diagnosing the traces the pests leave behind. Pest residues include egg shells, pupal cases, shed skins, residual hairs on the insect body and dead insect carcasses, as well as pest excrement such as frass, honeydew substances, silk webbing and frothy substances.
1. Leaves are eaten, forming notches. These are mostly eaten by Lepidoptera larvae and Coleoptera pests with chewing mouthparts.
2. There are linear streaks or grayish-white and grayish-yellow spots on the leaves. These symptoms are mostly caused by pests with piercing-sucking mouthparts, such as leaf miners or stink bugs.
3. Seedlings are bitten off or cut through. This is mostly the work of crickets or leaf moths.
4. Honeydew is secreted and sooty mold develops. These pests produce honeydew-like excrement that coats the vegetable surface and causes black spots; they are mainly sap-sucking, liquid-excreting pests, such as the various aphids.
5. The heart leaves shrink and thicken. This symptom appears mostly on sweet peppers and chili peppers, and is related to mite pests. 6. The interior of the vegetable is damaged. These pests generally enter the interior of the vegetable and are very hard to see from the outside. If you find fresh pest droppings on or around the plant and fresh entry holes on the plant, you can judge that the pests are far inside the plant doing damage. Sometimes, although there are droppings and entry holes, the droppings and entry holes have already dried up, which indicates that the pests have already moved elsewhere. These pests are mostly moths and their larvae.
7. The upper part of the seedling wilts and dies. This indicates that the roots of the vegetable have been damaged, and this is mostly the work of underground pests, such as mole crickets, root mites and root-knot nematodes.
8. Bulbous fruits are bored into and rot. For example, the underground tubers of potatoes, onions and garlic rot or are bored into during growth and storage; this is mostly caused by weevils, root mites and the like.
Use these features to identify the pests and take corresponding control measures. First, rule out the influence of other factors, such as excessive fertilizer or water causing the upper part of the vegetable seedlings to wilt and die.
Cultivate children's joy in growing plants
When children grow flowers and plants, the flowers and plants educate the children too. Growing flowers and vegetables can teach children that plants, like people, need food and water to grow and stay healthy. Caring for plants not only helps cultivate a child's sense of responsibility, but also stimulates a child's curiosity and imagination. Let children immerse themselves in the wonders of nature, such as seeds sprouting, flowers blooming, bees gathering nectar and insects pollinating, and lead your child to explore the mysteries of nature.
Create a little "garden plot" for your child. Set aside a small patch of the garden for your child as his (her) own garden plot, and make it clear that this is his (her) own territory and will not be taken over. This helps cultivate a child's sense of responsibility and independence. Generally, for children under 10 years old, one sq m is enough. If there is no garden, you can prepare a few flower pots or other growing containers and place them on a balcony or windowsill, and they can likewise become a "garden plot" your child loves.
Discuss with your child where the "garden plot" should be built. Discuss with your child where the "garden plot" should be located. This process is a great opportunity to teach your child that plants need sunlight, water and fertile soil to grow! Then choose a suitable spot together with your child.
Choose gardening tools specially made for children. Choose gardening tools in sizes suitable for children to use, to ensure your child's safety and convenience during gardening activities
Carefully choose plants that are easy to grow, easy to keep alive and interesting. Children get discouraged easily, so it is very important to make sure his (her) first growing experience is a success and richly rewarding. First, choose some plants that are easy to grow, easy to keep alive and fast-growing. Large-seeded plants such as sunflowers, zinnias, peas and pumpkins are the easiest to grow and grow quickly. Although radish seeds are not large, radishes grow very fast and are also favored by little ones. On the basis of being easy to grow, you can choose some interesting plants to attract your child's attention and keep their enthusiasm for growing.
Choose bright, eye-catching flowers. Children like beautiful and vivid things. So you can choose bright, eye-catching flowers, such as impatiens, moss rose, dahlias, pot marigolds, black-eyed Susans, autumn chrysanthemums, periwinkles, begonias, cockscombs, starflowers, morning glories, mistflowers, sweet alyssum and phlox.
Choose fruits and vegetables that children like. If what they grow themselves can end up in their mouths, that is very appealing to little ones too. You can choose to grow some melons, fruits and vegetables, such as carrots, radishes, cucumbers, potatoes, peppers, tomatoes, cauliflower, cherries, apricots and strawberries.
Choose aromatic plants. Plants release fragrance to attract pollinating insects or to stop pests from eating their leaves, and these scents may also attract your child. You can also grow some aromatic plants such as lavender, mint, vanilla and basil.
Dear, have you learned it?
Sharing is a kind of wisdom, and passing it on is a virtue. Give someone a rose, and the fragrance lingers on your hand!
Please click the share button in the top right corner to share to your Moments; sharing wisdom brings boundless merit!
What? You still haven't followed this platform?! Does your family know!?
-----------------
Follow this platform (WeChat official account ID: Amway168-23264163)
------------------
Click hard on 'Network Entrepreneurship Alliance' under the title of this article -> Follow
Following means you have wealth, health, confidence and beauty!
(Qiankun System, work-from-home business QQ: 23264163)