How to propagate the giant spider lily? Detailed explanation of seed propagation and division propagation methods
The giant spider lily is a fairly common ornamental flower in people's lives, and it is grown in many regions of our country. As more and more people grow it, questions about its propagation have also drawn people's attention. So how do you propagate the giant spider lily? What are the propagation methods for the giant spider lily? Below, the editor will walk everyone through it.
I. How to propagate the giant spider lily: seeding/division
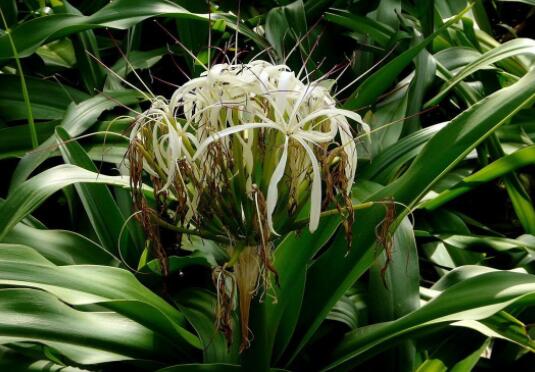
As for how to propagate the giant spider lily, it is mainly divided into two methods: seed propagation and division propagation. Among them, seed propagation is a method people use fairly often, and the survival rate is also fairly high, but there are also many points to pay attention to during the propagation process. The details are below, so let's keep reading.
II. Propagation methods for the giant spider lily
Seed propagation
1. Sowing time, March-April
The sowing time for the giant spider lily does have a certain effect on its survival rate. Choosing a suitable time to sow it can improve the survival rate. We can choose this suitable time in March-April each year, because the climate and environment at this time are both fairly suitable for the growth of the giant spider lily.
2. Substrate selection, humus soil
In the propagation process of the giant spider lily, first we need to choose soil. Only by choosing suitable soil can it grow vigorously. It relatively likes loose and fertile humus soil. This kind of soil has fairly good drainage and air permeability, and can let the giant spider lily grow better.
3. Seed germination, soak in warm water for 1-2 days
Harvested giant spider lily seeds are not suitable for direct sowing. Before sowing, we had best first soak them in warm water for 1-2 days. After the seeds begin to absorb water and swell, we can take them out and sow them. This can play a role in germinating the seeds and let them sprout faster.
4. Sowing method, scatter the seeds evenly
Among the propagation methods for the giant spider lily, seed propagation is fairly simple. First, we can evenly scatter the seeds on the selected substrate, then cover them with about 2 cm of soil and water them. When watering, be careful to water thoroughly at one time. After that, the seeds can sprout in about two weeks. After the seedlings grow 2-3 leaves, we can transplant them into small pots for care.
5. Follow-up management, pay attention to care
After transplanting the giant spider lily into a small pot, we can carry out normal care for it. There are also many points to pay attention to during care, such as fertilizing, light, watering and so on, all of which have many particular requirements. For details, everyone can refer to the article on how to grow the giant spider lily, which has detailed care instructions.
Division propagation
Division propagation of the giant spider lily can generally be carried out together with repotting in spring. First we need to take the mother plant out of the potting soil, then remove the soil from the roots, then peel off the surrounding bulbs, and plant them separately.
How to propagate the giant spider lily: seed propagation and division propagation methods
How to propagate the giant spider lily: it can generally be propagated by seeding and division. Flower lovers can choose a suitable propagation method according to their own conditions. Below are the steps for the giant spider lily's seed propagation and division propagation respectively.
How to propagate the giant spider lily 1. Seed propagation methodGiant spider lily seeds can be sown immediately after collection, generally better sown in autumn. The soil for sowing the giant spider lily is generally sandy loam or leaf mold, and the soil should also be disinfected. Flower lovers can sow the giant spider lily seeds on the prepared soil and cover them with a thin layer of soil, keeping the ambient temperature at 20°C?25°C,
After sowing the giant spider lily, the potting soil should not be too wet. Generally about 2 weeks after sowing, the seeds sprout. After the giant spider lily seedlings emerge and grow, flower lovers can gradually increase the amount of watering. Generally, seeded giant spider lilies take 3 to 4 years to bloom.
2. Division propagation methodThe division time for the giant spider lily is generally better in early spring together with repotting. You can first break off the rooted shoots around the mother plant of the giant spider lily, then place them in a cool place to dry for 1~2 days. After drying, they can be directly potted. In addition, when planting, they should not be planted too shallow, one giant spider lily per pot.
After potting, water once thoroughly, then place it in a semi-shaded place with little light for care and management. After the divided giant spider lily passes the seedling recovery period, it can be cared for normally.
Propagation methods for the giant spider lily
Seed propagation and division propagation are often used
Division
Division can be carried out in spring and autumn, with spring together with repotting being preferred. Turn the mother plant out of the pot, peel off the surrounding bulbs, and plant them separately.
Seeding
When the seeds are about to go into the soil, they need to be laid flat, with the sprouting end facing up
(1) Humus soil or fine sandy soil needs to be disinfected. (Humus soil needs to be soaked in boiling water, while fine sandy soil needs to be roasted and stir-fried. Maintain a temperature of about 25°C. Roots and sprouts appear in about 50-70 days.
(2) Select two or three leaves for transplanting, and during its germination period it must not be exposed to strong light.
(3) Seed propagation is best carried out in late autumn, sowing while collecting seeds, covering with soil at twice the diameter of the seed, always keeping the potting soil moist, watering more, and after it sprouts and emerges and grows about 3 true leaves, it can be planted.