How to Propagate Petunias? Sowing Time and Cutting Method Illustrated
Propagating petunias requires some skill, for example, you need to keep the temperature at 13-18 degrees, and choose a slightly acidic soil as the growing medium, and so on. Only when every aspect is correct can a relatively high success rate be ensured. So how do you propagate petunias? Let's take a look at the propagation methods for petunias.
How to Propagate Petunias
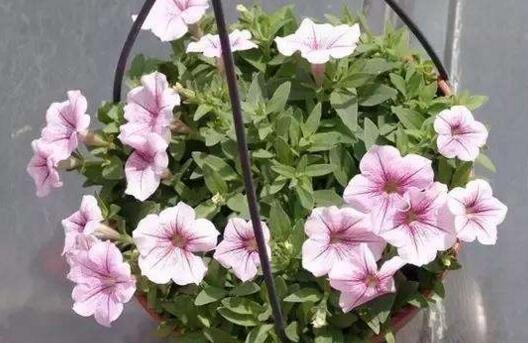
The commonly used petunia propagation methods are sowing and cuttings. Sowing can be divided into autumn sowing and spring sowing, while cuttings are often used for double-flowered petunias and large-flowered varieties. So when do you sow petunias? And what is the cutting method for petunias? A detailed introduction follows below.
Petunia Seed Propagation
I. When to Sow Petunias
For sowing, you can choose spring sowing or autumn sowing. Spring sowing is in late April, while autumn sowing is in October-November. When sowing, avoid the rainy season, so it is best to do it indoors, to prevent root rot caused by excessive rain.
II. Sowing Method
Before sowing, first fill the flower pot with the growing medium, generally made by mixing garden soil, leaf mold, fine sand and so on. Then scatter the selected high-quality seeds into the medium; there is no need to cover them with soil. Then spray the seeds with water and water the soil thoroughly.
Keep the temperature at 22-24 degrees; seedlings generally emerge in 4-7 days. If the temperature is kept at around 20 degrees, the emergence time is about 10 days. After the first pair of true leaves appears, you can apply some nitrogen fertilizer. When 2-3 pairs of true leaves have grown, lower the temperature to 18-20 degrees, then apply a compound fertilizer. After that, you can transplant and carry out normal care.
Petunia Cutting Method Illustrated
I. Cutting Time
The temperature after cutting is the key to its success. To make care and management easier, the time is generally chosen as May-June or August-September. These two periods make temperature control easier, and they are the times of year when cuttings are most likely to succeed.
II. Cutting Method
1. When choosing cuttings, how do you propagate petunias? Select healthy branches free of pests and diseases, cut them off from the base of a node, then trim them to a length of about 10 cm, making sure the cut is smooth and there are 2-3 leaves. Then soak the cut end in a potassium permanganate solution to disinfect it.
2. Insert the cuttings into the soil to a depth of about 1.5 cm, then water thoroughly and place in a semi-shady environment. Keep the soil moist, at a temperature of around 20 degrees. Avoid soil that is too wet, which can cause the cuttings to become infected and rot. They generally take root after 2-3 weeks.
Petunia Transplanting and Field Planting
1. Transplanting. When transplanting, the daytime temperature should be kept at around 27 degrees, and at night it needs to be kept above 15 degrees. The soil should be fertile and loose, but not too nutrient-rich, otherwise the plant is prone to leggy growth. Then give it plenty of light. Avoid injuring the plant when transplanting, so when transplanting the roots need to be kept with an intact soil ball.
2. Field planting. When the seedlings grow to a height of 15 cm, you can change them into a slightly larger pot. The field planting time is best chosen about 70 days before the flowering period. After field planting, fertilize and water reasonably, then make sure the soil drains well. After a period of patient care, you will see beautiful petunia flowers in full bloom.
Petunia Flower Photo Collection, Petunia Cutting Method (Illustrated)
The petunia is a plant introduced to our country from abroad, and it is currently widely cultivated in our country. Because of its high ornamental value, it is deeply loved by consumers. People like to grow it, but when growing it, you need to have a certain understanding of its cultivation techniques, so as to ensure its growth.
Petunia Cutting Method (Illustrated)
Cutting medium. Use a commercially sold potting soil, a mix of leaf mold and sandy soil, plus a little perlite, to maintain water permeability.
Cutting flower pot. Generally, the flower pot chosen should not be too large; a pot with a diameter of 15-20 is enough.
Cutting branches. Generally, do not choose old branches, as they are not easy to root. Choose healthy branches free of pests and diseases, cut below the node on the stem, about 10 cm, let the wound dry, remove all flower buds and fruits from the cutting, and remove 2/3 of the leaves.
Cutting temperature. The best cutting medium temperature is 18-20°C; pay attention to moisture retention. Pour the medium into the flower pot, and use scissors, chopsticks or a bamboo stick to make holes. The small holes should be 2-3 cm deep, spaced 6 cm apart.
Insert the cutting into the prepared small hole, then press the surrounding soil firm.
After everything is done, water thoroughly, then cover with plastic wrap. For indoor cuttings, place the cuttings where there is scattered sunlight. Remember not to lift the plastic wrap.
After 15-20 days, the cuttings will have rooted. If there is no wilting or rotting, that indicates the cuttings have survived. After 30 days, they can be transplanted into pots. Petunias recover relatively slowly after transplanting, so when potting up, take care to keep as much soil as possible.
Petunia Cutting Time Selection and Reasons
Petunias root relatively easily from cuttings. The time generally chosen for cuttings is spring and autumn, when the survival rate is high. In spring and autumn, the temperature is suitable and the air is dry, and constant temperature and high moisture can be achieved through human factors. Carrying out cuttings at this time can increase the survival rate through human effort.
The Growth Habits of Petunias
1. Sunlight and temperature. Petunias originate from South America and are long-day plants. They prefer a warm environment, but they are relatively adaptable to temperature. The suitable growth temperature is 13-18°C, and the temperature range they can withstand is about -2°C to 35°C, but if the temperature is below 4°C, the plant will stop growing.
2. Water and soil. Petunias need a sufficient water supply throughout their entire growth process, especially in the hot summer, when the pot soil should be kept moist morning and evening. In an outdoor environment, guard carefully against waterlogging, especially during the plum rain season, when you should pay even more attention to water control. Excess water leads to leggy stems and leaves, and long-term water accumulation can even cause root rot, and in the worst case the whole plant wilts and dies. In terms of soil choice, petunias should preferentially use fertile, loose, well-draining, slightly acidic sandy soil.
Petunia Care
1. After field planting, with reasonable care, the petunia seedlings will grow day by day and eventually become beautiful flower balls! Through pruning, pinching and disbudding the petunias, you can create a perfect flower ball. Early fertilization should use nitrogen fertilizer, and later you can use more phosphorus fertilizer, to make the seedlings stronger and bloom better. In summer care of petunias, note: when the temperature is too high, spray more water to maintain soil moisture. In winter, make sure petunias receive plenty of sunlight (temperature greater than 5°C); petunias have a certain ability to resist low temperatures.
2. Water less. It is recommended to water at noon when the sunlight is plentiful. Do not use too much water; just let the seedlings and flowers drink their fill! Petunia flowering period management methods and precautions. Petunias generally bloom in early spring in March, just as it turns warm. If the early flower shape is not attractive enough, you can cut it off. When many flower heads emerge at once, you can keep them and wait for them to bloom. During the flowering period, scientific fertilization should also be carried out; it is still recommended to fertilize on a 10-12 day cycle. Sufficient sunlight greatly improves the quantity and quality of flowering. If there is a lack of sunlight, it is prone to malnutrition——leaves turn yellow and soft, and the flower color is dull and smaller.
The cutting method for petunias is relatively simple. Before cutting, you need to do the preparatory work; all tools need to be disinfected. Then choose a suitable time to carry out the cutting. After cutting, you also need to strengthen its care and management, so that it can survive well.
When to Pinch Petunias, Petunia Disbudding Method (Illustrated)
Pinching and disbudding are very effective methods in the plant growing process for promoting normal plant growth. Through pinching and disbudding, you can effectively remove the plant's apical dominance, avoid leggy growth that wastes the whole plant's nutrients, and concentrate all the nutrients where they are most valuable.
When to Pinch Petunias
Pinching is the most important step in growing petunias. Many beginners end up with ugly flower shapes because they do not pay attention to pinching. For upright varieties, pinch more aggressively; the first pinching generally keeps 4-6 leaves, while trailing varieties keep 6-8 leaves, and side branches are treated the same way. In the meantime, pay attention to their branching condition. Generally, when the weather is relatively hot, branching is poorer, and flowering replaces branching. In winter, the branching ability is better; after pinching, new branches can basically emerge from the leaf axils.
Petunia Disbudding Method
1. The role of disbudding
If you do not disbud in time, the flower branches of the petunia will be like the picture above, and the plant can only produce a few flowers. There will also be very few branches, making it hard to achieve a full pot.
2. When to disbud
It is best to wait until the petunia has grown 5-6 leaves, then use flower scissors to cut off the top, leaving 4 leaves. When the branches have grown 5 leaves, you can prune again, "cut 3, keep 2." And so on, prune several more times (depending on the situation; 2-3 times can achieve the flower ball effect). Note that during daily care, you must clean up rotten flowers and leaves.
3. How to disbud
When flower lovers carry out the disbudding operation, the tool for disbudding can be scissors, or you can directly pinch off the top with your hands; feel free to try it. Also, if you feel that the cut branches are a waste, petunias can be propagated by cuttings; just take the cut branches directly, remove the leaves and keep the top core, sharpen the lower end, and you can insert them into the soil.
How Petunias Overwinter
1. Watering
First, you should follow the principle of "do not water if not dry; when you water, water thoroughly." The purpose of this principle is to prevent root rot and leaf drop, or leggy growth of young branches, caused by petunias absorbing excessive water. These situations will cause the later flower buds to be differentiated and the cold resistance to weaken.
Second, the water used for watering flowers in winter also needs to be exposed to sunlight before use. This is done to bring the water temperature close to room temperature.
Finally, the best time for watering is around noon. If you choose to water in the evening, the cold temperature can easily cause frost damage to the flower roots.
2. Fertilizing
Fertilization should be based on the specific growth condition of the petunia, with appropriate application of nitrogen fertilizer.
3. Other aspects
Because the winter air is relatively dry, indoors you should often use water close to room temperature to spray and wash the leaf surfaces of petunias, to keep the leaves clean and promote normal photosynthesis. But note that spraying water on the leaves must not increase the water in the pot soil, to avoid root rot.
Winter is also a season when pests such as aphids, scale insects and whiteflies are prone to occur, so prevention and control work must be done at all times. After aphids appear, try not to spray with fenvalerate, to avoid causing phytotoxicity, which is bad for the growth of petunias.
How to Make Petunias Fill a Pot
1. Temperature: you must ensure the temperature is within the range most suitable for it, to provide the foundation for it to fill a pot. For this plant, the most suitable range is 13 to 18 degrees. Once the temperature is relatively low, do not leave it outdoors any longer; move it indoors for care.
2. Light: to achieve the effect of filling a pot, sufficient light is a condition you must ensure. Especially when it is growing fast, this stage is the key period for filling a pot. During this period, unless the light is especially strong, there is no need to shade it.
3. Water: it grows relatively fast in summer, so it also needs more water. In the morning and evening, it is best to water twice. However, also pay special attention not to let water accumulate. In addition, do not let it get rained on too much.
4. Soil: first, the two requirements are loose and fertile. Then, considering that it cannot tolerate waterlogging, good drainage is required. Therefore, we had best choose sandy loam.
The methods of pinching and disbudding petunias are described in relatively detailed terms in this article. In short, to grow good petunias, there is still a lot to master, but friends who truly want to grow them, Zhifure will definitely work together with everyone to solve the difficulties in the growing process.