Spider Flower Sowing Time and Planting Method: The Substrate Must Be Sterilized Before Sowing
Among the propagation methods for the spider flower (Cleome hassleriana), sowing is a relatively common one, and having been tested by countless people, it still has a very high survival rate. However, there are many points to pay attention to if you want to grow it from seed. When should the spider flower be sown? What is the planting method for the spider flower? Below, the editor will walk you through it.
1. When to sow the spider flower: sow in spring
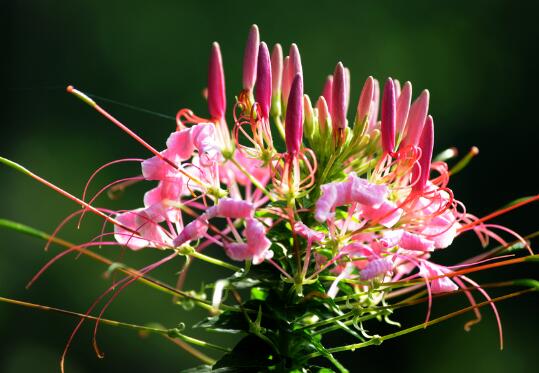
As for when to sow the spider flower, it is generally best to do so in spring. The growth pattern of this plant is not much different from that of ordinary crops: sown in spring and harvested in autumn. Moreover, spring is the season when all things revive, and the climate is very suitable, so choosing spring for sowing is the choice of the vast majority of plants.
2. Spider flower planting method
1. Substrate selection: slightly acidic sandy loam
The spider flower prefers loose, fertile, slightly acidic sandy loam, so we can choose this kind of soil as the substrate. This soil has relatively good drainage and aeration, which allows the spider flower to grow better and makes waterlogging less likely to occur.
2. Substrate sterilization: sun exposure or stir-frying
After choosing the substrate, we also need to sterilize it to prevent pests or bacteria in it from harming the plants. When sterilizing, we can break it up and put it under the sun to sterilize it, or we can put it in a pot and heat it while stirring, so that any pests and diseases will be killed by the heat.
3. Seed germination: soak in 25-30°C water
After sterilizing the substrate, we also need to germinate the seeds. We can soak the seeds in warm water at about 25-30°C for about 3-10 hours. When the seeds begin to absorb water and swell, we can take them out and sow them. This allows the seeds to sprout faster.
4. Planting method: water by the pot-soaking method after sowing
The planting method for the spider flower is actually very simple. Because its seeds are small, we can dip a toothpick in water and use it to stick the seeds one by one onto the surface of the substrate, then cover them with 1-2cm of substrate and water. When watering, we can place the flower pot in water and let the water slowly soak up from below.
5. Follow-up care: pay attention to light
After the spider flower seedlings emerge, we can let them receive light after 10 o'clock each day or at 3:30 in the afternoon, because if the light is too strong or they receive no light at all, the seedlings will grow very weak. So everyone should pay attention to the light exposure time. Later, after the seedlings grow 3 or more leaves, we can transplant them into pots.
How to sow the spider flower: seed planting method for the spider flower
The spider flower is generally propagated by seed sowing. So how do you sow the spider flower? Flower lovers must first prepare the planting materials for the spider flower in advance, including seeds, soil, flower pots, etc. Below is a summary of the steps for the spider flower seed planting method.
Spider flower seed planting method 1: Pot and soil preparationThe soil used for planting the spider flower needs to be sterilized before use. Generally, the potting soil can be put in a pot and heated while stirring, so that any pests and diseases will be killed by the heat.
The materials needed for the spider flower sowing substrate are peat and perlite. The perlite should be soaked thoroughly with water before use. Mix the imported peat and perlite at a ratio of 7:3, spray water to moisten the substrate, and then stir evenly to ensure the sowing substrate is loose and breathable.
2. Sowing and planting methodFor tiny seeds that are difficult to pick up with your hands or other tools, you can moisten one end of a toothpick with water and stick the seeds one by one onto the surface of the substrate, cover with substrate 1cm thick, then place the sown flower pot into water with the water depth at 1/2 to 2/3 of the pot's height, and let the water slowly soak up (this method is called the “pot-soaking method”);
For larger seeds that can be picked up with your hands or other tools, place the seeds directly into the substrate, spot-sowing at a spacing of 3×3 cm. After sowing, cover with substrate to a thickness 2 to 3 times that of the seeds. After sowing, use a sprayer or a fine-holed watering can to moisten the sowing substrate. Later, when the potting soil is slightly dry, water again. Still be careful not to water too forcefully, so as not to wash the seeds out.
3. Management after sowingAbout a week after sowing, the spider flower shows white, meaning the radicle has broken through the seed coat. After the seeds show white, they need to be watered thoroughly frequently. The best time to fertilize is to fertilize after every other watering, that is, after each watering, wait until the substrate has dried slightly, then fertilize. Alternate between two water-soluble fertilizers: a water-soluble compound fertilizer with a nitrogen, phosphorus, and potassium ratio of 14:0:14 and a water-soluble compound fertilizer with a nitrogen, phosphorus, and potassium ratio of 20:10:20. At this time, the fertilizer concentration is 100PPM.
After the seedlings emerge after sowing, promptly remove the plastic film, and let the seedlings receive sunlight before 9:30 every morning or after 3:30 in the afternoon, otherwise the seedlings will grow very weak.
After most of the seeds have emerged, appropriate thinning is needed: pull out the diseased and unhealthy seedlings so that the remaining seedlings have a certain amount of space between them; when most of the seedlings have grown 3 or more leaves, they can be transplanted into pots.
When the seedlings grow 2 true leaves, they need to be divided and transplanted once at a spacing of about 10 cm. When the small seedlings grow to about 5 cm, plant them out in the garden at a spacing of 30 cm to 40 cm between plants and rows.
When to sow the spider flower
Spider flower sowing season
The growth pattern of the spider flower is similar to that of ordinary crops: sown in spring and harvested in autumn. So, of course, sowing is chosen in spring, when all things revive.
When the seeds germinate, the temperature needs to be above 20°C. In early spring, they need to be sown under plastic tunnels for insulation before they can germinate uniformly. If the temperature is suitable, they will germinate about 1 week after sowing.
Flower lovers in the north can appropriately delay the sowing time, because spring in the north always arrives quite late!
Spider flower sowing soil
The method for preparing the sowing substrate: mix peat and perlite at a ratio of 7:3, add water and stir evenly. Evenly fill the prepared substrate into 128-cell plug trays, and gently smooth the substrate on the surface of the tray. After filling, gently move it onto the greenhouse bench and water thoroughly with a 1000-mesh nozzle.
Spider flower seedling management
Seedling separation: after the cotyledons of the plant unfold, plant the small seedlings separately into plug trays; this process is commonly called seedling separation. The most suitable depth for seedling separation is to keep the two cotyledons 2 to 3 cm above the soil surface. After seedling separation, immediately moisten evenly with a nozzle.
Water: if the weather is clear, water once every other day; on cloudy or rainy days, the watering interval can be appropriately extended according to how wet or dry the substrate is. After the spider flower grows its second pair of true leaves, you can carry out a wet-dry cycle. That is, when the substrate has already become quite dry but the seedlings have not yet wilted, water the small seedlings thoroughly, and repeat this cycle.
Fertilizing: the best time to fertilize the spider flower is to fertilize after every other watering, that is, after each watering, wait until the substrate has dried slightly, then fertilize.
Potting up spider flower seedlings
Pots: because the spider flower plant is relatively large, choose 18×18 cm pots directly for transplanting. After transplanting, do not repot for the entire growing season.
Potting up: when potting up, first fully fill the prepared substrate into the pot, use a finger to dig a hole in the center of the substrate, then take the spider flower seedling out of the plug tray and place the whole thing into the dug hole. The spider flower is suitable for shallow planting; the best planting depth is when the substrate just covers the seedling's roots. The filled substrate should keep a distance of 1 cm from the rim of the pot to make watering easier later. After transplanting, water thoroughly immediately. After transplanting, water thoroughly immediately.