How to Propagate Magnolia: Magnolia Propagation Methods / Seeding / Cuttings / Grafting / Layering
Magnolia is a highly ornamental flowering plant, and people in many regions of China are growing it. As more people grow magnolias, questions about their propagation have also drawn considerable attention. So how do you propagate magnolia? What are the magnolia propagation methods? Let us walk you through them below.
I. How to Propagate Magnolia: Seeding / Cuttings / Grafting / Layering
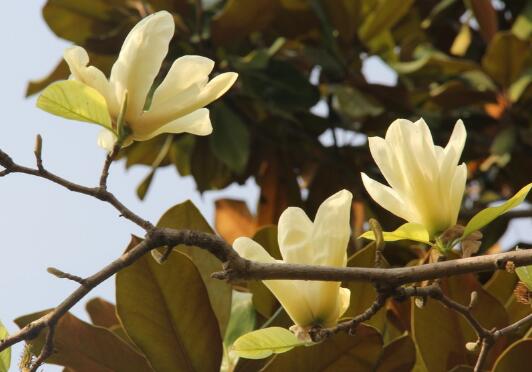
As for how to propagate magnolia, it is mainly divided into four methods: seeding, cuttings, grafting and layering. Among them, grafting and layering are more suitable for magnolias planted in the ground, while seeding and cuttings are more suitable for potted plants. Detailed explanations of the four propagation methods are given below, so let us take a look.
II. Magnolia Propagation Methods
1. Seed Propagation
Before propagating magnolia by seed, we must first know when the seeds mature. Generally, when the follicles turn red and split open, we can harvest them. After harvesting, we should put them in cold water and rub them to remove the seed coat, then take out the seeds, dry them and store them, and wait until the following spring to sow. Magnolias grown from seed have strong adaptability, and the results are generally no worse than those of plants grown by grafting.
2. Cutting Propagation
When propagating magnolia by cuttings, it is best to choose the period from May to June. For the cuttings, it is best to choose branches that grow vigorously and are free of pests and diseases, as this will give a higher survival rate. When taking cuttings, we can first use a chopstick to poke a hole in the potting soil, then insert the cutting into it, and afterwards water thoroughly and simply wait for roots to form. This operation can prevent the cutting from being damaged, and it is very practical.
3. Grafting Propagation
Magnolia grafting propagation can be divided into two methods: approach grafting and grafting propagation, and the survival rate of approach grafting is relatively higher. Approach grafting can generally be carried out from April to July, and the best position for the approach graft is 70 cm above the ground. After binding, wrap it with a ball of mud and cover the outside with leaves, which can prevent erosion by rainwater. After about 60 days, it can be cut off.
4. Layering Propagation
Ordinary layering: Layering is best carried out in spring. We should cut about halfway into the base of the branch to be layered, then cut upward for a section, insert a piece of tile in the middle, and then gently press it into the soil without breaking it. Use a thick "U"-shaped wire inserted into the soil to fix it and prevent it from lifting, then pile soil on top. Wait until root buds appear, then cut it off and plant separately.
Air layering: We should select a vigorous young branch on the mother plant, cut a slit below the branching point, then put a bamboo tube or a bottomless clay pot over it, fill it with growing medium, tie it tightly outside with fine string, and be careful not to disturb it. Spray a small amount of water frequently to keep it moist. Around May of the following year, new roots will grow, and it can be removed and planted.
Conclusion: After reading the above, I believe everyone has gained some understanding of how to propagate magnolia. That is all for the introduction to magnolia propagation methods, and we hope it can be of some help in your propagation process.
How to Propagate Magnolia? An Introduction to Several Magnolia Propagation Methods
Magnolia is also known as maguan, white magnolia and so on. It is a famous ornamental plant and traditional flower of the Magnoliaceae family, Magnolia genus. It is native to the central provinces of China. It prefers a warm and humid environment, is very sensitive to temperature, and has a certain resistance to low temperatures, able to overwinter safely at -20°C. Its propagation methods mainly include seed propagation, grafting propagation, cutting propagation and layering propagation, and so on. Let us take a look together below!
Magnolia Seed Propagation
Magnolia is best sown in autumn. When the seeds mature in September-October, sow them as soon as they are collected. You can also store the seeds in sand until the following spring, from March to April, for sowing. Before sowing, soak the seeds in warm water at about 50°C to remove the waxy layer on the outside of the seeds. To remove the waxy layer, you can either rub them with sand, or soak them in 0.5% alkaline water or plant ash water for 1-2 days. For sowing, use furrow drilling. Choose fertile sandy loam for the seedling bed. After sowing, cover with 2 cm of soil, water thoroughly, cover with grass, and keep the soil moist regularly. Generally, seedlings emerge after about 2 months. Shade is needed in summer, and protection from freezing is needed in winter. In the following spring, after the soil thaws, divide and plant.
Magnolia Grafting Propagation
Grafting propagation is the most commonly used method for propagating magnolia. It can not only maintain the quality of excellent varieties, but also allow flowering 2-3 years earlier than seedlings. When grafting, choose 2-3 year old magnolia seedlings as rootstock. Bud grafting is carried out in July-August, and cut grafting is carried out in autumn. After cut grafting, cover the scion completely with soil, and remove the covering soil in late spring of the following year. Cut grafting can also be done in a greenhouse (autumn or winter). After grafting, store it in wet sand, and after the graft union heals, transplant it before budding in the following spring.
Magnolia Cutting Propagation
Because magnolia cuttings do not root easily and have a low survival rate, this propagation method is generally rarely used. However, if before cutting the base of the cutting is dipped in rooting powder or soaked in a 25 ppm naphthaleneacetic acid solution for 20 hours, it can promote rooting and increase the survival rate. Take cuttings in June-July. The cuttings are taken from 1-year-old branches on a white magnolia mother plant. The cuttings are 15 cm long, with 2 leaves kept at the upper end, and 1/3-1/2 of each leaf blade is cut off. After cutting, pay attention to shading and watering, and keep the soil moist regularly.
Magnolia Layering Propagation
Magnolia layering propagation is also a relatively commonly used propagation method, mainly divided into ordinary layering and air layering.
1. Ordinary layering: Ordinary layering is best carried out in February-March. Cut about halfway into the base of the branch to be layered, then cut upward for a section, insert a piece of tile in the middle, and then gently press it into the soil without breaking it. Use a thick "U"-shaped wire inserted into the soil to fix it and prevent it from lifting, then pile soil on top. Layer in spring, and once root buds appear, it can be cut off and planted separately.
2. Air layering: Before the dog days, select a vigorous and disease-free young branch on the mother plant (1.5-2 cm in diameter), cut a slit below the branching point, then put a bamboo tube or a bottomless clay pot over it, fill it with growing medium, tie it tightly outside with fine string, and be careful not to disturb it. Spray a small amount of water frequently to keep it moist. Around May of the following year, new roots will grow, and it can be removed and planted.
September! The month most suitable for flower propagation. Seeding, cuttings, grafting, division and layering are all worth trying~
September! The month most suitable for flower propagation. Seeding, cuttings, grafting, division and layering are all worth trying~
September is coming soon, and it is a very delightful month. For flower lovers, this season, neither cold nor hot and very suitable for flower growth, is an even better time for seeding, cuttings, grafting, division and layering. Let us get moving together below with Huahua!
Seeding
Flowers that can be sown in autumn include: hollyhock, dianthus, Silene armeria, Silene pendula, pansy, snapdragon, petunia, daisy, corn poppy, pot marigold, black-eyed Susan, iris, verbena, and so on.
In addition, greenhouse flowers such as cyclamen, primrose, nasturtium, cineraria, wax begonia, gerbera, and calceolaria can also be sown at this time, but they need to overwinter in a plastic tunnel.
Huahua takes petunia as an example, and the specific operation method is as follows:
1. Mix peat soil, leaf mold and perlite thoroughly in a 1:1:1 ratio, then pour it into a seedling tray, pressing it down slightly while pouring.
2. Mix carbendazim with water at 800 times to make a carbendazim solution. First water the soil in the seedling tray with the carbendazim solution, then pour water into the outer seedling box and soak the seedling tray, soaking it for a day and a night. After soaking, let the potting soil air dry for 2-3 hours.
3. The suitable temperature for sowing is around 20-25 degrees. Before sowing, water the potting soil once with clean water to ensure the carbendazim does not harm the seeds. Petunia seeds are very small. You can use a spoon or a toothpick (dipped in water) to scoop (pick up) one seed and place it on the soil surface. Note that one seed per pot is enough!
4. Pour some clean water into the bottom of the large seedling box, with the water level reaching about half a centimeter at the bottom of the small seedling tray.
5. Cover with a lid or plastic film and place it in a spot with diffused light and good ventilation! Add water when it runs out. After 7-10 days, they will sprout, and after sprouting, gradually expose them to sunlight.
Cuttings
Woody flowers that can be propagated by cuttings in autumn include: purple magnolia, spiraea, pomegranate, hibiscus, crape myrtle, hydrangea, fig, oleander, serissa, gardenia, fatsia, Chaenomeles speciosa, peony, and so on.
Some herbaceous flowers can also be propagated by cuttings, such as salvia, globe amaranth, marigold, and so on.
Huahua takes hydrangea as an example, and the specific operation method is as follows:
1. Prepare the materials.
Choose healthy and relatively strong branches. The medium can be finer vermiculite, fine seedling peat, and so on. Try to use a utility knife or similar, and do not cut with scissors, because the wound made by scissors is a crushed wound, which is different from the cut made by a knife.
2. Make a diagonal cut about one inch below the node, that is, about three to five centimeters down.
3. Make a flat cut above the node, keeping the bud.
4. Cut off about two-thirds or one-half of the leaf blade. It depends on the size of the leaf: leave less for large ones and more for small ones.
5. Before cutting, sterilize the potting soil once with potassium permanganate or carbendazim. Then water the medium thoroughly so it absorbs enough water. Insert the cutting into the potting soil, inserting the entire part below the node. Finally, place the pot in a tray filled with water, and spray water frequently to keep it moist. (Remember, do not put it under strong sunlight.)
6. At the current temperature, roots will form in about twenty days, and after basically one month it can be pulled out and potted up.
Grafting
Flowering trees that can be grafted in autumn include: using peony root sections as rootstock to graft excellent peony varieties; using cactus as rootstock to graft excellent Christmas cactus; using Euphorbia tirucalli as rootstock to graft crown of thorns, and so on.
Huahua uses a current-year peach seedling as the rootstock and a green plum branch as the scion as an example. The specific operation method is as follows:
1. The mother plant should be chosen as one that blooms abundantly and has a vigorous tree habit, and from it cut plump buds with good growth.
2. Three-cut bud removal method: cut a shield shape of about one centimeter around the selected bud, with the lower part slightly longer than the upper part.
3. Use a fingernail to peel out the graft bud from the outside inward. After removing the graft bud, it can be placed in water to prevent water loss.
4. At a smooth place 10 to 15 cm from the base of the rootstock, use a knife to cut a T shape, slightly longer than the graft bud, and use the back of the knife or a fingernail to lift open the bark.
5. Insert the graft bud and wrap it with plastic film.
Layering
Ornamental flowering trees that can be propagated by layering include: Chaenomeles speciosa, weigela, hydrangea, gardenia, oleander, winter jasmine, Forsythia viridissima, osmanthus, purple magnolia, jasmine, Michelia figo, camellia, Chloranthus spicatus, French holly, snowball, Viburnum macrocephalum, Spiraea thunbergii, spiraea, and so on.
Huahua takes gardenia as a specific example, and the operation method is as follows:
1. Select a branch you like. It can be an extra part that needs to be cut off, or a healthy, well-growing curved branch.
2. Use a sharp knife to make a ring cut on the branch, then ring-bark and peel off the bark. The width is 1-2 cm.
3. Make a beverage bottle into a funnel shape, cut it open in the middle, put it over the ring-barked area, and tie it with metal wire.
4. Put growing medium and other water-retaining materials into the beverage bottle, and wrap the top and bottom with transparent film, trying to ensure no water leaks and no soil is exposed. Afterwards, add a little water every few days to maintain humidity, and wait patiently. Generally, roots will form in 2-3 months.
5. After the root system is well developed, cut off the branch and plant it directly! 6. Air layering succeeded, cut off and potted up.
The advantages of air layering propagation compared with cutting propagation are:
1. It can directly propagate thicker branches.
2. The safety factor is high. Even if rooting is unsuccessful, the branch will not die.
Division
Plants that can be divided in autumn include: Cymbidium goeringii, Cymbidium faberi, Cymbidium ensifolium, peony, tree peony, Guangdong evergreen, black-eyed Susan, snake plant, Syngonium podophyllum, sword fern, nandina, Aspidistra elatior, and so on.
In addition, hyacinth, tulip, freesia, calla lily, Lycoris radiata and so on can also have their daughter bulbs divided and planted at this time.
Huahua takes peace lily as an example, and the specific operation method is as follows:
1. A peace lily grown for two years is already very robust and has produced many plants, almost too many for one pot. At this time, division can be used to solve the problem!
2. Turn it upside down. Take out the whole plant together with the roots and potting soil. If it is not easy to remove, you can water it a little first, then use your thumb to push outward from the drainage hole at the bottom of the pot, and the whole pot can be taken out with the soil.
2. Separate the growing medium from the root system, and do not damage the roots, especially the fine roots.
3. Divide it into as many plants as needed for the number of pots. Try to choose a pot that has both strong plants and young plants to increase the survival rate.
4. Put growing medium into the pot and plant the divided peace lily into it. In the first few days, do not expose it to direct sunlight. After the root system has recovered, let the flower enjoy the sunlight.
Dear readers~ What other impressive September growing experiences do you have? Hurry and submit them or leave a message to tell Huahua.