How to grow Norfolk Island pine? Growing methods and precautions, it likes diffused light
Norfolk Island pine, one of the world's three great ornamental trees, is often kept indoors as a potted young tree, usually under 2 m tall. It has a graceful shape, is highly ornamental, and is also a master at purifying the air, so it is deeply loved by gardening enthusiasts. In daily life, many gardening enthusiasts want to know how to grow Norfolk Island pine. Next, let's take a look at the growing methods and precautions for Norfolk Island pine.
I. How to grow Norfolk Island pine: understand its habits
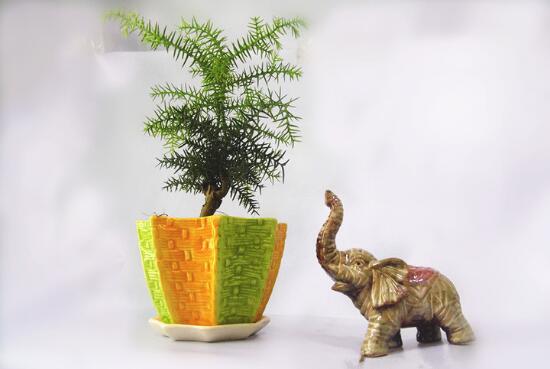
Norfolk Island pine likes a warm, humid environment, is relatively shade-tolerant, dislikes strong light, and is not tolerant of cold or drought. When growing it indoors, place it in a bright, semi-shaded spot, water it moderately, and take good cold-protection measures in winter. As for the potting soil, a slightly acidic sandy loam that drains well and is rich in humus is best. So how do you grow Norfolk Island pine? It's simple: just meet its growing habits.
II. Growing methods and precautions for Norfolk Island pine
1. Soil
How to grow Norfolk Island pine? First, you should reselect the potting soil. The reason is that many gardening enthusiasts' Norfolk Island pine bonsai are existing potted plants bought from flower shops or online; normal care can keep the plant growing. But that soil is very cheap, and if you want the Norfolk Island pine to grow well, it is best to choose new soil.
Soil selection: According to the growing habits of Norfolk Island pine, we know it likes slightly acidic sandy soil that drains well and is rich in humus. For this, the editor recommends using a substrate made by mixing garden soil, leaf mold, and peat moss.
2. Light
As a green plant, Norfolk Island pine has a great demand for light. However, Norfolk Island pine likes diffused light and fears strong light, so when growing it indoors, everyone should place it in a bright spot. If the indoor light is not strong, it should be moved into the sun for appropriate exposure every few weeks; only then will its leaves be more vividly green.
3. Temperature
How to grow Norfolk Island pine? Adjusting the temperature in good time is also very important. Norfolk Island pine likes a warm environment, and the most suitable growing temperature is 10-25°C; at this temperature, it can grow all year round. However, Norfolk Island pine dislikes high temperatures and is not cold-tolerant either; its growing temperature cannot exceed 32°C in summer and cannot be lower than 5°C in winter.
4. Watering
Water is the source of life, so in the growing methods and precautions for Norfolk Island pine, watering is a very important part. Norfolk Island pine likes a humid environment, and the potting soil should be kept moist. In summer, in addition to watering, the number of misting and sprinkling sessions should be increased to raise air humidity.
Watering method: Spring and autumn are the peak growing seasons for Norfolk Island pine. At this time, water more, and water promptly; do not wait until the soil is dry before watering, but avoid water accumulating in the pot. In summer, water when the potting soil is half dry, keeping the interval to twice a week. In winter, control watering, and you can reduce it by one time compared with summer.
5. Fertilizing
After watering, let's talk about fertilizing, which is also indispensable in the growth process of Norfolk Island pine. In the spring and autumn growing seasons, everyone should fertilize Norfolk Island pine once every 2 weeks, preferably with a compound fertilizer containing nitrogen and potassium. Do not neglect fertilizing, because once nutrients are insufficient, it easily causes the leaves of Norfolk Island pine to turn yellow, which will affect the plant's ornamental value.
6. Repotting and changing soil
In the growing methods and precautions for Norfolk Island pine, repotting and changing the soil is also a point that cannot be ignored. Because for any potted plant, the soil inside will eventually become poor one day, so timely repotting is indispensable. Everyone should repot once every 2-3 years, using the culture soil mentioned above. As for pruning, under normal circumstances, Norfolk Island pine does not need branch pruning; just let it grow naturally.
How to prune Norfolk Island pine bonsai, pruning methods for Norfolk Island pine / three tricks to create a perfect shape
Norfolk Island pine, a plant that stays evergreen all year round with a graceful shape, is often made into bonsai and grown indoors. It not only has a good decorative effect but also purifies the air very well! However, if you want Norfolk Island pine to look beautiful, in addition to daily care, timely pruning is also very important. So how do you prune Norfolk Island pine bonsai? Next, let's take a look at the pruning methods for Norfolk Island pine.
I. How to prune Norfolk Island pine bonsai
When growing Norfolk Island pine indoors, it is inevitable to prune it. As for how to prune Norfolk Island pine bonsai, simply put, there are three tricks: heading back (cutting longer branches shorter), thinning (cutting off dried-up and overly dense branches), and removing suckers (cutting off new shoots regenerating near the roots). As long as everyone follows the methods, they can create a perfect Norfolk Island pine bonsai shape.
II. Pruning methods for Norfolk Island pine
(1) Pruning time
How to prune Norfolk Island pine bonsai? First, you should choose the right time, so that the damage to the plant after pruning is minimized. For this, everyone first needs to understand the growing habits of Norfolk Island pine: its optimal growing temperature is 10-25°C, and it likes diffused light. So the pruning time can be chosen in spring and autumn; for the specific weather, everyone can choose a sunny noon to carry it out.
(2) Pruning techniques
1. Heading back
When water, fertilizer, and light are sufficient, Norfolk Island pine will grow wildly, and some branches will grow very fast, which breaks the plant's overall beauty. So how do you prune Norfolk Island pine bonsai? The first step is heading back: cut off part of the overly long branches.
Pruning effect: After heading back Norfolk Island pine, it not only makes the plant shape more layered but also stimulates its lateral buds to sprout quickly and grow new branches, thus greatly improving the ornamental effect of Norfolk Island pine.
2. Thinning
Many gardening enthusiasts' Norfolk Island pines grow with luxuriant branches and leaves, but this also has a drawback: the leaves inside cannot receive light. So how do you prune Norfolk Island pine bonsai? The second step is thinning: cut off the branches of Norfolk Island pine from the fork.
Pruning effect: After thinning, the branch distribution of Norfolk Island pine will be more even, which increases ventilation and light penetration and is beneficial for the rapid growth of the internal branches and leaves of Norfolk Island pine.
3. Removing suckers
The beauty of Norfolk Island pine bonsai lies in its overall shape: its upper part has luxuriant branches and leaves, while the lower part highlights a simple trunk. But sometimes, tender shoots or root suckers (small plants formed by adventitious buds growing from the roots and extending above the ground) will grow at the base of its trunk. So how do you prune Norfolk Island pine bonsai? The third step is removing suckers: cut off all the large branches or small plants growing near the roots.
(3) Pruning precautions
When pruning Norfolk Island pine, in addition to knowing the time and mastering the techniques, everyone should also pay attention to two details:
1. The scissors used for pruning must be sharp and smooth;
2. When pruning, the scissor opening should form a 45-degree oblique angle with the branch; this way the cut will be much smaller, which is beneficial for wound healing.