Why do Gloxinia tubers rot? Dig up the tuber, cut away the rotten part and replant
As a common indoor flowering plant, Gloxinia (Sinningia speciosa) should be familiar to flower lovers. Its leaves are large and emerald green, and its flowers are beautiful and multi-colored, making it highly ornamental when grown indoors. But during the growing process, many flower lovers encounter the phenomenon of the tuber rotting. So why do Gloxinia tubers rot? What should you do when a Gloxinia tuber rots? Today the editor will help everyone solve this problem.
1. Why do Gloxinia tubers rot: unsuitable soil / improper watering
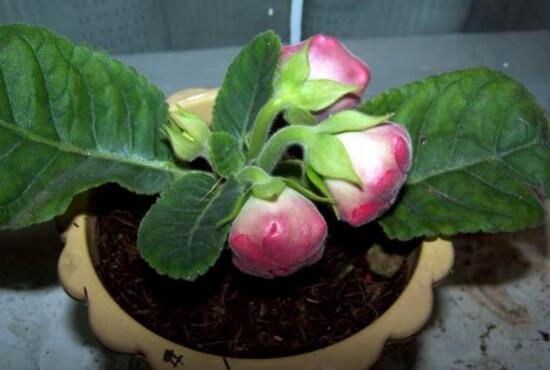
Although the growing method for Gloxinia is not difficult, it is a plant prone to tuber rot, which often gives flower lovers endless headaches, and they all want to know why Gloxinia tubers rot. On this point, after the editor's research, the reason is actually very simple: when the soil drainage is poor or watering is improper, the Gloxinia tuber will rot. As for what to do when a Gloxinia tuber rots, let's continue reading below.
2. What to do when a Gloxinia tuber rots: dig up the tuber, cut off the rot and replant
After discovering that a Gloxinia tuber has rotted, don't rush to deal with it. First observe how soft or firm the tuber is. If the Gloxinia tuber is soft, don't think twice, just throw it away, it's beyond saving! But if the tuber is still firm, it can still be saved. As long as you complete the following 5 steps, the Gloxinia can sprout and grow again~
1. Dig out the tuber
Dig out the tuber of the rotted Gloxinia, then wash it clean. During the washing process, you can directly remove the rotted roots first.
2. Cut off the rotten parts
Hold the cleaned tuber in one hand and the knife in the other, and cut off all the rotten parts of the tuber until you see healthy, intact tissue. The purpose of doing this is to prevent the infection from spreading further across the tuber.
3. Dry in the sun and disinfect
After the tuber is treated, place it in the sun to dry. Generally about 1 hour of drying is enough. This will not only dry the wound on the tuber, but also avoid dehydrating the tuber. Afterward, apply carbendazim to the tuber to achieve a disinfecting effect.
4. Replant
Prepare clean sterile soil; vermiculite, perlite, and river sand are all fine, but sphagnum moss is best (it can be wrung dry, allowing you to control moisture). Then replant the disinfected Gloxinia tuber, and finally cover it with a transparent container to keep it enclosed.
Notes: During planting, only plant the tuber halfway, and the wound must not touch the soil. In addition, the air humidity inside the container should not be too high, and water droplets must not appear, because there is a wound, and too much moisture makes it prone to rot.
5. Wait quietly for sprouting
After the Gloxinia tuber is planted, it will begin to sprout in about 1-2 weeks. After that, you need to clean off the sphagnum moss promptly, trying not to break the roots. Then bury it with soil. After doing this, the Gloxinia whose tuber rotted will regain a second spring.
What to do when a Gloxinia tuber rots
Gloxinia tuber rot
Gloxinia is quite prone to rotting. During cultivation, poor soil drainage or improper watering operations can both cause its tuber to rot, and it must be dealt with.
After a Gloxinia tuber rots, first test whether the tuber is firm or soft. If the tuber has already become soft, it is best to throw it away. However, if the tuber is still firm, it can be treated and can still sprout and grow again.
What to do when a Gloxinia tuber rots
Step one: dig out the rotted tuber, then wash it clean, and remove the rotted roots first; note that you can simply pull them off.
Step two: use a relatively sharp small knife to cut off the already rotted parts of the tuber, continuing to cut until healthy, intact tissue appears on the tuber. This can prevent the infection from spreading further across the tuber and causing it to continue rotting.
Step three: place the cleaned Gloxinia tuber, with the rotten parts already cut off, under the sun to dry. Generally about 1 hour of drying is needed to dry the wound, but be careful not to let the tuber dehydrate.
Step four: apply carbendazim to the tuber to disinfect it.
Step five: replant the treated tuber. First prepare the medium; you can prepare clean sphagnum moss, or vermiculite, river sand, etc., but sphagnum moss is still better, as it can be wrung dry and also allows you to control moisture.
Step six: bury the tuber with the prepared sphagnum moss or soil, burying only halfway, and be careful not to bury the wound. Then cover it with a transparent container to keep it enclosed, and note that the air humidity inside the container should not be too high, otherwise it is prone to rot.
Then, after about one or two weeks, it will begin to sprout.
After the tuber sprouts, if it was grown in sphagnum moss, you need to clean off the sphagnum moss promptly, but be careful not to damage the tuber. Then bury it with soil.
What to do when a Gloxinia tuber rots: teach you six steps to save Gloxinia
Gloxinia is a relatively common household flowering plant, but sometimes tuber rot occurs, which is a rather worrying situation. Let's take a look below at what to do when a Gloxinia tuber rots.
Gloxinia tuber rot:
Gloxinia is quite prone to rotting. During cultivation, poor soil drainage or improper watering operations can both cause its tuber to rot, and it must be dealt with.
After a Gloxinia tuber rots, first test whether the tuber is firm or soft. If the tuber has already become soft, it is best to throw it away. However, if the tuber is still firm, it can be treated and can still sprout and grow again.
What to do when a Gloxinia tuber rots:
Step one: dig out the rotted tuber, then wash it clean, and remove the rotted roots first; note that you can simply pull them off.
Step two: use a relatively sharp small knife to cut off the already rotted parts of the tuber, continuing to cut until healthy, intact tissue appears on the tuber. This can prevent the infection from spreading further across the tuber and causing it to continue rotting.
Step three: place the cleaned Gloxinia tuber, with the rotten parts already cut off, under the sun to dry. Generally about 1 hour of drying is needed to dry the wound, but be careful not to let the tuber dehydrate.
Step four: apply carbendazim to the tuber to disinfect it.
Step five: replant the treated tuber. First prepare the medium; you can prepare clean sphagnum moss, or vermiculite, river sand, etc., but sphagnum moss is still better, as it can be wrung dry and also allows you to control moisture.
Step six: bury the tuber with the prepared sphagnum moss or soil, burying only halfway, and be careful not to bury the wound. Then cover it with a transparent container to keep it enclosed, and note that the air humidity inside the container should not be too high, otherwise it is prone to rot.
Then, after about one or two weeks, it will begin to sprout.
After the tuber sprouts, if it was grown in sphagnum moss, you need to clean off the sphagnum moss promptly, but be careful not to damage the tuber. Then bury it with soil.