How to propagate Aptenia cordifolia? Summer and autumn cuttings have a high survival rate
Aptenia cordifolia, an exceptionally beautiful plant, has evergreen leaves like spider plant and beautiful flowers like peonies, and is often grown at home to decorate the interior. But does one pot of Aptenia cordifolia feel a bit lonely? It is time to propagate a few more pots, so how do you propagate Aptenia cordifolia? The following are two propagation methods for Aptenia cordifolia, among which cuttings have the highest survival rate. Today the editor will explain them in detail.
I. How to propagate Aptenia cordifolia, cuttings/sowing
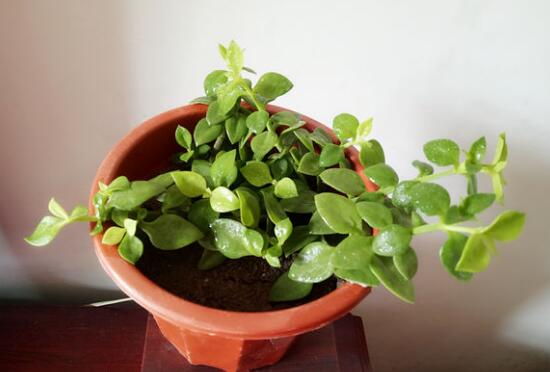
As a common indoor potted plant, Aptenia cordifolia is not difficult to grow; you only need to put in a little effort to master it perfectly. But if you want to master the propagation methods of Aptenia cordifolia, you need to put in a bit more thought. As for how to propagate Aptenia cordifolia, there are mainly two methods: cuttings and sowing, among which the most suitable for gardening enthusiasts is cuttings. Next, the editor will focus on the cutting method for Aptenia cordifolia.
II. Three propagation methods for Aptenia cordifolia
(1) Cutting method for Aptenia cordifolia
How to take cuttings of Aptenia cordifolia is actually simple to describe: pick a good time, choose a healthy branch, prepare a suitable potting soil, then insert the branch into the pot, water appropriately, and place it in a semi-shaded place for care. Although it sounds simple, doing it requires some skill. The specific steps are as follows:
1. Which months are suitable for cutting Aptenia cordifolia, June to November
For cutting Aptenia cordifolia, generally speaking, any season except winter will do. However, to achieve a high cutting survival rate, it is best to do it on rainy or cloudy days in summer and autumn.
2. Selection of cuttings
From a robustly growing Aptenia cordifolia plant, cut pest-free, disease-free, plump branches as cuttings, about 10 cm long. After cutting, the cuttings should be left to dry for about 1 day, and once the cut surface is dry, dip them in rooting powder and insert them into the prepared substrate.
Pruning tips: The cutting is the upper stem section of an Aptenia cordifolia branch. When cutting, the upper cut should be about 1 cm above a bud, and the lower cut should be 1-3 mm below a basal bud.
3. Preparing the soil
How do you take cuttings of Aptenia cordifolia? After choosing the time and cutting the cuttings, you also need to prepare the potting soil. Generally choose a mixed soil; a mix of peat soil plus perlite, small stones and the like will do, and some organic fertilizer can also be added. Insert the branches and be sure to water thoroughly.
4. Starting the cuttings
Once the above preparations are done, the cutting of Aptenia cordifolia can officially begin: insert the cuttings into the prepared potting soil, with the insertion depth being 1/2-2/3 of the total length, and a planting density of 3-4 cm between plants and rows.
5. Care after cutting
After the Aptenia cordifolia cuttings are inserted, place them in a ventilated, shady place, spray water frequently, and carry out routine care. Generally after 3 weeks the wounds heal and roots gradually form. Once new shoots grow, they can be moved to a place with ample light.
(2) Seed propagation of Aptenia cordifolia
After Aptenia cordifolia blooms, seeds can be obtained, so propagation can also use the sowing method. Specific steps: select plump, freshly colored, pure, pest-free and disease-free Aptenia cordifolia seeds, scatter-sow them, then cover with 1 cm of nutrient soil. At a temperature of 15°C, the seeds can sprout in about 2 weeks. After the seedlings take shape, transplant them for cultivation.
Overall, propagating Aptenia cordifolia is not difficult; both cuttings and sowing can take root and survive, but when it comes to survival rate, cuttings are still the best. Of course, methods are fixed while people are flexible; everyone can choose a method to propagate according to the actual situation. That is all the editor has to introduce about the propagation methods of Aptenia cordifolia, and I hope it can help everyone.
Flower propagation
When a plant produces a new individual similar to itself, this is called propagation. This is a natural phenomenon by which plants reproduce offspring and continue the species, and it is also one of the basic characteristics of plant life. There are mainly 5 methods of flower propagation: sowing, cutting, division, grafting, and layering.
1. Sowing propagation
Basic concept
The sowing process is as follows: sterilize the soil by sun exposure, water thoroughly, scatter the seeds evenly on the soil layer, then according to seed size choose whether to cover with soil or not; keep the soil moist but not waterlogged. After the seeds germinate, promptly move the flowerpot to a place with scattered light. Apply some liquid fertilizer, and when the seedlings grow 2-3 leaves, they can be transplanted.
Succulent sowing propagation
Precautions
1. The sowing period for flowers follows a pattern. Generally, outdoor annual flowers and woody flowers are sown from March to April in spring, when the average daily temperature is stable at 15°C; most outdoor biennial flowers are sown from August to September in autumn. The sowing period for greenhouse flowers often depends on the desired flowering period and has no strict seasonal restriction, but generally the coldest and hottest seasons should be avoided.
2. Before germination, flower seeds must first absorb enough water, then the radicle can extend and germination can proceed slowly. In order to meet the temperature, moisture and oxygen conditions required for seed germination, it is best before sowing to put the seeds in a gauze bag, soak them in 40°C warm water for 24 hours, then spread them on wet gauze and keep the gauze moist. Sow after the seed radicle breaks through the seed coat.
3. Flower seeds are divided into four grades: large, medium, small, and fine. Large seeds have a diameter above 0.5 cm, medium seeds 0.2-0.5 cm, small seeds 0.1-0.2 cm, and fine seeds below 0.1 cm. Whether large, medium or small, the sowing depth is suitably 2-3 times the seed diameter. Large seeds can be sown in holes, with the hole depth 23 times the seed diameter, and after sowing cover with soil level with the bed surface; medium and small seeds are first scattered on the bed surface and then covered with a thin layer of soil; fine seeds need no soil covering.
2. Cutting propagation
Basic concept
Cutting propagation means taking part of a plant's vegetative organ, inserting it into loose, moist soil or fine sand, and using its regenerative ability to make it root and sprout into a new plant.
Cutting propagationPrecautions
1. As the mother plant for collecting cuttings, it should have excellent variety characteristics, vigorous growth, and no pest or disease damage. Aged and declining plants are not suitable to be selected as the mother plant for cuttings. On the same plant, the cutting material should be selected from the sunny, plump middle and upper branches, preferably with shorter internodes, plump buds, and thick, strong branches and leaves. On the same branch, hardwood cuttings should use the middle and lower parts of the branch, because the middle and lower parts store more nutrients, while the tip tissue is often not plump.
2. Cuttings should be taken and inserted immediately. For cuttings of Chinese rose, hibiscus, and Chinese trumpet creeper taken in late autumn, since the temperature conditions for immediate cutting are not available, the cuttings can be trimmed, tied into bundles, buried in a flowerpot with moist sandy soil, and kept indoors at 0-5°C. In winter, be careful not to let the sandy soil become too dry, and then wait until early spring of the following year to insert them. For flowers such as Chinese rose, cuttings can also be taken in winter in a small plastic shed. For cuttings of succulents such as cactus, after cutting they should be placed in a ventilated place to dry for about a week, and inserted only after the cut surface has slightly shrunk, otherwise they easily rot. For cuttings of wax begonia and oleander, after cutting they can first be soaked in clean water, and once roots grow they can be directly planted in pots. For Chinese rose, Milan etc., the lower cut end of the cutting can be dipped in vitamin B injection, then taken out and left for one or two minutes so the medicinal liquid is absorbed into the cutting before inserting it into coarse sand; this treatment can promote rooting.
3. After cutting, management should be strengthened to create good rooting conditions for the cuttings. Generally, flower cuttings require both moist soil and air circulation. A cover made of glass or plastic film can be placed over the cutting pot or bed to maintain temperature and humidity. Small bricks should be placed under the cover to allow air to flow in. In summer and early autumn, the cutting pot should be placed in a shaded place during the day and in the open air at night; in early spring, late autumn and winter when the temperature is insufficient, it can be placed in a warm place or greenhouse, but attention must be paid to regulating temperature and humidity. Later, according to the speed of rooting, gradually increase light.
3. Division propagation
Basic concept
Division propagation is the method of separating a flower's sprouting branches, clustered branches, suckers, stolons, etc. from the mother plant and planting them separately as independent new plants. It is generally suitable for perennial flowers. The division method is divided into complete division and partial division.
Division propagationComplete division: Dig the mother plant out of the soil entirely with its roots, divide it by hand or with scissors into several small clumps, each small clump may carry 1-3 branches with roots at the lower part, and transplant them separately elsewhere or into flowerpots. After 3-4 years they can be divided again.
Partial division: When dividing, there is no need to dig out the entire mother plant. Only dig out soil around, on both sides, or on one side of the mother plant to expose the root system, use scissors to cut it into small clumps with 13 branches and roots at the lower part, and transplant these small clumps elsewhere, where they can grow into new plants.
Precautions
1. Because division has complete roots, stems and leaves, the survival rate is very high, but the number propagated is limited. This method is commonly used for species with strong tillering ability, such as wintersweet, palm bamboo, bamboo fern, tree peony, herbaceous peony, orchid, lucky bamboo, and hosta. In addition, small plants produced on stolons such as spider plant and saxifrage, and suckers (small branches) growing from the base of succulents such as sedum and echeveria, can all be separated and planted at any time.
2. Generally, flowers that bloom in early spring should be divided after growth stops in autumn, and flowers that bloom in summer and autumn should be divided before sprouting in early spring.
4. Grafting propagation
Basic concept
Grafting is the transfer of part of a plant's vegetative organ onto another plant body. The branch used for grafting is called the scion, the bud used is called the graft bud, the plant being grafted onto is called the rootstock, and the successfully grafted seedling is called the grafted seedling. Grafting propagation is a method of propagating excellent clones, commonly used for plum blossom, Chinese rose, etc. The principle of successful grafting is that the cambium layers of two plants with compatibility produce a healing phenomenon at the union, allowing vessels and sieve tubes to interconnect, thus forming a new individual.
Precautions for grafting propagation
1. Grafting includes branch grafting, bud grafting, approach grafting (two plants with root systems have part of their bark cut away at parts easy to bring close together, then joined to each other), pith grafting (scion and rootstock heal through the pith), root grafting (using roots as rootstock), and several other methods, but no matter which method is used, after grafting attention must be paid to management of temperature, light, moisture and other aspects.
2. The rootstock is best selected from a different plant body of the same genus or species as the scion, because compatibility between plants of the same genus is strong, grafting heals quickly, and the survival rate is high.
3. The rootstock should have a well-developed root system, grow robustly, adapt to the local soil and climate, and have good resistance to pests and diseases.
4. The scion should be selected from branches that are plump in growth and have full buds.
5. The grafting season varies with the flower and tree variety. For example, lilac uses bud grafting, mostly carried out in summer, while hibiscus uses branch grafting and can be carried out in spring or summer.
5. Layering propagation
Basic concept
Layering propagation is a propagation method in which branches still attached to the mother plant form adventitious roots and are then cut away from the mother plant to become a new individual. Layering propagation is mostly used for woody flowers whose stem nodes and internodes easily root naturally but which are difficult to root by cuttings. In warm regions, layering can be done all year round, while in the north it is mostly done in spring. When layering, in order to interrupt the downward transport of organic matter (such as sugars, auxins and other substances) from the leaves and upper part of the branch and cause these substances to accumulate in the upper part of the branch for use in rooting, ring barking can be carried out. Applying IBA-type auxin at the girdled part can promote rooting.
Layering methods generally include three types: ordinary layering, mound layering, and air layering.
1. Ordinary layering is mostly used for vine flowers with soft, slender branches, such as winter jasmine, honeysuckle, and Chinese trumpet creeper. When layering, bend the outer part of the mother plant into an arc, wound the protruding downward-bent part, bury it in soil, then use a hook to fix the downward-bent part. After it roots, it can be cut away from the mother plant and transplanted separately.
2. Mound layering is suitable for deciduous shrubs with strong clumping ability and relatively hard branches that are not easy to bend, such as red-twig dogwood, elm-leaved spirea, and yellow rose. In early summer, carry out ring barking about 1 cm at a place about 25 cm from the soil on the lower part of the branches, then mound soil around the mother plant, burying the lower half of the entire clump in soil, and keep the mound moist. After it roots, in the following spring before sprouting, dig open the mound, cut the branches away from the mother plant at the base, and then divide and transplant.
3. Air layering is mostly used for evergreen flowers and trees whose branches are difficult to root and not easy to bend, such as white orchid, Milan, and banana shrub. Air layering is generally carried out in the peak growth season. Select a plump two-year-old branch, carry out ring barking at an appropriate part, then put peat soil, mountain soil, moss, etc. into a plastic bag, wrap it around the branch, water thoroughly, and tie the bag opening tightly to fix it. Afterward, pay attention to supplying water in time and keep the culture soil moist. After the branch roots, cut it away from the mother plant from below the bag, remove the wrapping plastic bag, plant it with soil into a pot, place it in a shady place for care, and after a large number of new shoots sprout, expose it to full light.
The most notable advantage of layering propagation is that it easily survives and can maintain the characteristics of the original variety. For some species that are difficult to propagate by other methods, this method can be used.
How to grow and care for Monstera deliciosa, precautions, Monstera deliciosa pictures, Monstera deliciosa cultivation methods
Monstera deliciosa is a radiation-resistant plant. With its elegant, upright, refined and noble feel, it attracts the attention of many consumers, and more and more people have introduced and cultivated it, listing it among potted indoor ornamental plants. This article will combine Monstera deliciosa pictures to explain the cultivation methods of Monstera deliciosa.
[Editor's recommendation] Indoor plants, Cuban oregano, fragrant wood, hydroponic plants, small potted plants, flowering plants, feng shui radiation-resistant plants, Limonium
[Monstera deliciosa] Monstera deliciosa pictures, Monstera deliciosa cultivation methods——————————————————————————————————————————————
[Plant profile]
——————————————————————————————————————————————
Chinese name: Monstera deliciosa
Scientific name: Monstera deliciosa
Aliases: Penglai banana, wire orchid, perforated Philodendron, Monstera banana, electric wire lotus, dragon palm, electric wire orchid, Monstera taro
Family: Araceae
Genus: Monstera
Origin and distribution: Native to the tropical rainforests of Mexico, and widely introduced and cultivated in China.
Morphological characteristics: The stem is thick and strong, with many nodes like bamboo. The stem bears long, drooping brown aerial roots that can climb other objects and grow upward. Leaves are thick, leathery, alternate, dark green or green; leaves are thick, leathery, alternate, dark green or green; young leaves are heart-shaped without perforations, and after growing up the leaves become oblong with irregular pinnate deep lobes and holes from the leaf margin to near the veins; 30-50 cm long, dark green, with leaf scars; at the leaf scars there are bracts, leathery, yellow-white. The flower is shaped like a spathe, pale yellow. The fruit is edible.
How to grow Monstera deliciosa? - "Five likes and five dislikes" for growing Monstera deliciosa
——————————————————————————————————————————————
◆First, it likes warmth and dislikes severe cold. Monstera deliciosa originates from the tropical rainforests of Mexico and likes a warm environment, disliking freezing severe cold weather. It will not suffer cold damage above 5°C, and grows well above 12°C.
◆Second, it likes shade and dislikes strong light. Monstera deliciosa has strong shade tolerance. In a semi-shaded environment it grows especially well, showing vigorous growth, well-developed aerial roots, large leaves, and bright dark green leaf color.
◆Third, it likes moisture and dislikes waterlogging. Monstera deliciosa likes to grow in a moist ecological environment. In the south where there is a lot of rain, if waterlogging lasts too long, root rot, stem rot and leaf rot will occur.
◆Fourth, it likes fertile soil and dislikes poor soil. Monstera deliciosa likes fertile soil, especially fertile sandy loam. Although it can grow in poor red-yellow soil, its growth becomes weaker, its tree shape becomes deformed, its leaves become smaller, and its leaf color becomes lighter, affecting the ornamental effect.
◆Fifth, it likes soil fertilizer and dislikes chemical fertilizer. Monstera deliciosa is often given organic fertilizer, such as cake fertilizer, artificial organic fertilizer, livestock and poultry manure residue, and farmyard manure. Its tree vigor is strong, its leaves are as large as plates, the leaf texture is thick, and the leaf color is dark green and shiny, especially making the tortoise-shell pattern clearer and more distinct.
According to the characteristics of Monstera deliciosa's "five likes and five dislikes", in summer and autumn carry out shady and moist management, avoid direct sunlight, water twice a day, frequently spray the leaf surface, and maintain air humidity; in winter keep the room temperature above 5°C, and for outdoor cultivation set up a frame covered with film for insulation so it can overwinter safely. If cared for properly, Monstera deliciosa over 4 years old will also bloom. The petals are a single sheet, wrapping the berries; the flower is jade-colored and gorgeous, and the berries are pale yellow, long elliptical; its spadix inflorescence can be used to cook dishes, and the berries can also be eaten after ripening.
Cultivation methods for Monstera deliciosa
——————————————————————————————————————————————
① Sowing
Monstera deliciosa blooms in summer. To increase the seed setting rate, artificial pollination is needed. Pollinating at 9-10 a.m. and 3-4 p.m. twice is best, with a high pollination success rate. From pollination to seed maturity takes 15 months. During the seed development stage, pay attention to ventilation and fertilizer and water management to promote plump seeds.
Before sowing, first soak the seeds in 40°C warm water for 10 hours, and the sowing soil should be sterilized at high temperature. Monstera deliciosa seeds are relatively large, so spot sowing can be used. After sowing, keep the room temperature at 20-25°C, cover the box opening with plastic film, and maintain humidity above 80%. Generally, they germinate 20-25 days after sowing. If the room temperature is too low during sowing, it will not only affect emergence, but the seeds may even become water-soaked and rot.
② Cuttings
Stem node cuttings can be used in both spring and autumn, with the best results from April to May in spring and September to October in autumn. This is because the temperature during these periods is suitable for the stem node cuts to heal and root, and survival is quick.
Select current-year side branches with plump stem tissue and robust growth as cuttings. The cuttings are 20-25 cm long, and the leaves at the base are cut off. Keep the small leaves at the upper end, cut off long aerial roots, and keep short aerial roots to absorb water and help rooting. The cutting bed uses a mixed substrate of coarse sand and peat or leaf mold. After cutting, maintain 25-27°C and relatively high air humidity, and rooting begins only about 1 month after cutting. After the cuttings root, the axillary buds on the stem nodes also begin to sprout and unfold leaves. To accelerate seedling growth, keep the room temperature above 10°C and strengthen fertilizer and water management. In the second year after cutting, the seedlings take shape and can be sold as commodities.
Division: carried out in summer and autumn. Cut off an entire side branch of a large Monstera deliciosa, with some aerial roots, and plant it directly in a wooden tub or pot. Not only is the survival rate high, but the shaping effect is also quick.
③ Cultivation
Monstera deliciosa is very easy to cultivate, and it usually uses equal parts of leaf mold, garden soil and river sand mixed as the substrate. When planting, add a small amount of bone meal and dried cow manure as base fertilizer. Monstera deliciosa likes moisture and needs sufficient water to keep the potting soil moist. Of course, in dry weather the leaf surface must also be sprayed with water to keep the air humid. During the growing season, pay attention to shading and avoid direct strong light, especially in midsummer it must not be placed in direct sunlight, otherwise the leaves are likely to scorch and burn, affecting ornamental value.
"Conclusion: Today, large potted Monstera deliciosa has become the main backbone material for hotel lobbies, and small and medium potted Monstera deliciosa will also be one of the more ornamental plants in modern home decoration. It is very commonly introduced and cultivated in China.
Of course, potted Monstera deliciosa is loved not only because it is a famous indoor potted foliage plant, but also because Monstera deliciosa has the peculiar ability to absorb carbon dioxide at night.
[More plant encyclopedia]
How to grow Peperomia tetragona, how to grow sago palm, uses of cactus, characteristics of tree peony, how to grow wintersweet, how to grow Milan
How to grow and care for pothos, precautions, does cactus absorb radiation, how to grow Guzmania, cyclamen leaves turning yellow, price of blue enchantress
Lucky bamboo, sago palm pictures, how to grow sago palm, is rubber tree toxic, sunflower flower language, peace lily, cyclamen, Sansevieria trifasciata 'Laurentii'
Spider plant leaf tips turning yellow, how to grow lily, nine-child Cymbidium, anthurium, is flamingo flower toxic, how to grow money tree, Buddhist pine bonsai pictures