How to propagate Bougainvillea spectabilis by cuttings? Spring cuttings have a high survival rate
Bougainvillea spectabilis is a fairly common flowering plant in people's daily lives, with high ornamental value, and it is grown in every region. As more people grow it, questions about its propagation have also drawn concern, and its propagation method is generally based mainly on cuttings. So in which season should Bougainvillea spectabilis be propagated by cuttings? What is cutting propagation of Bougainvillea spectabilis like? Below, the editor takes everyone through it.
1. How to propagate Bougainvillea spectabilis by cuttings, April-May is best
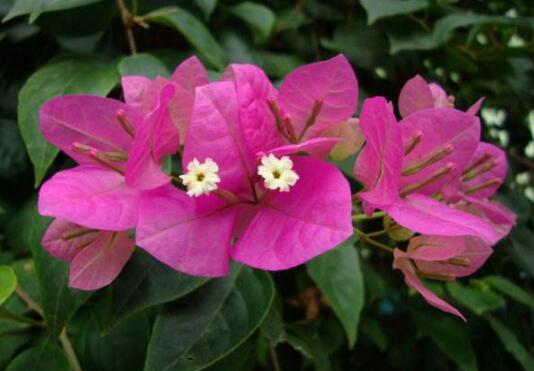
When preparing to propagate Bougainvillea spectabilis by cuttings, choosing the right time period is very important. Generally we can choose the period from May to June, because the climate during this period is more suitable for its growth, and the success rate of cuttings will also be greatly improved.
2. Cutting method for Bougainvillea spectabilis
1. Substrate selection, good drainage is required
Before propagating Bougainvillea spectabilis by cuttings, we must first choose the substrate. It is not strict about soil, but it is rather afraid of waterlogging, so we had best choose a loose, fertile culture soil with good drainage. Generally, a culture soil made of 4 parts humus soil, 4 parts garden soil and 2 parts sand can be used, or dried pond mud mixed with some coal cake residue can be used as potting soil.
2. Substrate disinfection, high-temperature disinfection
After choosing the substrate, we had best disinfect it first, so as to avoid bacteria in it infecting Bougainvillea spectabilis. When disinfecting, we can break it up and then expose it to the sun to disinfect it. It can also be put into an iron pot and stir-fried over high heat, so that even if there are bacteria they will be killed.
3. Cutting selection, choose vigorously growing branches
The choice of cuttings also has a great influence on the survival rate of Bougainvillea spectabilis cuttings. Generally, it is best to choose relatively vigorous branches free of pests and diseases as cuttings. If the branches we choose look very slender, then it can basically be judged that the cutting has failed, so choosing the cuttings is a very important step.
4. Cutting method, rooting in one month
Speaking of how to propagate Bougainvillea spectabilis by cuttings, the method is actually very simple. First we can use chopsticks to poke a hole in the soil, then insert the cutting, because the branches of Bougainvillea spectabilis are relatively easily damaged, and if inserted directly it is easy to injure the roots. After inserting the cutting we can water it, and about one month after watering it can take root.
5. Follow-up management, pay attention to daily care
After the cutting takes root, the cutting propagation can be declared successful, and afterward we can carry out follow-up care. There are also many points to note in care, such as watering and fertilizing, which all have particular requirements. If you do not know how to grow it, you can refer to the article on how to grow Bougainvillea spectabilis, which contains detailed instructions.
Cutting method for annual herbaceous flowers
Annual herbaceous flowers refer to herbaceous flowers whose life span is completed within one growing season, from sowing, growth, flowering and seed setting to aging and death. Generally they are sown in spring, grow in summer and autumn, flower and set seed, and then wither and die, so annual flowers are also called spring-sown flowers. In South China, most are annual herbaceous flowers, and perennial herbaceous flowers are not easy to bloom on flat land. Annual herbaceous flowers have a short cultivation period, usually blooming within 2-6 months, and after flowering and setting seed they naturally die, such as pansy, zinnia, cockscomb, scarlet sage, French marigold, cosmos, and pot marigold. Annual herbaceous flowers with slightly thicker cuttings can be directly cut and potted. When the sowing quantity is insufficient, the pruned waste branches can be reused, and moreover, the seeds of good varieties of herbaceous flowers are relatively expensive, so doing this can reduce costs. Rapid propagation by cuttings greatly shortens the production cycle, reduces production procedures, and saves manpower and material resources. Annual herbaceous flower varieties that can be propagated by cuttings include scarlet sage, marigold, French marigold, Chinese pink, Madagascar periwinkle, and verbena. The author has worked out rapid propagation techniques by cuttings in production practice, briefly described below:1. Pot soil selection
The culture soil should meet the requirements for potted flower culture soil: first, it should be loose; second, it should have good water permeability; third, it should be able to retain water and nutrients; fourth, it should have moderate acidity and alkalinity; fifth, it should be sterilized and disinfected. The author sifts garbage soil stored for four or five years, mixes in a certain amount of sand or river mud, and uses it as culture soil after chemical disinfection. Generally, it is not advisable to mix in organic fertilizer, so as to avoid burning the cuttings.
2. Cutting time
In summer and autumn, when the temperature is 20°C to 32°C, the afternoon is suitable, and rainy days are best.
3. Criteria for selecting cuttings
Choose vigorous young branches free of pests and diseases as cuttings. Each cutting is 8 to 10 cm long, with more than 2 nodes, and leaves can be retained at the top as appropriate. For marigold, all the terminal heart leaves can be retained; for scarlet sage and others, as long as the plant shape is not affected, more leaves can also be retained, but all the leaves on the part of the branch inserted into the soil must be removed, and the cut should be smooth.
4. Chemical solution treatment
After mixing 2.5% to 5% rooting agent with 800 times dilution of 50% carbendazim wettable powder, immerse half of the cutting in the solution for 5 to 10 seconds. When thicker marigold branches are used for cuttings without rooting agent and carbendazim, the survival rate can also reach more than 95%.
5. Cutting requirements
The cuttings should be cut, soaked and inserted in succession, inserted more than half into the soil, with main branch leaves and some side branch leaves left above, inserted in the center of the flower pot, watered immediately after planting, and sprayed with water to wash the leaves.
6. Management after cutting
1. Shading. After cutting, place them under a shade shed and care for them for 7 to 10 days. After rooting, place them in an open area. Among them, relatively sturdy marigold cuttings can reach a rooting rate of more than 90% under full-light conditions. Scarlet sage roots better in a relatively shaded environment, and roots even more easily in woods with a canopy density of 0.7 to 0.8. Other varieties are placed under shade netting.
2. Spraying. Because the weather is relatively hot when cuttings are potted, the number of water sprays per day should be no less than two, or even 3 to 5 times, to keep the leaves from wilting and the pot soil moist. After 7 to 10 days, if the branches and leaves are still green, and when the seedling is gently lifted with two fingers it does not move, and the base of the branch shows no water-soaked appearance, it indicates that the cutting has rooted. Spraying can then be stopped and watering done as usual, so as to avoid leggy growth under shaded conditions.
3. Topdressing. After the seedlings have grown for a certain period and have produced more tender leaves, foliar fertilizer can be applied. Spray with 0.5% urea and monopotassium phosphate, and cake fertilizer water can also be applied.
4. Pest control and weeding. Prevent damage from red spider mites, moths and snails, and remove weeds in time. As the seedlings grow, increase the spacing between pots in time.
How to propagate Gardenia jasminoides? What to do when Gardenia jasminoides leaves turn yellow
Gardenia jasminoides is highly ornamental, so many people grow it at home, but because they do not yet understand Gardenia jasminoides very well, the phenomenon of its leaves turning yellow often occurs. What should be done? Today, we will introduce relevant knowledge about Gardenia jasminoides.
How to propagate Gardenia jasminoides
1. Cutting method
Gardenia branches root very easily. In the warm south, cuttings are often taken from March to October, while in the north they are often taken from May to June. Cut vigorous mature branches and insert them in a sand bed; as long as they are kept moist often, they root and survive very easily. Water cuttings are far superior to soil cuttings, with a survival rate close to 100%. Conducted from April to July, the cut cuttings retain only the top 2 leaves and the terminal bud and are inserted in a container filled with clean water, with the water changed frequently to prevent the cut from rotting, and they begin to root after 3 weeks.
2. Layering method
Generally carried out around Qingming in April or in the plum rain season. In April, select 1-year-old vigorous branches 25-30 cm long from a 3-year-old mother plant for layering, pull them to the ground, and notch the part of the branch that enters the soil. If the notched part can be dipped in 200 ppm powdered naphthalene acetic acid and then covered with soil and pressed firm, rooting is even easier. If there is a three-forked branch, then at the fork opening three seedlings can be obtained at one time. Generally after 20-30 days they can root, and after rooting in June they can be separated from the mother plant; by the next spring they can be divided and planted with soil or potted individually.
For transplanting seedlings or potting, spring is best, carried out in the plum rain season, and a soil ball is needed. During the growth period keep the soil moist; during the flowering period and midsummer water more. Fertilize once a month, and apply phosphorus and potassium fertilizer once more before flowering. In early spring of the following year, prune and shape, and promptly cut off dead branches and leggy branches.
3. Sowing method
Generally choose plump, dark red ripe fruits, dry them in the sun or in the shade with the shell still on for use as seed. Before sowing, use scissors to cut open the seed fruit skin, dig out the seeds, rub them apart in hot water, remove floating seeds or impurities, then scoop out the sunken plump seeds, spread them on a bamboo mat, and place them in a ventilated place to dry off excess moisture. Generally choose a sunny hillside or soil plot, with deep, loose, fertile sandy loam for sowing; land at field edges and corners can be used for planting, or intercropping and relay intercropping with leguminous plants can be used. Before planting, plow the land 1-1.5 chi deep, remove miscellaneous tree stumps, and make beds with a bed surface width of 4-5 chi (if the soil quality is good the spacing can be larger, otherwise smaller), with a bed height of 6 cun. Farmyard manure, green manure or human and livestock manure water can be applied as base fertilizer, for example 20-30 dan of human excrement and urine per mu. After the soil dries, shallowly rake the clods and level the bed surface. On the bed surface, open sowing furrows at a row spacing of 6-7 cun, with a furrow depth of about 1 cun, ready for sowing.
Gardenia jasminoides can be sown in spring or autumn, generally mostly in spring. Spring sowing is done around Yushui, and autumn sowing around Qiufen. When sowing, mix the seeds with plant ash and evenly sow them in the sowing furrows, then cover and level the sowing furrows with fine soil or burnt soil, cover with grass and sprinkle water, and often keep the soil moist to facilitate emergence. Use 4-6 jin of seed per mu. After emergence, pay attention to promptly removing the covering grass. During the seedling stage, weed frequently, taking care not to damage the seedling roots. After weeding, light human excrement and urine water must be applied. After one year of seedling cultivation, they can be transplanted. If transport is relatively far, it is advisable to coat the roots with yellow mud slurry, cover with grass to retain moisture, plant one plant per hole, then cover with soil, press firm and sprinkle water. After planting, cultivate, weed and topdress once each in spring and summer every year. Applying human and livestock manure, barnyard manure, compost, cake fertilizer and the like are all acceptable. Before flowering in summer, it is better to apply fertilizer with relatively high phosphorus and potassium content. Fertilization is generally carried out after weeding and loosening the soil.
What to do when Gardenia jasminoides leaves turn yellow
Gradually adapt to the environment. If the Gardenia jasminoides was just bought from the market, suddenly moved from a greenhouse to a new environment, it needs to gradually adapt to the new environment. Of course, in the early stage of adaptation, due to differences in temperature and moisture, the leaves may turn yellow. Therefore, observe for a period first, and during this period focus on good care.
Water more. Gardenia jasminoides likes water and grows relatively easily in the south wind, but because the north is relatively dry and the air humidity is insufficient, leaves can turn yellow. Therefore, it is best to place Gardenia jasminoides in a large tray, fill the area around the tray with water, and at the same time pay attention to sprinkling water on the leaf surface every day so that the leaves are fully moistened.
Acidic water is more suitable. When watering Gardenia jasminoides, there are also points to note. Gardenia jasminoides likes acidic water. If alkaline water from the north is used too much, it easily causes leaves to turn yellow, so attention should be paid to correct watering.
Open windows for ventilation. The growing environment of Gardenia jasminoides needs to be ventilated and moist, with bright light. If windows are often not opened, yellowing at the leaf edges can also appear, so remember to open the windows every day for ventilation.
Fertilize reasonably. During care, Gardenia jasminoides needs fertilizer, but when fertilizing, care should be taken to avoid too high a concentration, otherwise it will also cause the leaves to turn yellow due to excess nutrients. Therefore, it is necessary to water with clean water to dilute the soil.