What to Do When Bleeding Heart Gets Bugs? 2 Pest and 2 Disease Control Methods
During the growth of bleeding heart, the last thing we want to encounter is pests and diseases. Such problems are extremely harmful to it, not only affecting its ornamental value but, in severe cases, causing the plant to wither and die. So what should you do when bugs appear on bleeding heart? And how should pest and disease control for bleeding heart be carried out? Let us walk you through it below.
I. What to Do When Bleeding Heart Gets Bugs: Find the Cause
To know what to do when bleeding heart gets bugs, we first need to identify what kind of bug it is, so that we can deal with it in a targeted way, because the treatment for each pest and disease is different. The details are described below, and those troubled by this can take a look.
II. Pest and Disease Control for Bleeding Heart
Aphids
Aphids are a type of very small pest, generally only 1.5-4.9mm in body length. These pests mainly feed on the sap in the bleeding heart plant, causing it to lose nutrients severely and wither. The places where they suck usually develop many dead spots, which you can use to identify them.
Control method: The peak period for this pest is every summer, so extra attention must be paid at this time. When dealing with this pest, you can choose to use a 50% malathion emulsion at 1000 times dilution for control.
Scale insects
Scale insects are a relatively common pest during the growth of bleeding heart. They mainly harm the plant's leaves, branches and fruits, and will live parasitically on the branches, leaves and fruits of bleeding heart for their entire life, causing its leaves to turn yellow and the branch tips to wither, and in severe cases causing the entire plant to die.
Control method: When controlling this pest and disease of bleeding heart, we can use an insecticide made by mixing 40.7% chlorpyrifos emulsion and 80% dichlorvos emulsion at a 1:1 ratio, diluted 1000-1500 times, to spray and kill them.
Fusarium wilt
Fusarium wilt is a disease caused by fungi. The pathogen generally invades through wounds on the roots and gradually spreads over time. From onset to death, the course of the disease is generally 15-45 days, making it an extremely harmful disease.
Control method: When targeting this pest and disease of bleeding heart, we can use carbendazim or benlate at 800-1000 times dilution to water the roots of bleeding heart, generally once a week, and after 5-6 times it can be cured.
Powdery mildew
Powdery mildew, just like its name, causes many white powder-like mold layers to appear on the leaves when it strikes. If left untreated for a long time, it will cause bleeding heart to show premature aging.
Control method: When this disease appears, we must carry out control in the early stage, because the longer it drags on, the harder it is to cure. When dealing with it, we can use 10% polyoxin at 1000 to 1500 times dilution to spray and control the diseased plants.
How to Grow Several Common Flowers
How to Grow Several Common Flowers
1. Fringed iris
Fringed iris is a perennial herb in the genus Iris of the family Iridaceae. It is distributed in almost every province and region of the country, and is also found in Japan.
The rhizome is relatively thin and weak, shallow in the ground, creeping horizontally, and yellow-brown. The leaves are sword-shaped, dark green, and glossy. The flower stalk rises above the leaves. The flowers are numerous, arranged in a terminal, long and sparse raceme. There are 3 style branches, dark purple, enlarged into petal-like shapes, rolled back and covering the anthers. The flowering period is April to May. The common flower colors of this species are light purple or light blue. It is suitable for natural-style planting, and also for flower borders, flower beds and as cut flower material.
Ecological habits: It prefers damp, shady places, and has strong adaptability and cold resistance. When cultivated outdoors and overwintering in the middle and lower reaches of the Yangtze River, the above-ground stems and leaves do not completely wither. It requires acidic soil and grows well in a moist, fertile and sunny environment.
Propagation: Mainly by division, generally once every 2 to 3 years. Division after flowering or in autumn is best, which is beneficial for sufficient plant growth and flower bud differentiation. Dig out the rhizome and divide it, and replant each segment with 1 to 2 buds. For seed propagation, germination occurs 4 to 6 weeks after sowing, and it takes 2 to 3 years after sowing to bloom.
Cultivation and pest control: Sufficient base fertilizer should be applied before planting. After planting, the rhizome should be pressed firmly, and shallow planting is advisable rather than deep planting. In early spring, remove leftover leaves to help new buds sprout. During the vigorous growth period, water sufficiently, and fertilize 1 to 2 times a month to achieve abundant flowers and lush leaves. During the flowering period, keep the soil moist, but avoid waterlogging. After flowering, apply one topdressing, mainly phosphorus and potassium fertilizer, which benefits rhizome development. When the rhizome goes dormant after the flowers fade, keep the soil dry. Common leaf blight and bacterial soft rot are mostly caused by the larvae of the owlet moth, and can be sprayed for control with 40% omethoate emulsion at 1000 times dilution. During the growth period, there are also slugs and snails doing damage; spray with 3% limewater in the evening.
Planting some flowers and trees around a farmhouse improves the environment and beautifies life. With clever arrangement, the courtyard becomes a feast for the eyes.
Planting one or two osmanthus or wintersweet trees alone or in pairs in the courtyard is a traditional Chinese garden arrangement. In the damp, shady spots by the wall, plant shade-tolerant flowers such as iris (commonly known as fringed iris) and begonia, which will grow well without meticulous management. For potted flowers on the balcony, small aglaia and Chinese rose are more suitable. On the sunny side, plant sun-loving flowers such as chrysanthemums and scarlet sage; ample sunlight will help them grow better. On the roof, cacti and variegated aloe grow well even without care for a long time. In places needing shade, plant a few grapevines, morning glories or Boston ivy by the window or along the fence. Even indoors, you can place a few pots of shade-tolerant asparagus fern or orchids on the desk or tea table, making the farmhouse courtyard colorful and full of life!
2. Florist's cineraria
Florist's cineraria is a perennial herbaceous plant of the family Asteraceae. The whole plant is densely covered with soft hairs. The leaves are arranged in whorls of three, triangular in shape, and resemble cucumber leaves, hence the name cineraria. Its flowers are gorgeous and rich in color, including a blue flower rarely seen indoors. It also has a long flowering period, blooming for about 6 months. It is an ideal potted flower for holidays such as New Year's Day, Spring Festival and May Day, and a representative flower of winter and spring. However, cultivating a potted cineraria with good plant shape, beautiful leaf color and long flowering is not easy. You must master the following key technical measures in cineraria cultivation.
Sowing time: Generally mid-August is chosen. Cineraria likes a cool climate and cannot tolerate hot, high temperatures. Its optimum growth temperature is 15°C to 20°C. The sowing box should be placed under a shade shed, or under tree shade. If sowing in beds, a shade shed must be built above the bed soil to reduce the radiant heat of the sun.
Seedling moisture control: This is mainly done by spraying water mist to lower the temperature of the seedbed and supply moisture to the seedlings. The principle of spraying is that moistening is enough; the seedbed soil must not be too dry, nor too wet. If too dry, the seedlings wilt and are difficult to revive. If too wet, plus the seedlings being in a high-temperature period, they easily fail to establish, resulting in a low seedling survival rate.
Preparation of growing soil: Cineraria likes sandy soil rich in humus and well-drained, with a pH of 6.5 to 7.5 being more suitable. When preparing the growing soil for sowing, be careful to mix unpolluted leaf mold or wood ash, pure loess and fine sand in a 3:1:1 ratio, then sift, and add no fertilizer at all. Growing soil prepared this way is beneficial for seed germination and growth. Overly sticky growing soil cannot withstand drying; once it cracks slightly, it will break the fibrous roots of the seedlings, causing seedling death and reducing the survival rate. The growing soil after pricking out can be the same as that used for sowing, to harden the seedlings. For the growing soil used when potting up, evenly add soybean cake, bone meal or superphosphate as base fertilizer, or use barnyard manure, burnt soil ash, garden soil, rapeseed cake and fine sand mixed in a 3:2:2:1:1 ratio to prepare the growing soil, to ensure a sufficient supply of nutrients for the plant. The barnyard manure must be composted, decomposed and sun-dried. The rapeseed cake must be crushed, and after thorough stirring and mixing and sifting, it can be used as the growing soil for final planting.
Pay attention to temperature control: Cineraria likes a cool climate, fears cold in winter and high temperatures in summer. Therefore, in winter it should be cultivated in a greenhouse, generally maintained above 10°C, and often kept at around 15°C room temperature, for good growth. In summer, place the sowing box under a shade shed, or open a sowing bed under the shade shed, and water before 10:00 in the morning or after 5:00 in the afternoon, which is more suitable. Never water at noon, so that the seedlings can smoothly pass through the high-temperature period.
Pay attention to humidity control in winter: Cineraria has relatively high humidity requirements in order to grow well. How to keep humidity moderate in winter is the key to successfully cultivating cineraria. If too dry, the leaves of cineraria easily remain in a wilted state, which is not conducive to leaf growth, easily causes the leaves to turn yellow, and also easily produces red spider mites and aphids. If watered too much, indoor humidity is too high, which easily causes the roots, main stems and leaves to rot, and also easily produces aphids. If, in addition, the room temperature is too high and ventilation is poor, diseases easily occur.
3. Corn poppy
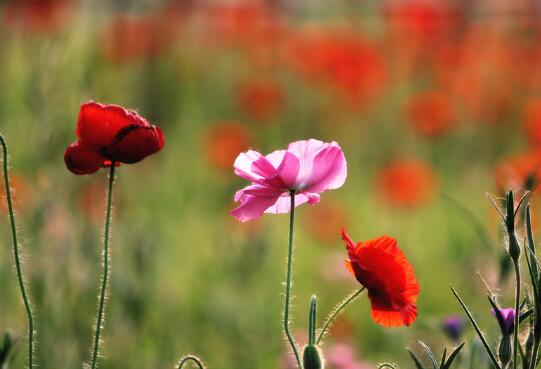
Corn poppy, also known as lichunhua and manyuanchun, is an annual or biennial herbaceous flower in the genus Papaver of the family Papaveraceae. The plant height is 30 to 90 cm. The stem is slender, and the branches are thin and weak. The leaves are alternate, irregularly pinnately lobed, with serrated edges. The whole plant has sparse hairs and milky sap. The flowers are solitary at the top of the branches, with long pedicels. The flower buds droop, and when the flowers open they immediately straighten up. Most horticultural cultivars are double-flowered. Corn poppy has extremely rich and gorgeous flower colors, including vermilion, dark purple, bright pink, snow white, tricolor and so on. The flowers last only 1 to 2 days before falling, but the buds are numerous and open one after another. The flowering period is May to June. The capsule is spherical, and the fruit ripening period is July. The seeds are very small.
Corn poppy is native to Asia and Europe, and is also distributed in North America. It is cold-resistant and suitable for sufficient light and a cool climate in spring, and cannot tolerate severe heat and humidity. It is usually sown in rows in flower bed plots in early winter. It has no strict soil requirements, but loose, fertile sandy loam is best. The row spacing is 20 cm. After sowing, cover with plastic film, or sow in early spring when the surface just thaws, and gradually remove the film after the seedlings emerge. Corn poppy is a taproot flower, with fine and deep roots and few lateral roots. At the seedling stage, the root length often exceeds the plant height by about 1 time, so it cannot be transplanted. If transplanted with difficulty, the survival rate is also very low. When the row-sown seedlings are relatively dense, thin them out two or three times at intervals, keeping a plant spacing of 10 to 15 cm. Corn poppy has low water and fertilizer requirements, but avoids heavy water and fertilizer and waterlogging of the soil.
Corn poppy is an excellent material for flower beds, flower borders and flower belts. It can also be sown in pots in a greenhouse or cold frame in January, and moved out in late April for use as flowers for the May Day holiday. For home flower growing, it can be cultivated on a south-facing enclosed balcony. In January, use a flower pot with an inner diameter of 20 cm, fill it more than half full with loose old potting soil, press it flat, scatter 20 to 30 seeds, cover with soil just enough that the seeds cannot be seen, and after sowing soak the pot in water to moisten it. When the seedlings emerge, thin them out several times, removing the weak and keeping the strong, and finally keep 3 to 5 plants for final planting. When the seedlings are 30 cm tall, gradually fill in growing soil up to the rim, to prevent the slender stems from lodging. Keep sufficient light and fresh ambient air, with nighttime temperatures not below 5°C, and avoid drought and waterlogging. It can bloom in March, right through to May Day.
Corn poppy and opium poppy belong to the same family, not only similar in appearance but also the same in habits. It is just that the opium poppy has a larger plant shape and fruit and is hairless all over, while the corn poppy is smaller and sparsely hairy all over. But the corn poppy is suspected by some people of being the drug opium. In fact, although the corn poppy has milky sap in its body, its composition does not contain opium tincture. Its flowers can be made into a gargle with an antitussive effect, and its milky sap has the effect of relieving pain and stopping diarrhea. On warm sunny spring days, patches of corn poppy in the courtyard greenery compete to show their beauty, like clusters of red clouds, and also like squares of silk handkerchiefs. When the breeze blows, both people and flowers feel as if floating.
4. Pocketbook plant
Pocketbook plant is a herbaceous plant in the genus Calceolaria of the family Scrophulariaceae. The flower colors include yellow, purple, red, cream, orange-red, dark brown and so on, and the flowers are adorned with colorful spots and markings, very lovely. It is often used as an indoor decorative display. It blooms from December to February of the following year, and the flowering period under greenhouse cultivation is March to April.
Pocketbook plant is native to the Mexico and Chile area. It likes cool, humid conditions, and can grow indoors in winter at 3°C to 6°C. During the growth period, relatively high air humidity needs to be maintained. Pay attention to ventilation; sufficient light is beneficial for the plant to bloom.
Ventilation and shading: Pocketbook plant likes cool conditions, with an optimum growth temperature of around 10°C. If the stems and leaves grow luxuriantly during the growth period, while the potting soil is too wet plus muggy, the stem base of the plant will rot. To lower the temperature, shading measures are often taken at noon to create a ventilated and cool environment. Especially after flowering in spring, until the seeds mature in May to June, ventilation work must be done even better, and shade at noon, which helps the seeds develop and mature.
Watering and fertilizing: Pocketbook plant likes a warm, humid environment, but avoids overly wet potting soil and excessive watering during flowering. Generally, water only when the potting soil is dry. If in a greenhouse, frequently spraying water to increase air humidity is even better. Do not water directly onto the plant; if water accumulates on the leaves and buds, it easily causes rot. During the pre-flowering growth season, apply decomposed cake fertilizer water once every 10 days (diluted 10 times). At the early flowering stage, apply more phosphorus-based fertilizer. When fertilizing, do not let the fertilizer water contaminate the leaves, so as to avoid rotting the heart and leaves.
Propagation techniques: Pocketbook plant is generally propagated by sowing. When seeds are lacking, division can also be used. Sowing should be done after the high temperatures pass and the weather turns cool, that is, in August to September, because during the high-temperature period the seedlings are prone to damping-off and rot. Use leaf mold or peat soil mixed with half sand, sift and disinfect it, then put it into a shallow pot, and use the soaking method to fill it with enough water, then sow. The seeds of pocketbook plant are tiny, in the form of relatively coarse powder grains. When sowing, it is best to first fold thick paper into a small triangular funnel, put the seeds in it, then hold the lower part of the small funnel with the right hand, so that the seeds fall evenly into the sowing pot. Do not sow too densely, otherwise the seedlings will grow thin and weak after emergence. For covering soil, just use a fine sieve to cover with a thin layer of fine soil (it is also fine not to cover with soil). After sowing, cover the pot with glass to maintain humidity. Before emergence, place in a cool place, keep the temperature at around 20°C, and emergence can occur in about 7 to 10 days. After emergence, remove the glass, thin the seedlings, and let them gradually receive sunlight, lowering the temperature to around 15°C.
When the seedlings have 2 true leaves, they can be transplanted. When they grow 4 to 6 true leaves, they can be potted individually. The growing soil is made by mixing 2 parts leaf mold, 1 part barnyard manure, 1 part sand and 6 parts garden soil, with a pH value of 6.5. In November to December, they can be planted into large pots for final planting.
5. Cockscomb
Cockscomb, also known as red cockscomb and rooster amaranth, is named because its inflorescence is twisted and folded like a cockscomb. It is an annual herbaceous plant with a plant height of 30 to 50 cm. The stem is erect, with the upper part of the stem flattened, green or red. The leaves are alternate, ovate, ovate-lanceolate or lanceolate, gradually narrowed at the tip, with entire margins, and petiolate. The spike is terminal, with a flattened, fleshy rachis, shaped like a cockscomb, yellow, white or red-purple, with a velvety sheen. The flowering period is July to October. The utricle is ovate, circumscissile, containing 4 seeds. The seeds are black and glossy, with a thousand-grain weight of 0.85 grams. It is used for flower beds and flower borders, and can also be potted. It is also quite good as a cut flower, and the vase life can reach more than 10 days.
Cockscomb has four types, namely mother-and-child cockscomb, common cockscomb, garden velvety cockscomb and foxtail cockscomb. In addition, there are many varieties. Divided by plant height, there are dwarf types (20 to 30 cm), medium-stem types (40 to 60 cm) and tall-stem types (higher than 60 cm). Divided by flowering period, there are early-flowering and late-flowering differences. The colors range from extremely pale yellow (nearly white) to golden yellow and brown yellow, and from jade red, rose red, orange red to purple red, and there are also bicolor types such as sajinhua and erqiao, with yellow and red lines mixed in.
Cockscomb is native to India. It likes a hot and dry climate, fears waterlogging, and grows well in sunny, fertile sandy soil. It avoids sticky soil, and grows poorly in barren, non-breathable soil, with the inflorescence becoming smaller. It can reproduce by self-sowing.
Propagation by sowing: Sow in the open field seedbed in spring from March to April. When sowing, do not cover with soil; after covering with grass, water and keep the soil moist. After germination, remove the covering grass. Transplant when there are 2 leaves. When the seedlings grow to 5 to 10 cm, plant out or pot up. No fertilizing is needed at the seedling stage, otherwise the side branches will grow vigorously and affect the development of the main branch. After the cockscomb forms, apply thin fertilizer to promote its growth. Seeds easily mutate, so careful selection is necessary every year when saving seeds.
Cockscomb can adjust its flowering period by controlling the sowing time. Generally, sowing can be done from March to June. Sow according to the need for flowers, to meet the demand for holiday flowers.
Growth habits: It likes a warm, dry climate, fears drought, likes sunlight, and cannot tolerate waterlogging, but has no strict soil requirements. It can generally be planted in ordinary soil courtyards. It is a new way to develop the courtyard economy at present, and those with insight may as well give it a try.
Propagation and cultivation: By the seed propagation method, select a good plot around Qingming, apply sufficient base fertilizer, plow fine and harrow evenly, level and make beds, evenly scatter the seeds on the bed surface, slightly cover the seeds, firm the soil and water thoroughly. Generally, at a temperature of 15 to 20°C, emergence occurs in 10 to 15 days. For summer sowing, sow after Mangzhong, with a row spacing of 30 cm. When the seedlings are 6 cm tall, thin them to a plant spacing of 20 cm. The thinned seedlings can be transplanted to other fields, and after transplanting they must be watered. At the seedling stage, be sure to weed and loosen the soil, and when it is not too dry, water as little as possible. When the seedlings are 30 cm tall, apply one topdressing. After the rows close, appropriately remove old leaves. When flowering and earing, if the weather is dry, water appropriately. In the rainy season, strictly prevent waterlogging in low-lying areas. After earing, the flower buds in the leaf axils of the lower part can be removed, so that nutrients are concentrated for the growth of the top main ear.
Pest and disease control: If root rot occurs at the seedling stage, quicklime can be broadcast in the field. During the growth period, the small cotton geometrid easily occurs; spraying the leaf surface with dimethoate or pyrethroid pesticides can provide control.
Harvesting and processing: Generally around Bailu, when the seeds gradually turn black and mature, the flower stalk can be cut off in time and placed in a ventilated place to dry. When drying, take them out early and bring them in late, do not let them be exposed to night dew, so as to avoid deterioration and reduced medicinal efficacy. Store in bags.
6. Garden balsam
Garden balsam, also known as zhijiacao, tougucao, jinfenghua and sajinhua. Its place of origin is China and India, and it can be planted in flower pots or flower beds. Garden balsam is an annual or biennial herbaceous plant, about 25 to 35 cm tall. The flowers include white, pink, orange-red, copper-red and so on, and the flower types include single-petaled and double-petaled. It is a very beautiful plant.
The suitable temperature for garden balsam germination is 22°C to 30°C. Sowing period: March to April or September to October.
The suitable temperature for garden balsam growth is 15°C to 32°C. Flowering period: May to July and December to February.
I. Before planting:
Flower growth is closely related to various factors in the natural environment. Among factors such as temperature, light, moisture and growing medium, temperature is the most important factor affecting flower growth. If an air conditioner or heater is used indoors to regulate the temperature, planting will not be affected by the season, but after emergence, the plant must be placed by a sunny window so that it can receive as much sufficient sunlight as possible.
II. When planting:
Good, now it is time to prepare to start sowing. Please confirm once more before sowing: are the conditions required for seed germination and growth now in place?
III. Planting:
1. When planting, pay special attention that at most only a thin layer of soil can cover the surface of the flower seeds, 1 to 3 times the diameter of the flower seeds (be as accurate as possible; feeling is also important). If the seeds are buried too deep, it will make seed germination difficult.
2. Adjust the watering can to the mist setting and spray an appropriate amount of water on them.
3. Cover the mouth of the flower pot with glass or plastic wrap to reduce water evaporation.
4. Place the flower pot in a dark place away from light, and remember to open it for 15 to 20 minutes every day for ventilation.
5. Flower seeds generally germinate in about 10 to 15 days. Be patient while waiting for germination. Sometimes factors such as temperature changes will affect the seed germination time, so please wait patiently.
IV. Emergence:
1. The seeds have germinated! At this time, please wait until the first pair of leaves on the sprout opens symmetrically, then immediately remove the covering (glass plate, plastic wrap), and place it in a sunny place, avoiding direct sunlight, paying attention to temperature changes, and do not water excessively.
2. When the first pair of cotyledons has fully expanded and turned green, it is necessary to gradually increase the duration of light under direct sunlight.
3. When the first pair of true leaves grows, it should be placed in all-day direct sunlight, and pay attention to the dryness of the growing medium and water appropriately. When the second pair of true leaves grows, it shows that the most difficult stage of planting has been passed. As long as temperature and moisture are well controlled, garden balsam will grow vigorously.
V. Light:
1. If the plant lacks light, it often becomes leggy, making the plant slender, weak and prone to falling over. The light duration should be increased.
2. Turn the flower pot as often as possible, so that the branches and leaves of the plant receive sunlight from all angles and grow fully.
VI. Care:
1. When the seedlings grow to nearly one inch, keep the robust plants and "move house" for the rest, that is, repot them.
2. When repotting, be careful not to damage the fibrous roots. When moving the seedling out, dig a pit of appropriate width and depth in the center of the flower pot, let its root system spread out fully, cover with growing medium, press lightly, and then water an appropriate amount.
VII. Watering:
1. During the emergence period, the soil needs to be kept moist. After emergence, it is better to keep it somewhat dry, with the surface soil dry and the interior still moist.
2. Water as much as possible in the morning, avoiding sunlight.
3. It is best to let the water sit for 4 to 6 minutes first, to dissipate the chlorine in the tap water.
4. When watering, it is best to use a fine-spouted pot, starting from a place far from the plant and gradually moving closer to the plant, watering more around the edges and less near the plant, and try not to splash it on the leaves and stems.
7. Lily
Lily is a perennial root vegetable crop. Its main edible part is the bulb. Besides being used as a vegetable, processed products are also widely used in medicine and health foods.
Ziyuan County has a long history of planting lilies, but due to long-term mixed varieties and extensive cultivation management, the per-unit yield is relatively low. To achieve better economic benefits from planting lilies, great effort must be put into cultivation.
1. Site selection: It is advisable to choose acidic sandy loam with sufficient light, deep soil layers, convenient drainage and irrigation, and a pH value of 5.7 to 6.3 for cultivation. The previous crop is best being legumes or grasses. Crop rotation should be carried out, and continuous cropping is not suitable.
2. Selection of good varieties: There are many lily varieties, mainly Longya lily, Yixing lily and Lanzhou lily. Ziyuan County mostly uses Longya lily, which has a large head, good quality, strong stress resistance, vigorous growth and high yield. Generally, small bulbs (single fruit weight 30 to 50 g) are used for propagation. Lily bulbs easily carry diseases, so robust bulbs with no leaky bottom, no disease spots and no mechanical damage must be selected as seed bulbs, to ensure neat emergence and less disease. Planted in the current year, they can be harvested the following year. If the seed source is insufficient, scale propagation can also be used, but it must be planted continuously for three years before harvest. Seeds are collected in July, stored in sand to after-ripen, and sown from late August to September.
3. Land preparation and sowing: Before planting, broadcast about 100 kg of lime per mu in August, deep-plow the soil two to three times, then apply 30 to 40 kg per mu of potassium sulfate compound fertilizer, prepare the land and make beds, with a bed surface width of about 1 m and a bed height of 20 to 30 cm, ensuring no waterlogging. Then open furrows for planting. Apply decomposed crushed cattle pen manure, chicken manure, burnt soil ash, tung oil cake and other organic fertilizers at the bottom of the furrow, 1200 to 1500 kg per mu, cover with a thin layer of soil, then plant. The seed bulbs must not touch the organic fertilizer. If rapeseed cake is used, the lily turns yellow and the export grade is low. If pig manure is applied, pests are easily produced. The planting density is 30 x 20 cm, the seed quantity per mu is 125 to 150 kg, and the harvest amount one year after planting is 4 to 6 times the seed quantity.
4. Pest and disease control:
Disease control: The main diseases of lily are damping-off and root rot. Before planting, first soak the seeds in 300 times formalin for 5 minutes, then dry them and sow. After emergence, use 80% mancozeb at 1000 times, or 25% carbendazim at 1000 times, or 70% thiophanate-methyl wettable powder at 600 to 800 times, alternating use once every 7 to 10 days, spraying continuously 2 to 3 times.
Pest control: For underground pests, use 50% phoxim emulsion or 50% dexon mixed into poisonous soil, and evenly scatter it into the planting furrows. For aphids, use 10% imidacloprid wettable powder at 2000 times for spraying, once every 7 to 10 days.
5. Timely harvesting: It can be harvested every year in July to August. Harvesting on a sunny day one week before the Start of Autumn gives the highest yield. Harvesting after the stems and leaves wither in late autumn is also possible, but the dry slice rate is low and the benefit is not as good as the former. At harvest, large bulbs can be sold fresh or processed into dry slices, and small bulbs below 50 g are all kept as seed.
8. Bleeding heart
Bleeding heart is native to Hebei and the Northeast region of our country. It likes a semi-shady environment with sufficient scattered light, is relatively cold-resistant, and fears midsummer heat and high temperatures and strong direct sunlight. Therefore, it is suitable to be placed under large trees in the courtyard, under grape trellises, on the shady side of tall buildings, and on east-facing or north-facing balconies. During the summer dormancy period, it should be placed in a well-ventilated shady place, must not be exposed to direct light, and water should often be sprinkled on the nearby ground to increase air humidity and lower the temperature.
Ecological habits:
Cold-resistant, avoids high temperatures, likes a shady, humid environment and loose, fertile neutral soil. It grows poorly in both sandy soil and clay soil. By midsummer the stems and leaves turn yellow and it enters dormancy. It goes dormant in hot summers. It cannot tolerate drought, and likes moist, well-drained, fertile sandy loam. It grows poorly in both sandy soil and clay soil. It avoids direct sunlight. The flowering period is April to June. It sprouts relatively early in spring, and after flowering until summer the stems and leaves gradually turn yellow and it goes dormant.
Bleeding heart propagation:
For propagation and cultivation, division, cutting and sowing can all be used.
Bleeding heart division propagation method.
It is suitable to carry out in early spring in February, after the buds begin to sprout and before the new leaves grow. When dividing, dig up the entire plant, shake off the soil from the roots, then use a knife to cut off the tender rhizomes around the main rhizome together with the roots, divide into 2 to 3 plants, and plant them in a seedbed prepared in advance, covering with 2 to 3 cm of soil, watering thoroughly, and placing in a shady place. Division can also be done after the plant enters dormancy in late autumn, with a method similar to early spring division. It must be done at the right time. If the new leaves of the old plant have already unfolded before division, the root system is easily damaged and the survival rate is low. Division can also be done during the dormant period in late autumn, but the survival rate is not high. It can only be divided once every 2 or 3 years, and cannot be divided every year.
The commonly used method is division. Before germination in March, dig out the underground part, remove old roots and rotten roots, separate the rhizomes naturally segment by segment, with each piece bearing 3 to 5 buds, and replant. It can bloom in May of the same year. In spring, break off the basal shoots for cutting, and roots can develop in about 1 month. For seed propagation, seedlings need to be cultivated for 3 years before they can bloom.
Bleeding heart cutting propagation method
Cutting medium: Choose loose, well-drained, humus-rich sandy loam as the medium, with a pH value between 5 and 6. Before use, it is best to disinfect it with a 0.1% potassium permanganate solution.
Cutting time: Carry out from June to July every year. At this time there is more rain, and the ground temperature and air temperature are also relatively suitable, so the cutting survival rate is high.
For softwood cuttings, in June and July, after all the flowers have faded, select branches that are fully grown and have relatively plump axillary buds, cut off the inflorescence, and after 7 to 10 days cut the robust branches with axillary buds at the lower part into sections of 2 to 3 nodes, each section about 10 to 15 cm long, keep one leaf at the upper end, and thin out some of the small leaves. Insert 2 nodes into the soil, with the upper node and its small leaf exposed above the soil surface, at a plant and row spacing of 10 cm x 10 cm.
Dip the cut end in sulfur powder or plant ash, insert into plain soil, water and place in a shady place, and often spray water on the cuttings, but restrict watering of the potting soil; it is enough to keep it slightly moist and not dry. Roots can form in about a month, and the following spring it can be potted with soil for final planting. With good management, it can bloom in the same year. The insertion depth is 1/3 of the branch length. The cutting bed can use sandy loam or sandy soil, and fertilizing must be avoided. After cutting, water thoroughly and shade. Generally, roots can form in 30 to 40 days.
Management after cutting:
After cutting, water thoroughly once with a fine-spouted watering can, so that the cuttings are in close contact with the medium. Cover the bed surface with an arched shed, cover with plastic film on top, and cover with straw curtains to create a semi-shady environment. Control the temperature at around 25°C; when too high, ventilate appropriately to cool down, and always keep the bed soil moist. Roots can form in about 40 days. Gradually remove the shed film and straw curtains. The following spring it can be transplanted and planted out, and it will bloom in the same year.
Plant in March to April. Cuttings are mostly taken in late March, and sowing is mostly done in autumn. Bleeding heart planted in the ground needs covering for warmth in winter. Potted plants are mostly divided or repotted around late March. In hot summer, place in a semi-shady place. In the rainy season, be careful to prevent water accumulation in the pot.
Or cut the rhizome into sections for propagation. In autumn, dig out the underground part, separate the rhizomes naturally segment by segment, and plant them separately. Alternatively, cut the rhizome into sections, each with a bud eye, insert into sand, and after rooting, plant into pots. For seed propagation, seedlings need to be cultivated for 3 years before they can bloom.
Bleeding heart sowing propagation method.
When the seeds mature in late June, harvest them in time. Cut off the inflorescence and dry it in the sun, winnow the seeds clean, then immediately broadcast them in the seedbed, water thoroughly, and emergence can occur in about 15 days. Cover in winter to keep the seedlings alive through the winter. The following spring, plant out the robust seedlings, with a plant and row spacing of 30 to 50 cm being suitable. Seedlings from sowing need 3 years to bloom.
Home propagation generally does not use this; garden departments use it only for mass propagation or for breeding new hybrid varieties.
Bleeding heart cultivation
For ground planting, choose a place with relatively high terrain. Before planting, deeply turn the bed soil and apply decomposed organic fertilizer. During the growth period, topdressing can be carried out in combination with irrigation. In summer high temperatures, the stems and leaves turn yellow and enter dormancy; the dead branches can be cut off. Watering thoroughly once before Frost's Descent is beneficial for cold protection. When potting, use a light growing soil with added fertilizer for potting, water thoroughly after planting, and place in a sunny place for care. During the growth period, give sufficient fertilizer and water. Move it less during the flowering period, so as not to drop flowers and affect the ornamental value. After flowering, if seeds are not needed, promptly cut off the faded flowers.
Bleeding heart management
Bleeding heart (Dicentra spectabilis) is cold-hardy and prefers shade, and does not tolerate high temperatures. It grows well when planted in loam rich in humus, and should generally be watered once a week. During the bud formation stage, apply 1 to 2 rounds of decomposed manure water; there is no need to water excessively, just keep the soil moist. During the growing season, apply once every 2 to 3 weeks a decomposed urine solution diluted with 5 times water. If sown directly in a flower bed, thin the seedlings when they have 5 leaves, with a plant spacing of 30 cm. In March of the following year, apply once more a decomposed urine solution diluted with 3 times water, and wait for it to bloom. In July, cut off the black fruits, sun-dry them and thresh them to collect the seeds.
Bleeding heart pests and diseases
For scale insects, spray with 40% omethoate emulsifiable concentrate at 1000 times dilution to kill them; leaf spot disease sometimes occurs, and can be prevented and controlled by spraying with 65% zineb wettable powder at 600 times dilution.
For leaf spot disease, spray with 65% zineb wettable powder at 600 times dilution. Among insect pests, scale insects cause damage; spray with 40% omethoate emulsifiable concentrate at 1500 times dilution to kill them.
9. Daylily
Hemerocallis hybrida, a perennial herbaceous plant of the genus Hemerocallis in the family Liliaceae, originated in China, Japan and Eurasia, and is now widely cultivated around the world. It is an excellent perennial garden flower.
Hemerocallis hybrida has strong drought resistance, tolerates high temperatures, resists low temperatures, and adapts to a wide temperature range; it can be planted from south to north in our country. It has strong disease resistance and wide adaptability to soil; apart from overly acidic, overly alkaline, overly sandy or overly clayey soils, it can generally be cultivated, with a pH value of 6.5 to 7.5 being preferable.
Propagation methods
Dividing the daylily clumps is the most commonly used propagation method. This method is simple to perform, the plants survive easily, and their growth is relatively uniform. For division, the entire mother clump can be dug out and replanted in divisions; alternatively, part of the plants can be dug out from one side of the mother clump as planting stock, while the remainder is left to continue growing.
Division is mostly carried out before sprouting in spring or after leaf fall in autumn. If divided and transplanted in spring, the plants can send up scapes and bloom in the same year; if divided and transplanted in autumn, they will only send up scapes and bloom the following year. When transplanting, choose plants that are vigorous in growth, have many buds, good quality and no pests or diseases.
When dividing, dig out part of the tillers from the clump as planting stock; the portion dug out must have roots, cut apart at the shortened stem, remove the old roots, decayed roots and diseased roots, retain as much of the fleshy roots as possible, shorten them appropriately (leaving about 10 cm), and then they can be planted. Planting should be done on a sunny day, digging, dividing and planting the seedlings as you go, injuring the roots as little as possible, so that the plants recover quickly. Generally divide once every 2 to 3 years to ensure vigorous growth of the plants.
Sowing is a method for rapidly producing planting stock in large quantities, but because the seed germination rate is low, the seeds must first be soaked to germinate, and only after one year from sowing can they be planted out. The seed collection period begins around September each year; the plants are required to be robust in growth, with plump fruits and no pests or diseases. Sowing is done in the spring of the following year.
The seedbed should first be given sufficient base fertilizer; the bed is 1.3 to 1.7 m wide and about 30 m long, with drainage ditches dug on both sides. When sowing, open shallow furrows about 3 cm deep every 20 cm, sow the seeds evenly into the furrows, cover with a layer of fine soil, then spread a thin layer of fine sand. Before emergence, water and weed, and maintain good soil moisture; by autumn the seedlings can be lifted and planted. Each mu of seedbed uses 2.5 kg of seed and can raise 50,000 to 60,000 seedlings.
The seeds can also be soaked to promote germination and then sown in the open field to raise seedlings, with a sowing rate of 5 to 7 kg per mu, using flat-ground drilling. Open furrows at a row spacing of 30 cm, about 3 cm deep, sow one seed every 3 to 5 cm, and after the plants grow 2 to 3 leaves, apply once a thin human manure and urine solution. For overwintering, use a small arched shed for cold protection; after the beginning of spring, strengthen field management, and by August they can be transplanted. Seeds collected from evergreen daylily can be sown directly, or stored at room temperature before sowing.
Bud division: flower buds refer to the small plants on the flower stems of Hemerocallis hybrida. The flower buds can be cut from the flower stems; if they are relatively large, they can be further divided before planting. The transplanted flower buds can take root after one week. The rooted flower buds can be used to propagate plants, increasing the number planted and ultimately improving economic returns.
Tissue culture: use young leaves, filaments, flower scapes and other organs to culture into plants. The method is to first induce the young organs to produce callus tissue, then culture them into young plantlets on a suitable medium under suitable conditions of temperature, humidity, light and air. The plantlets are then temporarily planted in nutrient pots, and after a period of culture become young plants, after which they are planted out. However, this method has not yet been widely accepted.
In addition to the four methods described above, other methods can also be used to propagate Hemerocallis hybrida. Individual clonal plants can be divided into thin slices with growth points and roots, and after about 6 months of planting they can be divided again. When dividing, these plants must not be smaller than 1/4 of the original plant. Another method is to cut the top of the crown and use plant growth regulators to strengthen the vitality of the cut plants, carry out in vitro culture to promote rooting, and then plant them.
Planting
Hemerocallis hybrida is mostly planted in early spring in early March before sprouting. Although it is not demanding regarding soil, because it can grow for many years after planting, attention should be paid to the choice of planting site. It is best to use level ground with a low groundwater table, or sloping land with good water sources and irrigation conditions, with good drainage, loose soil and deep soil layers. Newly opened wasteland must be fully weathered, or organic fertilizer applied to increase its organic matter content. The land must be leveled; because Hemerocallis hybrida has strong tillering ability, the plant and row spacing must be maintained at 40 to 50 cm when planting. Dig holes for planting, with the holes in a triangular arrangement, planting 3 to 5 plants. Planting should not be too deep or too shallow; if too deep, tillering is slow, and if too shallow, although tillering is fast, the plants mostly grow thin and weak. Generally the planting holes are more than 30 cm deep, base fertilizer is applied down to 15 to 20 cm from the ground surface, and after planting the soil is covered and compacted. Use 500 to 600 kg per mu of human manure and urine diluted with water for spot application to set the seedlings, ensuring the survival rate.
Management
Fertilization: Hemerocallis hybrida has a long flowering period and a relatively large demand for nitrogen, phosphorus and potassium. In addition to applying sufficient base fertilizer when planting (decomposed cow dung or pig manure is preferable), fertilizer should also be applied according to the needs of different developmental stages. When nitrogen is sufficient, it can promote robust plant growth and enlarge the leaves. Phosphorus can promote root growth, enhance tillering ability, help the transition from vegetative growth to reproductive growth, enhance bud-forming ability, and promote drought resistance, cold resistance and disease resistance, improving quality. When potassium supply is sufficient, the plant tissues are tough, growth is robust, and disease resistance is strong; in the middle and late stages it can make the flower scapes emerge neatly and thickly, the flower buds develop large and plump, and the bud-forming ability is enhanced. Therefore, topdressing is needed twice before and during flowering, each time mainly with quick-acting fertilizer combined with phosphorus and potassium fertilizer; nitrogen fertilizer alone must not be over-applied. A 0.2% monopotassium phosphate solution can also be sprayed to promote larger flowers and can achieve the effect of prolonging the flowering period.
Irrigation: Hemerocallis hybrida has relatively strong drought resistance and does not need much water during the vegetative growth period, so irrigation should be based on the water requirements of each growth and development stage of the daylily, combined with local climate, soil and water source conditions. After new seedlings are transplanted, the soil water-holding capacity needs to be maintained at 70% to 80%, and they should be watered promptly in drought. During the seedling stage the plants are small and their water requirement is also small. From the beginning of reproductive growth, the water requirement gradually increases; if there is a water shortage at this time, growth will be affected. During the bud stage, the soil must be kept moist frequently to prevent the buds from dropping due to drought, generally watering once a week. Watering should be thorough and even, preferably in the morning and evening. In July and August there is a lot of rain, so drainage and waterlogging prevention are needed. Before winter begins, winter irrigation should be applied to ensure early sprouting the following year.
Weeding: After planting out and during the seedling stage, timely intertillage and weeding should be carried out. During the seedling stage, intertillage should be shallow rather than deep; as the seedlings age, intertillage should be deepened. Carry out one shallow loosening of the soil before the spring seedlings emerge, and after emergence carry out timely shallow hoeing 3 to 4 times, which can achieve the dual purpose of weeding and drought prevention. Intertillage and weeding should be carried out when soil moisture is moderate, and can be stopped once the leaf clusters cover the ground. Remove weeds in the daylily field in time; if weeds grow in profusion they can easily trigger pests and diseases, affecting the growth and appearance of the daylily.
Weeding can be done either by traditional manual weeding or by using herbicides suitable for Hemerocallis hybrida. Sethoxydim, also known as Nabuqing, is a selective pre-emergence stem and leaf treatment agent that can control grass weeds such as barnyardgrass, wild oat, foxtail, goosegrass and bermudagrass; penoxalin, also known as amine nitro grass, is a selective pre-emergence soil treatment agent, and has a very good effect on pre-emergence control of annual narrow-leaf weeds and certain broadleaf weeds, such as annual grass weeds including crabgrass, goosegrass, foxtail, alopecurus and bluegrass, and broadleaf weeds including lambsquarters, amaranth, chickweed, galinsoga and shepherd's purse; metolachlor, also known as isopropyl metolachlor, is a selective pre-emergence dryland soil treatment agent used to control annual grass weeds such as barnyardgrass, crabgrass, goosegrass, foxtail and lovegrass, and also controls some small-seeded broadleaf weeds such as amaranth, purslane, shepherd's purse, galinsoga and chickweed, as well as rice flatsedge; it has poor control effect on perennial weeds and most broadleaf weeds; fluazifop-butyl is a post-emergence stem and leaf treatment herbicide with good control effect on annual and perennial grass weeds, but is ineffective against broadleaf weeds and sedges. In addition, there are also Surflan, Snapshot, etc., which can all be used to control weeds in Hemerocallis hybrida fields.
Pest and disease control: Rust, leaf spot and leaf blight are diseases that daylily is highly prone to. Rust is a fungal disease and is the main disease of daylily in the middle and late stages. It begins to occur in early May, is most severe from June to July, and gradually stops only after October, damaging leaves and flower scapes. At first a small number of yellow powdery spots appear on the leaves, then gradually spread to the whole leaf, until the whole plant dies. When the disease occurs, fungicides such as triadimefon and sodium dimethyldithiocarbamate can be sprayed for control. Leaf spot is caused by fungi of the genus Fusarium and is the main disease of daylily at the seedling stage. It begins to occur from late March to early April, with the peak from mid-to-late April to mid-to-late May. It often occurs in the middle part on both sides of the leaf midrib. After perforation it causes interruption of water and nutrient transport, and the leaf tips first turn yellow and withered, and finally the whole leaf wilts, yellows and dies. Bordeaux mixture or lime sulfur mixture can be sprayed for control.
Leaf blight is caused by pathogenic fungi of the genus Colletotrichum and is a seedling-stage disease that occurs after leaf spot. It generally begins to occur in early May, is most severe in early to mid-June, mainly damages leaves and also damages flower scapes. It occurs from the seedling stage onward. At the middle edge of the leaf, small water-soaked spots first appear, then gradually spread upward and downward, forming brown streaks, and finally turning grayish white; in severe cases the whole leaf dies. It can be controlled by spraying 50% carbendazim at 600 to 800 times dilution, or by spraying Bordeaux mixture around Qingming.
The main insect pests of daylily are red spider mites and aphids. Red spider mites are tiny red insects shaped like spiders, mainly piercing and sucking sap on the underside of leaves for damage, with grayish white small spots appearing at the damaged sites. They can be controlled with 40% dimethoate emulsion, 20% clofentezine wettable powder, etc. Aphids mainly occur in May, first damaging the leaves, then piercing and sucking sap on the flower buds; the damaged buds are thin and small and easily drop off. They can be controlled with lime sulfur mixture, 40% dimethoate emulsion, 25% malathion emulsifiable concentrate, tobacco-lime water, etc. In addition, in trials on Hemerocallis hybrida propagation it was found that from May to August snails cause relatively serious damage to Hemerocallis hybrida, and control measures should be taken in time.
10. Amaryllis
Amaryllis, also known as belladonna lily, spider lily and trumpet flower, is a plant of the genus Hippeastrum in the family Amaryllidaceae. The amaryllis flower stalk stands gracefully erect, with 4 to 6 vermilion trumpet-shaped flowers borne at the top, opening toward the sun and appearing especially gorgeous and pleasing to the eye. Because the amaryllis resembles clivia in appearance, it also has the elegant name "gentleman's red". In Tianjin it is called "rouge cave", which is quite a clever name. It is now widely cultivated around the world; besides potted ornamental use, it is also planted in open-field courtyards to form community landscapes, adding to the garden scenery. In recent years, European and American horticulturists, to make it convenient for flower growers, have specially produced amaryllis as canned flowers. To date, production in Europe is relatively large; the main producing country, the Netherlands, reached a sales output value of 19.1 million USD for amaryllis in 1995, and Belgium, Germany, France and Spain all have certain production. In Asia, eastern India produces amaryllis bulbs, but the production facilities are backward and the quality is poor. In our country, during the period from 1912 to 1949, Nanjing, Shanghai and other places already had potted ornamental amaryllis; in the 1970s, planting around open-field courtyards began in southern China as landscape ornamentation. In recent years, many excellent varieties have been introduced from abroad across the country, many of them dwarf varieties suitable for potted ornamental use, creating conditions for the development and utilization of amaryllis.
Seeding and division are commonly used for propagation.
Seed propagation: sow indoors in pots in May to June; the suitable germination temperature is 18 to 22°C, and germination occurs about 20 days after sowing. Pay attention to fertilizer and water management during the seedling stage; when there are 3 to 4 true leaves, carry out the first transplanting and maintain a certain plant spacing. It takes 3 to 4 years from sowing to flowering.
Division propagation: potted amaryllis is divided when repotting in February to March. Before dividing and planting, first remove the old roots and old soil, separate the small bulbs growing beside the mother bulb, and pot them by size class; generally flowering bulbs have a circumference of 24 to 26 cm. When planting, 1/3 of the bulb is exposed above the soil surface. Plant in March, and flowers appear in April to May.
In recent years, scale cutting, scoring and tissue culture methods have been widely used abroad to propagate amaryllis.
Scale cutting propagation: choose well-developed disease-free bulbs, peel off the overly old outer scales, and keep the plump middle scales for propagation, but each scale must have a stem disc. In September insert the scales into a sand bed, keep moist at 18 to 20°C, and in that same year small bulbs form and roots grow at the base. In the following spring new shoots grow from the small bulbs, and they need to be cultured for another 3 years to become flowering bulbs.
Scoring propagation: choose bulbs with a circumference of 24 to 26 cm, soak the bulbs in 1% copper sulfate solution for 5 minutes, wash with water, cut off 1/3 of the bulb, gently score the main bud in the center of the bulb with a knife, place flat on a sand bed, keep the room temperature at 18 to 22°C, maintain relatively high air humidity, and after 2 months several small bulbs form between the scales.
For potted amaryllis, use loose, fertile, slightly acidic leaf mold or peat soil. Flowering bulbs with a circumference of 24 to 26 cm need a 12 cm pot; for commercial cultivation, 18 to 20 cm pots are also used, planting 3 bulbs. The planting depth is based on 1/3 of the bulb being exposed above the pot soil. Water less at first planting; when flower stems or leaves appear, keep the pot soil moist. During the growing period, fertilize once every half month, and after the flower stems emerge apply phosphorus and potassium fertilizer once. After flowering, continue to supply water and fertilizer to promote plump and robust bulbs. In commercial production, amaryllis is often forced into cultivation: flowering bulbs pretreated at a low temperature of 5°C for 50 days bloom 6 weeks after planting under conditions of a soil temperature of 21°C and a room temperature of 17 to 19°C. According to experimental reports, soaking bulbs in indoleacetic acid can increase the weight and number of small bulbs. Soaking bulbs in gibberellin (GA3) can increase bulb weight and enlarge flower diameter. Soaking in chlormequat (CCC) can increase the number of flowers. Spraying amaryllis leaves with indoleacetic acid, gibberellin and chlormequat can likewise increase the number of small bulbs and flowers.
If amaryllis seeds are to be collected, artificial pollination should be carried out to increase the seed-setting rate. Because amaryllis seeds are flat and extremely thin, they easily lose water and lose germination ability, so they should be sown immediately after collection. If producing bulbs, cut off the flower stems promptly after flowering to avoid consuming bulb nutrients. After leaves grow, strengthen fertilization to promote bulb enlargement and the production of new bulbs. Bulbs can be stored for 8 to 10 weeks at 13°C, and can be stored long-term at 5°C.
The main diseases include viral disease, spot disease and nematode disease. Spot disease damages leaves and flowers.
11. Peony
Peony is one of our country's traditional famous flowers, with a cultivation history of more than 3000 years. Peony flower forms are varied, the colors are gorgeous, the green leaves are elegant, and the plant clumps are full; used for greening and ornamentation, it can lead people into a wonderland of endless beauty.
Peony is a perennial herbaceous flower of the family Ranunculaceae, with a plant height of about 1 m. The flowers are borne singly at the top of the current year's branches, and some are also borne in the leaf axils at the top; the flower stalks are relatively long, and the flowers are divided into single and double forms, with colors including white, yellow, pink, purple, rose and many other colors.
Peony flowers have strong cold resistance and can overwinter naturally in the open field in most areas of northern China. However, their heat resistance is relatively poor, and growth stops in hot summers. They like sunlight, but can also grow and bloom under light shade. They like moisture, but fear waterlogging, and are suitable for growing in deep, fertile, well-drained sandy loam; low-lying saline-alkali land is not suitable for cultivation.
Peony is commonly propagated by division, and the best time for division is from late August to mid-September. The division method is to dig up clumps that are more than 3 years old, shake off the soil, dry them in the shade until slightly wilted, then take three or four buds as one plant, find the smallest natural connection point and cut it open with a sharp knife, and coat the cut with charcoal powder for antisepsis. To promote the sprouting of new roots, the fleshy roots can be retained at 15 cm in length and shortened. After division, plant as soon as possible.
The growth characteristic of peony is that after sprouting in spring it grows rapidly and blooms, and after flowering it stops growing upward, and the number of leaves no longer increases. At the end of autumn all the aboveground stems and leaves die, while underground the spindle-shaped fleshy roots accumulate abundant nutrients, buried deep in the soil, and at the root crown there are dormant young buds that break through the soil when spring returns to the earth the following year.
1. Land requirements:
Choose sandy soil with high terrain, dryness, good drainage, deep soil layers, and looseness and fertility. Before planting, apply sufficient base fertilizer, preferably decomposed cake fertilizer (200 kg/mu) or dried manure (1500 kg/mu), and only after deep plowing and leveling can planting proceed.
2. Planting time and specifications:
The suitable planting time is generally from late August (End of Heat) to late September (Autumn Equinox); for planting density, generally for ornamental use 80 cm x 70 cm may be used, planting about 1200 plants per mu, and for production use 60 cm x 50 cm may be used, planting about 2200 plants per mu. When planting, the holes are generally about 35 cm deep and about 20 cm in diameter, and the seedling depth is preferably such that the buds are 3 cm below the ground surface; finally fill the holes with soil, tamp them firm, and pile up a 10 cm mound of soil to prevent cold and preserve soil moisture and also serve as a marker. After planting, depending on soil moisture, water appropriately for overwintering.
3. Field management:
(1) Intertillage and weeding: In the spring of the following year, before peony sprouts, loosen and level the soil mounds from the previous autumn; during the growing period, keep the soil loose and free of weeds, hoeing after rain and hoeing during long droughts.
(2) Removing side buds: Besides the bud borne at the top of the stem, peony also bears 3 to 6 side buds in the leaf axils on the upper part of the stem. If the side buds are removed early, nutrients can be concentrated so that the main bud flower becomes large and full; if the side buds are kept, the flowers bloom abundantly and the ornamental period is long. This can be controlled independently according to need.
(3) Watering and topdressing: Peony has fleshy roots, a well-developed root system and strong drought resistance, so generally no watering is needed; if spring drought or midsummer drought lasts a long time, water once or twice, preferably with unpolluted river water; in winter, depending on soil dryness and wetness, one winter irrigation may also be given. Peony grows vigorously and has a high fertilizer requirement, so it can be fertilized twice a year: before winter begins, apply some long-acting fertilizer, such as decomposed cake fertilizer (150 kg/mu) or dried night soil (1500 kg/mu); before or after flowering, apply some quick-acting fertilizer, such as compound fertilizer or diammonium phosphate (10 to 15 kg/mu); foliar topdressing can also be combined with this, such as monopotassium phosphate or trace-element fertilizer, sprayed once every 15 to 20 days.
4. Pest and disease control:
(1) Diseases: mainly leaf spot disease, including red spot disease and brown spot disease. The peak incidence is generally in summer and autumn seasons with high temperature and high humidity. In the early stage of the disease, spray the leaf surface with 40% carbendazim at 800 times dilution for control; in severe cases use 40% carbendazim at 500 times dilution, spraying once every 15 days, and 2 to 3 times is enough for control.
(2) Insect pests: mainly white grubs and nematodes. For white grubs, during the peak occurrence period in July to August, use 30% carbofuran (5 kg/mu) or 50% phoxim granules (3 kg/mu) or isofenphos-methyl liquid, mix with organic fertilizer or sandy soil to form poisoned bait, spread evenly, and then deep hoe. Nematodes are root-knot nematodes with strong transmissibility and cause relatively serious damage to peony; the symptoms are the appearance of nodular growths of varying sizes on the fibrous roots, weakened plant growth, yellowing, scorching and early falling of leaf margins, and in severe cases the plant becomes short until it dies. For control, use 30% carbofuran granules at 25 g/sq m, apply evenly to the affected plot during the rainy summer period, then deep hoe 5 to 10 cm. Because root-knot nematodes are aerobic lower animals and mainly live within the 5 to 20 cm soil layer, when applying the pesticide it must absolutely not be too deep.
12. Chrysanthemum
Chrysanthemum is a short-day plant. In the long-day seasons of spring and summer, it can only carry out vegetative growth. After the beginning of autumn, as the weather turns cooler and the sunshine duration shortens, it can begin flower bud differentiation, breed flower buds, and bloom with gorgeous flowers in the frost.
Chrysanthemum has strong adaptability and is not strict about climate and soil conditions. It is cultivated everywhere in our country, and can grow in both slightly acidic and slightly alkaline soils. Small chrysanthemums have stronger cold resistance than large chrysanthemums, and the flowers do not wither after several severe frosts. At temperatures above 10°C dormant buds can sprout, and 20 to 25°C is the most suitable temperature for growth. Chrysanthemum is drought-tolerant and fears waterlogging, and likes loose, fertile sandy soil rich in humus, a cool climate and sufficient sunlight.
Chrysanthemum can be propagated by many methods such as division, cutting, grafting and sowing. Grafting and sowing have high technical requirements and relatively cumbersome propagation processes; without superb cutting and grafting skills and techniques such as selection of fine varieties and artificial pollination, it is very difficult to propagate successfully. These two propagation methods are also used only when a large number of seedlings need to be raised, in nurseries; for home chrysanthemum growing, division and cutting are generally used for propagation.
1. Seed propagation: Before sowing, apply sufficient decomposed organic fertilizer as base fertilizer, and deep plow and harrow finely, making a flat bed. Mix the seeds evenly with fine sand and broadcast, cover with fine soil about 0.5 cm thick, and after sowing cover with a shade net and water thoroughly. In early spring when it is cold, cloudy and rainy, cover with plastic film to maintain soil moisture and temperature. Watering should be done by fine spraying to prevent the soil surface from crusting. After about 10 days the seedlings emerge; remove the shade net or plastic film, and when the seedlings have 2 to 3 leaves they can be transplanted to the field. Chrysanthemum greens can be sown directly; in southern China they can be sown in February, while in cold northern regions they can only be sown in early April, with about 0.2 kg of seed per mu.
2. Division propagation: In mid-to-late March, the old chrysanthemum greens stubble can be dug out, exposing the root crown, and the lateral buds that already have roots can be cut off together with the old roots and transplanted into the field. Division propagation is more suitable when new shoots are sprouting.
3. Cutting propagation: Cutting propagation can be carried out throughout the growing season, with the highest survival rate for cuttings taken from April to June. The seedbed is best made with new soil mixed with composted decomposed organic fertilizer. Cut branches with 3 to 5 nodes and 8 to 10 cm in length, remove the basal leaves, and insert to a depth of 1/3 to 1/2 of the cutting length. After cutting, keep the bed moist; avoid waterlogging; in high-temperature seasons shade is needed, while at lower temperatures a plastic film arched shed can be built to keep warm and moist. Generally after 15 days they can be transplanted to the field.
Some people may like to display chrysanthemums in a vase, so here are a few tips for everyone:
1. Before putting chrysanthemums in a vase, first cut off the flower leaves on the lower part of the stem that may be submerged in water. Because chrysanthemums have a relatively long flowering period, up to 2 to 3 weeks, while the flower leaves quickly turn yellow; leaves submerged in water will compete with the flowers for nutrients and may also breed bacteria.
2. To make the chrysanthemum flowering period long-lasting, not only should the water be changed every day, but each time the water is changed, cut off 1 inch of the stem base submerged in water, so that the water-absorbing channels can always be kept unobstructed.
3. Chrysanthemums in a vase likewise need certain nutrients. The simplest method is to put a vitamin tablet in the water, or put in 1 teaspoon of white sugar. However, organic nutrients (such as white sugar) will provide a great possibility for bacterial reproduction, so at the same time 1 to 2 drops of bleach or a little bleaching powder can be put into the water to effectively control bacterial reproduction (the dose of bleaching powder should be increased or decreased as appropriate according to the amount of water, the number of flowers and the purity of the bleaching powder).
13. Wax begonia
Wax begonia, also known as glass emerald and glass begonia, is a perennial herbaceous plant of the genus Begonia in the family Begoniaceae. It likes well-drained sandy loam rich in humus, is not cold-tolerant, and avoids exposure to the sun and rain. The single leaves are alternate, ovate to long-ovate, and the leaf colors include green, dark red, etc. The flower colors include bright red, pink, white, etc., and it blooms in all four seasons.
Sowing propagation can be done in all four seasons. First compact the pot soil and soak it thoroughly. Because the seeds are tiny, they should be mixed with fine sand and sprinkled evenly, with a light covering of fine sand or no covering. Cover with a glass plate or film to retain moisture, and they will germinate quickly. When the seedlings grow to 2 to 3 leaves, transplant them into pots, and at this time a thin liquid fertilizer can be applied. When they grow to 4 to 6 cm tall, plant them out for normal management.
Cutting propagation: take cuttings 7 to 10 cm long, dry them in the shade for 1 to 2 hours, keep half a leaf, and insert them into sandy soil. Keep the pot soil moist, and they will root quickly; this can be done throughout the year.
Cultivation management: The pot soil should be well-drained sandy loam rich in humus. During the growing period, moderate moisture is required, and apply a decomposed thin liquid fertilizer once every 1 to 2 weeks. Wax begonia likes light, but avoids direct sunlight exposure; too strong light easily makes the leaves curl and develop scorched spots, while insufficient light makes the plants grow thin and weak, affecting flowering. The optimum growth temperature is 20°C, and the minimum temperature is 10°C; lower than that it is prone to frost damage. In the high-temperature summer season it is in a semi-dormant state and should be placed in a well-ventilated shaded place, and fertilization should be stopped at this time. To make the plant shape full, pinch the growing tips multiple times during the growing period, and at the same time apply phosphorus and potassium fertilizer. After wax begonia has been grown for 1 to 2 years, it appears aged, and can be heavily pruned from the base to promote new shoots; after pinching treatment again, the original luxuriant posture can be restored. Repot once a year, removing old roots and necrotic roots.
14. Fuchsia
Fuchsia, also known as hanging bell begonia and lantern begonia, is an evergreen subshrub of the genus Fuchsia in the family Onagraceae. The flowers are borne singly in the leaf axils at the tips of the branches, with long stalks; the calyx tube is bell-shaped or tubular, and often droops downward. The flower colors include pink, purple-red, apricot yellow, white, etc., and it blooms in all four seasons, most profusely in spring and autumn. There are many fuchsia varieties, with plant forms and flower postures varying.
Fuchsia originated in South America and likes a mild, cool and humid environment; its optimum growth temperature is 10°C to 15°C. In summer, it fears strong direct sunlight and high temperatures; in winter, it fears cold below 5°C. No wonder it is called the "delicate lady among flowers". Its requirements for fertilizer and water differ according to the season: in spring and autumn the demand is relatively large; in the hot summer season, fuchsia enters a semi-dormant state, and watering should be controlled to avoid root rot and death. Ventilation and cooling measures should be taken, water should be sprayed on the leaves frequently, and the plant should be placed under a shade shed to ensure safe summering. After the autumn cools it revives; strengthen fertilizer and water management, pinch the growing tips in good time to shape the plant, and promote lateral branches. Generally, about two to three weeks after pinching the growing tips it can bloom, so pinching is also often used to control the flowering period. The pot soil is preferably fertile, loose, well-drained sandy loam; it can tolerate weak alkalinity.
Fuchsia sets fruit with difficulty after flowering, so cutting propagation is usually used, and it can be done throughout the year, but spring is preferable. One-year-old young branches root most easily; choose robust, plump top branches with three or four nodes, 5 cm to 10 cm long, keep the upper 3 small leaves, and insert them into sandy soil to the depth of one node; maintain the temperature at 15°C to 20°C; spray water once a day to maintain air humidity, and after two weeks they can root. Pot the plantlets in time with culture soil, and pinch the growing tips in time to promote lateral branches. Old plants should be repotted every spring, combined with heavy pruning for propagation, and the old roots around them should be cut off to rejuvenate the plant. There is an advantage to spring cuttings, namely that the seedlings have relatively strong heat resistance, and mostly do not shed leaves in the dog days. If cuttings are taken before the dog days, they bloom after autumn, hence the saying "keep the young, not the old". If the plant sheds leaves in summer, generally after the "Beginning of Autumn" it should be cut back promptly to promote new branches, topdress with liquid fertilizer, and it can bloom in autumn.
15. Clivia
Clivia has strong vitality and is easy to cultivate, but to grow it well, the correct cultivation method is indispensable. For a good clivia, cultivation skill and the plant itself can be divided 3 to 7, which shows the importance of cultivation techniques. Only by understanding the growth habits of clivia can one explore and summarize the correct cultivation techniques, and only then can one grow clivia with ease and get twice the result with half the effort; and only then will the clivia grown be pleasing to the eye. The growth of clivia is greatly affected by water, soil, fertilizer, light, temperature and humidity factors. Let me discuss my views on these six aspects:
1. Water: As everyone knows, plant growth cannot be separated from water; the absorption of nutrients and all physiological activities must depend on water, but different plants have different requirements for water, and the water quality also differs from place to place. Clivia's requirements for water are as follows:
The pH of water: Clivia likes neutral or slightly acidic water, with a pH value of about 6.5. The pH of water differs from place to place; if it is not neutral or slightly acidic water, then improvement should be considered. For example, alkaline water can be neutralized with rice-washing water.
Water quality: Tap water, river water, lake water, etc. differ from one another in water quality; clean water rich in minerals is the best. Tap water, having been treated with artificially added chemicals, should generally be stored for a few days before being used to water flowers.
The water content in the soil: The suitable water content should be 20% to 40%, preferably neither dry nor wet. If the water content in the soil is too high for a long time, the air permeability in the soil will become poor, easily causing root rot; conversely, if the water content is too low, it will dehydrate the plant, causing the roots to shrivel and wither.
Watering method: The principle of watering is not to water if not dry, and to water thoroughly when watering. The practice of light sprinkling, a little at a time, is extremely harmful. The dryness mentioned here does not mean dry to the point of no water, but rather that the water content in the soil is relatively low, which is the time to water. People who often grow clivia usually tap the flower pot with their fingers, judging the level of water content in the soil by the sound produced by the tapping. If the sound produced by tapping is dull, it indicates that the water content in the soil is relatively high and there is no need to water; conversely, if the sound is crisp, it indicates that the water content in the soil is relatively low and watering should be done immediately. The reason why the practice of light sprinkling is extremely harmful is that most of the small amount of water is absorbed by the soil or flows away directly along the channels formed in the soil, and very little is absorbed by the root system, almost equivalent to not watering.
In addition, when watering, note that the water temperature and soil temperature should be close, and the temperature difference between the two should not be too large; the watering time is preferably in the morning and evening; at noon in summer, when the temperature is very high, it is not suitable to water; watering should avoid the flower heart, especially during the period of sending up the scape and flowering, to prevent unclean water from causing heart rot.
2. Soil: Clivia's roots are fleshy roots, suitable for growing in loose, fertile, water-permeable and well-aerated soil, so the choice of cultivation soil should strictly consider these four factors.
Soil quality: Humus soil meets the above four requirements and is the first choice for growing clivia. The best humus soil is oak leaves (oak tree leaves); other leaves such as larch, hazel, pear and apple tree leaves are also acceptable, but attention should be paid to pesticide factors. Walnut tree leaves are toxic and cannot be used. High-quality humus soil should be moderately rotted tree leaves, with a rotting degree of about 50%; too high a rotting degree is not good, as water permeability and air permeability are poor.
To further improve the structure of the humus soil and increase water permeability and air permeability, some larch pine needles, carbon made from burned rice husks (not ash), washed river sand and furnace cinders can also be added, accounting for 10% to 20%. Compacted and barren ordinary soil is not suitable for growing clivia, and will seriously affect the normal growth of clivia.
In addition, the pH of soil differs from region to region, so neutral or slightly acidic soil should be chosen, with a pH value between 6.5 and 7.
3. Fertilizer: As the saying goes, "For a crop to bloom, it all depends on fertilizer as the master." Fertilizer is an essential and important nutrient source for the vigorous growth of clivia; clivia is a flower that likes fertilizer, and mature clivia must have sufficient fertility.
Fertilizing clivia should be determined according to the size, variety, growth and development status and season of the clivia. Too much or too little fertilization is not conducive to the growth of clivia. Too much will cause root burn, and the leaves will wrinkle or stall; too little will lead to a lack of nutrients, slow growth of clivia, and the leaves will noticeably become narrower and softer, no longer upright.
Types and uses of fertilizer: Fertilizers are divided into solid fertilizer and liquid fertilizer.
Solid fertilizer: Castor seeds, hemp seeds, sunflower seeds, perilla seeds, etc., after being fried and cooked, with a small amount of bone meal added, make a very good solid fertilizer. Solid fertilizer is usually used as base fertilizer (bottom fertilizer and waist fertilizer), applied twice a year (April to May in spring and September to October in autumn), but it must not touch the roots, to avoid causing root burn.
Liquid fertilizer: Sesame, peanuts, hemp seeds, sunflower seeds, freshwater fish (with internal organs removed), etc., after full fermentation, make good liquid fertilizer. Liquid fertilizer used as topdressing has a quick fertilizer effect but short fertilizer duration, and can be applied once every half month. The application of liquid fertilizer should follow the principle of low concentration and small amounts applied multiple times, to prevent over-fertilization and root burn. In spring and autumn, clivia grows vigorously, and liquid fertilizer should be applied to provide sufficient nutrients. When applying liquid fertilizer, prevent it from dripping onto the clivia leaves or heart, to avoid leaf rot or heart rot; after each fertilization, use a spray bottle to spray clean water to rinse the clivia leaves or heart.
All the above are organic fertilizers; inorganic fertilizers can also be used, and their effects are faster. The growth of clivia emphasizes nutritional balance; it needs not only the nitrogen, phosphorus and potassium we are familiar with, but also various trace elements. A serious deficiency of any one element will have adverse effects on the normal growth of clivia. This is also the reason why people have long mostly used organic fertilizers.
4. Light: Light is an indispensable element for clivia photosynthesis. Sufficient light is needed; indoor clivia growing should be placed on a windowsill to ensure sufficient light. It is not tolerant of strong light and likes weak light (dappled light); summer light is strong, so shading treatment is needed to prevent burning the leaves. Clivia leaves have strong phototropism; regularly adjust the direction toward the light so that the plant shape is neat; if conditions permit, the direction of leaf extension should be consistent with the north-south direction.
Clivia leaves should be kept clean; frequently wipe the dust off the leaves with a soft damp cloth, which is beneficial to photosynthesis.
5. Temperature: The suitable temperature for clivia growth is 15°C to 25°C, neither cold nor hot.
In summer, when the temperature is above 25°C, measures such as ventilation and shading should be taken to lower the temperature; above 30°C with low humidity will cause the leaf luster to diminish; high temperature with abundant water will make the leaves grow too long; high temperature may even cause high-fever disease, leading to the whole plant rotting.
Below 10°C growth and development will be slow; below 5°C growth will be inhibited; below 0°C the leaves will freeze and be damaged or die.
6. Humidity: Clivia likes a warm and humid environment; low environmental humidity will affect the luster of the leaves; dry air and wind and sun in the open field will make the leaves lose their delicate luster, becoming rough and dull in color. It has been found that clivia cultivated in flower cellars is delicate, succulent and full of luster, while clivia grown on windowsills cannot achieve this effect; the reason lies precisely in this. The solution is to try to create a small environment similar to a flower cellar on the balcony.
To grow clivia well in summer, one should achieve the "six preventions" and "six don'ts".
1. Prevent direct sunlight, do not expose to the sun. In summer, clivia should be shielded from strong light all day. Using the slanting sunlight in the early morning to shine on it for a while each day is enough to satisfy photosynthesis.
2. Prevent high temperatures, do not let it dry out. The suitable temperature for clivia in summer is 18°C to 25°C; it is best placed in an air-conditioned room, and a shaded and ventilated balcony is also acceptable. When watering, it is best to use tap water that has been sunned for two or three days, watering once a day after 6 o'clock in the afternoon, and do not let the pot soil become too dry or too wet.
3. Prevent leggy growth, do not fertilize. Summer is the dormant period of clivia; stop fertilizing, water moderately, and controlling humidity is an effective measure. If too much fertilizer has been applied to the pot soil or the fertilizer effect is relatively strong, the upper part of the soil in the flower pot should be poured out, mixed with 1/3 to 2/3 sand evenly and put back into the pot, which not only reduces the fertilizer effect but also has a cooling effect.
4. Prevent dust pollution, do not water with dirty water. Clivia leaf surfaces should be kept clean; once a week dip a fine gauze in clean water, wring it dry and gently wipe once. Watering with dirty water will cause roots and leaves to rot and turn yellow.
5. Prevent soil compaction, do not use clay (yellow soil) in the pot. Clivia is suited to cultivation in loose, air-permeable, water-permeable, fertile humus soil with a pH value of about 7.0.
6. Prevent diseases, do not cause infection. When changing soil or wiping leaves, the movements should be gentle, to prevent roots and leaves from being broken and exuding sap, which can trigger infection and cause rot.
16. Cyclamen
Cyclamen originated in the southeastern Mediterranean coast, in the coastal low-mountain forest zones from Israel and Jordan to Greece. It is now widely cultivated around the world. Cyclamen likes a cool, humid environment with sufficient light. The suitable growth temperature is 15 to 20°C; below 10°C, growth vigor weakens, flower color becomes dull, and flowers easily wither; when the temperature reaches above 30°C, the plant enters dormancy. In the hot summer regions of our country, at that time, cyclamen are all in a dormant or semi-dormant state; while in the Kunming area of Yunnan Province, where it is like spring all year round, the summer is cool and humid, so it does not go dormant and continues normal growth. When the temperature exceeds 35°C, the plant is very easily damaged and rots and dies. The seedling stage has relatively strong resistance to high temperatures. During the growing period, the relative humidity is preferably 70% to 75%. Cyclamen is neutral to day length, and temperature is the main environmental factor affecting flower bud differentiation. The suitable temperature for flower bud differentiation is 15 to 18°C. During the growing period, the required light intensity is 28000 to 36000 Lx; if higher than 45000 Lx or lower than 15000 Lx, the photosynthesis intensity decreases significantly. However, it is also not tolerant of strong light exposure in summer and should be cultivated under a shade shed. It often self-pollinates, and can also cross-pollinate. It has relatively strong resistance to sulfur dioxide and is suitable for indoor greening in factory areas.
I. Key points for propagation and cultivation of potted cyclamen: cultivation techniques
Seeding is mostly used for propagation. Sow in September and it blooms in the winter of the following year. It can also be propagated by the cut tuber method, but it easily rots, so it is mostly not used. The key to cultivation is to maintain a cool but not overly wet environment during the summer dormancy period. Tubers 2 to 3 years old have the strongest growth, so old tubers are often discarded. Repot once a year.
II. Propagation and cultivation care of cyclamen
1. Sowing: Cyclamen tubers cannot naturally divide into small tubers, so seeding is generally used for propagation. However, cyclamen virus damage is serious, and seeds often have a relatively high virus infection rate. If the virus infection rate is more than 20%, then before sowing the seeds must be detoxified. The method is: soak the seeds in 0.1% mercuric chloride for 1 to 2 minutes, then rinse clean with water; then soak in 10% sodium phosphate solution for 10 to 20 minutes and rinse clean; finally soak in a 35 to 40°C colloidal solution, treat for 48 hours, rinse clean with water, and then sow. Determine the sowing date according to the flower supply time. Generally sow 13 months before the flower supply time, and even early-flowering varieties need 8 to 10 months. To supply flowers for Christmas, New Year's Day and Spring Festival, sowing is usually done in September to October.
Cyclamen germinates slowly and emerges unevenly, with a germination rate of about 85% to 95%. To germinate earlier and more uniformly, seed soaking to promote germination can be done before sowing (detoxified seeds sown immediately do not need germination promotion): soak the seeds in cold water for 24 hours, or soak in 30°C warm water for 2 to 3 hours, wash off the sticky matter on the seed surface, wrap in a wet cloth to promote germination, treat at 25°C for 1 to 2 days, and when the seeds slightly begin to sprout, take them out and sow. For sowing soil, use equal parts vermiculite and fine furnace cinders mixed; equal parts peat soil and vermiculite mixed; or equal parts loam, leaf mold and river sand mixed. Sow in spots, at a spacing of 2 cm x 2 cm, and cover with 0.5 cm of soil. Use the pot-soaking method to keep the pot soil moist, at a temperature of 18 to 20°C, and germination occurs in 30 to 40 days. When the sown seedlings grow 1 true leaf, divide the seedlings at a spacing of 3.5 cm x 3.5 cm, using soil mixed in the ratio of 5 leaf mold, 3 loam and 2 river sand. When planting, make the top of the small tuber level with the soil surface, keep moist, place in a weak-light place during the recovery period, and after growth resumes, gradually increase light, strengthen ventilation, with a suitable temperature of 15 to 18°C, topdress appropriately, and be careful not to let the fertilizer liquid contaminate the leaves, to avoid causing rot. When the seedlings have 3 to 5 leaves, pot them.
2. Tuber division method. For superior varieties of cyclamen that set seed poorly, the tuber division method can be used for propagation. In late August, when the tuber is about to sprout, cut the tuber longitudinally from the top into several pieces; each piece must have a bud eye. Coat the cut surfaces with plant ash or charcoal powder, let them dry slightly, and they can then be planted in pots. Careful maintenance and management are required. This method has a low propagation rate, the tubers rot easily, management is difficult, few flowers are produced, the plant form is unattractive, and the tuber portions exposed above the soil surface are not round and neat, so it is rarely used.
In recent years, extensive research on vegetative propagation of cyclamen has been carried out internationally. Successful methods include: 1. Tuber tissue culture, in which tuber pieces are cut and cultured aseptically to form regenerated plants; 2. Cuttage using leaf buds with some tuber tissue attached; 3. In the original pot, cutting off the upper part of the tuber and then dividing it longitudinally to form regenerated shoots, etc. The third method is described in detail below. The cyclamen tuber is formed by the abnormal thickening of the hypocotyl. After the upper part is cut off, adventitious buds can grow from the cut surface and then form regenerated plants. By dividing one tuber, many regenerated individuals can be obtained. The procedure is: select a robust, plump, and well-developed tuber, and carry out division 1 to 2 months after flowering. The suitable period for division is May to June. First, adjust the moisture of the potting soil, because if division is carried out under normal cultivation conditions, the wound will secrete a large amount of sap. This bleeding not only affects growth vigor and especially hinders the formation of adventitious buds, but also easily leads to rot. Therefore, watering should be controlled to reduce soil moisture. When the leaf tips feel soft to the touch, this is the suitable time for division. First cut off the upper part of the tuber, about 1/3 of the tuber in thickness. Then make radial cuts (for tubers with a diameter under 4 cm) or checkerboard-like longitudinal cuts (for tubers with a diameter over 4 cm), with the depth not injuring the root system. If checkerboard cutting is used, the interval between cuts is 1 cm; a tuber 6 cm in diameter can be cut into 27 pieces.
Immediately after division, cover the flowerpot with plastic film and carry out curing treatment at 30°C until the wound forms periderm, which takes about 12 days, then promote adventitious bud growth at 20°C. During this period (about 20 to 30 days), the key point of management is to maintain the soil moisture level present at the time of division. The pot can be weighed together with the soil at the time of division, and every 2 to 3 days the lost water is replenished according to weight. From 70 to 80 days after division, each cut piece forms adventitious buds; lower the temperature to 15°C to allow them to gradually adapt to the environment. From the beginning of adventitious bud formation (about 35 days after division), gradually increase the amount of water supplied, and apply liquid fertilizer once a week. About 100 days after division, regenerated plants are basically formed and can be transplanted into pots. Normally, flowering occurs 11 to 14 months after division. This method is performed in the original cultivation pot, is simple and easy to carry out, and requires no complex techniques or equipment; the time to form regenerated plants is short; the regenerated individuals are uniform in character; and the regeneration rate is high. It is a vegetative propagation method with great prospects for application. It can be used to multiply clonal lines of superior varieties; in addition, it also has practical value in the production of first-generation hybrid (F1) seeds.
3. To meet the need for flowers in different periods, the following methods are mainly used to control the flowering period:
1. Adjust the sowing date. By taking advantage of the seedlings' relatively strong tolerance to high temperatures and placing them in a cool, ventilated environment so that they do not go dormant in summer, the flowering period can be advanced. Sowing can be done from December to early summer, and flowering occurs in about 12 months. The sowing time can be determined according to the required flowering period.
2. Control environmental factors to delay or advance dormancy, or to break or prolong the dormancy of dormant tubers. For example, for flowering plants about to enter dormancy, apply additional phosphorus and potassium fertilizer, provide appropriate shading, and place them in a cool, ventilated place at 25°C, and they can continue to flower until June to July.
3. Use certain volatile chemical agents to break or promote dormancy of the bulbs in order to control the flowering period. For example, injecting aqueous solutions of ether, camphor, etc. into the buds or fumigating with them can break dormancy. For example, in a sealed space of 1000 cubic meters, place 0.5 cm of ether and treat for 24 to 48 hours; cyclamen tubers quickly break dormancy, resume growth, and flower early. Another example is placing a cloth ball soaked with ester solutions such as ethyl naphthaleneacetate or ethyl phenylcarbamate beside a cyclamen tuber about to sprout, which can keep the tuber from sprouting for several weeks, thereby delaying the flowering period.
4. Pest and disease control of cyclamen
1. Soft rot is caused by Bacterium
aroideae and occurs under high temperature and high humidity in summer. It damages leaf stalks and flower stalks, causing water-soaked softening; in dry weather the lesions dry up, while in rainy weather they rot and smell foul. The pathogen overwinters in the soil. Control methods: first, the potting soil must be thoroughly sterilized; second, during high summer temperatures, control water, do not apply nitrogen fertilizer, do not injure the plants, maintain air circulation, and provide appropriate shading; third, promptly remove diseased leaves and burn them, and spray with Bordeaux mixture.
2. Anthracnose is caused by the pathogen Glomerella
rufomaculans. The lesions are tea-brown, round, and sunken; later the lesions enlarge and bear black conidia. The spores disperse and infect via water. Control methods: remove infected leaves and leaf stalks and burn them; avoid wetting the leaves when watering; in the early stage of the disease, spray with a 500- to 600-fold solution of 50% carbendazim.
3. Nematode disease is caused by parasitism by Heterodelaradicicola. A soil temperature of 25 to 30°C and soil moisture of about 40% favor nematode damage, and they invade the roots to form root galls. Affected plants grow weakly, the lower leaves turn yellow, and the whole plant may even die. Control methods: sterilize the soil; burn affected plants; soaking in hot water at 50°C for 10 minutes can kill nematodes.
4. Aphids cause leaves to curl, leaf stalks to bend, growth to be hindered, and flowers to fail to open. They can be controlled with a 1500-fold solution of dimethoate. Red spider mites are also seen causing damage; spray with a 1500-fold solution of dicofol.
17. Narcissus
In the cold winter months, narcissus can, in a dish of clear water, unfold verdant leaves and produce elegant, fragrant flowers. Placed on a table indoors, it brings vitality and a feeling of spring.
According to Chinese flower introductions: narcissus cultivation methods include soil culture, sand culture, water culture, and carved shaping. The cultivation requirements are not high; as long as the temperature is maintained at around 15°C, there is sufficient sunlight, and water is given frequently and changed often, it can bloom in 25 to 30 days. However, several points must be noted:
1. The temperature must not exceed 25°C, otherwise growth stops and the plant enters dormancy, causing the flower buds to turn yellow, shrivel, and dry up;
2. Sunlight must be sufficient, otherwise the leaves will grow like garlic leaves;
3. The water used must be clean, otherwise water deterioration causes pollution and root rot.
Narcissus has special growth characteristics; its flowering date can be decided by people themselves. If it is required to bloom during the Spring Festival, the bulb (narcissus head) can be planted in a pot about 20 to 300 days before the Spring Festival. After potting, it begins to grow until flowering. Several cultivation methods are introduced below:
Soil culture
For soil culture, the soil should be loose humus soil. Before planting, peel off the dry, withered bulb scales on the outside of the narcissus head and scrape off the old roots, then add humus soil to 3 cm below the pot rim. Hold the pot with both hands and shake it to make the humus soil firm, then set the narcissus basal plate in the pot, continue adding soil for about 1 cm, then water thoroughly, and place the flowerpot in a cool place. After 5 days, when the basal plate has grown roots, place the flowerpot in a sunny place for cultivation. When watering in soil culture, pay attention to watering only when dry and watering thoroughly when watering, that is, do not water if the soil is not dry, and once watering, water until water leaks from the bottom of the pot. Watering should be done in the morning and evening, otherwise it will damage root growth.
Sand culture
For sand culture, it is best to use clean, washed fine sand, and the pot should also be a breathable clay pot. Before planting, first put sand into the pot to 3 cm below the pot rim, then set the narcissus head, with old stem scales and old roots removed, into the flowerpot filled with fine sand, and add about 1 cm more sand so that the lower stem of the narcissus head is buried about 1 cm in the sand. Then water thoroughly and place in a cool place. After 5 days, place it in a sunny place until flowering. When growing narcissus heads in sand, water thoroughly every day; failure to water in time will cause water deficiency and affect root growth. Watering should also be arranged in the morning and evening.
Water culture
Before water culture, also peel off the old stem scales and old roots cleanly, then place it into the narcissus flowerpot used for cultivation, add water to about 1 cm above the lower bulb of the narcissus head, and place in a cool place. After the basal plate has grown roots, place it in a sunny place until flowering. For water-cultured narcissus, it is best to change the water every day. On the one hand, this prevents water deterioration and pollution from causing root rot; on the other hand, by changing the water every day, the water stays clean and the roots grown are also white and beautiful.
Carved shaping of narcissus
In order to make the flowers and leaves grow in graceful and varied forms, the flower head must be carved. The specific procedure is: first peel off the dry, withered scales on the outside of the bulb and scrape off the old roots, then carve. When carving, first observe the growth trend of the buds, use the curved side as the carving surface, then use a small pointed knife to gently make a horizontal cut line from left to right on the bulb 2 cm from the basal plate, then make one vertical line on each of the left and right sides, then peel off the scales layer by layer within the range of the horizontal and vertical lines, and at the same time dig out the scales between the buds until the leaves and pale yellow flower scapes are exposed; at this point the leaves can be curled. Next, shape the flower scape: use a small knife to scrape a line from top to bottom above the flower scape and below the flower bud, or use a needle to prick the flower scape several times from top to bottom; the growth of the flower scape will then become abnormal and also bend toward the wound side. According to the requirements of different shapes, the degree of scraping and the position also differ. After carved shaping, the narcissus head should be promptly soaked in water with the cut surface facing down to remove the mucus secreted from the wound, changing the water every day, and soaking for about 2 to 3 days. When the mucus has been cleaned away, take it out and cover the basal plate (root plate) with absorbent cotton. Then place the carved surface facing up, put it into a narcissus pot, add water, and cultivate in a cool place. Change the water once a day to keep the water clean. When the basal plate has grown to about 1 cm, place the narcissus pot in a sunny place for cultivation. Remember that during cultivation the temperature should not exceed 20°C, water should be changed frequently, once a day, and water should be sprayed frequently, 1 to 2 times a day, with frequent sunlight. In this way, the cultivated flowers will be luxuriant, fragrant, and graceful in form.