How to Propagate Holly? Detailed Explanation of Seed Propagation and Cutting Propagation Methods
Holly is a world-renowned ornamental flowering plant, and people all over the world cultivate it. However, as more people grow it, questions about its propagation have also become a concern. How to propagate holly? What are the propagation methods for holly? Below, the editor will walk everyone through it.
I. How to Propagate Holly: Seeding/Cutting
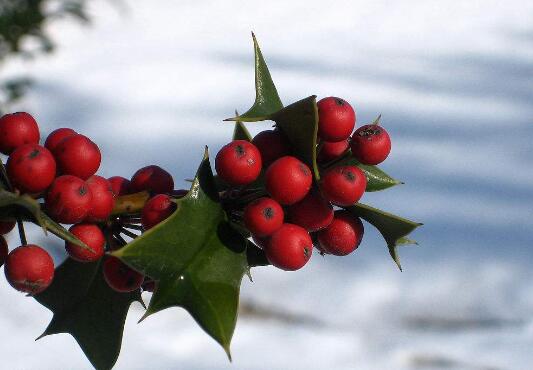
When it comes to how to propagate holly, it can mainly be divided into two methods: seed propagation and cutting propagation. As long as the operation is done properly, the survival rate of both propagation methods is very high. As for how to carry out the two propagation methods specifically, there is a detailed introduction below, and interested friends can take a look.
II. Holly Propagation Methods (Seed Propagation)
1. Sowing time, spring
When carrying out seed propagation of holly, choosing a suitable time is very important. As for when it is most suitable to sow holly, we can choose spring each year, preferably before March, because the climate at this time is more suitable for its growth, so the survival rate will also be relatively higher.
2. Seed germination promotion, soaking in warm water
Before carrying out seed propagation of holly, there is first a preliminary step, which is to promote germination of the seeds. Generally, the seeds can be soaked in warm hot water for about 24 hours. When the seeds begin to absorb water and swell, take them out and plant them. This can make the seeds germinate more easily and also germinate faster.
3. Sowing method, cover with 1-2 cm of soil
When planting holly, we can first add an appropriate amount of base fertilizer to the substrate, then evenly scatter the seeds on the soil surface. After scattering, cover them with 1-2 cm of soil and then water. However, when watering, it is best not to water directly, so as not to wash the seeds away. We can use the bottom-watering method to water, placing the flowerpot halfway into water and letting the water slowly soak up.
III. Holly Propagation Methods (Cutting Propagation)
1. Selection of cuttings, robust-growing branches
Before carrying out cutting propagation of holly, we must first select cuttings. The quality of the selected cuttings directly affects its survival rate, so it is generally best to choose branches that grow robustly and are free of pests and diseases as cuttings. The length of the cuttings should be 6-8 cm. Cut off the lower leaves and keep only 1-2 leaves before carrying out cutting.
2. Cutting method, roots in one month
It is generally best to carry out holly cuttings during the plum rain season. Before cutting, we can use chopsticks to poke a hole in the substrate, then insert the cutting halfway in. This operation can avoid damage to the cutting and is very practical. Afterward, water thoroughly and let it sit for about one month, and it will take root.
3. Follow-up management, pay attention to water and fertilizer management
After the cuttings take root, cutting can be declared successful, and then we can carry out follow-up care. There are also many points to pay attention to in terms of care, such as watering and fertilizing, which are quite particular. If you do not know how to grow it, you can refer to the article on holly cultivation methods, which has detailed teaching.
Cutting Propagation of French Holly
The propagation of French holly is mainly by cuttings, and it can also be propagated by sowing. Using cutting propagation is not only simple and easy to carry out, but also roots quickly and has a high survival rate, so it is widely used in production.For the French holly cutting seedbed, choose a plot with high terrain, deep soil layer, loose soil, and good drainage and irrigation. After clearing grass roots and stones, form a high bed about 1-1.2 m wide, and drench with 10% imidacloprid at 1000 times plus 5% mancozeb at 1500 times to eliminate underground pests and harmful pathogens. After leveling the seedbed, pat it flat with an iron shovel, pour on 10% decomposed dilute human manure, and then spread a layer of sifted burnt mud ash or yellow soil on the bed surface, about 5 cm thick.
French holly cuttings can be carried out all year round, with late spring and early summer and late summer and early autumn being the most suitable. For winter cuttings, good insulation of the seedbed must be done. For cuttings, choose well-developed, robust one-year-old branches from young or mature mother trees, which are the easiest to survive.
After the cuttings are collected, cutting the cuttings should be done in a cool, wind-sheltered place, and the knives and scissors used should be sharp. When cutting, for branches that have already grown small branches at the nodes, cut them off 0.5 cm above and below the node, then split the stem node into two halves according to the position where the small branches grow, and cut them into two branches for cutting. For branches that have not grown small branches, 2 nodes must be kept. The upper end is cut into a flat cut 1 cm above the bud, and the lower end is cut into a horse-ear shape or flat cut 0.5 cm from the bud.
After the cuttings are trimmed, dip them in 500 ppm naphthalene acetic acid or 200 ppm ABT rooting powder for 5 seconds, then immediately cover with wet straw or wrap with agricultural film to prevent drying.
French holly cuttings should be shallow rather than deep. For split small-branch cuttings, the flat cut faces downward, and the depth should be 1 cm of the mother plant inserted into the soil; for large-branch cuttings, the depth is 1 cm of the next stem node inserted into the soil, and the cutting should be inserted at an angle of about 45 degrees to the ground. Shallow and slanted insertion helps the cuttings take root and survive earlier.
After cutting, compact the soil around the cuttings and immediately water thoroughly once, so that the lower part of the cuttings fits tightly with the soil. The row spacing for cuttings is generally 12-15 cm, and the plant spacing is 6-8 cm. When cutting, the leaves on the cuttings should not be kept too many, nor should they all be cut off. The lower leaves can all be cut off together with the petioles, and 2 leaves are kept at the upper part. Then, according to the size of the leaves, each leaf is further cut by 1/2 to 2/3 to reduce excessive consumption of water and nutrients.
After French holly cuttings, a shed should be built for shade to reduce transpiration and direct sunlight on the seedbed. When cutting in early spring or late autumn, a film should also be added to prevent winter damage. After cutting, water frequently to keep the seedbed soil moist, with it being appropriate that the surface soil of the seedbed does not appear white.
Topdressing for cutting seedlings can be carried out together with watering, or potassium dihydrogen phosphate plus urea can be used for foliar spraying. Weeding work must be very meticulous, and do not bump the cuttings. French holly has strong stress resistance and few pests and diseases. Occasionally, slug moths or aphids occur, and pesticides such as dichlorvos and imidacloprid can be sprayed.
Holly Propagation Methods
Seed Propagation of Holly
Collect mature holly fruits in autumn, rub off the fruit skin and wash clean with water. The seeds need germination promotion and can be treated by low-temperature stratification with wet sand, then sown before March of the following year. During the seedling stage, growth is slow, and attention should be paid to care and management. If holly seeds are not treated for germination promotion, they often do not germinate until the year after next.
Cutting Propagation of Holly
Holly cuttings can be carried out in all four seasons, and are suitable in late spring and early summer and late summer and early autumn. Generally, softwood cuttings are carried out during the plum rain season. The cuttings are 6 to 8 cm long. Remove the lower leaves, keep 1-2 leaves and shorten them, insert halfway deep, and use sandy soil as the substrate. After cutting, build a shed for shade, spray water frequently, and keep the soil moist. Roots will form in about one month.
Precautions for Holly Propagation
After the seedlings are cultivated in the nursery for 2 or 3 years, they can be transplanted and planted out. Transplantation is best chosen in spring. Be careful and meticulous when digging up seedlings to avoid damaging the roots, and transplant with soil. At the initial planting, do well in intertillage and weeding, water reasonably, and strengthen management. In addition, holly is susceptible to damage from white wax scale and sooty mold, among others, so pay attention to timely control.
After holly cuttings, a shed needs to be built for shade, reducing transpiration while also weakening direct sunlight on the seedbed. If cuttings are carried out in early spring or late autumn, a film needs to be added to prevent winter damage. After cutting, water frequently to keep the soil moist. Topdressing for cutting seedlings can be carried out together with watering, or potassium dihydrogen phosphate plus urea can be used for foliar spraying. Weeding work should be meticulous and careful to avoid bumping the cuttings.