How to Propagate Dwarf Asparagus Fern? Detailed Guide to Cutting, Seeding and Division Methods
Dwarf asparagus fern (Asparagus setaceus 'Nanus'), a beautiful foliage plant, has a short and sturdy habit with feathery leaves that look both elegant and delicate, and is deeply loved by plant enthusiasts. In daily life, many people want to grow dwarf asparagus fern, but rather than buying one to grow, it is better to propagate it yourself and raise it step by step. So how do you propagate dwarf asparagus fern? Below are three propagation methods for dwarf asparagus fern, let's take a look!
I. How to Propagate Dwarf Asparagus Fern: Cutting / Seeding / Division
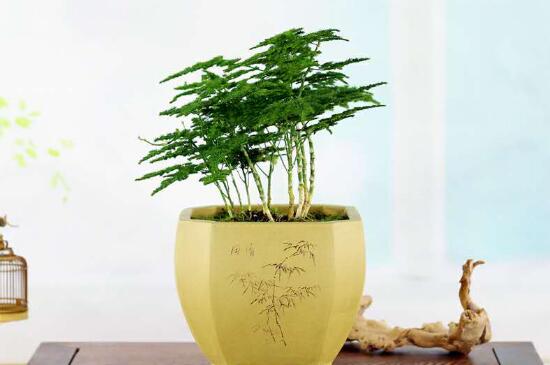
There are generally three methods for propagating dwarf asparagus fern: cutting, seeding and division. Among them, cutting involves selecting a vigorously growing dwarf asparagus fern branch, treating it and inserting it into soil, then potting it up once it has rooted; seeding involves scattering dwarf asparagus fern seeds on the soil and transplanting the seedlings into pots once they reach a certain height; division is carried out together with repotting, dividing the plant into several portions and planting them in separate pots.
II. Three Propagation Methods for Dwarf Asparagus Fern
(1) Cutting Propagation of Dwarf Asparagus Fern
1. Cutting time: Generally speaking, dwarf asparagus fern can be propagated by cutting throughout the year, but the most suitable time is when the temperature is between 20-30°C.
2. Selection of cuttings: On a healthy, growing dwarf asparagus fern pot, select a vigorously growing branch, gently push aside the surrounding potting soil below it to expose the junction of the branch and root, and make a small incision with a knife half a centimeter from the soil. Then apply a layer of washed fresh moss over the wound and keep it moist at all times.
3. Taking the cuttings: After about 10 days, you can remove the fresh moss, by which time the wound has healed. Then cut off the selected branch close to the root, keep two side branches and shorten them by one third, remove all the rest, and what you have is the dwarf asparagus fern cutting.
4. Preparing the cutting bed: Choose a cloth bag 8-10 cm tall and 6 cm in diameter, and fill it with moist sandy soil as the cutting bed. Then use a bamboo stick to make a hole in the center of the bag so the cutting can be inserted easily.
5. Starting the cutting: Insert the prepared cutting into the prepared cutting bed to a depth of 2 cm and firm it down. After inserting, line the bags up one by one along the inner wall of the cutting pot, place a wide-mouthed glass bottle of moderate height in the center of the pot, and wrap a 60-70 cm strip of gauze once around the outside of each bag, with both ends of the strip reaching the bottom of the glass bottle.
6. Filling soil after cutting: After completing the steps above, fill the cutting pot with soil so that the mouth of the glass bottle is slightly higher than the soil surface. Then water the soil thoroughly once and fill the glass bottle with water. From then on, keep the glass bottle constantly filled with water, place the cutting pot in a sheltered, shady spot, and new roots will emerge in about 20 days; after 1 month it can be potted up for planting.
(2) Seed Propagation of Dwarf Asparagus Fern
Besides cutting, the most commonly used propagation method for dwarf asparagus fern is seeding. Choose the time in March-April, soak the dwarf asparagus fern seeds in water and scatter them on a seedbed of fine soil, covering with about 1 cm of soil. Then cover the sowing pot with plastic film to retain moisture, and they will germinate in about one month; when the seedlings are 5-10 cm tall, transplant them into pots.
(3) Division Propagation of Dwarf Asparagus Fern
Besides cutting and seeding, dwarf asparagus fern can also be propagated by division. Specific operation: cut the roots of the dwarf asparagus fern plant into several pieces, apply plant ash to the wounds to disinfect them, and place the divisions in a shaded spot. Then care for them according to dwarf asparagus fern growing methods, and before long you will have several beautiful pots of dwarf asparagus fern.
Overall, when propagating dwarf asparagus fern, whether by cutting, seeding or division, all can survive, but the most suitable for home propagation are seeding and division. Of course, methods are fixed but people are flexible, and everyone can choose a method to propagate according to the actual situation. That is all for the propagation methods of dwarf asparagus fern; I hope it has been helpful to everyone.
The Simplest Cutting Propagation Method for Asparagus Fern
What the editor of the Flower Bonsai Network is sharing with you today is an article about the simplest cutting propagation method for asparagus fern, so let's take a look together.
Asparagus fern (Asparagus setaceus) is slender and graceful, verdant as clouds, with a clear and gentle charm, and is deeply loved by people. Propagating asparagus fern usually uses seeding or division, which have relatively large limitations. Asparagus fern propagated by cutting has the good effect of producing multiple plants at once and taking shape quickly.
The Timing of Asparagus Fern Cuttings
Cuttings can be taken throughout the year, but the temperature is required to be between 20~30°C.
Selecting Branches for Asparagus Fern Cuttings
When taking cuttings, choose an asparagus fern with many branches and vigorous growth, gently push aside the surrounding potting soil to expose the junction of the branch and root, and make a small incision with a sharp knife half a centimeter above the junction of the root and stem of the branch to be used as the cutting, let the cut be exposed for half a day, then apply a layer of washed fresh moss and keep it moist at all times.
Pruning Branches for Asparagus Fern Cuttings
After 10 days, remove the fresh moss, and when you see tumor-like healing tissue at the wound, cut it off close to the root, keep two side branches and shorten them by one third, and remove all the rest.
Inserting Branches for Asparagus Fern Cuttings
Use a bamboo stick to make a hole in the center of a cloth bag (the bag is 8-10 cm tall and 6 cm in diameter, filled with moist sandy soil), insert the cutting into the hole 2 cm deep, and firm it down. Line the bags with the inserted cuttings up one by one along the inner wall of the cutting pot, place a wide-mouthed glass bottle of moderate height in the center of the pot, and wrap a 60-70 cm strip of gauze once around the outside of each bag, with both ends of the strip reaching the bottom of the glass bottle.
Filling Soil for Asparagus Fern Cuttings
Finally, fill the cutting pot with soil so that the mouth of the glass bottle is slightly higher than the soil surface, water thoroughly once, and fill the glass bottle with water. From then on, as long as the glass bottle is kept constantly filled with water, it can normally and moderately supply water to the cut asparagus fern.
Place the cutting pot in a sheltered, shady spot, and new roots will emerge in about 20 days; after 1 month it can be potted up for planting.
How to Propagate Asparagus Fern: 3 Convenient and Easy-to-Use Methods
1. Division Propagation
The division propagation method requires the plant to be as large as possible; generally, plants that have grown for two or three years are more suitable for propagation by division. Division means dividing one pot of asparagus fern into two or three pots to grow, depending on the size of the plant. The division method is very simple and easy to do: after taking the asparagus fern out of the flower pot, remove the soil from the roots completely and separate the plant's roots by hand. The survival rate of this plant is quite high; as long as the root damage is not too serious, it will survive once planted in a pot.
After division, the asparagus fern should be given some fertilizer as a base fertilizer for growing; you can choose sesame paste residue or about 3 pieces of horseshoe slices. When dividing, choose loose soil for cultivation, and place some pond mud at the bottom of the pot.
After planting, water the plant thoroughly all at once, until water seeps out from the bottom of the pot. Do not water all the time normally; only water again when you notice the surface has become somewhat dry. When watering, note that the water temperature should ideally be similar to the soil temperature or the weather temperature. Do not water with just any water; be sure to use clean water.
2. Cutting Propagation
Asparagus fern cutting propagation can be done throughout the year, but if the temperature is relatively low, its survival rate is relatively low. Generally, cutting propagation requires a temperature between 20-30°C; if the temperature is just right, you can use this method to propagate this flower.
When taking asparagus fern cuttings, choose branches with very luxuriant foliage and very many branches. Push aside the potting soil by hand, and the part where the root and branch connect can be seen. Use a knife to make a small incision of moderate size 0.5 cm above the part to be used for cutting.
Leave this small incision exposed to the air for half a day, then apply a layer of washed fresh moss to the surface. Leave it for about 10 days, keeping it moist throughout these days.
After about 10 days, you can see tumor-like nodules at the incision, and then you can cut off this branch. The side branches on this branch do not all need to be kept; just keep two and also cut them in half for the cutting, and cut off all the remaining side branches.
Make a cloth bag yourself that is 6 cm in diameter and 10 cm tall, place some loose, moist soil inside, and poke some small holes on the outside. Insert the cut branch tip for cutting into the small hole about 2 cm deep.
Wrap the bags with the cuttings inserted with cloth strips, place them in a large pot with a glass bottle in the center. Fill it with soil and then you can wait for them to survive.
3. Seed Propagation
When the outer skin of asparagus fern seeds turns black and soft, they are already ripe; at this time you can pick these ripe seeds one after another. First remove the soft fruit skin, then wash the seeds inside with clean water. The washed seeds must be dried before they can be stored; if not dried, they are afraid they will not keep.
Around the first ten days of April in the year, plant the asparagus fern seeds in sandy soil; it is best to use a wooden pot or clay pot for sowing, planting at a spacing of about 3 cm.
Put 3 seeds in each planting hole; after sowing, cover the seeds with a layer of sandy soil, but do not cover too thickly, and do not press the soil too firmly. Generally, covering with 5 cm of soil is enough; after planting, water it generously, then cover it with plastic wrap or a glass lid, keeping the soil inside moist and the temperature at around 25°C.
Normally, do not water heavily again; use a spray bottle to spray some water on it frequently. About one month after planting, the asparagus fern will sprout; when it grows to about 5 cm it can be transplanted, and at about 10 cm it can be planted in a flower pot.