How to propagate the Norfolk Island pine? Introducing two methods: cuttings and sowing
The Norfolk Island pine, I believe all plant lovers know it, is an evergreen tree often kept as a bonsai for people to admire, and is one of the world's three great ornamental trees. Nowadays, more and more people are starting to grow the Norfolk Island pine, but compared to buying one to grow, doing the propagation yourself is certainly more fun. So, how do you propagate the Norfolk Island pine? Let's take a look together at the propagation methods for the Norfolk Island pine.
1. How to propagate the Norfolk Island pine: cuttings/sowing
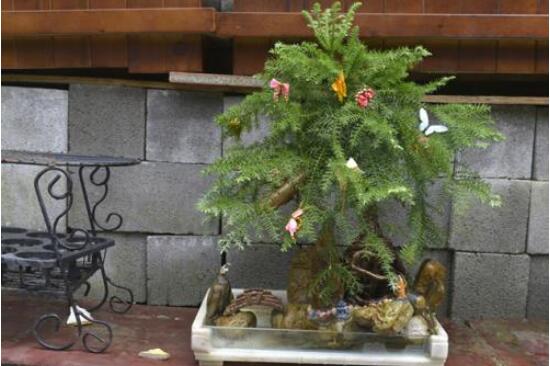
There are generally two propagation methods for the Norfolk Island pine: cuttings and sowing. Among them, cuttings means cutting a section of robustly growing branch from the Norfolk Island pine, then inserting it into growing medium; sowing means scattering the seeds of the Norfolk Island pine onto the soil and caring for them after covering with soil. Sounds simple, right? But it is a bit difficult to actually do~ Let's continue reading for the specific steps.
2. The two propagation methods for the Norfolk Island pine
(1) Propagation of the Norfolk Island pine by cuttings
1. Cutting time
The most suitable growing temperature for the Norfolk Island pine is 10-25°C, so cuttings are best taken in May in spring or October in autumn, when the branches are highly active and more likely to take root after cutting.
2. Selection of cuttings
From a potted Norfolk Island pine, cut a section of robustly growing branch, taking the first 2-3 nodes from the tip as the cutting. Then remove the leaves from the cutting, and soak it in clean water overnight, ready for use in cutting.
Note: When selecting cuttings, do not choose the main axis or a leggy branch as the cutting, otherwise it easily causes the plant's crown shape to be irregular, able to grow only sideways, affecting its ornamental value.
3. Cutting medium
According to the growth habits of the Norfolk Island pine, we should use coarse sand or vermiculite as the cutting bed, as this has good drainage.
4. Starting the cuttings
For propagating the Norfolk Island pine by cuttings, once the above preparation work is done, you can officially begin. Insert the cuttings into the sand bed, maintaining a growing environment of 20-25°C; besides this, also give it sufficient water to maintain relatively high air humidity. After doing this, roots generally form about 3 months after cutting, after which they can be transplanted and cared for according to the Norfolk Island pine's cultivation methods.
(2) Propagation of the Norfolk Island pine by sowing
How do you propagate the Norfolk Island pine? Even better than cuttings is sowing, because seedlings grown from seed are more firm and strong, and grow more vigorously. However, sowing propagation is more suitable for mass propagation; plant lovers propagating indoors are better off with cuttings. The specific sowing method is as follows:
In July-August, take the seeds of the Norfolk Island pine and scarify the seed coat to promote rooting and sprouting. Then scatter the seeds on a sand bed, and cover with fine sand 2 cm deep on top. After that, maintain a temperature of 20-25°C, along with relatively high humidity; after doing this, they will sprout in about 2-3 weeks, and should be planted immediately after sprouting.
Overall, whether by cuttings or sowing, the Norfolk Island pine can take root and survive, but the one with the highest survival rate and most suitable for indoor propagation is still cuttings. Of course, methods are fixed but people are flexible; everyone can choose a method to propagate according to the actual situation. That is all for the propagation methods of the Norfolk Island pine; I hope it can be of help to everyone.
Propagation methods of the Norfolk Island pine
The Norfolk Island pine mainly relies on seed propagation, but cuttings can also propagate daughter plants.1. Seedlings grown from sowing are firm and strong, growing vigorously, suitable for mass propagation. Generally, in July-August, first scarify the seed coat of freshly collected seeds to promote sprouting, otherwise leaving them in the soil for too long easily causes the seeds to rot; then sow the treated seeds in a sand bed, covering with fine sand about 1.5-2 cm deep. Under conditions of maintaining 25-28°C and a certain humidity, they will sprout in about 2-3 weeks, and should be planted immediately after sprouting.
2. When taking cuttings, if the main axis or a leggy branch is chosen as the cutting, it easily causes the plant's crown shape to be irregular, able to grow only sideways, affecting its ornamental value. Cut the first 2-3 nodes of a robust branch that roots easily as the cutting, remove some leaves, soak in clean water overnight, then insert into a sand bed using coarse sand or vermiculite as the medium. Maintain a temperature of 20-25°C and relatively high air humidity, and roots will form after about 3 months.
Pest and disease control: It has very few pests and diseases; when cared for indoors, scale insect damage is more commonly seen, and spraying with methidathion, chlorpyrifos emulsifiable concentrate, Guoguang Jie Bisi and the like for control gives good results.
How to prune the Norfolk Island pine and what to do when its leaves turn yellow
The Norfolk Island pine has very strong vitality, is evergreen all year round, and is also one of the masters at purifying the air, making it very suitable for long-term care indoors where light is insufficient. So do you know how to prune the Norfolk Island pine? What to do when its leaves turn yellow? Let's tell you below.
How to prune the Norfolk Island pine?
Pruning the Norfolk Island pine can be chosen to be done at the same time as repotting in spring. By April-May, you can prune appropriately according to your own preferences, and soon you will see tender green new leaves emerging, with high ornamental value. During the growing period, watering more is fine, and spraying water on the leaves will make it grow better. Fertilizer is mainly nitrogen-based, with phosphorus and potassium fertilizers used as well; inorganic compound fertilizers from flower markets, or cake fertilizer, can both be used. During the growing period of the Norfolk Island pine, apply fertilizer about once every half month, or spray the leaves with 0.2% urea or potassium nitrate, which can make the leaf color a deep green.
What to do when the Norfolk Island pine's leaves turn yellow:
1. Strong light and scorching sun turn leaves yellow In summer, strong scorching sunlight causes yellow leaves with yellow spots (sunscald). Spray water promptly to cool it down and increase humidity. Add a shade net, which can allow the plant to grow normally.
2. Too much fertilizer burns leaves yellow Applying too much concentrated fertilizer, which the plant cannot absorb, burns the roots, so it cannot absorb water and the leaves turn yellow and fall. In summer, apply thin fertilizer once a week, and do not apply concentrated fertilizer too much. If too much fertilizer is applied, water more to flush the fertilizer out.
3. Lack of fertilizer makes leaves thin and yellow With a lack of fertilizer, the leaves turn yellow, thin and fall, and the branches become slender, yellow and tender. Fertilize immediately, and results will be seen within a week. Fertilize on schedule to let the plant grow normally and bloom more.
4. Too much alkalinity soaks leaves yellow Because potted plants are watered for a long time, salty alkali accumulates in the potting soil. In severe cases, there is an alkali crust on the potting soil, causing the leaves to fall off. Especially in the north, both water and soil contain alkali. The method is to change to new soil or apply ferrous sulfate solution.
How often should the Norfolk Island pine be watered?
During care, how often the Norfolk Island pine should be watered depends on the potting soil's moisture. In summer, generally, watering twice a week is enough. In winter, the control of watering can be reduced by one time compared with summer.
From spring to autumn, the Norfolk Island pine bonsai should be watered more, but waterlogging in the pot should be avoided. In high temperature and dry conditions, spray water on the potted plant and the nearby ground to cool down and increase humidity. Water promptly, and do not wait until the soil is dry before watering. From late autumn onward, gradually reduce watering to enhance its cold resistance.
In summer, water when the potting soil is half dry, and when watering just water in a circle along the pot's edge. If the weather is very dry, spray water around the Norfolk Island pine bonsai to increase the air's humidity and create a humid, suitable environment for it.
Propagation methods of the Norfolk Island pine:
The Norfolk Island pine mainly relies on seed propagation, but cuttings can also propagate daughter plants.
1. Seedlings grown from sowing are firm and strong, growing vigorously, suitable for mass propagation. Generally, in July-August, first scarify the seed coat of freshly collected seeds to promote sprouting, otherwise leaving them in the soil for too long easily causes the seeds to rot; then sow the treated seeds in a sand bed, covering with fine sand about 1.5-2 cm deep. Under conditions of maintaining 25-28°C and a certain humidity, they will sprout in about 2-3 weeks, and should be planted immediately after sprouting.
2. When taking cuttings, if the main axis or a leggy branch is chosen as the cutting, it easily causes the plant's crown shape to be irregular, able to grow only sideways, affecting its ornamental value. Cut the first 2-3 nodes of a robust branch that roots easily as the cutting, remove some leaves, soak in clean water overnight, then insert into a sand bed using coarse sand or vermiculite as the medium. Maintain a temperature of 20-25°C and relatively high air humidity, and roots will form after about 3 months.