How to plant anemones? Master the planting method and the survival rate can reach 90%
Among the propagation methods for anemones, seed sowing is the main one. After countless trials by growers, this method still achieves a very high survival rate. However, to plant them successfully, there are still many points to pay attention to. How do you plant anemones? What is the anemone planting method? Below, the editor will walk you through it.
1. How to plant anemones: be careful
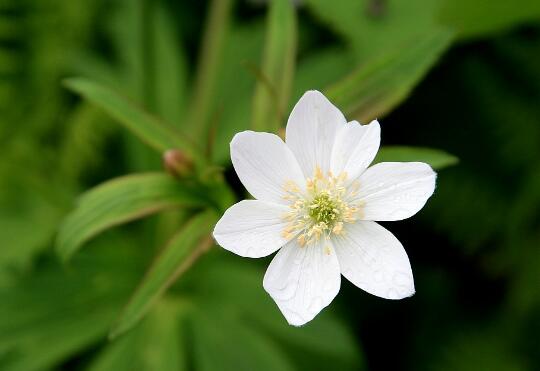
When it comes to how to plant anemones, there are many points we need to pay attention to, such as the planting time, the selection and disinfection of the growing medium, and the planting method, all of which are very important. Besides these methods, we also need to be careful, so that the survival rate will be higher. The specific planting methods are below. Let's take a look.
2. Anemone planting method
1. Planting time
First, before planting anemones, we need to choose a suitable season. So when is it most suitable to plant them? We can choose the autumn of each year, that is, the period from August to October, because the climate at this time is relatively suitable for their growth, so the survival rate will also be relatively higher.
2. Medium selection
Besides choosing a suitable time to plant, we also need to choose a medium that is beneficial to their growth. In this respect, it is best to choose loose, fertile humus soil as the medium. This kind of soil is rich in nutrients and has good drainage and aeration, allowing the plants to absorb nutrients better and making it less likely for water to accumulate in the pot.
3. Medium disinfection
After choosing the medium for anemones, we also need to disinfect it, so as to avoid pests and diseases in it infecting the plants. When disinfecting, we can break it up and spread it flat under the sun to bake, or put it into an iron wok and stir-fry it over high heat. In this way, even if there are pests and diseases in it, they will be killed by the high temperature.
4. Planting method
Anemone seeds are basically sown as soon as they are collected. When planting, first we need to poke the seeds open with sand, then evenly scatter the seeds on the soil surface. After scattering, cover them with 1-2cm of soil and then water. When watering, it is best to use the immersion method, because anemone seeds are relatively small and can easily be washed away if watered directly. Generally, about 15 days after watering, the seeds will germinate.
5. Follow-up management
After successfully planting anemones, we can carry out daily care for them. There are also many points to pay attention to in terms of care, such as water, fertilizer and light, all of which require careful attention. If you do not know how to care for them, you can refer to the article on anemone cultivation methods, which contains detailed care instructions.
How to grow lilies: teaching you the cultivation methods and precautions for potted lilies
Like all living things, for lilies to grow vigorously and finally produce beautiful flowers, the most fundamental conditions are: the bulbs themselves must be of good quality, the environment must be suitable, management must keep up, and from the time you plan to plant them until the flowers finally fade, you must always care for them and manage them carefully. In this way, you can certainly ensure that the lilies will be as you wish, pleasing to the eye. As for whether they can make money, that still depends on whether the market cooperates, but flower lovers grow them for their own enjoyment, so this is not within the scope of this article.1. Successfully ordering high-quality bulbs is the foundation of successful planting. However, because bulbs are not industrial products but agricultural products, and are also imported products facing various national quality inspection requirements, there will always be various problems. No matter which company it is, domestic or foreign, if they pat their chest and guarantee that everyone's orders (supply and supply quality) have no problems at all, then they must be lying. That being the case, you can only choose reliable suppliers to reduce the probability of problems with the bulbs.High-quality lily bulbs: firm, clean, with a good root system
A common problem with lily bulbs is Penicillium infection (as shown in the picture below). If the infection has not endangered the basal plate of the bulb, the problem is not serious.Freeze damage -- the sprout of the bulb turns black (as shown in the picture below). In severe cases, it can only be discarded.2. Environment: a common slogan everyone sees is "even small grass has life." I remember a Dutch expert also said, "The water you can drink, it can drink too; the environment you can stay in, it can stay in too." "Even small grass has life" expresses the truth. You must treat it like your own baby, touch it, sense it, and then change its environment at any time, so that it can repay you with beautiful flowers.
1) Soil:
Soil structure: although lilies can grow in all kinds of soil, it is very important to ensure that the cultivation soil has a good structure and maintains good drainage throughout the entire growth stage. Poor soil structure and compaction often make the lily root system grow weakly or even die due to lack of oxygen, or because of poor drainage, Pythium runs rampant and causes the lily root system to die, ultimately leading to poor growth or even death of the lily.
The picture below shows the situation where soil was flooded by heavy rain from a typhoon, causing the root system to die from lack of oxygen. Of course, overly compacted soil also makes the situation worse.Soil pH and salinity: maintaining an appropriate soil pH is very important for the development of the lily root system and the correct absorption of nutrients. If the pH is too low, it will lead to excessive absorption of mineral nutrients (such as iron, manganese and aluminum), while if the pH is too high, it will lead to insufficient absorption of phosphorus, manganese and iron. Everyone knows that deficiency is bad, but not everyone necessarily knows that excess is just as bad as deficiency.
Lilies are also sensitive to salinity. Too high salinity will form roots that are hard, brittle, and yellow or brown in color, reduce the root system's absorption of water, affect lily quality, and in severe cases even cause the death of the lily root system and the lily plant. Soil salinity is often affected by the fertilizers and water used.
The picture below shows what was originally a very beautiful root system, but because of the use of unrotted organic fertilizer, part or all of the root system died. It is a great pity.Soil pathogens: lilies often die because soil fungi harm the root system. Common fungi include Rhizoctonia, Pythium and Phytophthora. Rhizoctonia only harms the plant while the sprout is still in the soil, and Pythium can be reduced by improving soil drainage. Generally speaking, during the entire growth process, it is very necessary to use broad-spectrum fungicides several times, such as chlorothalonil.
The picture below shows damage caused by Rhizoctonia and Phytophthora.From the above, it can be seen how crucial suitable cultivation soil is to successful cultivation. If the soil is bad, even if you spend a great deal of effort managing it, you can only end up in tears. Therefore, it is best to choose soil that has not previously been used to grow lilies for planting lilies. Of course, the most ideal choice is peat (domestic peat is sufficient). To reduce management difficulty, it is very wise to use 80% peat and add 20% perlite or pine bark medium. If you are considering base fertilizer, controlled-release fertilizer with a controllable release rate is the most ideal. If you are very fond of organic fertilizer, please be sure to use fully rotted organic fertilizer.With such a good root system, why worry about not having beautiful lily flowers?
2) Temperature
Rooting stage temperature: in the 2-3 weeks after planting, maintaining an appropriately low temperature (10-12°C) to ensure that lilies can grow good stem roots is very critical. However, most of the time we cannot guarantee such ideal weather. Therefore, professional growers use cold storage for rooting, and we can use the crisper compartment of a refrigerator. Wrapping lily bulbs in peat (the peat should not be too wet; enough that a handful squeezed by hand can drip water) and placing them in the refrigerator's crisper compartment (with air permeability) for rooting is a good idea. Although low temperature will prolong the growth period, I think everyone should not mind managing them for a few more days.In the case of pre-rooting, during high-temperature seasons, root them first, then plant.
Growth stage temperature: although the most ideal growth temperature for lilies is 15-25°C, we have no way to control the temperature in nature. However, we still need to avoid extreme situations. Lilies are very prone to freeze damage below 5°C, and above 35°C the growth period will be greatly shortened and quality will decline accordingly. In summer when the sunlight is strong, we can lower the temperature by shading and increasing ventilation. How pleasant it would be in summer to have cool breezes under the shade of trees.
3) Relative humidity: the suitable relative humidity for lilies needs to be between 70-80%, but this refers to professional producers growing them in greenhouses. For those of us growing lilies in the yard or placing them on the balcony, there is no need to consider this point. In greenhouses, poor growth is often caused by excessively high humidity, but I have not seen outdoor lilies grow poorly even because of continuous rainy weather (provided the soil drainage is good and fungicides are frequently sprayed to control Botrytis). Of course, slight effects will still be encountered. This is because ventilation in greenhouses is very poor. When people go in, they feel very stuffy, and plants feel the same way.
Here are a few pictures of lily leaf damage caused by excessively high humidity in the greenhouse.Because the humidity is too high, the water pressure inside the plant becomes too great, and ultimately the leaves are damaged when the cell walls rupture. In severe cases, even the flower buds are gone. This is a physiological disease, not damage caused by pathogens, so spraying fungicides is useless. Using calcium fertilizer can increase the resistance of the cell walls and can reduce the damage.Long periods of rainy weather make the plant's leaves very tender, and because the plant needs to expel excess water from its body, the leaf stomata remain open all the time. Being open for a long time ultimately makes the leaf stomata lose their closing function (they originally open and close automatically in response to climatic conditions). After the rainy weather ends, the leaf stomata still remain open, transpiring and expelling water, which ultimately causes the leaves to lose water, become papery, and even scorch.
4) Shading: shading can control temperature, relative humidity and light.
In summer, sunlight is usually very strong. In the 2-3 weeks after planting (before budding), 80% of the light can be shaded. After budding, because Asiatic lilies and LA hybrid lilies are sensitive to light, lack of light will cause bud abortion, so shading can be appropriately reduced, for example shading 50% of the light. Oriental lilies are not sensitive to light, so 50-70% of the light can still be shaded.
The general steps for growing potted lilies at home:
1. Preparation stage:
1) Growing medium: it is recommended that you choose peat soil as the main medium for planting.
2) Fertilizer: it is recommended to mix 3 kg of 14-14-14 controlled-release fertilizer and 0.5 kg of calcium nitrate per cubic meter of medium as base fertilizer.
3) Pots: a 13 cm pot can plant 3 bulbs of the 12-14 cm size; a 15 cm pot can plant 3 bulbs of the 12-14 or 14-16 cm size; in this way, choose pots according to your own situation. It is best if the pot height is above 12 cm.
2. Receiving the lily bulbs: after long-distance logistics, when everyone receives the lily bulbs, they have already thawed. Normally, there should be a few small sprouts. As long as the sprouts are no longer than 5 cm and are not broken, then even curved sprouts are no problem at all. Please feel confident and plant them boldly.
After receiving the bulbs, they can be soaked for 30 minutes in a 600-800 times dilution of chlorothalonil.
3. Planting:
1) First mix the medium and base fertilizer evenly, and water until a handful squeezed by hand drips water.
2) Spread 2-3 cm of the mixed medium at the bottom of the pot.
3) Place the bulbs in the pot with the sprouts facing outward.
4) Cover the bulbs with about 8 cm of medium.
5) Water thoroughly, place in a shaded area, and avoid sunlight as much as possible.
4. It is recommended to plant 1, 3, or 5 bulbs per pot. Odd numbers look better. If there are more than 5, then odd or even numbers do not matter.
At temperatures in June-July, sprouts generally emerge in 7 days.
1. Medium: peat soil2. Fertilizer: controlled-release fertilizer, calcium nitrate3. Pot: a 160 dual-color pot, planting 3 bulbs4. Planting
1) Correct planting method: the sprout of the bulb should face the pot wall.Incorrect planting method: the sprout of the bulb faces the middle. Consequence: all the sprouts gather in the middle, which does not look good.Of course, if planted randomly, when the sprouts grow out, they will be messy and disordered and will not look good. As for potted planting, it is best to wait until the bulbs have a 3-5 cm sprout before planting. In this way, you can control the direction of the sprouts, and the overall appearance of the plants will be better.
What kind of growing environment after planting?
In the two weeks after planting, lily growth still needs relatively low temperatures to continue developing a good root system. Therefore, for potted lilies, after planting you can choose a place without direct sunlight; for lilies planted in the open ground, you can use a shade net to block direct sunlight. However, whether potted or open-ground cultivated, once the lilies have formed flower buds, they should immediately be given light. Potted lilies can be moved to a place with ample light, and for open-ground lilies the shading material must be removed. Otherwise, it will affect the number of lily buds and the quality of flowering. Asiatic lilies in particular are more sensitive to light, and in severe cases all the buds may drop. Proper topdressing can make lily stems thicker and stronger, especially in hot summer. However, note that the concentration should be lighter than usual application to avoid fertilizer damage. For topdressing, you can still choose a high-potassium special lily fertilizer 15-15-30 mixed with water at a concentration of 1000-1500 ppm, that is, add 1 gram of water-soluble fertilizer to 1-1.5 liters of water and mix evenly.
Each variety has different characteristics, and the flowering time also differs. But temperature also affects how early or late flowering occurs. For the conventional flowering time of specific varieties, please see the product information for each variety. Here, I want to remind friends in the far north that in the later growth stage of lilies, if the nighttime temperature falls below 10°C, please move the lilies indoors at night. Generally speaking, the time from rooting to flowering for Oriental lilies is about 100 days, while Asiatic lilies need only about 60 days. Therefore, when choosing varieties, flower lovers should choose according to local climatic conditions and their own care conditions, to avoid the situation where, just at the moment of flowering, they are frozen and all the previous effort is wasted. Wouldn't that be a pity?
Notes:
1. The earlier mention that "you can use the crisper compartment of a refrigerator. Wrapping lily bulbs in peat (the peat should not be too wet; enough that a handful squeezed by hand can drip water) and placing them in the refrigerator's crisper compartment (with air permeability) for rooting is a good idea" -- if you put them in the refrigerator's cold storage compartment and go through the 2-3 week rooting period, then when you take them out from the 5°C temperature of the cold storage compartment, the outside temperature is at least 25°C. Can they adapt?
Answer: Yes. For professional lily cut-flower producers, after rooting the lily bulbs are taken out of cold storage, and the temperature inside the greenhouse is as high as 40°C. However, please pay attention to shading in the early stage, and after budding please reduce the degree of shading. If heavy shading of 80% is maintained all the time, Asiatic lilies may abort their buds due to lack of light.
2. How to handle the bulbs after the flowers fade
After the flowers fade, please cut off the spent flowers. Of course, the stems and leaves are retained. At the same time, please carry out normal care. Generally, when the low-temperature season (November-December) arrives, the aboveground stems will die, and the bulbs will remain in the soil. During this stage, please reduce the use of water and fertilizer. After spring begins, as long as the bulbs have not rotted or been eaten by insects, they will grow and bloom again. For lilies planted in the yard, you can leave them alone, and the next year they will grow out nicely. They can do so year after year, and more and more small lilies will appear.
3. Posting a few pictures of professional lily pot cultivation from abroad★How to grow potted lilies
Lilies belong to cool-season flowers, meaning regions with a cool climate and large day-night temperature differences are most suitable for growing lilies.
Lilies do not have the brown outer skin on tulip bulbs. Before they are planted in soil, they must be stored at a constant temperature of 2°C, otherwise they will quickly root and are also prone to rotting. Therefore, after we buy lily bulbs from the market, we must plant them as soon as possible and cannot leave them for long.
1. Prepare the bulbs
The top is the sprout, and the bottom is the roots. Do not put them in upside down! Some bulbs have not yet grown roots. Look at the scales; the one with the opening facing upward is the sprout!
Before planting, the bulbs should first be disinfected. Soak them for 20 minutes in a 1000 times solution of imported carbendazim, rinse with clean water, and after drying they can be planted.2. Prepare soil and pots
Lilies like fertile sandy soil with both good water retention and good drainage. Peat:river sand:perlite = 2:2:1. You can also use soil for cactus plants. In any case, clay soil cannot be used.
Because lilies are bulbous flowers with two layers of roots, the container chosen should be a relatively deep pot.3. Planting
First put 10-15 cm of soil into the bottom of the pot, place the bulbs, and if there are three bulbs in one pot, place the heads of the bulbs toward the edge of the pot, that is, tilt them toward the pot edge. In this way, after germination the plants will be evenly distributed. Cover the tops of the bulbs with about 5 cm of soil, water thoroughly, and place in a cool place for 1-2 days.4. Care
Water: keep the soil moist. From just budding to flowering, spraying water twice a day in the morning and evening is enough. In addition, use a 1000 times solution of imported carbendazim to water twice a month.
Fertilizing: generally fertilize once every half month.Common problems in lily cultivation
1. Leaf scorch
Cause of leaf scorch: caused by physiological calcium deficiency
Conditions for occurrence: it is prone to occur under conditions such as excessive shading, poor ventilation, high air humidity, continuous cloudy days, too low soil pH, and poor plant root systems.
Preventive measures: improve ventilation conditions and increase plant water transpiration.
Give light appropriately earlier and harden the seedlings.
Use rooting treatment before planting, which is beneficial to root development and the absorption of calcium ions.
Peeling leaves (separating the tightly clasped leaves) just before the leaf scorch period can also reduce the occurrence of leaf scorch.
Keep dry and avoid long-term water accumulation on the plants.
Increase the application of calcium fertilizers such as calcium nitrate, which can be applied through root fertilization or foliar fertilization.2. Root burn
Cause of root burn: excessively high salt concentration in the soil solution
A. The soil itself is severely salinized and the EC value is too high;
B. Improper fertilization, with too much fertilizer applied at one time, causing the concentration of the soil solution to become too high;
C. Insufficient water and overly dry soil can also cause the concentration of the soil solution to increase.
Preventive measures: do not choose soil with excessively high salinity; do not directly place high-salt medium or fertilizer on the bulbs; adopt the method of applying thin fertilizer frequently to avoid using a large amount of fertilizer at one time and causing root burn; check the root system frequently. If root burn occurs, water promptly and combine with foliar fertilizer spraying.3. High temperature has a serious impact on lilies and should be avoided as much as possible, including high temperatures in soil and the environment. Above 30°C is considered high temperature.4. Common yellowing of leaves5. Phytophthora blight
Preventive measures:
A. Focus on prevention, avoid continuously excessive soil moisture (especially avoid flooding) and excessively high air humidity, and try to avoid air humidity above 90%.
B. Disinfect soil and bulbs before planting. Dexon, phosethyl-Al manganese zinc, hymexazol, etc. can be used.
C. Avoid continuous cropping in Phytophthora-infected crop land with common pathogen hosts, such as avoiding continuous cropping with Gypsophila, carnation, Solanaceae, cucurbits and other vegetables. That is: soil that has grown Gypsophila, carnation, Solanaceae, or cucurbits should as much as possible not be used again to grow lilies.
6. Root rot
Preventive measures:
Control soil moisture
Disinfect bulbs and soil with carbendazim, Dexon, hymexazol, etc.
Reduce the amount of nitrogen fertilizer used, especially ammoniacal nitrogen, and appropriately increase the application of phosphorus and potassium fertilizers.7. Fusarium stem rot
Preventive measures:
Disinfect bulbs and soil before planting; lower soil temperature.8. Gray mold -- avoid continuously high-humidity environments.9. Blind flower (no flower)
Causes of blind flower:
A. Insufficient water and fertilizer supply: Lilies are a flower variety that requires a relatively large supply of water and fertilizer. In the early stage, the plant growth mainly relies on the nutrients supplied by the bulb; in the middle and later stages, growth is mainly maintained by fertilizer and water supply and photosynthesis. If the water and fertilizer supply is poor, it will seriously affect the growth and development of lilies, causing the branches to be thick at the bottom and thin at the top, the plant to be weak and spindly, and in severe cases causing blind flowers and bud drop.
B. Temperature too high: Too high a temperature will seriously affect lily quality: lilies prefer a cool climate. If the temperature is too high, growth is too fast, material accumulation in the plant is low, and organic matter consumption is high, which will cause malnutrition and in severe cases cause blind flowers and bud drop.
C. Insufficient light: Insufficient light, planting too densely, and poor ventilation affect the plant's photosynthesis, leading to low material accumulation and easily causing weak, spindly plants or even bud drop. OT-type lilies are especially sensitive to light, and insufficient light easily causes bud abortion.
D. Insufficient nutrients in the bulb: If the bulb size is too small, the bulb is harvested too early, or it is stored too long, the bulb's nutrients will also be insufficient, easily causing blind flowers and bud drop in lilies.
E. Planting depth too deep: If planted too deep, lilies emerge slowly, which consumes a large part of the bulb's nutrients, leaving the plant with insufficient nutrients and poor growth, and in severe cases causing blind flowers.
F. Poor root growth in lilies: If the lily's root system is poor and its absorption capacity is insufficient, the plant will be undernourished, and there will not be enough nutrients to supply the growth of the flower buds. Bud growth will be inhibited, and blind flowers and bud drop will also occur.★Lily variety selection and planting methods
I. Basic introduction
Are lilies hard to grow?
Actually, not at all
I am a bulb enthusiast. After many years of cultivation, the order I have found is
Ease of growing: (common problems in parentheses)
Rain lily > Amaryllis (expensive...) = Freesia (lodging) = Portuguese squill (messy foliage) = Crocus (degeneration) > Lily (bud abortion and bulb rot) > Narcissus (bulb rot, degeneration, slow growth) > Hyacinth (bloom stuck in the bud, bulb rot, degeneration) > Tulip (bulb rot, bud abortion, one-time bloom) > Ranunculus (one word: rot) > Anemone (rots nonstop from the very beginning)
There are too many Oxalis varieties to say for sure; some are as easy to grow as grass, while others are god-tier difficult
Gloxinia and Cyclamen are better grown as herbaceous plants and are not included in the ranking. Bulbous irises are not widely popular, so they are not included either
It can be seen that lilies are not only suitable as cut flowers in flower shops; as houseplants and perennial garden plants they are also very good
In fact, most of the parents of lily hybrids come from China. They are truly Chinese flowers and are very well adapted to our climate (except Oriental lilies, which come from Japan)
II. Variety selection
Order of ease of growing
LA > Asiatic (A) > Longiflorum (L) = LO > OT > Oriental (O)
LA is an improvement on Asiatic lilies, producing bulblets faster and with larger flowers
LO can be considered an improvement on Longiflorum, with richer flower colors and stronger fragrance
OT improves the heat tolerance, propagation rate and ease of growing of Oriental lilies
Fragrance
Oriental = OT > Longiflorum = LO >> LA Asiatic = 0
The last two, the Asiatic types, are basically unscented and suitable for flower lovers who dislike the fragrance of lilies
Longiflorum has a light, sweet fragrance, stronger at night.
The first two are strongly fragrant. Oriental lilies have the classic flower-shop lily smell. OT lilies are sometimes sweet and sometimes pungent. LO is a mixed scent of Longiflorum and Oriental, and the fragrance is very weak in hot weather.
1. Lily flowers generally have their strongest fragrance 1-2 days after opening, then gradually become lighter. It is normal for them not to be very fragrant just after opening
2. Lily fragrance is not harmful to the human body and will not trigger allergies. It is only that an overly strong fragrance may stimulate the olfactory nerves of sensitive people and cause symptoms such as dizziness and excitement with difficulty sleeping
3. Lily pollen easily stains clothing and skin. Do not rinse with water, as it will stick more firmly; use clear tape to lift it off. Even so, removing the stamens is a good method
Main hybrid classifications and their detailed advantages and disadvantages
1. Asiatic lily (Asiatic)
Advantages: Many flower colors, short plant height, many buds, flowers facing upward, early blooming (2-3 months from planting), easy to grow, fast propagation, extremely cold hardy (can overwinter outdoors in Northeast China)
Disadvantages: Flowers on the small side (12-15 cm), no fragrance, relatively high light requirements during the bud stage, and insufficient light easily causes bud abortion
Representative varieties: Many; most can be chosen with confidence, and there are also potted varieties around 20-30 cm tall
The potted effect of Asiatic lily 'Spring Field', pot diameter 15 cm; the right side shows the result of chlormequat treatment, and the far left is the original plant height
Actual potted plants do not reach the stated plant height (110 cm); that is the height after two to three years of cultivation
SpringfieldTinos2. Oriental lily (Oriental), together with OT commonly known as fragrant lily, a flower-shop cut flower
Advantages: Strong fragrance, large flowers (15-20 cm), low light requirements, flat flower shape, broad leaves, bold and gorgeous blooms
Disadvantages: Some varieties are weak and prone to lodging, not very heat tolerant, relatively slow to propagate, bloom late, and lower leaves yellow more severely
Representative varieties: Sorbonne (the light pink flower in flower shops), Siberia (the white flower in flower shops)
Potted Oriental lily effect (the famous variety Stargazer), very beautiful; note that the leaves are fewer but broader and thicker than those of Asiatic liliesSorbonne3. Muskmelon/Longiflorum lily (Longiflorum), also called Easter lily
Advantages: Elegant and graceful flower shape, very easy to grow, moisture tolerant, fast propagation, relatively poor cold hardiness, native to the subtropics, does not need low-temperature dormancy
Disadvantages: Only white (all pink and yellow series are LO hybrids; online shops have all labeled them incorrectly this year), pollen easily stains the petals
Representative variety: Everyone has heard of the famous White Heaven, right?4. LO hybrids - recommended
Advantages: Inherits the flower shape and ease of growing of Longiflorum, and the flower color and fragrance of Oriental lilies. Very easy to grow and propagate, large flowers (18-25 cm), fast development, does not need low-temperature dormancy
Disadvantages: Under high temperatures the blooming period of a single flower is not long, buds are somewhat few, insufficient light makes the color fade, and there are relatively few varieties in China
Representative variety: Triumphator is its standout representative. It is especially recommended, one of the lilies that any beginner can keep alive (often sold out...)
Potted effect of Triumphator; note that it is relatively tall and has large flowersUnder strong light and low temperature the flower color is very intense5. OT hybrids - recommended
Advantages: Inherits the excellent genes of Trumpet lilies (whose parents are Lilium regale from Sichuan and so on). Flower colors are richer than those of Oriental lilies, heat tolerant and easy to grow, robust plants, does not need low-temperature dormancy. The stems are very thick, flowers are large (20-25 cm), and the fragrance is rich. Suitable for courtyards and large containers. Commonly called Tree lily abroad
Disadvantages: In the first year there are often not many flowers, some varieties have flowers that are abnormally large, and the flowers easily droop
Representative varieties: Conca D'or, Yelloween, Nymph; the colors cover a wide range, especially the yellow series that Oriental lilies do not have
Note: Except for Yelloween, yellow varieties generally have relatively few buds; even a 16-18 cm bulb has only two to three buds
A perennial Conca D'or; note the height and flower countYelloween, with large flowers and a rich, fruity sweet fragrance6. LA hybrids - recommended
Advantages: Propagates even more crazily than Asiatic lilies, large flowers, some varieties have a light fragrance; this type loves to divide bulbs madly and does not abort buds as easily as Asiatic lilies
Disadvantages: Like Asiatic lilies, the flower shape is rather stiff, flowers are prone to deformity, and the flower count is often lower than that of Asiatic lilies
Representative varieties: Red Alert, Diamond Party, etc. Basically you can choose any of them; there are no taboos
Potted effect of Red Alert; compared with Asiatic lilies, the flowers are larger and the leaves broader. The Longiflorum flower shape has not been inherited, and the fragrance comes and goesRed Alert7. Edible lilies
The most common is often the native Chinese species Lilium lancifolium; the plant is tall and slender, the petals are recurved, and it is easy to grow, but not suitable for indoors
Its ornamental value may be inferior to Dutch hybrids, and it is one of the parents of Asiatic lilies
A very distinctive recurved, drooping flower type
Sometimes used by unscrupulous sellers to pass it off as a fragrant lily8. Double-flowered lilies
Divided into Asiatic and Oriental types; their characteristics and care are the same as above. They are rather like double amaryllis, while the distinctive features of lilies are not strong. They are prone to deformity and incomplete petalizationIII. Indoor care
1. Light
Not very picky; they can also be grown on an enclosed balcony, and east, west and south exposures are all fine
At least 3 hours of direct light, with 4-6 hours better
The scorching sun of a west-facing exposure may burn the leaves of Oriental lilies, so moderate protection should be given
Note that when the buds of Asiatic lilies are the size of peanut kernels, they must not lack light, otherwise the buds will abort
2. Soil, this is the most important; water permeability and air permeability are the first priority
I use peat and perlite, but the materials are not limited; as long as it is loose, airy and light, and prevents bulb rot
Peat (peat moss, sterilized potting soil, compost soil, coconut coir): perlite (or various granular substrates) = 2:1 to 1:1
The soil near the bulb can have more perlite added, which is more reassuring
When mixing soil, slow-release fertilizer/organic fertilizer can be evenly blended in. Do not pile it all at the bottom of the bulb; it will not be absorbed and easily causes bulb rot
3. Water
Except that Oriental lilies are best kept evenly moist, the other varieties are very drought tolerant (especially when planted in the ground), so it is better to err on the side of less. It is fine to water only when the pot soil becomes light or the surface soil is completely dry
For each watering, you can rely on judging the weight of the pot; water thoroughly when it becomes lighter
The signs of overwatering are bulb rot, large numbers of lower leaves turning yellow and dropping, withered and scorched buds, and scorched yellow top leaves. If any one of these appears, be on alert
Underwatering rarely occurs, because both the bulb and the fleshy stem can store water, so if you see wilting, first suspect bulb rot rather than lack of water
4. Fertilizer and bulb nurturing
Lilies like fertilizer, but it should be applied lightly and often; heavy fertilizer will cause leaf burn (scorched leaf tips, dead buds)
If growing them for a single season, no fertilization is necessary
If you want them to bloom again year after year, then fertilizing after flowering is very important, mainly with nitrogen and potassium fertilizer
The nutrient absorption ratio of lilies: nitrogen: phosphorus: potassium = 10:1:12, but phosphorus fertilizer is easily fixed and not easily absorbed, so using a ratio of 1:1:1 or 1:1:1.5 is fine
Remember to apply light fertilizer frequently; just add a little with each watering. There is no need to serve strong fertilizer; its fertilizer requirement is smaller than that of other bulbs
Do not fertilize at sprouting; during rapid growth, mainly use nitrogen fertilizer; when buds appear, mainly use phosphorus and potassium fertilizer; do not fertilize during the flowering period; begin nurturing the bulb immediately after flowering, with the fertilizer ratio as stated above
5.pH
The soil for Oriental lilies is best slightly acidic (5.5-6); peat itself is acidic enough
The other varieties are not particular
6. Temperature
Lilies are actually spring-planted bulbs: plant in spring, flower in summer, nurture in autumn, store in winter (for most regions of the country)
For the Guangdong and Guangxi regions, which are very hot and humid in summer, as well as Hong Kong, China and Taiwan, China, you can consider cold storage in summer, planting in autumn, and viewing flowers in winter and spring
When rooting in spring, keep the temperature at around 12 degrees, which is most favorable for stem root growth
In summer, take care to protect them from the harm of high temperatures. Low temperatures can extend the flowering period. OT lilies are very heat tolerant, so they can bloom under the blazing sun, while Oriental lily flowers often wither rapidly when the sunlight is strongest
7. Dormancy
When winter temperatures are low (0-10 degrees), they will go dormant (leaves drop and stems yellow; at this point cut off the withered stems)
Ordinary Asiatic and Oriental lilies need a cold period of at least 1.5-3 months (4-5 degrees) before they can begin the next year's growth
Lilies with Longiflorum (LO, LA, L) and Trumpet (T) genes can be planted year-round and do not need a deliberately created cold period; it is only necessary for winter temperatures to be below 20 degrees
Natural low temperatures can be replaced by refrigeration in a refrigerator at 4 degrees
Varieties that are not heat tolerant may go dormant 1-2 months after flowering, but early dormancy is unfavorable for nurturing the bulb and reblooming. Even more, do not cut off the stems and leaves as soon as flowering ends
Leaves dropping and dormancy starting early often means bulb rot or severely unfavorable conditions
8. How to plant
No need for a disinfecting soak
For basal roots (the old roots at the bottom of the bulb), keep as many as possible; severely rotted parts can be cut off
There must be at least 5 cm of soil above the top of the lily bulb. Bulbs should be at least 2-3 cm apart, and the growing tip should lean slightly toward the pot wall rather than the center of the pot
9. Planting depth
Lilies have two layers of roots. Below the bulb are the basal roots (which can remain functional for several years), with a relatively weak absorption function. The bulbs you receive often have basal roots that are rotted and broken, so there is no need to worry
At the base of a newly sprouted shoot, several layers of dense, pure white roots will be produced, called stem roots (annual). These are the main force for absorbing nutrients, so the top of the bulb must not be placed at the soil surface
Moderately deep planting helps avoid heat damage and build up the bulb
So the formula is drainage layer + 3-5cm base soil + bulb + 5-10cm cover soil, very simple right~, pot height at least 15cm
Water thoroughly to settle the roots, then wait patiently, do not dig around, and resume normal care after the sprout breaks through the soil
As shown in the pictureHere is an updated beginner planting method: "step-by-step soil addition - different from the old method of adding all the soil at once"
I forgot to mention this before
When planting lilies for the first time, you can let the soil just cover the lily bulb, then do not add more soil on top for now, and only reserve 8-10cm of space above the soil surface for adding more soil later. Water thoroughly, wait for the sprout to emerge from the top of the bulb, then gradually add soil to the normal depth (5-10cm from the top of the bulb to the soil surface)
The advantage is that it satisfies everyone's curious and eager mindset, avoids the worry of being afraid the bulb will not sprout and wanting to dig it up but not daring to, and at the same time you can adjust the direction of the sprout when it grows, so that it does not emerge crookedly from deep in the soil and look unattractive. The first watering is also easier to do thoroughly. (For reference only, this method will not interfere with stem root growth)
10. After flowering and dormancy
After opening, they can be cut for vase arrangements, usually fading in 5-7 days, or you can enjoy them directly on the plant. The cut length should not exceed 1/3 of the plant height (at least 2/3 must remain, and the more left the better, otherwise what will you use to build up the bulb?), and the stamens can be removed to prevent staining the petals
After flowering, remove the faded flowers to prevent seed formation
Try not to force dormancy; following the lily's own rhythm this way best achieves good reblooming results and multiplication rate.
During dormancy, store in the original pot, with almost no watering; give a little water each month just to keep the peat slightly damp
In hot summer regions, you can dig up the bulbs in spring, put them in the refrigerator, and plant them in autumn
Asiatic lilies and Oriental lilies will sprout new shoots around February-March of the following year when temperatures rise
Trumpet lilies may also sprout in autumn; let them grow and bloom naturally
IV. Courtyard cultivation
This is very simple
Planting depth in the north is 15cm-20cm, while in the south plant shallower as appropriate
Asiatic lilies can be grown throughout China
Oriental lilies can be safely planted in the ground except in South China and Northeast China
OT, LO, and LA can be planted in the ground south of Liaoning
Pure trumpet lilies can be planted in the ground south of the Yellow River
In areas that are especially cold and without snow cover, you can cover with branches, straw, compost, etc. to a depth of 5cm; if there is snow, there is no need to worry about them being frostbitten
Cold hardiness A > LA >> LO = OT > O >> L
A spring cold snap may damage newly sprouted lilies, so some covering protection is needed
Note to deep-dig the soil; heavy clay soil should be made into ridges, add more organic matter to facilitate drainage (the key among keys), and water occasionally during hot dry summers
V. Lily propagation methods
1. Bulb division
When the main bulb grows to a certain size, the growth points naturally split into two to several joined bulbs (basically all of flowering size). This process begins after flowering and occurs every year, and is the simplest propagation method
The propagation speed mentioned when introducing varieties refers to the speed of bulb division
L=LA=A>LO=OT>>O
Oriental lilies may divide every year or may not, depending on cultivation and care; the first five types all divide very readily
When the number of divided bulbs is too great and the shoots are overcrowded, you can separate them by hand during winter dormancy; it is very simple and will not damage the bulbs
Asiatic lilies may send up multiple shoots in the first year; such bulbs often bloom poorly, but after one year of growing you will have several plants
The growth point splits in two, with the remains of that year's old stem in the middle2. Stem bulbs
These are actually small daughter bulbs produced on the stem roots. Their number and quality are greatly related to the quality of the stem roots and how well they were cultivated that year, and they can reach flowering size after 1-3 years
They develop faster than bulbils, equivalent to starting from the second growth stage of a bulbil (basal leaves --- stem --- flower)
Asiatic lilies, trumpet lilies, LA, and LO are likewise outstanding at this type of propagation
Especially LA; the stem bulbs in the first year are very likely to reach flowering bulb size
The picture shows the small bulbs around the stem roots3. Bulbils
After Asiatic lilies and tiger lilies bloom, especially after bud blast, they produce small bulbs at the base of the leaves, called bulbils, which often root and drop off when mature
They develop in the soil; in the first year they only grow a single grass-like leaf, go dormant in winter, and in the second year grow daughter bulbs and clustered leaves
Then they go dormant again, and in the third year send up a stem and bloom; although slow, the quantity is large
When mature they are purplish-black4. Scales
Very similar to propagating amaryllis by cutting the bulb; remove healthy scales (or scales that have accidentally fallen off), insert them diagonally in sterilized moist peat or vermiculite, and refrigerate. After one month small bulbs will grow, which can be planted separately; the multiplication rate is high but it is slow
The development process is the same as for bulbils.5. Seeds - not recommended
Not recommended unless you are an enthusiast. Aside from species such as trumpet lilies and Lilium regale, which can be tried, most hybrids either have empty seed shells or grow slowly, and self-pollinated offspring will vary
6. Cuttings - not recommended
Only applies to Taiwan lily (Lilium formosanum) hybrids, which can root
For LO and LA, if the cut flower stems are kept moist, they can produce small bulbils that can be separated and planted, but the stems themselves are difficult to root
It is basically useless for Oriental lilies and others, so cut flowers from flower shops cannot be grown
Lilies are monopodial monocots; once the terminal bud is damaged, that year's reproductive growth (flowering) stops, so absolutely do not attempt pinching or cuttings
VI. Common problems
Basically gardeners' problems are concentrated in the first two items
1. Bulb rot - control watering well; better dry than wet
Caused by fungi, with waterlogging as the main trigger. By the time it is discovered it is often too late. If the basal plate is intact, you can peel off the rotten scales and store them after disinfection
Symptoms vary: yellowing leaf edges, shedding of lower leaves, plant wilting that does not improve with watering, blackening buds on OT, LO, LA, etc., and obvious growth stagnation, etc.; all are very likely bulb rot
2. Bud blast
Common in Asiatic lilies, caused by insufficient light (continuous rain, placed indoors). The phenomenon is that small buds turn from green to brown, then wither and scorch, and they will not bloom that year; continue to care for the bulb well. In lilies without Asiatic bloodlines, the main cause of bud blast is bulb rot.
3. Leaf scorch
Strong fertilizer or unrotted fertilizer may damage the roots, causing severe leaf tip scorch and withered buds. At this time, flush the potting soil with plenty of water, and repot and change the soil if necessary. Oriental lilies are relatively prone to leaf scorch; note that chloride and fluoride ions in water and fertilizer should be low (phosphorus fertilizers such as superphosphate contain more of them, use with caution)
4. Breakage
Handle the same as bud blast and continue to build up the bulb. Lilies will not grow side branches; a broken terminal bud means they will not bloom that year
5. Lower leaves turning yellow and dropping
A common issue in lilies, especially severe in Oriental lilies and some Asiatic lilies; in LA, LO, and OT this phenomenon is not obvious. If it is not serious, it basically does not affect ornamental value and can serve as an indicator of the plant's health
5. Pests
Not common; occasionally scale insects, Japanese beetles, aphids, etc. may attack, and snails may chew the buds. For ground planting, pay attention to protection
6. Gray mold
Common in greenhouses with especially high humidity, and during hot rainy periods; mold-like lesions appear on the leaves and can be eliminated by spraying with fungicide
7. Off-season sprouting
For especially robust varieties such as trumpet lilies, new shoots may emerge in winter as dormancy approaches; let them grow
8. Failure to sprout
This is what beginners fear most. Fortunately, unless it is due to bulb rot or bud rot, this situation is rare and is often because the bulb has not experienced enough cold to break dormancy
In this case you can treat it in the refrigerator and plant it once there are signs of sprouting
9. Deformed buds, double flowers
Often appear in cold-treated autumn bulbs and are related to too long a cold treatment period; generally they do not affect planting
VII. Selection, purchase, and storage
Each year suppliers have spring group buys and autumn group buys
Spring is a good season to buy lilies. Now various places are taking preorders, with shipping periods in February-April
The bulbs you buy are often fresh bulbs with very short sprouts or no sprouts
In autumn, cold-treated bulbs (to break dormancy for autumn flowering) and pre-rooted bulbs (provided with suitable temperatures in summer for stem root growth) are offered, with shipping periods in August-September and fewer varieties. Recommended for indoor planting in the north and for the Guangdong and Guangxi regions; when planted outdoors in the north they often dry up in the north wind before blooming
When such bulbs arrive, the sprouts are already very long and break easily, so absolutely do not handle them roughly
Lily bulbs do not store well because they have no protective outer skin, and once they dehydrate they die
During winter dormancy they can be left in the original pot without taking them out; watering once a month to keep the potting soil slightly moist is enough
If you must take them out of the pot, you can put moist peat in a plastic bag, remove the stems from the dug-up bulbs and bury them in it, and store them in the refrigerator's refrigeration compartment (not the freezer!) until they break dormancy and sprout, then take them out and plant
VIII. Other
Pots:
The bigger and deeper the pot the better, as long as drainage is smooth
For home use
Three 14-16cm bulbs can be planted in an 18cm pot
Three 16-18cm bulbs can be planted in a 20cm pot
You can also use a 15cm-18cm pot to plant a single bulb
This is the minimum for pot use; you can increase the pot diameter as appropriate. Do not use shallow pots, for the reasons already stated above
Bulb size:
14-16cm bulbs are mainly L, A, LA, and LO varieties
For Oriental lilies and OT, you generally need to buy 16-18cm bulbs to ensure the flower count
Bulb circumference is greatly related to flower count; generally flowering starts at 12-14cm, and 18-20cm is exhibition level. Trumpet lily types and OT types can be grown to 25cm circumference
Plant height:
When first growing lilies, seeing data of 90, 100, 110, 120, or even 130cm seems terrifying
But that is the mature plant height reachable only after about two years of ground planting
The plant height of potted plants is far below the listed values, and modern hybrids have very thick sturdy stems, so even with large flowers and many flowers they will not lodge or break
(In the first year, potted plants are about 1/2 to 2/3 of the standard height)
In theory, strong light and moderately high temperatures make plants shorter and bloom earlier, while weak light and low temperatures make stems elongate and bloom later
Asiatic lilies take 70-90 days from planting to flowering, Oriental lilies 90-120 days, and the order for the remaining varieties is early A
Please learn to grow lilies in a rough, low-maintenance way
There are now many lily-growing posts on forums, but gardeners still treat them as too delicate: how to mix soil, how to disinfect, how to plant, how to water, whether to shade or sun them, all in exhaustive detail. Studying carefully is certainly good, but I think growing flowers should be a kind of leisure, concerned with a calm and unhurried state of mind, rather than being filled with anxiety and worry. What meaning is there in growing flowers then?
Taking care too meticulously actually makes it especially easy to become overzealous, wishing to dig them up and look every day, water a little every day, and move them around constantly. The result is often too much water, rotten roots, and no flowers.
In fact, under natural conditions there is often a lack of water and fertilizer, pests and diseases run rampant, heavy rain pours down, and fierce winds blow, yet lilies still bloom and set seed year after year, growing and multiplying. If you ignore them, they can bloom very well.
★How to grow potted lilies
Growth habits: likes moisture and light; requires fertile, humus-rich, deep, extremely well-drained sandy soil. Most varieties are suitable for growing in slightly acidic to neutral soil. Specifically, there are the following points:
Lilies like cool, moist environments; places with ample sunlight and slightly shaded environments are more suitable for lilies. They dislike drought and severe heat, and their cold hardiness is somewhat poor.
The growth and flowering temperature is 16-24°C; below 5°C or above 30°C growth almost stops, plants only grow normally above 10°C, and growth stalls again when it exceeds 25°C. If winter nighttime temperatures stay below 5°C for 5-7 consecutive days, flower bud differentiation and bud development will be seriously affected, delaying flowering or even causing blind flowers and split flowers.
Likes fertile, deep soil rich in humus, and especially dislikes hard clay; well-drained slightly acidic soil is best, with a soil pH of 5.5-6.5.
How to grow potted lilies? Potted lily cultivation methods:
1. Cultivation time: potted lilies are best done in September-October.
2. Soil: the growing medium should be mixed from leaf mold, sand, and garden soil in a 1:1:1 ratio, with plenty of fully rotted compost and a small amount of bone meal added at the bottom of the pot as a base fertilizer. The planting depth is generally about 2-3 times the diameter of the bulb.
The potting soil should not be too wet, otherwise the bulbs are prone to rot. Potted lilies should be repotted once a year, with fresh growing medium and base fertilizer.
3. Fertilizing: Lilies do not have very high fertilizer requirements; usually it is enough to apply fertilizer modestly when growth begins in spring and at the early flowering stage. Some growers abroad believe that lilies need relatively large amounts of nitrogen and potassium fertilizer, and that fertilizer should be applied every 10-15 days during the growing period, while phosphorus fertilizer should be limited, because too much phosphorus fertilizer can cause the leaves to turn yellow.
During the flowering period, phosphorus fertilizer can be applied additionally for 1-2 days. To make the bulbs plump, the spent flowers should be cut off promptly after blooming to reduce nutrient consumption. Watering only needs to keep the potting soil moist, but during the peak growing season and in dry weather, watering should be appropriately more frequent, and water should often be sprinkled around the flower pot to increase air humidity.
4. Temperature: The suitable growing temperature for lilies is 12-18°C. In winter, even if the temperature drops to 3-5°C, they will not die of cold.
5. Light: Lilies have the characteristics of cold resistance, love of light, tolerance of fertilizer, and fear of wetness. Lack of sunlight and long-term shading will affect normal flowering. However, they have wide regional adaptability and can be grown in the ground or in pots in both the north and the south.
Since lilies are bulbous plants, they can also be planted directly from bulbs, which should be planted deep to 6-7 cm so that the lateral roots can grow deep and absorb as many nutrients as possible. The growing medium required is preferably sandy loam; clay and lime soil should not be used. If pond mud is used for planting, some river sand and crushed charcoal should also be mixed in appropriately, so that the growing medium is loose and breathable, which is necessary for timely flowering.
In addition, during the growing period of lilies, the flower pot should also be rotated once a week. Otherwise, the plant tends to grow lopsided, affecting its appearance.
★How to grow lilies
Lilies are undoubtedly a flower loved very much by many flower enthusiasts. Many flower enthusiasts want to grow them at home to beautify their rooms, but they do not know how to grow lilies. Here is a brief introduction:
Lilies prefer a cool and humid environment; places with ample sunlight and slightly shaded environments are more suitable for lilies. They avoid drought and extreme heat, and their cold resistance is somewhat weaker. The growing and flowering temperature is 16-24°C. If the winter nighttime temperature is below 5°C for 5-7 consecutive days, flower bud differentiation and flower bud development will be seriously affected, delaying flowering or even causing blind flowers and split flowers. Lilies prefer fertile, deep soil rich in humus, and most avoid hard clay; slightly acidic soil with good drainage is best. Lily propagation methods include bulb division, scale cuttings, seed propagation, and tissue culture.
I. Growth habits of lilies
Lilies are bulb flowers belonging to the genus Lilium in the family Liliaceae. They prefer an environment with ample sunlight and are long-day plants. Day length not only affects flower bud differentiation but also affects flower growth and development. Lilies do not like high temperatures and prefer a cool and humid climate. The suitable growing temperature for Asiatic lilies and Oriental lilies is 20-25°C during the day, while for Lilium longiflorum it is 25-28°C, with nighttime temperatures above 14°C. Temperatures above 30°C will seriously affect the growth and development of lilies, causing bud abortion, and the flowering rate will also decrease markedly. Below 10°C, growth nearly stops.
II. Soil requirements for lilies
Lilies require soil that is rich in humus, deep and loose, able to remain appropriately moist yet well drained; sandy loam is best. Clay must absolutely not be used to grow lilies.
Lilies prefer slightly acidic soil. The suitable soil pH for Asiatic lilies and Lilium longiflorum is 6-7, and the suitable soil pH for Oriental lilies is 5.5-6.5. Lilies are generally not salt tolerant. The fluorine and chlorine content in the soil is required to be below 50 mg/L, and the total soil salinity should not exceed 1.5 ms/cm.
III. Preparatory work before planting
1. Soil disinfection: Before planting lilies, the soil must be disinfected. Commonly used disinfection methods include steam disinfection and chemical disinfection. Steam disinfection is rarely used now because it consumes a lot of energy and is troublesome to operate. Chemical disinfection uses
40% formalin diluted into a 1:50 or 1:100 medicinal solution and sprinkled on the soil at 2.5 kg/sq m. After sprinkling, cover with plastic film for 5-7 days, then uncover and air for 10-15 days before planting, or use 8-10 g/sq m of carbendazim technical powder scattered into the soil for disinfection.
2. Thawing and disinfection of seed bulbs: After the bulbs arrive, immediately open the packaging and place them in a 10-15°C environment to thaw. After they are completely thawed, disinfect them. Disinfection method: Soak the bulbs in a one-thousandth aqueous solution of captan, chlorothalonil, carbendazim, potassium permanganate, etc. for 30 minutes, or soak the bulbs in an 80-fold solution of 40% formalin for 30 minutes. After removing them, rinse off the residual solution on the bulbs with clean water, then dry them in a cool place before planting. At some domestic planting bases, before planting, the original basal roots are cut off, which helps promote new basal roots.
3. Storage of seed bulbs: If the thawed bulbs cannot all be planted immediately, they must not be frozen again, otherwise there is a risk of frost damage. They can be stored at 0-2°C, but for no more than two weeks; they can also be stored at 2-5°C for no more than one week, and the plastic film packaging must be opened at the same time.
IV. Planting depth and density
For planting in spring and summer, the planting depth requires the top of the bulb to be 8-10 cm below the soil surface; in winter, 6-8 cm. Planting density varies depending on the variety, bulb size, and seasonal factors. In spring and summer, they can be planted more densely; in winter, when sunlight is weaker, they should be planted more sparsely.
The planting densities for lily bulbs of different groups and different specifications (expressed as the number of bulbs per square meter) are listed below for reference:V. Management after planting
1. Temperature: To obtain high-quality lily cut flowers, temperature control in the greenhouse is very important. Within 3-4 weeks after planting, the soil temperature must be maintained at a low temperature of 9-13°C to promote rooting. Too low a temperature will unnecessarily prolong the growing period, while a temperature above 15°C will lead to poor development of stem roots. These stem roots will quickly replace the basal roots in supplying 90% of the plant's water and nutrients, so to obtain high-quality lilies, the development of stem roots is crucial. After the rooting period, the environmental temperature for Oriental lilies should be controlled at 15-25°C, and the environmental temperature for Asiatic lilies and Lilium longiflorum should be controlled at 14-23°C. If the daytime temperature is too high, ventilation and shading should be used to lower the temperature; if the nighttime temperature reaches 15-25°C, lily cut flowers will have short stems and few buds, and quality will decline. At this time (domestically), a gibberellin solution is sprayed on the plants to increase stem length. The specific dosage varies with different growth stages and different environmental temperatures; generally less can be used in the early growth stage and more in the later stage. The winter temperatures in domestic solar greenhouses generally prolong the growing period of lilies and seriously affect cut flower quality, so temperature regulation measures should be increased.
2. Humidity: Before planting, the soil moisture should be such that it forms a ball when squeezed in the hand and breaks apart when dropped. In hotter seasons, before planting, if conditions permit, cold water should be poured once to lower the soil temperature. After planting, water once again so that the soil and bulbs are fully in contact, creating good conditions for the development of stem roots. Subsequent watering should be based on keeping the soil moist, that is, a handful of soil forms a ball in the hand but does not release water. Watering is generally done in the morning on sunny days. The relative humidity should preferably be 80%-85%, and large fluctuations in relative humidity should be avoided, otherwise leaf scorch may occur.
3. Fertilizer: In the early stage of growth, flowering lily bulbs mainly consume the nutrients stored in their own scales, so excessive base fertilizer is not needed before planting. One month after planting, some fertilizer can be applied as a top dressing according to soil fertility. Lilies have a very large demand for potassium, and a compound fertilizer can be prepared according to the ratio of N-
P2O5-K2O=14:7:21. Apply 10 kg per mu each time, once every 10-15 days, until 3 weeks before flower harvest. At the same time, attention should also be paid to supplementing trace elements such as iron, boron, and zinc.
4. Light: Light is an important condition for controlling quality, and lily flower bud development especially requires ample light. Insufficient light will cause poor plant growth and cause lily bud drop, lighter leaf and flower colors, and shortened vase life. When growing lilies in winter in northern China, due to the influence of glass or plastic film and other insulation materials, about 25-30% of sunlight is blocked. Therefore, in addition to keeping the surface of glass and plastic film clean to allow good light transmission, some varieties also need supplemental lighting, which can be provided with incandescent lamps. In good modern greenhouses, horticultural high-pressure sodium lamps should be used. When producing lilies in summer, strong direct sunlight must also be avoided, generally using shade nets for shading. Asiatic lilies and Lilium longiflorum are shaded 40%, and Oriental lilies are shaded 50%.
5. Carbon dioxide: Carbon dioxide is beneficial to the growth and flowering of lilies. From 8-10 a.m. on sunny days, in a non-ventilated shed, carbon dioxide gas pellets are applied to increase the carbon dioxide content in the shed. Other methods can also be used, for example: hang a plastic bucket every 15-20 m (the bucket is 1 m above the ground), fill the bucket with a 20% sodium bicarbonate solution (the baking soda commonly used at home is sodium bicarbonate), then gradually pour the prepared 10% dilute sulfuric acid solution into each plastic bucket in 3-4 portions. Sodium bicarbonate reacts with sulfuric acid to produce carbon dioxide gas. A solar greenhouse 60 m long and 7 m wide requires 1.7 kg of pure sodium bicarbonate and 1 kg of concentrated sulfuric acid (98% concentration).
VI. Harvesting and storage of lily cut flowers
1. Harvesting: Harvest after at least 2-3 flower buds have shown color. Harvesting too early affects flower color, making the flowers look pale and unattractive, and some buds will not open. Harvesting too late will make post-harvest handling and packaging difficult, the petals will be soiled by pollen, and the already opened flowers will release ethylene, greatly shortening the freshness period of the flowers.
2. Handling: After harvest, remove the lower 10 cm of leaves, then grade and bundle. A grade interval of 10 cm is appropriate. For lilies bundled in one bunch, the longest and shortest stems should preferably differ by no more than 5 cm, and the flower tops should be aligned.
3. Storage: After bundling, lilies should immediately be placed in clean, pre-cooled water, then placed in a cold storage room. The temperature of the water and the cold storage room should preferably be 2-3°C.
VII. Common diseases and pests of lilies and their control methods
1. Lily fungal diseases
(1) Blue mold
Symptoms: During storage, white spots grow on the rotting spots on the scales, and then fluffy green-blue patches grow. After infection, even at a low temperature of -2°C, the rot will gradually increase. The pathogen will eventually invade the basal plate of the bulb, making the bulb worthless or causing the plant to grow slowly. Although infected bulbs look unhealthy, as long as the basal plate of the bulb is intact, the growth of the plant during planting will not be affected. After planting, the infection will not transfer to the stem, nor will it infect the plant from the soil.
Control: Store the bulbs at the recommended minimum temperature; do not plant bulbs whose basal plates have already been damaged. Infected bulbs must be soaked for 30 minutes in a one-thousandth aqueous solution of fungicides such as captan, chlorothalonil, or carbendazim before planting, and then planted. After planting, maintain an appropriate soil temperature.
(2) Bulb and scale rot and stem diseases caused by Fusarium
Symptoms: Plants with bulb and scale rot grow very slowly, and the leaves are pale green. Underground, brown spots appear at the top of the scales, on the sides, or where the scales connect to the basal plate, and these spots gradually begin to rot. If the basal plate stem is infected, the entire bulb will rot. The stem disease caused by Fusarium is a disease that infects the aboveground part. The identifying sign is that the basal leaves turn yellow before maturity, and the yellowed leaves turn brown and fall off. On the underground part of the stem, orange to dark brown spots appear, which later enlarge, eventually extending into the interior of the stem. Afterward the stem rots, and finally the plant dies before maturity.
Control: a. Disinfect infected soil; b. Plant mildly or moderately infected bulbs as quickly as possible, and the soil temperature should be low.
(3) Rhizoctonia
Symptoms: If the infection is mild, it only harms the leaves in the soil and the green leaves below the young shoots, with sunken light brown spots appearing on the leaves. Generally speaking, although plant growth is somewhat affected, it can still continue to grow. In severely infected plants, the upper growth is hindered, and the white leaves underground as well as the lowest leaves of the aboveground part will rot or wilt and fall off, leaving only brown scars on the stem.
Control: Disinfect soil suspected of infection with a soil disinfectant. After disinfection, the soil must be ensured to be no longer infected; if the previous crop has already shown infection, general soil disinfectants cannot be applied, so before planting, pre-treat the soil with a chemical for controlling Rhizoctonia (thoroughly incorporated into the soil to a depth of 10 cm).
(4) Phytophthora
Symptoms: Foot rot of the plant (Phytophthora) will hinder growth or cause sudden wilting. Soft rot occurs at the infected area at the base of the stem, becoming dark green to dark brown and spreading upward. The leaves turn yellow, and discoloration begins at the base of the stem. Similar soft rot infections often also occur on the aboveground stem, causing the stem to collapse or bend.
Control: Disinfect infected soil with a general soil disinfectant; during cultivation, fungicides that control Pythium can also effectively control foot rot; ensure the soil has good drainage conditions; prevent the crop from remaining wet for a long time after watering; keep the soil temperature as low as possible in summer.
(5) Pythium
Symptoms: This type of fungus infects both individual plants and plants within an area. Plants are stunted, the lower leaves turn yellow, the upper leaves become narrower, the leaf color is lighter, and they often wilt. In plants affected by root rot, the flower buds shrink and dry. When the plant is pulled up, transparent, light brown rot spots can be seen on the bulb and root crown, or they become completely soft and rotten.
Control: Disinfect infected or suspected infected soil with a general soil disinfectant; keep the soil temperature low in the early cultivation period, and adopt correct cultivation procedures throughout the cultivation period. Cultivation in boxes filled with potting soil and peat can keep Pythium under control.
After the crop has emerged or in cases where Pythium infection may have occurred, fungicides for controlling Pythium that are easy to spray onto the crop can be used, preferably in the evening. Spraying water for a few minutes (about three minutes) before applying the fungicide will significantly enhance the effect of the fungicide, and can also rinse the crop clean.
2. Abnormal phenomena
(1) Leaf scorch
Symptoms: First, young leaves curl slightly inward. After a few days, yellow to white spots appear on the scorched leaves. If leaf scorch is mild, the plant can still continue to grow normally, but if leaf scorch is very severe, the white spots can turn brown, and the leaves bend at the damaged areas. In very severe cases, all leaves and young shoots will fall off, and the plant will not develop further. This is called the most severe form of scorch. Control: The soil should be kept moist before planting; it is best not to use susceptible varieties; the planting depth should be appropriate, with 6-10 cm of soil above the bulb; during periods of increased sensitivity, avoid large differences in temperature and relative humidity in the greenhouse, and try to keep the relative humidity at about 75%.
(2) Bud drop and bud shriveling
Symptoms: Bud drop occurs when flower buds grow to 1-2 cm. The color of the bud turns pale green, and at the same time, the pedicel connected to the stem shortens, after which the bud falls off. In spring, the lower buds are affected first, while in autumn, the upper buds fall off first.
Control: Do not cultivate varieties prone to bud drop in environments with poor light. To prevent bud shriveling, the bulbs must not dry out during cultivation. Ensure that the bulbs have a good root system and let them grow under conditions that are as suitable as possible, with particular attention to light and transpiration.
★How to grow potted lilies
How to grow potted lilies is something many flower enthusiasts who want to grow lilies themselves want to know. Many articles online are very theoretical, leaving flower enthusiasts uncertain, so let us use actual cases to explain in detail how to grow potted lilies.
First, a brief introduction: Lilies are perennial herbaceous bulbous plants of the genus Lilium in the family Liliaceae, mainly distributed in temperate regions of the Northern Hemisphere such as eastern Asia, Europe, and North America. More than a hundred varieties have been discovered worldwide. China is its most important center of origin, with more than fifty native species, and is the natural distribution center of the genus Lilium.
I. The materials needed for planting lilies are as follows:
1. Soil: Lilies are not very strict about soil; as long as it does not waterlog, ordinary garden soil is also suitable. Of course, nutrient soil is even better, and for those who are particular, peat is also fine.
2. Pot: This needs attention. Lilies have relatively developed roots, so a relatively deep and large pot is suitable. Small pots are not suitable! The case below uses a 2-gallon pot.
3. Location choice: Some flower enthusiasts may ask whether a balcony at home with no light is okay, or say they plan to grow them on a rooftop terrace. Here it should be said that lilies prefer a cool and humid environment; places with ample sunlight and slightly shaded environments are more suitable for lilies. They avoid drought and extreme heat, and their cold resistance is somewhat weaker. The growing and flowering temperature of lilies is 16-24°C. Below 5°C or above 30°C, growth almost stops. Only above 10°C do plants grow normally, and above 25°C growth stalls again. If the winter nighttime temperature is below 5°C for 5-7 consecutive days, flower bud differentiation and flower bud development will be seriously affected, delaying flowering or even causing blind flowers and split flowers.
II. First, feast your eyes
The bulbs in the picture below are lily bulbs just received a few days ago. They look pretty good, right! I got five in total, and will not post them one by one. Hundreds of flower enthusiasts on the forum joined the group buy!III. Planting process
First: I planned to divide my 5 bulbs between 2 flower pots. I first checked the colors of the bulbs. There are 2 Siberia (this is because another variety originally was detained by customs and replacements were provided), white; Malone is pink; Yelloween is yellow; Tiber is also pink. I planned to plant Siberia and Malone in a white flower pot, and the other three in a 2+ pot, so they can look splendid when flowering.
Second: First clean the flower pot thoroughly, lay breathable coarse cinders at the bottom, and cover with soil.
Third: Sprinkle some phosphorus fertilizer on the soil (bone meal can also be used as a substitute). If there is no bone meal, chicken manure can also be used as a substitute to ensure nutrients for flowering.
Fourth: Cover with soil again. After covering with soil, sprinkle carbendazim. (I carefully checked the root bulbs and found no mold. Flower enthusiasts who receive diseased root bulbs can soak the root bulbs in carbendazim before planting.)
Fifth: Cover with soil again and place the root bulbs in. You can use scissors to cut off the root systems that have already dried out, then cover with soil. Generally, the soil can be level with the upper buds of the root bulbs, and a distance should be left between the soil surface and the rim of the pot for later filling with soil. This depth is not enough.
Sixth: Water thoroughly, then place in a cool, open-air place.IV. Troubleshooting during the planting process
Overall, lilies are very easy to grow. As long as the bulbs are bought correctly, the flowering and survival rate is almost 100%. The growing period generally lasts about 90-150 days depending on the variety.
1. How many lilies can be planted in one pot?
It depends on the size of the pot. For a 2-gallon pot with a diameter of about 25 cm, planting 1-3 is acceptable!
2. Can lilies rebloom?
Whether lilies rebloom relatively speaking mainly depends on the first year of planting. If planting in the first year is good, reblooming in the second year is no problem.
3. Are lilies very fragrant?
Different lily varieties have different concentrations of fragrance. Whether a specific one is fragrant can be determined according to the variety description at the time of purchase.
★Lily cultivation techniques
Authors: Zhu Yunyi, Yang Ming
Lilies are bulbous herbaceous plants of the genus Lilium in the family Liliaceae. Lily stems are upright and graceful, the leaves are emerald green, the flower shapes are unique, the flowers are large and colorful, and the colors are elegant. Lilies carry the meaning of a harmonious union lasting a hundred years and are very beloved. They are one of the bulbous flowers widely cultivated at home and abroad. Lily introduction and cultivation in China are gradually expanding, and market sales are increasingly active.
I. Morphological characteristics
Lilies are perennial herbaceous plants. The seed bulb is a non-tunicate bulb, spherical in shape, pale white, formed by the aggregation of several fleshy, thick, egg-spoon-shaped scales; the stem is upright, with stem roots at the underground nodes, the stem cylindrical or rhombic-columnar, the aboveground stem upright and robust, green and smooth, with a stem diameter of 3-10 mm and a plant height of 70-200 cm; the leaves are scattered or alternate, sessile, lanceolate to elliptic-lanceolate, entire, with a total of more than 100 leaves; the flowers are solitary in several leaf axils at the top of the stem, with 1-10 flowers, large, trumpet-shaped; different varieties have different flower colors and different fragrances.
II. Requirements for environmental conditions
1. Temperature. Lilies prefer a warm environment with ample sunlight, are relatively cold resistant, and fear high temperatures, strong light, and high humidity. The suitable growing temperature for lilies is 15-25°C. Below 10°C, growth is slow, and above 30°C, growth is poor and leaf burn occurs. During growth, daytime temperatures of 21-23°C and nighttime temperatures of 15-17°C are best. However, seed bulbs have a dormant period and must be stored at a low temperature of 3-7°C for 4-6 weeks to break the dormancy of the seed bulb, so that planting can lead to sprouting.
2. Light. Lilies prefer soft light and can also tolerate strong light and semi-shade. Insufficient light will cause flower buds to fall off. With ample light, plants are robust, shorter, and the flowers are vivid. Lilies are long-day plants; long light periods cause earlier flowering, and short light periods delay flowering.
3. Water. When planting lily bulbs, the furrows should be filled with water to 3/4, allowing the water to fully penetrate the bed surface. Afterward, when lacking water, irrigate with running water and simply keep the soil moist for a long time. This can increase the emergence rate of seed bulbs, make emergence uniform, and benefit stem and leaf growth.
4. Nutrients. Lilies are bulbous cut flower plants, prefer phosphorus and potassium, and avoid excessive nitrogen. Sufficient phosphorus and potassium help improve flower quality and the formation and plumpness of bulbs. Excessive nitrogen is unfavorable for flower and bulb formation, and flower quality is poor and weak. Fertilization should be mainly organic fertilizer, mainly phosphorus and potassium fertilizer, with nitrogen fertilizer as a supplement.
III. Cultivation techniques
1. Rationally arrange the planting period. At present, lilies are grown in Hunan, Sichuan, Henan, Jiangsu, Yunnan, Guizhou, Guangxi, Zhejiang, Guangdong, and other places in China. We should make full use of the unique winter climate conditions in the south and arrange the harvest period from late December to May 1, trying to avoid competing for the market with lilies grown in other provinces, striving to sell at a good price and obtain greater income and better economic benefits. Lilies generally take 80-130 days from planting to harvest and market. Early planting (such as before the Autumn Equinox) means high temperatures, long sunshine, and strong light, shortening the time from planting to harvest; late planting (such as after Cold Dew) means low temperatures, short sunshine, and weak light, prolonging the time from planting to harvest. If they are to be marketed at Christmas, they should be planted in mid-to-late September, and if marketed at Spring Festival, they should be planted in mid-to-late October.
2. Select land, prepare the soil finely, and apply sufficient base fertilizer. Choose plots with deep soil, loose and fertile texture, high terrain, and good drainage for planting. Planting lilies in semi-shaded, semi-sunny plots with slightly acidic soil is even better. Lilies should not be continuous cropped, and fields where the previous crop was pepper, eggplant, or similar crops should not be chosen; leguminous or grass crops are better.
3. Build frames and cover with shade nets for shading. In order to meet the light, temperature, and humidity requirements of lilies during growth, lilies prefer soft light (semi-shade) and fear high temperatures and strong light. After preparing the land and making the beds, frames should be built and shade nets covered before the seed bulbs emerge. Shade nets with 70-80% shading are best. For planting from April to August, an additional layer of shade net should be added to reduce field temperature and light intensity, increase field humidity, avoid or reduce high-temperature and strong-light damage to plant leaves, and promote plant and leaf growth. But when the maximum daytime temperature drops to 26°C (generally in early December), the shade nets should be uncovered to increase light intensity and promote plant and leaf growth. When the average temperature is below 10°C, nylon film should then be covered again to increase temperature and preserve moisture, ensuring normal growth of lilies and harvest and flowering as expected.
4. Rational close planting. Because lilies tolerate semi-shade, on the basis of sufficient base fertilizer they can be planted more densely. Generally, 12,000-18,000 seed bulbs can be planted per mu, with a plant-row spacing of 15-20 x 10-15 cm. The planting depth of seed bulbs is 10 cm (at least the height of 3 seed bulbs), so as to avoid sunburn damage to the root system. After planting, spray butachlor immediately to control early weeds in the field.
5. Field management. After full emergence, before the seedlings grow to 20 cm, in combination with intertillage and weeding, apply 500 kg of human and animal manure and 10 kg of superphosphate per mu, or apply 10-15 kg of high-quality compound fertilizer (containing 15% each of nitrogen, P2O5, and K2O) plus 5 kg of urea. The fertilizer solution should be dilute rather than concentrated; too high a concentration easily damages roots and inhibits growth. Apply frequently and lightly, once every 8-10 days. When applying top dressing, avoid the fertilizer solution directly contacting the seed bulbs and plant stems to prevent rot of bulbs and stems. If the fertilizer solution is splashed onto the plant leaves, spray clean water immediately after applying the fertilizer solution to wash off the fertilizer solution on the leaves, so as not to damage leaves and plants. But when the winter temperature drops below 8°C, fertilization should be stopped and resumed when the temperature rises. After lily emergence, deep tillage and weeding are no longer suitable, so as not to damage the root system; weeds should be pulled as soon as they appear to prevent weed damage.
6. Water management. Because lilies prefer moisture, fear waterlogging, and avoid drought, ditches should often be cleared to drain accumulated water on rainy days, and irrigation should be done in drought to maintain moisture, ensuring that after people walk into the bed furrows, footprints remain (but feet do not sink), the surface soil of the bed does not show white, the surface soil between beds forms a ball when grasped by hand, and when released from a height of one meter above the ground, the mud ball breaks apart upon landing.
7. Timely control of diseases and pests. Lilies have relatively few diseases and pests. The main diseases are anthracnose, gray mold, damping-off, root rot, and bulb rot. Anthracnose can be controlled with chlorothalonil, Score, Rovral, anthracnose Fumei, etc.; gray mold can be controlled with mancozeb, Sumilex, 50% iprodione, chlorothalonil, or 1% Bordeaux mixture; damping-off requires first removing diseased plants, then controlling with 1% Bordeaux mixture, chlorothalonil, Tuzet, etc.; for root rot and bulb rot, before planting, dress seeds with 0.5% quintozene to prevent disease occurrence, and in the early stage of disease, drench or spray with 300-500 times 50% amobam solution. For disease control in lilies, spray once every 7-10 days, for 2-3 consecutive sprays. The main pests are aphids and white grubs. Aphids and white grubs often gather on tender leaves and flower buds to suck sap, causing plants to shrivel and grow poorly. They can be controlled with fenvalerate, omethoate, imidacloprid, Dagongshen, etc. When controlling diseases and pests, it is best to add some foliar fertilizer, both to control diseases and pests and to promote plant and leaf growth.
8. Harvest seed bulbs at the right time. When the underground seed bulbs expand, become plump and full, and the aboveground plant leaves yellow or even dry and fall off, the seed bulbs can be harvested. Keep the root system of the harvested seed bulbs, remove loose soil completely, pile them by grade, and later pack them into cold storage for low-temperature treatment.
★Cultivation techniques for Oriental lilies
With the improvement of people's living standards, the sales volume of fresh flowers is increasing day by day. In 2007, we introduced Oriental lilies in small batches for cultivation and achieved success. The cultivation techniques are now introduced as follows:
1 Soil preparation
Deeply plow the soil 30 cm, apply 2-3 m3 of peat or rotted larch pine needles, 3-5 kg of ferrous sulfate, and 500-1000 kg of organic fertilizer such as expanded chicken manure per 667 sq m, so that the soil pH is slightly acidic at 6-6.5; and add 1.5-2.5 kg of thiram or 2000-3000 ml of soil fungicide for disinfection.
2 Bed making
Make raised beds 20 cm high and 80-100 cm wide, leaving a 40 cm walkway between two beds, with length depending on the land.
3 Planting
The planting time should be determined by two indicators: the flower supply time and the growth cycle of the variety. Be sure to use seed bulbs whose dormancy period has passed. The dormancy period varies with variety. Generally, after the leaves turn yellow and the bulbs are lifted, dormancy can be broken in 80-120 days in a 0-4°C environment. For seed bulb disinfection, dress seeds with 5-10 g/kg carbendazim, or soak seeds in a 2% potassium permanganate aqueous solution for 10 minutes before planting. When planting, first move about 8 cm of the soil layer on the bed surface to one side, then use a nail board or tree root measured to size to punch holes at set distances. Generally, for medium-sized seed bulbs, the spring and autumn density is 13 cm x 13 cm; for large bulbs increase by 1 cm, and for small bulbs reduce by 1 cm. In winter the spacing is slightly larger, and in summer it is denser. Generally, about 20,000 bulbs are planted per 667 sq m. After punching the holes, place the seed bulbs on the holes, then fill back the bed surface soil that was moved to one side, and rake level.
4 Water management
After planting, water thoroughly with drip irrigation or sprinkler irrigation. Except in summer, flood irrigation is prohibited. Afterward, water whenever the seedbed becomes dry, watering until it connects with the lower moist soil. Avoid water accumulation to prevent root rot. In too dry weather, water can be sprayed on the leaves to maintain relative air humidity at about 70%.
5 Temperature management
After the seed bulbs are planted, it takes 20-30 days until emergence. During this period, a temperature of about 12°C is suitable to favor rooting. After emergence, raise the temperature, otherwise the plants are prone to infection by multiple diseases. Therefore, in winter production, oil-fired furnaces or small boilers should be used for heating, and in summer shade nets or ground grass cover should be used to lower the temperature.
6 Light management
When planting lilies in winter, try to choose day-neutral lilies rather than long-day lilies, while in spring, summer, and autumn, long-day varieties are also acceptable. Lilies prefer light and do not tolerate shade. Supplemental lighting in winter gives better growth; if not supplementing light, open the straw curtains as early as possible and cover them late to extend the lighting time. In summer, if a shade net with 30% shading can be used to block part of the strong light, it will help lilies grow faster and enlarge their flowers.
7 Nutrition management
Start top dressing after the seedlings grow stems and the leaves unfold. Apply chemical fertilizer once every 10-15 days, using 4-5 kg each of diammonium phosphate and potassium nitrate mixed per 667 sq m. When the plant height is 60 cm, spray 2%-3% monopotassium phosphate on the leaves every 7-10 days. If the whole leaf surface turns yellow, spray 0.5% urea; if the small leaves turn yellow, spray 0.1% ferrous sulfate, while adding trace fertilizers such as copper and zinc. When flower buds are 6 cm long, stop top dressing.
8 Disease and pest control
The main lily diseases include black spot, gray mold, and rust, which can be controlled by spraying 500 times 25% carbendazim wettable powder; pests include white grubs and aphids, which can be controlled by spraying 1000 times 25% dichlorvos emulsifiable concentrate.
★Open-field cultivation techniques for lilies
Open-field cultivation is also a common production method for cut-flower lilies. It has the advantages of low production cost and simple cultivation management, but the drawbacks of open-field cultivation are also obvious: the flowering period is not easy to control, and low product quality is the main factor affecting open-field production of cut-flower lilies.
1. Land selection
For open-field lily cultivation, choose land that is high and well-drained, with loose soil. High-altitude cool mountain areas or areas beside lakes and rivers and peninsulas are ideal locations for growing lilies. Northwest Yunnan Province, Xichang in Sichuan, the Qinba Mountains in Shaanxi, Anshan in Liaoning, and Lanzhou in Gansu, China, can all serve as bases for open-field production of cut-flower lilies.
Soil improvement
Generally speaking, the soil used for producing lilies does not occupy as vast an area as that for grain crops. If the soil texture is unsuitable, local soil replacement can be used to create a suitable soil environment. When replacing soil locally for a lily plot, first dig out the original soil in the rows where lilies are to be planted, and add a soft, good soil medium. So-called soil medium refers to artificially prepared materials that replace soil. Commonly used soil media include pine-needle soil, peat, fermented sawdust, vermiculite, perlite, and so on. Mix these materials with soil in a certain ratio and fill them into the planting furrows for lilies, then plant the lilies. In addition, attention should also be paid to measuring the soil pH of the cultivation site.
How to improve soil pH: 6 weeks before planting, take soil samples for analysis, and measure salt and oxide content, pH, and nutrient content. If the salt content and chlorine content exceed the standard, a large amount of irrigation water must be used to dilute the salts in the soil. Maintaining the correct acidity and alkalinity helps the lily root system absorb nutrients from the soil. Applying peat mixed with topsoil can lower pH, and using ammonium fertilizer and urea can also lower pH. In addition, mixing a small amount of sulfur powder or ferrous sulfate into the soil can also lower soil pH. If the soil pH is too low, mix lime-containing compounds or magnesium-containing lime with the soil before planting. After using lime, wait at least 1 week before planting. During the growth stage, it is best to use nitrate nitrogen fertilizer, which can raise pH.
2. Crop rotation
To prevent the massive occurrence of lily pests and diseases, crop rotation should be practiced. Before planting, an overall plan should be made for the land, and every plot planted with cut-flower lilies should be rotated to a different crop each year. During rotation, the previous crop should not be bulb flowers of the Liliaceae or Amaryllidaceae families; planting leguminous plants is most suitable.
Base fertilizer
The fertilizer applied before planting lilies is base fertilizer, generally an organic fertilizer with long-lasting effect. There are two ways to prepare base fertilizer: one is to mix 1/3 various humus fertilizers (organic fertilizer made by mixing decomposed leaf mold, compost, peat, cake fertilizer, etc.) into the soil to form a 30 cm deep furrow; first spread the above mixed soil in the furrow, then plant the lilies. Lilies planted in this mixed soil generally grow better. The mixed soil not only improves the soil but also achieves the purpose of applying base fertilizer.
3. Planting
Planting period: open-field lilies are mostly planted in autumn, while cold regions use spring planting.
Taking Beijing's climatic conditions as an example, the lowest temperature in January in winter is generally 8-15°C, and most cut-flower lilies can overwinter in the open field. Summer is relatively hot, and the highest temperature in July can reach 33-36°C. Therefore, lilies are in a semi-dormant period during this time. According to Beijing's climatic characteristics, lilies can be planted in autumn or spring. Autumn planting is generally carried out in September-October when the temperature drops noticeably. Autumn-planted lilies develop a good root system, grow robustly, and produce more flowers the following year. Spring planting is generally carried out in March-April when the temperature begins to rise. They sprout in April-May, and bolt and form buds in May-June. From mid-June to the end of July is the peak flowering season for open-field cut-flower lilies.
The flowering periods of autumn-planted and spring-planted lilies differ little, but the stem height and flower number of spring-planted lilies are inferior to those of autumn-planted lilies.
Topdressing
For open-field lily cultivation, topdressing should be carried out in the early growth stage, late growth stage, and bud stage respectively. In the early growth stage, apply 37.5 kg diammonium phosphate and 75 kg urea per hectare; in the late growth stage, apply 75 kg diammonium phosphate and 22.5 kg monopotassium phosphate per hectare. The fertilization method is to dissolve the above fertilizers in water and pour the solution on. In the bud stage, apply 22.5 kg potassium sulfate, 30 kg monopotassium phosphate, and 0.3 kg boric acid per hectare, sprayed on the leaves at 0.1%.
Irrigation
Open-field lilies can obtain part of their water from natural rainfall, but because it is often untimely, it is far from enough to meet the needs of normal plant growth and development, especially in dry seasons, when timely irrigation is even more important. For open-field lily cultivation, methods such as flood irrigation, sprinkler irrigation, and drip irrigation can be chosen according to local conditions. Flood irrigation is directly introducing water onto the bed surface, which causes soil compaction. Sprinkler irrigation distributes water evenly and can increase air humidity. Drip irrigation uses a low-pressure pipe system to make irrigation water drip slowly and continuously into the soil within the range of the plant root activity. Modern cut-flower cultivation often combines sprinkler and drip irrigation: sprinkler irrigation creates an air humidity environment suitable for plant growth, while drip irrigation supplies the water needed for plant root activity. The amount, frequency, and timing of irrigation often vary with the season, soil texture, and cultivated variety. As for the amount of water per irrigation, the principle should be to water thoroughly and appropriately. In summer, temperatures are high and evaporation is great, so irrigation frequency should be higher; in autumn and early [season], water demand is low, so watering should be minimized as much as possible, and one freezing-water irrigation should be given before the soil freezes. Clay soil should be irrigated less frequently, while sandy soil should be irrigated more frequently. Within a day, in summer, irrigation should be done in the morning and evening, when the difference between water temperature and soil temperature is relatively small and will not affect root activity.
4. Intertillage and weeding
In open-field lily cultivation, the soil tends to become compacted after rain or watering, which is unfavorable for root growth. In addition, because weeds have strong reproductive capacity, they will grow together with lily plants and compete for water, nutrients, sunlight, and space, and can also lead to pest and disease problems in lily plants. Therefore, timely intertillage and weeding are necessary to create a good living environment for lily plant growth.
Intertillage should be carried out together with loosening the soil after irrigation. The depth of intertillage should be: shallow hoeing at the seedling stage to prevent root damage; shallow hoeing near the plants; deep hoeing in the rows away from the plants. When the lilies grow luxuriantly and the field rows close, there is no need to loosen the soil anymore.
Weeding should be done early, at the initial stage of weed occurrence, and weeds must be completely removed before they set seed. For weeding methods, small areas are mainly hand-weeded, while large areas can use mechanical weeding or chemical weeding.
5. Netting and staking
Open-field lilies are often vulnerable to adverse weather such as wind, rain, and hail, so nets and stakes must be set up promptly to prevent plants from lodging.
6. Topdressing
Lily is a potassium-loving crop. According to nutrient analysis of Yixing lily plants at various growth stages, K2O content was the highest, with the average content in aboveground stems and leaves at various growth stages being 3.76%, which is 5.55 times the K2O5 content and 1.59 times the N content; the average K2O content in underground bulbs at various growth stages was 2.16%, which is 4.48 times the K20 content and 1.59 times the N content. The seedling stage is the period with the highest K2O content among all growth stages, with 4.70% in stems and leaves and 2.88% in bulbs. For the proportions of nitrogen, phosphorus, and potassium in lily plants at various growth stages, the periods with the highest K2O proportions in aboveground stems and leaves and bulbs were both the middle and late growth stages of the lily, namely the bulbil harvest period and the full flowering period (the beginning of decline of aboveground stems and leaves). The N:P:K ratios in aboveground stems and leaves were 1:0.20:1.98 and 1:0.22:2.22 respectively; the N:P:K ratios in bulbs were 1:0.41:1.79 and 1:0.34:1.66. Traditional cultivation of Yixing lily uses straw mulching and application of organic fertilizers such as pig manure and cake fertilizer, which can supply large amounts of potassium. Generally, about 450 kg of dry straw is spread per mu. Experiments have shown that without straw mulching, yield decreases by 14.48%. Applying more potassium fertilizer to lilies can promote root development during overwintering and seedling-stage growth, and meet the lily plant's peak potassium demand in the middle and late stages. Potassium can promote the synthesis and transport of carbohydrates in the crop. When potassium supply is sufficient, the lignin, cellulose, and starch contents in lily plants increase, and the carbohydrates formed by photosynthesis are quickly transported to the bulbs, promoting bulb expansion. Experiments show that applying 15 kg, 10 kg of potassium sulfate and 75 kg of plant ash per mu generally increases yield by 10% compared with the control. Among them, the yield with plant ash ranked first. In potassium-deficient fields, applying potassium fertilizer increases yield even more significantly, with the highest increase reaching 54.29%; each kilogram of potassium sulfate can increase lily yield by 32.76 kg. While lilies emerge, new daughter bulbs also differentiate and develop in the heart buds of the seed bulbs, so strong seedlings must be promoted to grow early in the early stage. After repeated experiments, lily fertilizer management should adhere to the principle of "heavy at the front, controlled in the middle, supplemented at the end" and the two "mainly" fertilization methods, namely mainly organic fertilizer, applied at planting time and before emergence, accounting for more than 70% of the total fertilization amount. Generally, base fertilizer per mu includes about 450 kg dry straw mulching, 2.5 tons of high-quality pig manure, 50-75 kg decomposed cake fertilizer, 30 kg standard nitrogen chemical fertilizer, 20-30 kg phosphate fertilizer, and 15-20 kg potassium fertilizer. When hilling soil before emergence, apply 50 kg cake fertilizer, 15 kg standard nitrogen chemical fertilizer, 10 kg phosphate fertilizer, and 15 kg potassium fertilizer per mu (or 30-40 kg ternary compound fertilizer alone). If there is no potassium fertilizer, 100 kg plant ash can be applied instead. For Yixing lily with a yield of more than 1000 kg per mu, the total fertilization amount is 42.7 kg pure nitrogen, 514.1 kg K2O, and 56.2 kg K2O, with an N:P:K ratio of 1:0.33:1.32. Experiments with different amounts of nitrogen, phosphorus, and potassium chemical fertilizers show that the optimal application rate of chemical nitrogen fertilizer is 5.6 kg K2O5 per mu, and chemical potassium K2O is 7.5-22.5 kg. The suitable soil acidity and alkalinity for lily growth is pH 5.7-6.3. Soils along the Taihu Lake region are generally neutral to slightly acidic, with pH between 6.5 and 5.0. Test results on phosphate fertilizer types show that calcium magnesium phosphate fertilizer is more effective than superphosphate. Lily bulbs are tender; affected by the free acid in superphosphate, the rate of rotten and missing lily plants increases, diseases are severe, and the disease incidence rate reaches as high as 60%, with a disease index as high as 52.5%, reducing yield by 4.6% compared with applying calcium magnesium phosphate fertilizer, and the bulb color is also poor. On alkaline soil with pH above 7.5, applying superphosphate can appropriately regulate soil acidity and alkalinity, which is beneficial to lily growth.
★ Cultivation of perfume lilies
Perfume lily, namely Oriental lily, is one of the ten most popular flowers in the world today. Because of its beautiful flower shape, bright colors, and rich fragrance, it is an ideal material for gift bouquets, flower baskets, and artistic flower arrangements. Since China's reform and opening up, it has developed rapidly. Especially in recent years, due to the sharp increase in flower consumption in China, its planting area has continued to expand. Perfume lily has become an indispensable category among fresh flowers. Its cultivation techniques are introduced as follows:
I. Land selection, bed preparation, and disinfection
(1) Land selection. Because perfume lily bulbs degenerate quickly and have strict requirements for the cultivation environment, suitable planting areas are hard to find, so the choice of planting site is also of paramount importance. Perfume lily prefers cool, humid climates and semi-shaded environments. The soil should be deep, loose, well-drained, rich in humus, and slightly acidic.
(2) Bed preparation. The bed surface is generally prepared to 1-1.2 m wide and 25-30 cm high, with furrow width between beds of 40 cm. Before preparing the beds, apply 1-1.3 tons of humus soil or pig manure to each simple greenhouse (30 m × 5.5 m), sprinkle 2 kg of carbofuran or phoxim (used to kill underground pests), water to loosen the soil, and mix it thoroughly.
(3) Disinfection. Because perfume lilies are highly susceptible to stem rot, Phytophthora blight, leaf blight, and gray mold, prevention should be the priority, starting with soil control. Commonly used methods include steam disinfection and chemical disinfection. a. Steam disinfection: bury heat-resistant plastic pipes with small holes 30 cm below the bed surface, cover the bed surface with film, then introduce steam and continue fumigating for 1 hour. b. Chemical disinfection: generally use 40% formalin diluted to a 1:50 solution and splash it on the bed surface at 25-30 kg/M. After splashing, cover with plastic film for 2 days, then uncover the film and air-dry for 10 days. Planting can be done only after the chemical vapor has completely dissipated.
II. Cultivation management
(1) Treatment of bulbs. Before planting, pick the bulbs out of the bulb boxes, handling them gently to prevent breaking the sprouts. At the same time, check bulb quality and remove unqualified bulbs such as those with broken sprouts or rot, or with rotten scales or basal plates. Soak the bulbs in a 500-800 times solution of fungicides such as thiophanate-methyl or chlorothalonil or carbendazim for 15-20 minutes.
(2) Planting time. In order to bloom at Spring Festival and Valentine's Day, planting should generally be done in mid-October and early November. When planting, it is best to plant before 10 a.m. or after 4 p.m.
(3) Planting density and depth. Generally, plant spacing is 10-15 cm, and row spacing is 15-18 cm; for depth, the planting depth is about 6-8 cm above the sprout point. After planting, cover the surface with a layer of sawdust and fallen leaves, cover with a shade net, and water thoroughly.
(4) Make labels and records. After planting, labels should also be made, indicating specifications and planting date. Hang two thermohygrometers in each greenhouse, one at the greenhouse entrance and one in the middle, and keep a record book. Observe the thermohygrometers three times a day and keep records.
(5) Precautions
1. The sprout point of the planted bulb should point vertically upward from the ground.
2. The soil temperature should be lowered before planting.
3. The perfume lilies we plant in Guangxi are generally air-freighted from Kunming and have already been thawed, so they should be planted as soon as possible, minimizing the time left in the open field, and preferably planted within two days.
4. After small seedlings grow 2 cm above the ground, upright the crooked seedlings promptly. This critical period must be strictly grasped. If this opportunity is missed, straightening the seedlings later easily damages the root system, and not straightening them will seriously affect the survival quality of perfume lilies.
(6) Water and fertilizer management. When planting perfume lilies, sprinkle 5 kg of superphosphate in each greenhouse. Then, from planting until emergence, generally no fertilizer is applied, but the soil should be kept moist, with the degree being that no water oozes out when soil is held in the hand. Avoid excessive dryness and waterlogging. In particular, water demand is relatively high during the rooting period and harvest period, and especially must not be too dry. When seedlings grow to 10-15 cm, begin applying fertilizer for the first time, then apply once a week, adhering to the principle of light fertilizer applied frequently. At the same time, in each greenhouse, select several representative plants for each specification and measure their height, leaf length, leaf width, and leaf number every three days, and keep records, so as to adjust and determine the ratio of nitrogen, phosphorus, and potassium fertilizer for the next application. Generally, in the early and middle stages, apply more compound fertilizer mainly of nitrogen, phosphorus, and calcium at a ratio of 10:15:8 to promote seedlings and rooting; in the middle and late stages, favor compound fertilizer mainly of nitrogen, potassium, and phosphorus at a ratio of 8:10:20 to help increase stem hardness; spray monopotassium phosphate once every 10 days at a concentration of 0.1%. At the same time, pay attention to watering, avoid excessive dryness and waterlogging, and maintain air humidity at 50%-80%.
Precautions: It is strictly forbidden to pour fertilizer onto the leaves. If fertilizer is accidentally poured onto the leaves, rinse quickly with clean water to avoid burning the leaves and affecting quality.
(7) Temperature management. The maximum temperature must not exceed 30°C, and the minimum must not be lower than 5°C. The most suitable soil temperature is 12°C-15°C. If it exceeds 18°C or is lower than 10°C, it is unfavorable to roots. After rooting, the temperature can be increased, maintaining 18-25°C during the day and 12-18°C at night. Too high daytime temperature will reduce plant height, reduce the number of flower buds per stem, and produce a large number of blind flowers. Night temperature lower than 12°C will cause bud drop or leaf yellowing, reducing ornamental value.
(8) Light management. Perfume lily flower bud development especially requires sufficient light conditions, but excessively high temperature will burn the leaves and reduce the ornamental effect.
(9) Netting and staking. In addition to the color and shape of the flowers themselves and the texture of the petals, the height standard of perfume lilies also requires the stems to stand upright and straight. Perfume lilies have strong phototropism, and those cultivated in winter often lean southward and lodge, so nets and stakes must be set up promptly. According to bulb specifications: for large bulbs, set up stakes and pull nets for the first time when they grow to 20 cm, and the second time when they grow to 45-50 cm; for small bulbs, set up stakes and pull nets for the first time when they grow to 15 cm, and the second time when they grow to 40-45 cm.
(10) Pest and disease control. Perfume lilies are prone to Phytophthora blight, gray mold, and stem blight. a. Pay attention to ventilation in the greenhouse and keep it clean; b. At the initial stage of disease, immediately remove diseased plants, spray 1% Bordeaux mixture and 65% zineb 600 times solution, or use 800-1000 times solution of bactericidal agents (such as thiophanate-methyl, chlorothalonil, agricultural streptomycin for bacteria, etc.) to drench roots or spray; c. Usually focus on prevention, spraying bactericidal agents once every 10-15 days. D. Pests are generally aphids, prevented with omethoate and derris extract, etc. After occurrence, spray 2-3 times continuously. Special attention: do not use dichlorvos during the flowering period, otherwise it will damage the petals. Therefore, when aphids occur on the corolla, use deltamethrin or pyrethrum for control.
III. Harvest
For stems with 5-10 flower heads, 2 buds must be colored; for stems with fewer than 5 flower heads, at least one bud must be colored before harvest. Harvesting is best done in the morning, which can reduce water loss and make buds less likely to wilt. After harvest, insert them as soon as possible into clean water containing preservative to absorb water.
Cultivation methods and precautions for Pulsatilla chinensis
Chinese scientific name: Pulsatilla chinensisLatin scientific name: Pulsatilla chinensis (Bunge) RegelOther names: Jujumiao, Laowenghua, Laoguanhua, MaozhuazihuaBinomial name: Anemone chinensisKingdom: PlantaePhylum: AngiospermsClass: DicotyledoneaeSubclass: ArchichlamydeaeOrder: RanunculalesFamily: RanunculaceaeSubfamily: RanunculoideaeTribe: AnemoneaeGenus: PulsatillaPulsatilla chinensis (Latin scientific name: Pulsatilla chinensis (Bunge) Regel), a plant in the Ranunculaceae family, is a perennial herb. Its aliases include Naihecao, Fenrucao, Baitoucao, Laogucao, and so on. The plant is 15-35 cm tall. The petiole is 7-15 cm long and densely covered with long soft hairs. The scape is 1 (-2), with soft hairs. The rhizome is 0.8-1.5 cm thick. It is distributed in China in Jilin, Liaoning, Hebei, Shandong, Henan, Shanxi, Shaanxi, Heilongjiang, and other provinces, on hillsides, barren slopes, and in fields. It has the effects of clearing heat and detoxifying, cooling blood and stopping dysentery, and drying dampness and killing insects, and has high medicinal value. (Overview image reference source:)1. Morphological characteristics
The plant is 15-35 cm tall. The rhizome is 0.8-1.5 cm thick. Basal leaves are 4-5, usually just emerging at flowering time, with long petioles; the leaf blade is broadly ovate, 4.5-14 cm long and 6.5-16 cm wide, ternately parted; the middle primary segment is stalked or nearly sessile, broadly ovate, ternately parted; the middle secondary segment is cuneate-obovate, rarely narrowly cuneate or trapezoid, entire or toothed; the lateral secondary segments are unequally two-lobed; the lateral primary segments are sessile or nearly sessile, unequally ternately parted; the upper surface becomes hairless, while the lower surface has long soft hairs; the petiole is 7-15 cm long and densely covered with long soft hairs. Scape 1 (-2), with soft hairs; bracts 3, connate at the base into a 3-10 mm tube, ternately parted, the segments linear, undivided or the upper part three-lobed, the lower surface densely covered with long soft hairs; pedicel 2.5-5.5 cm long, up to 23 cm long when fruiting; flower upright; sepals blue-purple, oblong-ovate, 2.8-4.4 cm long and 0.9-2 cm wide, densely covered with soft hairs on the lower surface; stamens about half as long as the sepals. Aggregate fruit 9-12 cm in diameter; achenes spindle-shaped, flattened, 3.5-4 mm long, with long soft hairs; persistent style 3.5-6.5 cm long, with long soft hairs spreading upward and obliquely. It flowers from April to May.2. Growth habits
It prefers a cool and dry climate. It is cold-tolerant and drought-tolerant, but not heat-tolerant. It grows best in deep, well-drained sandy loam soil, followed by alluvial soil and clay loam, while low-lying land with poor drainage is not suitable for planting.3. Geographical distribution
In China it is distributed in Sichuan (Baoxing, altitude 3200 m), northern Hubei, Jiangsu, Anhui, Henan, southern Gansu, Shaanxi, Shanxi, Shandong, Hebei (altitude 200-1900 m), Inner Mongolia, Liaoning, Jilin, and Heilongjiang. It grows in plains and low mountain slopes among grasses, at forest edges, or on dry, stony slopes. It is also distributed in Korea and the Far East region of the Soviet Union.4. Identification
Macroscopic identification
Pulsatilla chinensis root is long cylindrical or conical, slightly curved, sometimes twisted and slightly flattened, 5-20 cm long and 0.5-2 cm in diameter. The surface is yellow-brown or brownish, with irregular longitudinal wrinkles or longitudinal grooves. The middle sometimes divides into 2-3 branch roots. The bark easily falls off to expose the yellow xylem, and often decays into concave holes, where longitudinally raised reticulate patterns can be seen; the root head is slightly swollen, sometimes forked, with several layers of sheath-like petiole bases and young leaves remaining at the tip, densely covered with white long tomentum. It is hard and brittle, and the fractured surface is slightly flat and yellow-white, sometimes with gaps between the bark and xylem. The odor is slight, and the taste is slightly bitter and astringent. Roots that are thick and long and solid in texture are considered better.Microscopic identification
Root cross-section: epidermis, cortex, and endodermis usually have fallen off. The phloem is broad, with brown outer cells and suberized walls; phloem fibers are single or in groups of several, 15-35 μm in diameter, with relatively thick walls; some roots have no fibers. The cambium ring is obvious. Xylem rays are relatively wide; vessels are round-polygonal, single or in groups of several, 25-85 μm in diameter; wood fibers up to 42 μm in diameter, with slightly thick, non-lignified walls. In thicker roots, the center is often parenchyma cells.Powder characteristics: gray-brown.
1. Phloem fibers fusiform or spindle-shaped, 100-390 μm long, 16-42 μm in diameter, walls lignified.
2. Non-glandular hairs unicellular, 13-33 μm in diameter, base slightly swollen, walls mostly lignified, sometimes with spiral or double-spiral striations visible.
3. Bordered pits, reticulate, and spiral vessels, 10-72 μm in diameter.
Physicochemical identification
Take 4 g of the powder, add 20 ml ethanol, heat under reflux for 1 hour, filter, concentrate the filtrate to about 6 ml, cool, add an appropriate amount of acetone to form a precipitate, filter, quickly take a small amount of precipitate (about 5 mg), place it in a test tube, add 1 ml acetic anhydride to dissolve it, then add 1 ml sulfuric acid along the tube wall; a red or red-purple ring appears at the interface of the two liquids.5. Chemical constituents
Pulsatilla chinensis root contains pulchinenosides A, B, C, D, 3-O-α-L-rhamnopyranosyl-(1→2)-α-L-arabinopyranosyl-3β,23-dihydroxylup-△20(29)-en-28-oic acid [3-O-α-L-rhamnopyranosyl-(1→2)α-L-arabinopyranosyl-3β,23-dihydroxylup△-20(29)-en-28-oicacid], pulchinenosides A3, B4, saponins 1, 2, betulinic acid 3-O-α-L-arabinopyranoside, betulinic acid, 3-oxobetulinic acid, daucosterol, anemonin, and protoanemonin.The root of Pulsatilla koreana contains clematis diose saponin (CP3a), clematis diose saponin (CP2), saponin II, and saponin III. The root of Pulsatilla campanella contains pulsatilosides A, B, C, D, leontosides A, B, D, calcoside D, and caulosides D, F.
6. Propagation methods
Seed propagation
In production, seed seedling raising and transplanting are mainly used. In Northeast China, seed harvesting is generally in early June; when 60% of the seeds have yellowed and matured, they can be harvested. If seeds are harvested too early, maturity is insufficient and sprouts are weak; if harvested too late, the seeds will be carried away by their own plumes and scattered by the wind. Put the harvested seeds in a basket and dry them in the sun, covering them with a window screen to prevent the seeds from flying away with the wind. When dried to more than 98% dryness, rub them repeatedly on an iron mesh sieve until both seeds and plumes are rubbed to pieces and fall under the iron mesh. Pulsatilla chinensis seeds are very small; generally 1 kg of seeds contains 500,000 seeds. If sown at the right time and properly, the germination rate can reach more than 80%.Early spring sowing is mostly carried out in March-April, in rows, with row spacing of 3.0-4.5 cm; after sowing, cover with soil just enough to cover the seeds. By early spring of the second year, before overwintering seedlings sprout, transplant at row and plant spacing of 30 cm × 9 cm.
Division propagation
When old plants have not yet sprouted, dig them up with roots and divide them for planting.7. Cultivation techniques
Land selection and land preparation
Choose slightly elevated sandy loam or loam with sufficient light, good drainage, and loose, fertile soil for cultivation; saline-alkali and easily waterlogged heavy clay land is not suitable for planting. After selecting the land, apply fertilizer according to soil fertility, mainly fully decomposed farmyard manure, with less chemical fertilizer. Apply 3000-4000 kg farmyard manure per mu (667 sq m, same below), and plow 30-35 cm deep. After raking the soil clods fine, make beds 15-20 cm high and 1.0-1.2 m wide. Rake the bed surface fine with a rake and make it slightly convex, ready for sowing.Seedling raising
Use new seeds collected in the same year; old seeds are prohibited. Where sprinkler irrigation is available, sow directly; where sprinkler irrigation is not available, sow after pregermination. Seed pregermination method: soak the seeds in warm water for 4-6 hours, changing the water once during this period, then remove and drain the water, and place them at 25-30 [°C] for pregermination; during pregermination, turn the seeds appropriately to prevent heating; after 4-6 days, when more than 70% of the seeds have sprouted tips, sow them; if they cannot be sown in time, store the germinated seeds at 2-5°C. When sowing, use 2.5 kg of seeds per mu, sow the seeds evenly on the bed surface, then cover the seeds with fine soil sieved through a sieve, generally covering about 0.2 cm, then water thoroughly, and cover the bed surface with straw, pine needles, etc., to help retain moisture and promote emergence.Post-sowing management
Under suitable conditions after sowing, pregerminated seeds generally emerge 4-5 days after sowing, while seeds without pregermination take longer to emerge. After emergence, gradually remove coverings such as straw, with half shading and half covering as the degree. After true leaves grow, spray with hymexazol plus foliar fertilizer to prevent damping-off, once every 5-7 days, generally 2 sprays. In addition, apply urea 2 times according to growth vigor, 10 kg each time, and water immediately after application or apply before rain in the rain, to prevent seedling burn. Weeding should be early and thorough to prevent weeds from competing with seedlings for nutrients; glyphosate can also be sprayed before emergence for weed control, but the timing of spraying must be well controlled.Transplanting
Pulsatilla chinensis can be transplanted in spring and autumn. One-year-old seedlings of the current year or two-year-old seedlings can be used for transplanting. Because Pulsatilla chinensis prefers a dry and cool climate, the transplanting field should preferably be high, dry land or sloping land. It can be transplanted in beds or in ridges. For bed cultivation, plant and row spacing is generally 10 cm × 25-30 cm; for ridge cultivation, plant spacing is about 8 cm. After transplanting, if there is drought, water thoroughly after planting. Pulsatilla chinensis is extremely drought-tolerant, so after seedling recovery, under conditions without severe drought, basically no watering is needed. Pulsatilla chinensis is tolerant of poor soil, and nitrogen fertilizer can be applied appropriately at the seedling stage; when bolting, remove flower buds to favor root development; thereafter, before green return each year, apply 10 kg compound potassium fertilizer per mu to help accelerate root growth.Harvesting and processing
Generally harvested 2-3 years after transplanting. In autumn, after the aboveground parts wither, cut off the remaining aboveground stems, dig out the main roots by machine or by hand, remove the soil, and dry them in the sun to obtain the finished product. Generally, more than 1500-2000 kg of fresh Pulsatilla chinensis is produced per mu.8. Pest and disease control
Root rot
Root rot easily occurs in rainy seasons and low-lying waterlogged plots. Control methods: ① Before transplanting, soak the seed roots in 50% Tuzet 100 times solution for 3-5 minutes before planting; ② During the rainy season in the growth period, pay attention to drainage to prevent water accumulation in the field. ③ During the disease period, irrigate with 50% thiophanate-methyl 800 times solution.Aphids
During plant growth and development, aphids cause damage, mainly sucking tender buds and tender leaves, especially severe in dry weather. Control method: during aphid occurrence, spray with 50% fenitrothion 1000-2000 times solution or 40% dimethoate emulsifiable concentrate 1500-2000 times solution, once a week, until there is no aphid damage.9. Main value
Ornamental
Pulsatilla chinensis has more than 30 varieties. The flowers are bell-shaped and have three colors: white, purple, and blue. The whole plant is covered with hairs, which is very unusual. During the one and a half months from flower opening to capsule maturity, one first enjoys the flowers and then observes the fruit. In summer and autumn, the leaf clusters are green, and after severe frost they go dormant. As a wild perennial root plant, it can be planted once and enjoyed for many years, overcoming the shortcomings of high cost and easy variety degeneration of annual and biennial herbaceous flowers. In gardens, it can be planted in forest gaps and among shrubs, or planted naturally in flower borders. Because of its early flowering period and short plant height, it is an ideal groundcover plant variety. In the fruit period, the feathery styles persist, shaped like a head, and are extremely unique. It can also be used for flower beds or potted appreciation. In addition, because Pulsatilla chinensis is very sensitive to acid rain, it dies quickly when acid rain falls. This characteristic not only makes it often used as an indicator plant for detecting the degree of environmental pollution, but also increases its value as an ornamental flower.Medicinal
Pharmacological effects1. Anti-Entamoeba histolytica: Pulsatilla chinensis decoction and its saponins can inhibit the growth of Entamoeba histolytica both in vitro and in vivo, but both require large doses. In in vitro tests, the decoction at 1:40 can completely inhibit the growth of amoebae; at 1:60, rounded precyst forms appear in the culture medium; saponins at 1:200 can completely inhibit protozoan growth, at 1:500 rounded precyst forms appear, and at 1:1000 there is a therapeutic effect on trophozoite infection in white rats. Both the decoction and saponins can effectively inhibit the growth of Entamoeba histolytica in the rat intestine, with the lowest effective dose both being 1.0 g (crude drug)/kg (equivalent to 1/250-1/750 of emetine hydrochloride); when the dose is reduced to 0.3 g/kg, the effect is no longer obvious.
Potentilla, often mistaken for Pulsatilla chinensis on the market, also has a certain effect on Entamoeba histolytica in in vitro or animal in vivo tests, but a very large dose is required (3 times that of Pulsatilla chinensis). As for other plants mistaken for Pulsatilla chinensis, such as Potentilla discolor (Rosaceae), Polycarpaea corymbosa (Caryophyllaceae), Rhaponticum uniflorum and Gnaphalium affine (Asteraceae), none have anti-amoebic effects in vivo or in vitro.
2. Anti-Trichomonas vaginalis: In in vitro tests of Pulsatilla chinensis against Trichomonas vaginalis, 60% extract or aqueous liquid at 5% concentration can kill Trichomonas in 5 minutes. The fluid extract is highly irritating to vaginal mucosa, but the fractions obtained by successive extraction with acetone and ether are less irritating and still effective against Trichomonas. Another report states that the MIC of Pulsatilla chinensis powder against Trichomonas is 2 mg/ml.
3. Antibacterial effect: The juice squeezed from fresh stems and leaves of Pulsatilla chinensis has an inhibitory effect on Staphylococcus aureus and Pseudomonas aeruginosa in vitro (plate hole method), and loses its effect after tannins are removed (while Anemone hupehensis var. japonica still has this effect); its effect on Shigella is relatively poor, but there are also reports that the effect of the decoction on Shigella varies with bacterial concentration, with a relatively strong effect on Shigella dysenteriae, and successively weaker or no inhibitory effect on Shigella flexneri, Shigella boydii, and Shigella sonnei.
In in vitro tests against Shigella, the components of Pulsatilla decoction (Pulsatilla chinensis, Cortex Fraxini, Coptis chinensis, Phellodendron amurense) showed neither synergy nor antagonism. The alcohol-soaked liquid of Pulsatilla chinensis also has some inhibitory effect on Bacillus subtilis and Staphylococcus aureus in test tubes, has no inhibitory effect on the growth of Mycobacterium tuberculosis in vitro, and has a mild inhibitory effect on influenza virus infection in mice. Some researchers have studied the effect of Pulsatilla chinensis (Anemone cernua) on pathogenic and non-pathogenic fungi in test tubes, and the results showed weak inhibition of a few fungi. The effective antibacterial component of Pulsatilla chinensis is anemonin. The MIC of anemonin against Corynebacterium diphtheriae, Staphylococcus, Streptococcus, Escherichia coli, Mycobacterium tuberculosis, etc. is between 8×10(-5) and 2×10(-6). The antibacterial activity of anemonin also has a synergistic effect with streptomycin.
4. Antiviral effect: The water-soaked liquid of Pulsatilla chinensis can prolong the survival date of mice infected with influenza virus PR8 and also mildly reduce lung damage.
5. Other effects: It is reported that the ethanol extract of Pulsatilla chinensis has sedative, analgesic, and antispasmodic effects. The whole plant of Pulsatilla chinensis with the root removed contains a cardiotonic component, okinalin, whose action is somewhat similar to digitalis. Foreign Pulsatilla nigricans has a sedative effect, can lower blood pressure, slow heart rate, strengthen cardiac contraction, and promote gastrointestinal movement. Pulsatilla chinensis can also inhibit plant seed germination. Its contained pulchinenoside A3 has a certain anticancer effect, with an inhibition rate of 53.7% against P-388 at 100 μg/ml.
Nature and flavor
Bitter, cold.
①"Shennong Bencao Jing": Bitter in taste, warm, non-toxic.
②"Mingyi Bielu": Toxic.
③"Yaoxing Lun": Sweet and bitter in taste, mildly toxic.
④Li Gao: Bitter in taste, cold in nature.
Meridian entry
Enters the large intestine, liver and stomach meridians.
①"Leigong Paozhi Yaoxing Jie": Enters the heart and kidney meridians.
②"Bencao Jingshu": Enters the blood aspect of the hand and foot Yangming meridians.
③"Changsha Yaojie": Enters the foot Shaoyang gallbladder and foot Jueyin liver meridians.
Functions and indications
Clears heat and cools the blood, resolves toxin. Treats heat-toxin bloody dysentery, warm malaria with cold and heat, nosebleed, and bleeding hemorrhoids.
①"Shennong Bencao Jing": Mainly treats warm malaria with manic alternation of cold and heat, abdominal masses and accumulations, goiter qi, expels blood and relieves pain, and metal wounds.
②"Mingyi Bielu": (Mainly treats) nosebleed.
③Tao Hongjing: Treats toxic dysentery.
④"Yaoxing Lun": Stops abdominal pain and red toxic dysentery, treats toothache, mainly treats tumors and scrofula below the neck. Mainly treats pain of all bones and joints.
⑤"Rihua Zi Bencao": Treats all wind qi and warms the waist and knees, brightens the eyes, and reduces warts. Seeds: the functions are the same as above.
⑥"Shanghan Yunyao": Suitable for those with heat-toxin dysentery passing purple or fresh blood.
⑦"Bencao Huiyan": Cools the blood, disperses stasis, resolves damp toxin.
⑧"Bencao Bei Yao": Treats tinea capitis, scrofula, hernia masses, bleeding hemorrhoids, unilateral sagging, brightens the eyes, and reduces warts.
⑨"Gangmu Shiyi": Removes intestinal grime, disperses accumulation and stagnation.
⑩"Xiandai Shiyong Zhongyao": Treats swollen throat.
Usage and dosage: Oral administration: decoct in water, 3-5 qian (0.5-1 liang if fresh); or make into pills or powders. External use: pound and apply.
Precautions
Contraindicated in deficiency-cold diarrhea and dysentery.
①"Yaoxing Lun": Pig testes is used as the guiding agent.
②"Rihua Zi Bencao": Enhanced by wine.
③"Bencao Jingshu": Contraindicated for tenesmus with stomach deficiency and loss of appetite, and for diarrhea with undigested food, and for diarrhea due to deficiency-cold and cold-dampness rather than damp toxin.
④"Bencao Congxin": Contraindicated when there is no heat in the blood aspect.
Clinical application
1. Treatment of protozoal dysentery: Adults use 15-30 grams of the rhizome of Chinese pulsatilla (Baitouweng) daily, decocted in water and taken in 3 divided doses, with 7 days as one course of treatment. For more severe cases, an additional 30-50 grams is decocted into 100 milliliters of medicinal liquid for retention enema, once daily. According to observations of 23 cases, after administration the frequency of bowel movements and red and white mucus were significantly reduced; the average time for amoebas in stool microscopy to turn negative was 1.4 days; proctoscopy confirmed that ulcers healed rapidly, and all cases were cured in an average of 7 days. Another report described the use of Chinese pulsatilla decoction to treat several dozen cases, all cured; the longest treatment time was 9 days, the shortest 1 day, with an average of 2 days. In addition, Chinese pulsatilla tissue extract can also be used, injected intramuscularly once daily, with an initial dose of 2 milliliters, then increased by 0.5 milliliters each time up to 3.5 milliliters; after symptoms disappear, continue injections 5-10 more times, then reduce to 1-2 times per week, with the whole course lasting 3 months. For severe and chronic cases, 5-8 milliliters of Chinese pulsatilla tissue extract plus 60 milliliters of normal saline is used for rectal instillation, once daily. Of 23 cases treated, 19 were cured and 4 improved; the average time for symptom disappearance was 4.4 days, and stool conversion to negative was 6.1 days.
2. Treatment of bacterial dysentery: There appear to be relatively few systematic observations on treating bacillary dysentery with single Chinese pulsatilla. It was once reported that a modified Chinese pulsatilla decoction (Chinese pulsatilla 6 qian, Phellodendron 3-6 qian, Qinpi 2-3 qian, Muxiang, Chenpi and Gancao 1 qian each, add 400 milliliters of water and decoct to 200 milliliters as one dose) was used to treat 123 cases of acute bacillary dysentery or the acute attack type of chronic bacillary dysentery, all taking 1 dose daily, divided between morning and afternoon, for 5-10 consecutive days or 7-15 days as one course. Treatment results: the cure rate was 78%, close to the 76% cure rate of the control group (treated with sulfaguanidine). When efficacy was observed according to different intestinal lesions, the catarrhal type had higher efficacy, with a cure rate of 95%, the erosive type had a cure rate of 75%, and the ulcerative type had a cure rate of 56.7%. The erosive and ulcerative types were both treated for 7-15 days, and at the same time a 10% green tea decoction was added for retention enema. In effectively treated cases, the average time for fever reduction was 2.01 days, the time for disappearance of abdominal pain, tenesmus and abdominal tenderness was 6.9 days, the time for bowel movement frequency to return to normal was 10.02 days, the time for stool character to return to normal was 10.1 days, the time for routine stool examination to return to normal was 9.4 days, and the time for stool culture to turn negative was 4.05 days.
3. Treatment of scrofula: Take 5 liang of Chinese pulsatilla, wash clean and cut into one-cun segments, soak in 2 jin of white liquor, place in a jar and seal, then heat in a water bath and bring to a boil several times, remove and place in a cool shaded place on the ground for 2-3 days, then open the jar, remove the Chinese pulsatilla, and pour the liquor into bottles and seal for later use. Take once each morning and evening 1 hour after meals, 1-2 cups each time. Generally 1-2 months is one course of treatment. It is suitable for patients with ruptured scrofula, thin clear pus, and long-unhealed openings. More than 10 cases treated were all effective.
4. Treatment of boils and carbuncles: 2 liang of Chinese pulsatilla, decocted in water, taken for several consecutive days. Routine local treatment is still combined. No adverse reactions occur after taking Chinese pulsatilla; a small number of patients have a mild laxative effect after taking it, which is extremely suitable for patients with excess-heat constipation.
10. Plant culture
Cultural meaning
[Birthday flower]: wood anemone (woodanemone)[Birthday]: April 7.
[Flower language]: wit
The pure white wood anemone, which gives a feeling of purity, is the flower offered to the fourth-century Persian Christian writer Aphrahat. Therefore, the flower language of the wood anemone matches the wit of Aphrahat - wit.
Anyone born under the blessing of this flower has outstanding wit; and not only rich in intellect, but also possesses a delicate sensitivity to perceive people's hearts. If you take the artistic path, perhaps it will be easier to succeed? Such a you, only someone whose values resonate with yours.
[Flower language]: love growing ever thinner, love of betrayal.