How to propagate gloxinia? Division and cuttings are the most practical methods
Gloxinia has excellent benefits: not only are its flowers beautiful, it can also absorb dust and make indoor air fresher. Such a plant is naturally kept in many homes, but rather than buying one to grow, it is better to plant it yourself, and that requires us to master the propagation methods of gloxinia. So how do you propagate gloxinia? Let the editor introduce it in detail below.
I. How to propagate gloxinia
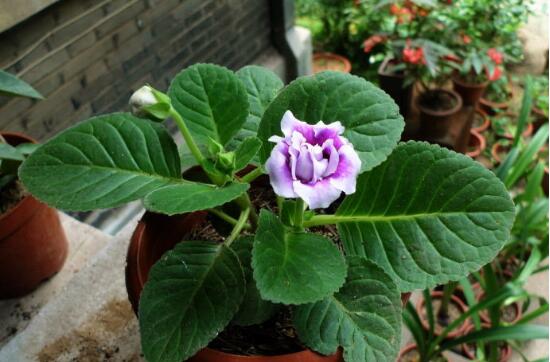
Generally speaking, there are three propagation methods for gloxinia: division, sowing, and cuttings. Among them, division means burying the gloxinia tuber in soil, then planting it into a new flower pot; sowing means scattering the seeds in soil; and cuttings are divided into stem cuttings and shoot cuttings, that is, inserting gloxinia's stems or shoots into soil. Let's continue below to see the specific operation methods.
II. The three propagation methods for gloxinia
(1) How to divide gloxinia
1. Tuber selection: For gloxinia division propagation, it is best to choose 3-4 year old plants. In winter, gloxinia enters dormancy; at this time dig out its tuber and store it in a cool, dry environment.
2. Potting soil selection: According to gloxinia's habits, the culture soil chosen for planting tubers is generally made with: 1 part perlite, 1 part river sand, 3 parts leaf mold, plus a small amount of decomposed, sun-dried, finely crushed poultry manure. It is best to spread a layer of coarse sand or coarse coal cinder at the bottom of the flower pot, which helps drainage and ventilation and prevents the tuber from rotting.
3. Starting division: Water the tuber appropriately. In spring, when the temperature warms up, it will sprout. When the sprouts grow to about 5 cm, take out the tuber and cut it into multiple pieces with a knife; each piece must have one sprout. Then coat the cut surfaces with plant ash and plant them into the potting soil. After planting, water once thoroughly, then water sparingly afterward, just keeping the potting soil moist.
(2) Gloxinia sowing propagation
Gloxinia can retain seeds after flowering, so the sowing method can be chosen for propagation, and the time can be spring or autumn. The method is as follows:
First soak the gloxinia seeds for one day, then prepare sowing soil, put it into a flower pot, and scatter the seeds on top. After sowing, moisten the flower pot with water, then cover it with glass, and place it in an environment of 18-20°C; it will sprout in about 10 days and bloom after 6 months.
(3) Gloxinia cutting methods
Besides division and sowing, cuttings are the most common propagation method for gloxinia. Gloxinia cutting propagation is divided into stem cuttings and shoot cuttings, with specific operations as follows:
1. Stem cutting method: Take the newly sprouted tender stems on the gloxinia corm, 2-3 cm is enough, and insert them into fine sand or soil. After cutting, place it in half shade, maintain the temperature at 18-20°C, and roots will grow in about 15 days.
2. Leaf cutting method: Take off vigorously growing gloxinia leaves together with their petioles, cut off 1/2 of the leaf, then insert them obliquely into the substrate. After cutting, keep the soil moist, then cover with glass, place in a semi-shaded indoor spot, maintain a room temperature of 25°C and high humidity, and roots will grow well in about 20 days after cutting.
Overall, gloxinia cultivation is very simple, and its propagation methods are not difficult either. Whether by division, sowing, or cuttings, gloxinia can survive. But methods are fixed while people are flexible; everyone can choose a method for propagation according to actual conditions. The editor has introduced the propagation methods here, hoping to bring everyone some help.
How to propagate gloxinia? Gloxinia propagation methods
[Common questions]How to propagate gloxinia?
[Answers from experienced flower lovers]Gloxinia blooms brilliantly and the plant is small, making it very suitable for indoor planting, and it is deeply loved by flower and plant enthusiasts. With such a beautiful potted plant, I believe many friends cannot wait to propagate a few plants themselves, so how should gloxinia be propagated? The propagation methods of gloxinia are introduced as follows.
Image: Gloxinia
I. Sowing propagation
Before sowing, first soak the seeds for 24 hours to promote earlier germination. Use a shallow pot or wooden box filled with culture soil mixed from leaf mold, vegetable garden soil, and fine sand. After leveling the soil, evenly scatter the seeds. After the bottom of the pot is moistened with water, cover with glass, and under conditions of 18-20°C, seedlings will emerge after about 10 days.
II. Division propagation
Choose 2 to 3 year old corms that have gone through dormancy, bury them in soil in autumn, water thoroughly, and keep the room temperature at 22°C to force sprouting. When the sprouts grow to about 0.5 cm, dig up the corm and cut it into 2 to 4 pieces; each piece must have one sprout. Plant each piece in one pot, and each forms a new plant.
III. Stem cutting propagation
Stem cutting propagation is a commonly used propagation method for gloxinia. Tender stems often sprout from the gloxinia tuber. When taking cuttings, cut them 2-3 cm long and insert them into fine sand or expanded perlite substrate. Pay attention to shading and avoid direct sunlight, maintain a room temperature of 18-20°C, and roots will form in 15 days.
Image: Gloxinia cutting propagation
IV. Leaf cutting propagation
Choose healthy leaves in the middle stage of development, take them together with the petiole from the base, cut off half of the leaf, insert the petiole obliquely into a wet sand substrate, cover with glass and shade, keep the room temperature at 25°C and relatively high air humidity. About 20 days after cutting, callus tissue forms at the base of the petiole.
V. Shoot cutting propagation
Gloxinia shoot cutting propagation is generally carried out in spring when new shoots sprouting from the seed corm reach 4 cm to 6 cm in length. Break off the excess new shoots from the base, then insert them into a sand bed and maintain a certain humidity. After a period of cultivation, they bloom from June to July of the following year.
Image: Gloxinia
[Editor's conclusion]When growing flowers and plants, nothing is more fulfilling than watching the potted plants you propagated grow little by little. The propagation methods of gloxinia were introduced above for everyone, so hurry up and get started, and propagate a few pots.
Gloxinia propagation methods: a cultivation expert teaches you five ways
Gloxinia has large, brightly colored flowers and a long flowering period. A small potted plant is an ideal potted flower for decorating and adorning indoor spaces and windowsills, and gloxinia propagation and care are also relatively simple. Today the editor will tell everyone about gloxinia propagation methods:
Gloxinia propagation methods:
1. Gloxinia sowing propagation
Gloxinia can be propagated by sowing, generally in spring or autumn. Before sowing, first soak the seeds for 24 hours to promote earlier germination. Use a shallow pot or wooden box filled with culture soil mixed from leaf mold, vegetable garden soil, and fine sand. After leveling the soil, evenly scatter the seeds. After the bottom of the pot is moistened with water, cover with glass on top. Under conditions of 18-20°C, seedlings emerge after about 10 days. After emergence, let them gradually receive sunlight. When the seedlings grow 3-4 true leaves, transplant them separately into small pots.
2. Gloxinia division propagation
Gloxinia can choose the division method for propagation. Choose 2 to 3 year old corms that have gone through dormancy, bury them in soil in autumn or from December to March of the following year, water thoroughly, and keep the room temperature at 22°C to force sprouting. When the sprouts grow to about 0.5 cm, dig up the corm and use a sharp knife to cut the corm into 2 to 4 pieces; each piece must have one sprout. Coat the cut surfaces with plant ash to prevent rotting. Plant each piece in one pot, and each forms a new plant.
3. Gloxinia stem cutting propagation
Stem cutting propagation is also a commonly used propagation method for gloxinia. Tender stems often sprout from the gloxinia tuber. When taking cuttings, cut them 2-3 cm long and insert them into fine sand or expanded perlite substrate. Pay attention to shading and avoid direct sunlight, maintain a room temperature of 18-20°C, and roots will form in 15 days.
4. Gloxinia leaf cutting propagation
Gloxinia leaf cutting propagation means choosing healthy leaves in the middle stage of development, taking them together with the petiole from the base, cutting off half of the leaf, inserting the petiole obliquely into a wet sand substrate, covering with glass and shading, maintaining a room temperature of 25°C and relatively high air humidity. About 20 days after cutting, callus tissue forms at the base of the petiole. After small seedlings grow, move them into small pots. In the same year they only form small tubers, and after dormancy new shoots emerge from the tubers. After a period of cultivation, they bloom from June to July of the following year.
5. Gloxinia shoot cutting propagation
Shoot cutting is also a commonly used propagation method for gloxinia. It is generally carried out in spring when new shoots sprouting from the seed corm reach 4 cm to 6 cm in length. Break off the excess new shoots from the base, insert them into a sand bed, and maintain a certain humidity. After a period of cultivation, they bloom from June to July of the following year.
Gloxinia has vigorous growth ability, can be propagated by relatively many methods, and is relatively easy to keep alive. Propagating several more pots of gloxinia to display and beautify the home will, I believe, have very good results.