How to propagate Podocarpus nagi? Early spring cutting method has a survival rate as high as 100%
When growing plants indoors, many people choose Podocarpus nagi. It stays green all year round and looks great no matter where it is placed. But is one pot of Podocarpus nagi too monotonous? Several pots together look even better! If you don't want to buy them, you'll need to propagate them yourself, so how do you propagate Podocarpus nagi? Now let's take a look at the cutting propagation method for Podocarpus nagi.
1. How to propagate Podocarpus nagi: cuttings
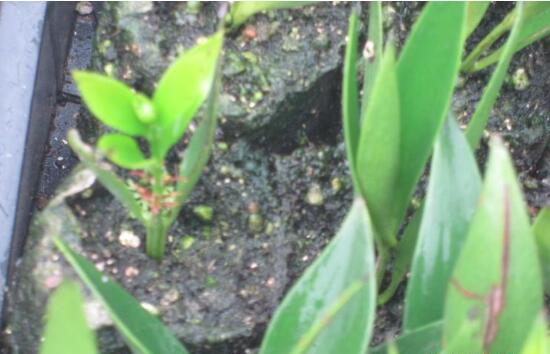
When it comes to propagation methods for Podocarpus nagi, both cuttings and layering work, but the one most suitable for indoor propagation with a higher survival rate is cuttings. It is also simple to do: cut a Podocarpus nagi branch as a cutting, insert it into potting soil, provide a good environment and care for it carefully, and once it roots, repot and transplant it.
2. Cutting propagation method for Podocarpus nagi
1. Cutting time
To propagate Podocarpus nagi by cuttings, you first need to choose a good time. Generally speaking, Podocarpus nagi can be propagated by cuttings in all four seasons, but if you want a survival rate as high as 100%, it is best to choose early to mid-March, with mid-September as the second option.
2. Cutting selection
In the cutting propagation method for Podocarpus nagi, the selection of cuttings is undoubtedly the most important step. Once they are chosen well, the whole propagation is basically half done. From a potted Podocarpus nagi, select branches of the current year that are robust and free of pests and diseases as cuttings.
3. Cutting treatment
Cut the selected branches into sections about 5-15 cm long. Each section needs to have more than 3 leaf nodes; as for leaves, keep just one. After the cuttings are prepared, soak them in potassium permanganate solution for about 3 minutes, then soak the base in LBA solution for 4-5 hours, ready for insertion.
4. Starting the cuttings
Before preparing to insert the cuttings, it is best to use a bamboo stick to make small holes about 3-5 cm deep in the substrate, then insert the cuttings into the holes, and finally press the base firmly with your hand.
Note: For the leaves on each cutting, finally press the base firmly with your hand. When inserting, avoid covering the leaves of adjacent cuttings.
5. Care after insertion
After the Podocarpus nagi cuttings are finished, water them promptly so the cuttings can make close contact with the substrate. Then do the shading work well, keeping the shade level at about 50%-80% for best results. After the Podocarpus nagi has rooted, gradually remove the shade net. When the Podocarpus nagi seedlings have grown to about 25-30 cm tall, they can be repotted and transplanted, and after that they can be cared for according to Podocarpus nagi cultivation methods.
After reading the whole article, I believe many flower lovers will know how to propagate Podocarpus nagi! Overall, Podocarpus nagi has strong vitality and a high cutting survival rate, so even beginners can easily succeed. So what are you waiting for? If you have a Podocarpus nagi nearby, try taking cuttings. The joy after success is a rare experience.
Podocarpus nagi Podocarpus nagi (Thunb.) Zoll. et Mor ex Zoll. Podocarpus nagi guide: how to grow Podocarpus nagi / how to propagate Podocarpus nagi
Podocarpus nagi profilePodocarpus nagi Podocarpus nagi (Thunb.) Zoll. et Mor ex Zoll.
Podocarpus nagi cultivation methods and precautions Introduction to Podocarpus nagi
Podocarpus nagi aliases: Luohan chai, big-fruited Podocarpus nagi, mountain fir, bamboo-leaf podocarpus. A plant of the order Pinales, family Podocarpaceae, genus Podocarpus. It gets its name because its leaf veins are parallel like bamboo leaves, and its wood resembles fir, hence the name mountain fir.
Podocarpus nagi is a well-known landscape tree and street tree species. It is an evergreen tree that grows slowly and can reach 20 m tall, and is one of the common street tree species. It likes warm environments, is neither tolerant of wetness nor drought, and is slightly cold-tolerant. It is native to Taiwan, China, southeastern mainland China, Japan, Ryukyu and other places. In Taiwan, China, it is naturally distributed in the low- and mid-altitude Wenshan area in the north and the North Dawu Mountain area of the Hengchun Peninsula in the south.
Podocarpus nagi is an ancient gymnosperm that originated about 155 million years ago in the Mesozoic Cretaceous period. It is called a "living fossil" and is a precious, rare and endangered tree species. Podocarpus nagi has unusual leaf shapes and is verdant all year round; its trunk is straight, its tree form is graceful, its foliage is dense and shady, and it has strong resistance to pests and diseases. It is a beautiful evergreen ornamental tree that can be planted in patches in parks, courtyards, residential communities, streets and other areas, and can also be mixed with other evergreen and deciduous tree species.
Morphological characteristics of Podocarpus nagi
Podocarpus nagi is a tree up to 20 m tall and 50 cm in diameter at breast height; the bark is nearly smooth, red-brown or dark purple-red, and flakes off in small thin pieces; the branches spread or extend, and the crown is broadly conical. Leaves are opposite, leathery, long ovate, ovate-lanceolate or lanceolate-elliptic, with many parallel fine veins and no midrib, 3.5-9 cm long and 1.5-2.5 cm wide, dark green and glossy above, light green below, gradually narrowing upward, base cuneate or broadly cuneate, narrowing downward into a stalk-like form. Male cones are spicate-cylindrical, solitary in leaf axils, often branched, 1.8-2.5 cm long, with a thick short peduncle and a few triangular bracts at the base; female cones are solitary in leaf axils, rarely paired, with several bracts at the base; after flowering the bracts do not enlarge into a fleshy seed receptacle.
Seeds are spherical, 1.2-1.5 cm in diameter; when mature the aril is dark purple with a white bloom, the stalk is 7-13 mm long and bears traces of fallen bracts; the bony outer seed coat is yellow-brown, rounded at the top and pointed at the base, densely covered with small pits, and the inner seed coat is membranous.
Podocarpus nagi flowers from March to April, and the seeds mature in October.
Ecological habits of Podocarpus nagi
Its vertical distribution ranges from hilly areas above the coast up to high mountain zones at an altitude of 1600 m, often forming forests with evergreen broad-leaved trees. [2]
Podocarpus nagi likes warm, hot and humid climates, roughly distributed in areas with an annual average temperature of 18~26°C. It is shade-tolerant and likes moisture, but grows in areas without standing water. It can grow in East China and South China. [2] It grows in mid-subtropical evergreen and deciduous broad-leaved forest zones; south subtropical evergreen broad-leaved forest zones; tropical monsoon forest and rainforest zones, and other areas.
Podocarpus nagi has strict soil requirements. Deep, loose, moist, humus-rich, acidic sandy loam to light clay developed from parent rocks such as sandstone, granite and metamorphic rock is more suitable. It likes mountain yellow soil and brown forest soil, and grows especially rapidly in sandy loam. It grows extremely slowly on infertile soil. Limestone areas are not suitable for cultivation, and cultivation in low-lying waterlogged areas also grows poorly.
Cultivation techniques of Podocarpus nagi Cultivation points
Podocarpus nagi is deeply loved and favored by courtyard, residential community and street greening staff. Generally, large seedlings are preferred for transplanting. To cultivate Podocarpus nagi, it should be transplanted after 3-4 years, with a plant spacing of 4 m or 6 m as suitable, and this can also be determined according to actual needs.
The hole specifications depend on the thickness of the seedling, preferably 0.5-0.8 m long x 0.5-0.8 m wide and 0.4-0.6 m deep. Before transplanting, sufficient base fertilizer should be applied at the bottom of the hole (topdressing can also be done after the plant survives). Large Podocarpus nagi seedlings must be kept with a soil ball. The size of the soil ball depends on the seedling; generally, for a diameter at breast height of 3-5 cm, the soil ball diameter is 15-30 cm.
When lifting the seedling, first dig away the soil around the soil ball, and use straw rope to bind and tie the upper part of the soil ball firmly to prevent it from loosening. Then dig away the soil at the bottom, cut off the main root, lift it gently to the ground, and then bind and tie the entire soil ball firmly with straw rope.
Before planting, branches and leaves should be pruned reasonably to prevent excessive water evaporation from causing drying. After the seedling is placed in the planting hole, the straw rope should be cut on all sides to facilitate close contact when filling soil and to make the straw rope rot easily. When planted, the surface soil at the root collar should be 5-10 cm above the ground, and water once thoroughly. Consider shading according to the transplanting season. The survival rate can generally reach more than 95%.
Cultivation management
Potting
When potting small seedlings or repotting large plants that have been grown for several years, first place 2-3 cm thick coarse-grained substrate at the bottom of the pot as a drainage layer, sprinkle a layer of fully decomposed organic fertilizer on top as base fertilizer at a thickness of about 1-2 cm, then cover with a thin layer of substrate about 1-2 cm thick, and then place the plant in, so as to separate the fertilizer from the root system and avoid burning the roots.
Pruning
In winter, when the plant enters dormancy or semi-dormancy, cut off weak, diseased and pest-infested, dead and overly dense branches. Branch organization can also be combined with cutting propagation.
Repotting
As long as it is cared for properly, it will grow very quickly. When it grows to a certain size, consider giving it a larger pot so it can continue to grow vigorously. For the potting soil and component ratios used for repotting, one of the following can be chosen: vegetable garden soil: cinder = 3:1; or garden soil, medium coarse river sand: sawdust (mushroom residue) = 4:1:2; or one of paddy soil, pond mud, or leaf mold.
Unpotting
Place the flower to be repotted on the ground, first pat the sides of the pot lightly with your palm so the root system is shaken and separates from the pot wall, then turn the flower pot upside down on your left hand, gently hold the plant between the index finger and middle finger of your left hand, press the wrist and fingertips against the pot rim, pat the bottom of the pot with your right hand, and then use your thumb to push the root soil downward from the bottom hole to let the plant come out. After it comes out, pat the pot soil gently with both palms to let excess soil fall off.
Raising seedlings
1. Seed collection and seed treatment
To ensure the production of excellent seedlings, seed collection must select excellent mother trees for seed collection. Excellent mother trees should meet the following conditions: robust growth, straight and full trunk form, symmetrical and complete crown form, no pest or disease damage, and vigorous mother trees 20-30 years old that can flower and fruit normally. After late October, when the seeds are mature and the fruit diameter is 1.2-1.5 cm, collect the seeds using tools such as high branch shears and seed collection knives, and spread cloth to collect them. After the seeds are collected, they should be processed promptly. Rub or pound the fleshy aril with a wooden stick, wash the seeds out with water, then remove the pulp, fruit skin and debris, and spread them on a mat or other bedding or a dry floor to dry in the shade. Seeds must not be exposed to the sun, otherwise they easily lose germination ability. Seeds are best sown as soon as collected, or they can be stored, but not for more than one year.
2. Nursery site requirements
Podocarpus nagi seedlings are shade-tolerant and like fertilizer, so the nursery site should choose cultivated or dry land that is flat, has loose and fertile soil, good drainage and is sheltered from the wind. Before sowing, the soil should be deeply plowed and carefully prepared, stones, weeds and debris removed, and sufficient base fertilizer applied. Fertilizer amount: crushed rapeseed cake fertilizer 1200-1500 kg/hectare, phosphate fertilizer 100-150 kg/hectare, preferably decomposed barnyard manure 30000-45000 kg/hectare. For continuous cropping nursery land, 150-225 kg/hectare ferrous sulfate and 25-30 kg/hectare fenitrothion should also be used to disinfect the soil. After the nursery land is leveled, make beds 20-25 cm high and 100-120 cm wide, with paths 30-40 cm wide. The length depends on the terrain and generally does not exceed 10 m. Open drainage ditches well, rake the bed surface level, compact it to preserve moisture, and sieve a 0.5 cm thick layer of yellow subsoil on the bed surface.
3. Sowing and seedling raising
Sowing is best done in winter or as soon as seeds are collected, and can also be done in spring. Spring sowing is in mid-to-late February. When sowing, holes are generally made on the seedbed for sowing, with a row spacing of 15-20 cm and a hole spacing of about 10 cm. It is best to put 2-3 seeds per hole, with a sowing rate of 200-250 kg/hectare. After sowing, cover with 2-3 cm thick burnt soil or yellow subsoil, then cover with weeds or rice straw and other coverings. This keeps the seedbed soil loose and moist, which is beneficial for seed germination and emergence. Seeds sown in winter or as soon as collected emerge unevenly; spring sowing is slightly better, beginning to germinate and emerge after 20 days, generally in 30-50 days.
After the seeds germinate and emerge, the covering should be gradually removed: remove 1/3 the first time, remove 2/3 after 30 days, and remove all the covering after 40 days when about 2/3 of the seedlings have emerged.
4. Management after planting
Within 1-2 months after the seedlings emerge, the aboveground part grows slowly and has poor resistance to adverse external factors. In addition, Podocarpus nagi seedlings are shade-tolerant and avoid standing water, so heavy rain, high temperature and strong sunlight can cause large numbers of seedlings to die. Therefore, after the seedlings emerge, a shade shed should be built. The shading material should be sturdy and firm and not damage the seedlings. Reed curtains are generally used, and shade nets are best. A shade net with a shading rate of 50%-75% can be chosen. Shading time and intensity have a great influence on the degree of lignification of the seedlings. Too long a shading period will make the seedlings slender and weak with poorly developed roots. The suitable shading period is from seedling emergence until the seedlings are fully lignified. The daily shading time is from about 10 a.m. to 4 p.m. The shade shed should only be removed in November. Shading is not necessary in the morning and evening or on cloudy and rainy days. From April to June, weeds should be removed in time, and attention should be paid to timely drainage, loosening soil and appropriate fertilization. Once every 15-20 days, apply 0.2% urea or 3%-5% dilute decomposed pig manure urine. When applying fertilizer, do it in appropriate amounts and multiple times: apply less when seedlings are small and more when seedlings are large. As much as possible, do not pour it on the leaves and stems of the seedlings; it is best to apply it between the rows.
Starting in early June, thin the seedlings in 2-3 rounds. The final thinning should be no later than mid-July, retaining 40-55 plants/square meter. After mid-June, the seedlings enter a vigorous growth period. At this time the seedlings grow fastest, but the degree of lignification is still low and stress resistance is still poor. When temperatures are high, irrigation should be strengthened in time, but because Podocarpus nagi avoids standing water, flooding irrigation is not suitable; sprinkler or drip irrigation should be used as much as possible.
At the same time, soil loosening and weeding should also be done well to keep the soil loose and moist. From late August to early September, the seedlings enter the late growth stage, and nitrogen fertilizer should be stopped to avoid excessive growth and cold damage. Because Podocarpus nagi is easily damaged by low temperatures, starting in late August, spray a 0.2%-0.5% potassium dihydrogen phosphate solution once every 10-15 days, for 2-3 consecutive sprays, to promote earlier lignification of the seedlings so they can overwinter safely.
Podocarpus nagi has a good natural seeding ability. The soil under the crown of Podocarpus nagi is moist, and there are large numbers of wild seedlings. Therefore, in places with excellent mother trees and good site conditions, natural nurseries can be established.
In early to mid-October, clear the miscellaneous trees around the mother tree, turn the surface soil (be sure not to damage the mother tree's roots), remove stones and debris, and gently rake the surface soil level. After the seeds fall, either cover them with soil or rake the surface soil level to cover the seeds. The next spring there will be many clustered seedlings, and the seedlings grow well. At this time, aside from not needing shade, seedling management can be the same as for nursery bed seedling raising. Podocarpus nagi current-year seedlings are 20-30 cm tall. After one year of retaining in the bed for cultivation, when two-year-old seedlings are 50-80 cm tall, they can leave the nursery and be transplanted to the large seedling area for continued cultivation. At this time, proper shading should be provided. After 3-4 years, transplanting can be done, and the diameter at breast height can reach 3-5 cm, suitable for street trees and courtyard greening. Practice has shown that 1-2 year old seedlings are not suitable for direct use in greening. At this time their root systems are not well developed, and individual plants have poor stress resistance, so they often do not survive easily.
Technical points
1. Seed collection of Podocarpus nagi
To ensure the production of excellent seedlings, seed collection must select virus-free vigorous mother trees 15 to 40 years old, carried out after the seeds mature in late October.
2. Seed treatment and storage
Sowing is best done in winter or as soon as seeds are collected. Generally, seeds can be sown directly with the fruit skin, or the seeds can be treated first. Method: soak the seeds with fruit skin in water and pound the fleshy aril, wash the seeds out with water, then remove the pulp, fruit skin and debris, and spread them on bedding or a dry floor to dry in the shade. Seeds must not be exposed to the sun, otherwise they easily lose germination ability. If sowing in February or March, the seeds need to be stored in a sand bed. Method: spread one layer of fine river sand, then place seeds, then spread another layer of fine river sand, for a total of 3 to 4 layers, and maintain a certain humidity.
3. Nursery land preparation and sowing for seedling raising
Sowing can be done in a greenhouse in November or in the spring of the following year. Greenhouse sowing: generally the greenhouse seedbed is divided into three rows, with the soil deeply turned 15 cm, and more than 500 kg of organic fertilizer applied per mu. After leveling, make beds 20 cm to 25 cm high and 1 m to 1.2 m wide, with paths 30 cm to 40 cm wide. The length depends on the situation and generally does not exceed 15 m. Open drainage ditches well, then level and compact the soil and broadcast the seeds. The sowing rate per mu is 500 kg to 1000 kg. Use 3 kg to 5 kg of 3% chlorpyrifos granules to control underground pests. Use 5 kg to 10 kg of quintozene per mu scattered on the bed surface for soil disinfection. Then sieve a 1 cm to 2 cm thick layer of mixed yellow subsoil and calcium magnesium phosphate onto the bed surface. Finally, spray the surface layer of the mixed soil with 800-fold diluent of 70% thiophanate-methyl wettable powder, and cover with plastic film fixed in place every 80 to 90 cm. A small arch shed inside a large greenhouse works even better, and the temperature, humidity and light in the greenhouse can be adjusted. Podocarpus nagi does not need watering before sprouting. Be sure to cover the film well at night, and use a shade net when light is strong. By January, 90% of the seeds can sprout.
When Podocarpus nagi first emerges, it is curved, growing stems first and then leaves. The emerged rhizomes are easily infected by fungi, so spray alternately with thiophanate-methyl and carbendazim. During the bud and seedling stage, weed frequently. Podocarpus nagi buds and seedlings are tender, so water and fertilizer management should be strengthened, watering once at regular intervals. For topdressing, nitrogen-phosphorus-potassium compound fertilizer can be dissolved into 0.5% liquid fertilizer, or urea at a concentration of 0.1% to 0.2% can be sprayed. With management until February, bud seedlings can be transplanted.
4. Bud seedling transplanting and small seedling management
Podocarpus nagi grows slowly. First plant it into nutrition pots. After one year, when the bud seedling has one leaf and two hearts, it can be transplanted into the field. Podocarpus nagi belongs to the taproot type, and the main root is especially developed. Cutting off the main root is beneficial for lateral root growth. Bud seedlings can be transplanted into light substrate mesh bags or other containers, then placed in a greenhouse or simple shed for management, and by the second year they can grow to about 15 cm.
5. Small seedling transplanting
In February to March of the second year, Podocarpus nagi can grow to 15 cm to 20 cm. Because Podocarpus nagi grows slowly and is too short when planted, making management difficult, it can be cultivated in the nursery for another year. In the spring of the third year, Podocarpus nagi will grow to 30 cm to 50 cm and needs to be transplanted to the field or hillsides. When transplanting, dig holes and apply sufficient base fertilizer. In the field, both plant spacing and row spacing can be 60 cm, planting about 1000 Podocarpus nagi per mu. After transplanting, water to settle the roots, and the rest can follow normal seedling management.
Cultivation methods of Podocarpus nagi Ecological characteristics
Temperature
Podocarpus nagi is distributed in evergreen broad-leaved forests in Jiangxi, Zhejiang, Fujian, Hunan, Guangxi, Guangdong and other provinces between east longitude 105°-120° and north latitude 21°-29°. The most suitable annual average temperature is 18-26°C; cold resistance is weak, and the extreme minimum temperature is -7°C, otherwise it is prone to low-temperature damage.
Rainfall
Podocarpus nagi grows well in areas with an average rainfall of 1200-1800 mm. Below 800 mm rainfall, growth is poor. The extreme minimum temperature reaches -7°C, but in areas with an average January temperature of 6-20°C. Distributed between east longitude 105°-120°, it likes humid areas without standing water.
Light
Podocarpus nagi is a shade-tolerant tree species, often scattered in evergreen broad-leaved forests in the hills and low mountains of southeastern subtropical China. It grows 5-6 times faster on shady slopes than on sunny slopes. On sunny slopes with strong sunlight, the root collar may suffer sunscald or die. Annual light of 500-800 hours is sufficient, and natural regeneration under the forest canopy is good.
Soil
Podocarpus nagi grows slowly in the initial period, then growth gradually accelerates after 4-5 years. At 6-10 years old, the tree height is 5 m and the diameter at breast height is 8-10 cm. It begins to flower and bear fruit after about 10 years of growth. A 15-year-old plant can produce about 5-15 kg of fruit per plant, and at 40 years it can reach as high as 500-650 kg.
Cultivation points
Keep it moist. When watering, it is best to water thoroughly when the surface soil is slightly dry. In winter, when the temperature is below 15°C, water thoroughly after the soil dries. In spring, about once every three days. Around 0°C it enters dormancy. For overwintering in winter, the minimum temperature above 10°C is best; below 2°C there may be frost injury or death.
Propagation methods of Podocarpus nagi Cutting propagation
Softwood cuttings are often taken in late spring and early autumn using current-year branches, or hardwood cuttings are taken in early spring using branches from the previous year. For softwood cuttings, when the plant grows vigorously from late spring to early autumn, select robust current-year branches as cuttings. After cutting the branches off, select the sturdy parts and cut them into sections 5-15 cm long, each section with more than 3 leaf nodes. When cutting the cuttings, note that the upper cut should be made flat about 1 cm above the topmost leaf node, and the lower cut should be made at an angle about 0.5 cm below the bottommost leaf node. Both upper and lower cuts should be smooth (the knife must be sharp). For hardwood cuttings, after temperatures rise in early spring, select robust branches from the previous year as cuttings. Each cutting usually retains 3-4 nodes, and the cutting method is the same as for softwood cuttings.
Management after cutting
Temperature
The optimum temperature for cutting rooting is 20°C-30°C. Below 20°C, cuttings root with difficulty and slowly; above 30°C, the upper and lower cuts of the cuttings are easily infected by pathogens and rot, and the higher the temperature, the greater the proportion of rot. When low temperatures occur after cutting, the main insulation measure is to wrap the flower pot or container used for cuttings with film. When the temperature is too high after cutting, the main cooling measure is to shade the cuttings, blocking out 50-80% of sunlight, and at the same time spray the cuttings 3-5 times a day. On sunny days with higher temperatures, spray more often; on cloudy and rainy days with lower temperatures and higher humidity, spray less often or not at all.
Humidity
After cutting, the relative air humidity must be kept at 75-85%. The basic requirement for cutting rooting is that before the cuttings root, they must be kept fresh and tender enough to carry out photosynthesis to produce rooting substances. However, cuttings that have not rooted cannot absorb enough water to maintain their internal water balance. Therefore, spraying must be used to reduce water evaporation from the cuttings: under shaded conditions, spray the cuttings 3-5 times a day. On sunny days, the higher the temperature, the more often to spray; on cloudy and rainy days, the lower the temperature, the less often to spray or not at all. But excessive spraying makes cuttings easily infected by pathogens and rot, because many kinds of pathogens exist in water.
Sunlight
Cutting propagation cannot do without sunlight, because the cuttings still need to continue photosynthesis to produce nutrients and rooting substances to supply their rooting needs. However, the stronger the light, the higher the temperature inside the cuttings, the stronger the transpiration of the cuttings, and the more water they consume, which is not conducive to the survival of the cuttings. Therefore, after cutting, 50-80% of sunlight must be blocked. After the root system grows out, gradually remove the shade net: on sunny days, remove the shade net at 4:00 p.m. each day, and cover it again before 9:00 a.m. the next day.
Pest and disease control of Podocarpus nagi Insect pests
Aphids: 50% pirimicarb 3000-5000-fold diluent or 40% omethoate 1500-2000-fold diluent
Scale insects: fenitrothion 2000-fold diluent, 1605 1500-fold diluent
Leaf miners: dichlorvos or fenitrothion 1000-1500-fold diluent, or 90% trichlorfon 1500-fold diluent
Diseases
Black spot: in early June, spray 40% carbendazim 800-fold diluent or 65% zineb 400-500-fold diluent
Rust powdery: triadimefon 1500-2000-fold diluent or 65% zineb wettable powder 500-600-fold diluent
Powdery mildew: 50% carbendazim wettable powder 1000-1500-fold diluent
Anthracnose, sooty mold: carbendazim 800-fold diluent or low-concentration virucide liquid
Control of nutrient deficiency: it can be controlled by injecting trace fertilizer into rock crevices or spraying trace fertilizer on the leaves
Variety classification of Podocarpus nagi
1. Podocarpus nagi Nageia nagi (Thunb.) Kuntze (Podocarpus nagi Zoll. et Mor) [Broadleaf Podocarpus]
Produced in southeastern to southern China; also distributed in Japan. It likes warm and humid climates and deep, loose soil, often grows on both sides of gullies, has strong shade tolerance and is not cold-tolerant. Propagated by sowing or cuttings. The wood is excellent, the seeds can be pressed for oil, and the tree form is beautiful; it is a timber, oil and garden ornamental tree species in the south, and can also be planted as a street tree.
Evergreen tree, up to 20 m tall. Leaves opposite, ovate-oblong to lanceolate-elliptic, 3.5-9 cm long and 1.5-2.5 cm wide, without a midrib, with many parallel fine veins, thickly leathery and glossy. Seeds borne on a slender woody seed receptacle. Flowering from March to April; seeds mature in October.
There are cultivars such as golden-leaf 'Aurea', white-spotted 'Cacsius', yellow-striped 'Vriegata', round-leaf 'Ovatus', fine-leaf 'Angustifolius' and weeping 'Penula'.
2. Long-leaf Podocarpus nagi N. fleuryi (Hickel) de Laub. (P. fleuryi Hicke)
Produced in South China, Taiwan, China and Yunnan; also distributed in Vietnam and Cambodia. The tree form is beautiful and the branches and leaves are emerald green, making it a beautiful garden greening and ornamental tree species in warm areas.
Evergreen tree; leaves ovate-elliptic to ovate-lanceolate, 8-18 cm long and 2.2-5 cm wide, apex acuminate, base cuneate, thickly leathery.
Distribution area of Podocarpus nagi
Podocarpus nagi is produced in Zhejiang, Fujian, Jiangxi, Hunan, Guangdong, Guangxi and Sichuan; its vertical distribution ranges from hilly areas above the coast up to high mountain zones at an altitude of 1600 m, often forming forests with evergreen broad-leaved trees.
Dietary or medicinal value of Podocarpus nagi
The medical information and health dietary information on Huhuawang are for reference only and cannot be used as a basis for diagnosis or medical treatment. Any health issues should be consulted with professional medical staff, and treatment of any disease should follow doctor's advice.
Ultimate flower protection task: To love yourself, start from reality and strictly follow doctor's advice. For illness, do not be careless, do not delay, do not give up hope, face it bravely, warm the silent world with love, and care for the flower field in your heart with your heart.
Medicinal value
[Source]
1. The wood section of the Baitiao in the Compendium of Materia Medica records: In Mount Emei, there is a kind with bamboo leaves and a cypress body, called bamboo cypress.
2. The Luohansong section of the Illustrated Investigation of Plant Names records: Examining the Yibu Fangwu Ji, bamboo cypress leaves are numerous and long, and the sheaths resemble bamboo. If the sheaths are regarded as fallen leaves, then it is very similar; if they are considered bamboo shoot sheaths, then it is not similar at all. Keep this for further investigation. All of the above are similar to this species.
[Medicinal material source] The leaves of Podocarpus nagi (Thunb.) Zoll. et Mor. ex Zoll., a plant of the family Podocarpaceae.
[Latin botanical name] Podocarpus nagi (Thunb.) Zoll. et Mor. ex Zoll. [Myrica nagi Thunb.]
[Harvesting and storage] Can be collected throughout the year, washed clean, used fresh or dried in the sun.
[Ecological environment] Scattered in low-altitude evergreen broad-leaved forests.
[Efficacy and treatment] Stops bleeding; sets bones. Mainly used for traumatic bleeding; fractures.
[Usage and dosage] External use: appropriate amount, pound the fresh product and apply; or grind the dried product into powder and apply after mixing.
[Supplementary note] Because its leaves resemble bamboo leaves, while the branches and trunk are like those of a cypress, it is named bamboo-cypress (Podocarpus nagi).
[Excerpt] "Chinese Materia Medica"
[Pharmacological effects]
Among the compounds isolated from the root bark of Podocarpus nagi, 2α-hydroxynagilactone F inhibited only the growth of Saccharomyces cerevisiae in tests against 12 microorganisms, with an MIC (minimum inhibitory concentration) of 800 μg/ml. From the seeds of Podocarpus nagi, components such as nagilactone A, 1-deoxy-2β,3β-epoxynagilactone A, 1-deoxy-2α-hydroxynagilactone A, and nagilactoside A were isolated; the first three compounds at 10 μg/ml showed inhibition rates of 73%, 88.5% and 97.4% respectively against leukemia cells P388; nagilactoside A, however, had no effect. The results of biological tests indicate that diterpene dilactone compounds become inactivated after their hydroxyl groups are acylated or glycosylated, suggesting that the hydroxyl group is an important part of the activity, that the conformation of C-14 is related to activity, and that opening the epoxide ring of the A ring and introducing halogen atoms does not help to improve antitumor activity.
[Chemical composition]
The leaves of Podocarpus nagi contain nagilactone A, B, C, D, E, vomifoliol, 15-methoxynagilactone D, 3-deoxy-2α-hydroxynagilactone E, and 3-epinagilactone C. The wood contains totarol, podototarin, 16-carboxyltotarol, and β-sitosterol.
The uses and purposes of Podocarpus nagi: ornamental value
The branches and leaves of Podocarpus nagi are verdant and glossy, with a dense crown and beautiful tree form. It is a good shade tree in the south and a street tree in gardens, and is also an excellent tree species for greening the four sides of both urban and rural areas.
Economic value
The sapwood is pale yellowish-white, the heartwood is darker in color, the grain is straight, the texture is fine, the hardness is moderate, and the specific gravity is 0.47-0.53. It is easy to process and durable. It is an excellent timber for construction, shipbuilding, furniture, utensils and crafts.
The kernel oil is used for food and industrial oil.
The garden uses of Podocarpus nagi
The leaves of Podocarpus nagi are peculiar in shape and verdant all year round; the trunk is straight and slender, the tree form is graceful, the foliage is dense and the shade is heavy, and it is strongly resistant to pests and diseases. It is a beautiful evergreen ornamental tree that can be planted in patches in parks, courtyards, residential communities, streets and other areas, and can also be planted mixed with other evergreen and deciduous tree species.
The cultural background of Podocarpus nagi: origin of the name
It is named for its parallel leaf veins that resemble bamboo leaves, and its wood resembles that of Chinese fir, hence it is also called mountain fir.
Podocarpus nagi is an ancient gymnosperm that originated about 155 million years ago in the Mesozoic Cretaceous period. It is called a "living fossil" by people and is a precious, rare and endangered tree species.
The story of the Podocarpus nagi Cool Garden
The Podocarpus nagi of Nankun Mountain is a rare tree species. This tree has the characteristics of cypress: it stays green and vigorous all year round, does not shed its leaves, and has an extremely long growth period. But its leaves are shaped like bamboo leaves, slender and pointed, tough and not easily damaged. Many people have tried every possible way to transplant Podocarpus nagi elsewhere, and it is said that the chances of success are very few. Why is Podocarpus nagi so partial to Nankun - not only taking root and surviving, but also forming groves and forests? Upon inquiry, there is a story here.
Many years ago, a woodcutter was resting by the mountain. Because his bundle of firewood was too heavy and he had not eaten, he truly could not walk any further. He sat on a stone and thought to himself: when I go back, no matter what, I must find some grain so that my old mother can eat a full meal. Just then, he suddenly noticed an animal moving under a moso bamboo not far ahead, and it looked as if it had been injured. As he approached the animal step by step, he saw that it showed an expression in its eyes begging for help. Looking more carefully, he finally realized it was a mountain deer that had broken its leg. Without hesitation, the woodcutter pulled up some herbs nearby, chewed them in his mouth, then gently applied the herbs to the deer's leg, and afterward bandaged the deer with the towel he carried for wiping sweat.
The woodcutter comforted the mountain deer as if comforting a child: "You will get better soon, nothing will happen." Just like that, he waited until the mountain deer got up and slowly left before the woodcutter picked up his bundle of firewood and went on his way. When he happened to look back, he also saw the mountain deer repeatedly touching the ground with its mouth, as if eating grass, yet not eating grass. The woodcutter did not take this matter to heart, but what appeared the next day greatly astonished people: in the area where the woodcutter had rested and the mountain deer had lain, a new patch of woods had grown - trees of a new variety never seen before, resembling both bamboo and cypress.
Afterward, word spread that the mountain deer that appeared that day was actually an immortal deer. It had been looking for the best location to sow the rare tree called Podocarpus nagi, and the woodcutter's behavior moved it, so it finally settled on the spot. Later everyone knew that the tree resembling both bamboo and cypress was called Podocarpus nagi. Podocarpus nagi gradually spread in all directions, but the Podocarpus nagi in the area where the woodcutter saved the deer that day always grew the best.
The place where Podocarpus nagi first appeared is now called "Podocarpus nagi Cool Garden." The Podocarpus nagi here grows well, with tall trees of Podocarpus nagi rising in irregular tiers and pointing straight to the blue sky. People passing below all stop in their tracks, and very often those working nearby, or pedestrians who happen to pass by, rest in the cool garden, drink water, and eat dry rations. And people who come from all around, drawn by its fame to experience this strange tree species Podocarpus nagi, are an endless stream.
The flower language of Podocarpus nagi
The flower language of pines and cypresses: longevity, bravery, evergreen through the four seasons.
Pictures of Podocarpus nagi
Vegetative propagation of nursery stock - green branch cuttings
Vegetative propagation of nursery stock - green branch cuttings
Vegetative propagation is a seedling-raising method that uses the vegetative organs of plants, such as branches, roots, stems and leaves, and under suitable conditions cultivates them into an independent individual. Because vegetative propagation does not involve sexual cells, it is also called asexual propagation. Seedlings cultivated by vegetative propagation methods are called vegetatively propagated seedlings or asexually propagated seedlings.
Vegetative propagation is also a seedling-raising method that uses the regenerative capacity and meristematic capacity of plant cells, as well as the compatibility for grafting and growing with another plant. Regenerative capacity refers to the ability of a part of a plant's vegetative organs (roots, stems, leaves) to differentiate and form other parts that it did not originally have, such as using a stem or branch cutting to grow new leaves and new roots, using a root cutting to grow new branches and new leaves, and using a leaf cutting to grow new roots and a new stem. Meristematic capacity refers to the ability of some plants to grow special metamorphosed organs specifically for vegetative propagation, such as corms, bulbs, stolons, and so on.
v Vegetative propagation has the following characteristics:
v ① It can maintain the excellent traits of the mother plant. Because vegetative propagation is not produced through the union of sexual cells, but by somatic cells directly divided from meristematic tissue, all the genetic information of the parent can be reproduced, and the original excellent traits and inherent phenotypic characteristics of the mother plant can be maintained, without producing the trait segregation that occurs in seed propagation. This achieves the purpose of preserving and propagating excellent varieties.
v ② Seedlings from vegetative propagation generally grow quickly and can flower and bear fruit earlier. Because the new plant from vegetative propagation is a continuation based on the original developmental stage of the mother plant, unlike seedlings from seed propagation whose individual development starts anew.
v ③ Some garden plants do not bear fruit, bear little fruit, or do not produce viable seeds, so vegetative propagation can be used for seedling cultivation, improving the effectiveness of seedling production and the propagation coefficient. Examples include double-flowered ornamental peach and seedless fruits.
v ④ Some garden plants with special shapes need to be propagated and produced through vegetative propagation methods, such as tree (form) roses and Chinese pagoda tree (Sophora japonica var. pendula). Moreover, the rejuvenation of ancient and famous trees in gardens also requires promoting tissue proliferation or restoring their growth vigor through grafting (top grafting or bridge grafting).
v ⑤ The method is simple and economical. Because the seeds of some garden plants have deep dormancy, propagation by seed is relatively cumbersome and difficult, while vegetative propagation is easier, and also simple and economical.
v From the above, it can be seen that vegetative propagation plays a very important role in garden seedling cultivation, plant shaping, and the rejuvenation of ancient and famous trees. However, vegetative propagation also has its shortcomings. For example, the root system of vegetatively propagated seedlings has no obvious main root and is not as developed as that of seedling-grown plants (except grafted seedlings), with poorer resistance and a shorter lifespan. For some tree species, repeated vegetative propagation over multiple generations easily causes degeneration, resulting in weak seedling growth, such as in Chinese fir.
v The methods commonly used in vegetative propagation in the cultivation of garden nursery stock include: cutting propagation, grafting propagation, division propagation, layering by burying stems, and air layering, etc.
Section 1 Cutting propagation
v Cutting propagation is a propagation method that uses a part of a detached plant vegetative organ such as roots, stems (branches), leaves, etc., inserts it under certain conditions into soil, sand or other substrate, and uses the plant's regenerative capacity, through artificial cultivation, to develop it into a complete new plant. The part that is cut for direct insertion is called the cutting, and the seedling obtained by cutting propagation is called a cutting seedling.
v Cutting propagation is simple, with abundant material, and can carry out large-scale seedling cultivation and multi-season seedling cultivation. It has already become one of the main propagation means for trees, especially for precious garden tree species that do not bear fruit or bear few fruits. Cutting seedling cultivation, like other vegetative propagation, has the characteristics of rapid seedling formation, older developmental stage, and maintaining the excellent traits of the mother plant. However, because the cuttings are separated from the mother body, suitable environmental conditions such as temperature and humidity must be provided for them to survive. For some tree species with higher requirements, necessary measures such as shading, misting, and building plastic tunnels must also be adopted to succeed. Therefore, cutting propagation requires meticulous management and is relatively labor-intensive.
I. Principles of cutting survival
(1) Rooting types of cuttings
v The rooting of plant cuttings, because there is no fixed position of attachment, is called adventitious rooting. The key to cutting survival is the formation of adventitious roots, and adventitious roots originate from cell groups of some meristematic tissues. The origin sites of these meristematic tissues differ greatly and vary with plant species. According to the site of adventitious root formation, they can be divided into 2 types: one is the bark rooting type, mainly rooting from the bark, sending out many adventitious roots from the lenticels, nodes (buds) and other places of the bark all over the cutting. The other is the callus rooting type, mainly rooting from callus, sending out many adventitious roots from the callus at the base, or from the stem nodes adjacent to the callus. These 2 rooting types have different rooting mechanisms, and thus also differ in the degree of difficulty of rooting. But there are also many tree species whose rooting is in an intermediate state, namely the comprehensive rooting type, in which the amounts of callus rooting and bark rooting differ relatively little, such as poplar, grape, oleander, golden privet, and photinia.
v 1. Bark rooting type Cuttings belonging to this type all have root primordia or root initials, located at the intersection of the widest part of the medullary ray and the cambium. This is because the cambium undergoes cell division, differentiating outward into blunt cone-shaped root primordia, invading the phloem and leading to the lenticels. During the outward development of the root primordia, the medullary ray connected to it also gradually thickens, passing through the xylem toward the pith, and obtaining nutrients from the pith cells. This kind of bark rooting is relatively rapid, with a wide rooting area, and has no connection with callus tissue. Generally speaking, this bark rooting type belongs to easy-to-root tree species.
v 2. Callus rooting type For cuttings of this rooting type, the formation of adventitious roots must be completed through the differentiation of callus. First, on the surface of the lower cut of the cutting, a translucent group of parenchyma cells with obvious nuclei is formed, namely the primary callus. The cells of the primary callus continue to differentiate, gradually forming tissues such as xylem, phloem and cambium that connect with the corresponding tissues of the cutting. Finally, after full healing, under suitable temperature and humidity conditions, roots differentiate from the callus. Because this kind of rooting requires a long time and grows slowly, all tree species that are relatively difficult to root and slow to root mostly root at the callus.
v In addition, after the cutting survives, the first bud (or second bud) from the upper part sprouts and grows into a new stem. When the base of the new stem is buried by the substrate, adventitious roots can often grow, and this kind of root is called a new stem root. For example, poplar, willow, plane tree, edgeworthia, and ornamental pomegranate can promote new stem rooting, thereby increasing the number of roots and improving the yield and quality of seedlings.
Bark rooting type Callus rooting type
Picture 2
Positions where adventitious roots are produced
v In studying the theory of cutting rooting, many scholars have done a great deal of work, put forward many views from different angles, and used them to guide cutting practice, achieving certain results. These views are briefly introduced as follows:
v 1. Auxin viewpoint It is believed that the rooting of plant cuttings and the formation of callus are all controlled and regulated by auxin, and cytokinins and abscisic acid also have a certain relationship. The auxin synthesized by the branch itself can promote the formation of the root system. It is mainly synthesized in the young buds and leaves of the branch, then transported toward the base, participating in the formation of the root system. Production practice has proved that when people use young plant shoots for cutting propagation, their endogenous auxin content is high, the cell division ability is strong, and the cuttings survive easily. Grape cuttings themselves do not have latent root primordia. When grape cuttings are inserted with leaves, their root system is very developed. If the buds and leaves are removed in advance, the rooting ability will be significantly affected, or there will be no rooting at all, indicating that there is an important substance affecting cutting rooting. This is that the leaves and buds of the plant can synthesize natural auxin and other effective rooting substances, and transport them downward through the phloem to the base of the cutting. This shows that there is a polar transport from the top to the base, and also shows that the base of the cutting is the most active place for promoting root formation.
v Among auxins, auxin a, auxin b and indoleacetic acid (IAA) have been discovered. This provides a basis for humans to use plant endogenous auxin and artificially synthesized exogenous auxin to promote the formation of adventitious roots at the base of cuttings. At present, those used in production include indolebutyric acid (IBA), indoleacetic acid (IAA), naphthaleneacetic acid (NAA), naphthaleneacetamide (NAD), and broad-spectrum rooting agents ABT, HL-43, etc. Treating the base of cuttings with these auxins increased the rooting rate and also shortened the rooting time. In addition, many experiments and production practices have also confirmed that auxin is not the only substance that promotes cutting rooting; there must also be another special substance produced in buds and leaves to assist, in order to lead to the occurrence of adventitious roots. This substance is the rooting cofactor.
v 2. Growth inhibitors Growth inhibitors are substances in plants that hinder rooting. Many studies have confirmed that in the life cycle, old trees have a high content of inhibitory substances, and in the annual growth cycle of trees the content is highest during the dormant period; for hardwood cuttings, cuttings near the tip also have a higher content of inhibitory substances than those at the base. Therefore, in actual production, we can take corresponding measures, such as washing with running water, low-temperature treatment, dark treatment, etc., to eliminate or reduce inhibitors, so as to facilitate rooting.
v 3. Nutrients The survival of cuttings has a certain relationship with the nutrients in their bodies, especially the content of carbon and nitrogen and their relative ratio. Generally speaking, a high C/N ratio, that is, a high carbohydrate content in the plant and a relatively low nitrogen compound content, is more favorable for inducing adventitious roots in cuttings. Low nitrogen can increase the number of roots, while nitrogen deficiency will inhibit rooting. Sufficient nutrition in the cutting can not only promote the formation of root primordia, but also promote the growth of the aboveground part. Practice has proved that supplementing cuttings with carbohydrates and nitrogen can promote rooting. Generally, soaking the lower cut of the cutting with sugar solution or spraying nitrogen such as urea on the cutting can increase the rooting rate. However, exogenous supplementation of carbohydrates easily causes the cut to rot.
v 4. Plant development Due to the effects of three kinds of aging - chronological, ontogenetic and physiological - the rooting ability of plant cuttings also weakens with the increase of the age of the mother tree. According to this characteristic, for some rare, precious tree species or tree species difficult to propagate, in order to make them physiologically "rejuvenate," the following effective approaches can be adopted.
v (1) Hedge-style scion collection That is, heavily prune the mother trees prepared for collecting cuttings so that they do not grow upward, but sprout many new branches.
v (2) Continuous cutting propagation With 2 to 3 continuous cuttings, the rooting ability of new branches increases sharply, and the rooting rate can be increased by 40% to 50%.
v (3) Continuous grafting propagation using young rootstocks That is, graft scions collected from old mother trees onto young rootstocks, repeatedly grafting continuously 2 to 3 times to make them "rejuvenate," and then collect their branches or needle leaf bundles for cuttings.
v (4) Using basal sprout shoots as cuttings That is, saw off the trunk of an old tree so that the juvenile (seedling) zone produces new sprout branches for use as cuttings.
v 5. Anatomical structure of the stem
The difficulty of cutting rooting also has a close relationship with the anatomical structure of the stem. If there is a ring of sclerenchyma tissue composed of one, two or multiple layers of fiber cells in the cortex of the cutting, rooting will be difficult; if there is no sclerenchyma tissue in the cortex, or it is present but discontinuous, rooting will be relatively easy. Therefore, during cutting seedling cultivation, the method of cutting through the cortex can be adopted to destroy its ring-shaped sclerenchyma tissue and promote rooting. For example, the Hubei Forestry Science Research Institute made longitudinal cuts on olive cuttings, increasing the cutting survival rate.
II. Factors affecting cutting rooting
v In the process of cutting rooting, the formation of adventitious roots in cuttings is a complex physiological process. Whether cuttings can root and survive after insertion depends not only on the internal factors of the plant itself, but also has a close relationship with external environmental factors.
(1) Internal factors affecting cutting rooting
1. Biological characteristics of tree species Different tree species have different biological characteristics, so their branch rooting abilities are also different. According to the degree of difficulty of cutting rooting, they can be divided into:
v (1) Easily rooted tree species Such as willow, section Tacamahaca poplars, section Aigeiros poplars, dawn redwood, pond cypress, Chinese fir, Japanese cedar, littleleaf box, false indigo, forsythia, rose, winter jasmine, honeysuckle, ivy, euonymus, nandina, red-leaf barberry, boxwood, Amur honeysuckle, grape, fig and pomegranate, etc.;
v (2) Relatively easily rooted tree species Such as oriental arborvitae, hinoki cypress, hiba arborvitae [Thujopsis dolabrata], Podocarpus macrophyllus, black locust, Chinese scholar tree, tea, camellia, cherry, wild rose, rhododendron, pearl bush, privet, ash, plane tree, Acanthopanax, elderberry, glossy privet, Kalopanax, bamboo (Sinocalamus affinis), oleander, kiwifruit, etc.;
v (3) Relatively difficult-to-root tree species Such as golden larch, Chinese juniper, Japanese white pine, Chinese parasol tree, Chinaberry, tree of heaven, date plum, Aglaia, begonia, jujube, etc.;
v (4) Extremely difficult-to-root tree species Such as Japanese black pine, masson pine, Japanese red pine, camphor tree, Chinese chestnut, walnut, oak, tulip tree, persimmon, elm, maple, etc.
v The difficulty of rooting of different tree species is only relative. With the deepening of scientific research, some tree species that were very difficult to root may become easy-to-root species for cuttings and be promoted and applied in production. Therefore, when doing cutting seedling cultivation, attention should be paid to referring to proven materials; for varieties without materials, trial cuttings should be carried out to avoid detours. In cutting propagation work, as long as attention is paid to improving methods, the survival rate may be increased. For example, Japanese red pine, Japanese black pine and others generally considered very difficult to root can, through the cultivation of sprout shoots and hormone treatment, under full-light automatic mist cutting seedling technology, reach a rooting rate of more than 80%. Among rose varieties generally considered easy to root, many excellent lines root with great difficulty; if the cutting period is changed to cutting with leaves after autumn, under conditions of heat preservation and mist moisture retention, the rooting rate can reach more than 95%. This shows that for many difficult-to-root tree species or flowers, with the continuous progress of science and technology, according to the genetic characteristics of the parent, corresponding measures can be taken to find a good method for rooting.
v 2. Age of the cutting This includes 2 meanings: first, the age of the mother tree from which the branch is collected; second, the age of the branch itself that is collected.
v (1) Age of the mother tree The rooting ability of cuttings decreases with the increase of the age of the mother tree. Under general circumstances, the older the mother tree, the more difficult it is for plant cuttings to root, while the younger the mother tree, the easier it is to root. Because the strength of tree metabolism weakens as the developmental stage ages, its vitality and adaptability also gradually decrease. On the contrary, the young branches of a young mother tree have very strong vital activity in the cortical meristem, and the branches collected have a high cutting survival rate. Therefore, when selecting branches, they should be collected from young mother trees. Especially for many difficult-to-root tree species, branches from 1- to 2-year-old seedlings should be selected, giving the best cutting results. For example, the Qianjiang Forestry Research Institute of Hubei Province conducted cutting experiments on 1-year-old branches of dawn redwood from mother trees of different ages, and the cutting rooting rates were: 1-year-old 92%, 2-year-old 66%, 3-year-old 61%, 4-year-old 42%, 5-year-old 34%. As the age of the mother tree increased, the rooting rate of cuttings decreased. Besides the decline in vitality, the reasons for the decline in rooting ability of cuttings as the mother tree ages are that the substances necessary for rooting decrease while the substances hindering rooting increase. For example, in the cuttings of tree species such as Japanese red pine, Japanese black pine, hinoki cypress, larch, and Japanese cedar, rooting-inhibiting substances or tannin-like substances have been found. With increasing age, the nutritional conditions of the mother tree may become worse. Especially in cutting orchards, due to repeated cutting collection, soil fertility declines, and insufficient nutrition in the branches of the mother plant will also affect the rooting ability of cuttings.
v (2) Age of the cutting The age of the cutting has a significant effect on rooting. Generally, the regenerative capacity of current-year branches is the strongest, because softwood cuttings have high endogenous auxin content and vigorous cell division ability, promoting the formation of adventitious roots. The regenerative capacity of 1-year-old branches is also relatively strong, but the specific age also varies with tree species. For example, for poplars, 1-year-old branches have a high survival rate, while 2-year-old branches have a low survival rate, and even if they survive, the seedlings grow poorly. For dawn redwood and Japanese cedar, 1-year-old branches are better, and the base can also carry a short section of 2-year-old branch; while for Thujopsis dolabrata, branch sections carrying 2- to 3-year-old wood have a high rooting rate.
v 3. Position of branch attachment and developmental status For some tree species, branches on the crown have a low rooting rate, while sprout shoots from the roots and base of the trunk have a high rooting rate. This is because the 1-year-old sprout shoots at the root collar of the mother tree are at the youngest developmental stage and have strong regenerative capacity, and because the sprout shoots grow in a position close to the root system, obtaining more nutrients and having higher plasticity, they survive easily after cutting. Although basal sprout branches have a high rooting rate, their sources are few. Therefore, branches used as cuttings are ideally collected from a cutting orchard; if there is no cutting orchard, the seedling stems of cutting seedlings, root-retaining seedlings and root cuttings can be used, among which the latter two are better.
v For conifers, branches on the main trunk of the mother tree have strong rooting ability, while side branches, especially side branches that have branched multiple times, have weak rooting ability. If branches are collected from the crown, it is better to collect from the lower part of the crown where light is weaker. In production practice, for some tree species, carrying a part of 2-year-old wood, that is, using the "heel cutting method" or "mallet cutting method," can often increase the survival rate.
The branches for hardwood cuttings must be well developed, thick and strong, fully lignified, and free of pests and diseases
v 4. Different parts of the branch Different parts of the same branch have different numbers of root primordia and amounts of stored nutrients, and their cutting rooting rate, survival rate and seedling growth amount all show obvious differences. But which specific part is better also depends on the plant's rooting type, the maturity of the branch, and so on. Generally speaking, for evergreen tree species, the middle and upper branches are better. This is mainly because the middle and upper branches grow vigorously, have vigorous metabolism, and sufficient nutrition, and the new shoots in the middle and upper parts also have strong photosynthesis, which is beneficial to rooting. In hardwood cutting of deciduous tree species, the middle and lower branches are better. Because the middle and lower branches are well developed and store more nutrients, providing favorable factors for rooting. If softwood cutting is used for deciduous tree species, then the middle and upper branches are better. Because in young branches, the middle and upper parts have the highest endogenous auxin content, and the cell division ability is vigorous, which is beneficial to rooting. For example, in softwood cutting of Chinese white poplar, the tip is best.
v 5. Thickness and length of cuttings The thickness and length of cuttings have a certain effect on the survival rate and seedling growth. For the vast majority of tree species, long cuttings have more root primordia and store more nutrients, which is beneficial to cutting rooting. The determination of the length of cuttings should be based on the speed of rooting of the tree species and soil moisture conditions. Generally, hardwood cuttings of deciduous trees are 10-25 cm; evergreen tree species 10-35 cm. With the improvement of cutting techniques, cuttings are gradually developing toward shorter cuttings, and some even use one bud and one leaf cuttings. For example, tea and grape use 3-5 cm short cuttings with very good results.
v For cuttings of different thicknesses, thick cuttings contain more nutrients, which is beneficial to rooting. The suitable thickness of cuttings varies with tree species. Most coniferous tree species have a diameter of 0.3-1 cm; broad-leaved tree species have a diameter of 0.5-2 cm.
In production practice, appropriate lengths and thicknesses of cuttings should be used according to needs and possibilities, branches should be used rationally, and the principle of short cutting for thick branches and longer retention for thin branches should be mastered
v 6. Leaves and buds of the cutting The buds on the cutting are the basis for forming stems and trunks. Buds and leaves can supply the nutrients, growth hormones, vitamins, etc. necessary for cutting rooting, which is beneficial to rooting. This is especially important for softwood cuttings and cuttings of coniferous and evergreen tree species. The number of leaves retained on the cutting is generally determined according to specific conditions. Generally, 2-4 leaves are retained. If there is a misting device to maintain moisture at regular intervals, more leaves can be retained to accelerate rooting.
v In addition, branches or cuttings collected from the mother tree have significantly weakened resistance to drying and pathogen infection. Therefore, when carrying out cutting propagation, attention must be paid to maintaining the cutting's own moisture. In production, the lower end of the cutting can be soaked in water, which not only increases the cutting's moisture but also reduces rooting-inhibiting substances.
(2) External factors affecting cutting rooting
v The main external factors affecting cutting rooting are temperature, humidity, aeration, light, substrate, etc. These factors influence and constrain each other. Therefore, during cutting, various environmental factors must be organically and coordinately satisfied to meet the various requirements for cutting rooting, so as to achieve the purpose of increasing the rooting rate and cultivating high-quality seedlings.
v 1. Temperature The suitable temperature for cutting rooting varies with tree species. The optimum temperature for rooting of most tree species is 15-25°C, with 20°C being the most suitable. However, many tree species have their own minimum rooting temperature. For example, poplar and willow begin to root at around 7°C. The general rule is that those that sprout early, such as poplar and willow, require lower temperatures; those that sprout and break dormancy late and evergreen tree species such as osmanthus, gardenia, and coral tree require higher temperatures. In addition, plants in different climatic zones also have different optimum cutting temperatures. For example, MaLisch H of the United States believes that temperate plants are suitable at around 20°C; tropical plants at around 23°C. Soviet scholars believe that temperate plants are 20-25°C; tropical plants are between 25-30°C.
v Different tree species also have different soil temperature requirements for cutting rooting. Generally, when the soil temperature is 3-5°C higher than the air temperature, it is extremely favorable for rooting. This is beneficial to the formation of adventitious roots and unsuitable for bud sprouting, concentrating nutrients so that buds sprout and grow after adventitious roots have formed. In production, horse manure or electric heating wires can be used as heating materials to increase ground temperature, and the heat energy of sunlight can also be used for inverted insertion to promote rooting, increasing the cutting survival rate.
v Temperature is even more important for softwood cuttings. Below 30°C is beneficial to the utilization of rooting-promoting substances inside the branch, and therefore beneficial to rooting. But temperatures above 30°C will lead to cutting failure. Generally, misting methods can be adopted to lower the temperature of the cuttings. The best period for cutting activity is also the period when pathogens are rampant, so special attention should be paid during cutting.
v 2. Humidity During the rooting process of cuttings, the relative humidity of the air, the humidity of the cutting medium, and the water content of the cutting itself are the keys to cutting survival. Especially for softwood cuttings, special attention should be paid to maintaining suitable humidity.
v (1) Relative humidity of the air The relative humidity of the air has a great influence on difficult-to-root coniferous and broad-leaved tree species. The relative humidity of the air required by cuttings is generally about 90%. Hardwood cuttings can be slightly lower, but the relative humidity of the air for softwood cuttings must be controlled above 90%, so that the transpiration intensity of the branches is minimized. In production, methods such as spraying water and interval-controlled misting can be used to increase the relative humidity of the air, making cuttings easier to root.
v (2) Humidity of the cutting medium Cuttings most easily lose water balance, so the cutting medium is required to have suitable moisture. The humidity of the cutting medium depends on the cutting substrate, cutting material and management technical level, etc. According to Chinese white poplar cutting experiments, the water content in the cutting medium is generally suitable at 20%-25%. When the water content is below 20%, cutting rooting and survival are both affected. Reports show that from cutting to callus formation and rooting, the water content requirements of the cutting medium differ at each stage. Usually the former is higher, and the latter decreases in turn. Especially after complete rooting, the water supply should be gradually reduced to inhibit the vigorous growth of the aboveground part of the cutting, increase the lignification degree of new branches, and better adapt to the field environment after transplanting.
v 3. Aeration conditions Cuttings need oxygen when rooting. Fujii of Japan conducted experiments with grape in cutting media with different oxygen concentrations (Table 5-1). From Table 5-1, it can be seen that the cutting rooting rate is directly proportional to the oxygen content in the cutting medium. Therefore, during cutting, the cutting substrate is required to be loose and breathable. Especially for tree species with higher oxygen demand, it is even more necessary to choose a loose and breathable cutting substrate, and at the same time insert shallowly. If the substrate is loam, the soil must be loosened in time after each irrigation, otherwise the survival rate will be reduced.
Picture 6
v 4. Light Light can promote cutting rooting and is indispensable for evergreen trees and softwood cuttings. But during the cutting process, strong light will also dry or scorch the cuttings, reducing the survival rate. In actual work, measures such as spraying water to cool down or appropriate shading can be taken to maintain the water balance of the cuttings. When cutting in summer, the best method is to use the full-light automatic intermittent misting method, which ensures water supply without affecting light.
v 5. Cutting substrate No matter what kind of substrate is used, as long as it can satisfy the cutting's requirements for substrate moisture and aeration conditions, it is beneficial to rooting. At present, the cutting substrates used have the following three states:
v (1) Solid state The most commonly used substrate in production generally includes river sand, vermiculite, perlite, furnace slag, peat soil, carbonized rice husk, peanut shell, moss, foam plastic, and so on. These substrates have good aeration and drainage performance. But after repeated use, the particles are often broken and the powder component increases, so the new substrate must be replaced regularly.
v (2) Liquid state Inserting cuttings into water or nutrient solution to make them root and survive is called liquid cutting. Liquid cutting is often used for easy-to-root tree species. Because nutrient solution is used as the substrate, cuttings easily rot, so it should generally be used with caution.
v (3) Gaseous state Making the air into a water vapor mist state and suspending cuttings in the mist to make them root and survive is called mist cutting or aerial cutting. Mist cutting, as long as temperature and air relative humidity are well controlled, can fully utilize space, and cuttings root quickly, shortening the seedling cultivation cycle. But because cuttings root under conditions of high temperature and high humidity, hardening the seedlings becomes one of the important links for the survival of mist cuttings.
v The selection of substrate should be based on the requirements of the tree species, choosing the most suitable substrate. When cutting in the open field, it is actually impossible to replace the cutting soil over a large area, so sandy loam with good drainage is usually chosen.
III. Techniques for promoting cutting rooting
v 1. Treatment with auxins and rooting promoters
v (1) Growth hormone treatment Commonly used auxins include naphthaleneacetic acid (NAA), indoleacetic acid (IAA), indolebutyric acid (IBA), 2,4-D, etc. The methods of use are: first, dissolve the auxin with a small amount of alcohol, then prepare solutions of different concentrations. Soak the lower end of the cutting in a low-concentration solution (such as 50-200 mg/L) for 6-24 h; high concentration (such as 500-10000 mg/L) can be used for rapid treatment (a few seconds to one minute); second, mix the dissolved auxin evenly with talcum powder or charcoal powder, dry in the shade and make it into powder, dip the lower end of a wet cutting into the powder and insert it; or dilute the powder with water into a paste, dip the lower end of the cutting into it; or make it into a mud form and embed the lower end of the cutting. The treatment time and solution concentration vary with tree species and cutting type. Generally, the concentration should be higher for difficult-to-root species and lower for easy-to-root species. Hardwood cuttings use higher concentrations, softwood cuttings lower concentrations.
v (2) Rooting promoter treatment At present, the more widely used ones include the "ABT Rooting Powder" series developed by Wang Tao of the Research Institute of Forestry, Chinese Academy of Forestry; the broad-spectrum "Plant Rooting Agent HL-43" developed by the Department of Forestry, Huazhong Agricultural University; "Genbao" developed by the Department of Forestry, Shanxi Agricultural University and which won the National Science and Technology Invention Award; and the "3A Series Root-Promoting Powder" developed by the Kunming Institute of Landscape Architecture and others. They can all increase the rooting rate of many trees such as ginkgo, osmanthus, Chinese chestnut, red maple, cherry blossom, plum, larch, etc., with rooting rates reaching more than 90%, and with developed root systems and an increased number of absorbing roots.
v 2. Washing and elution treatment Washing and elution treatment generally includes warm water treatment, running water treatment, alcohol treatment, etc. Washing and elution treatment can not only reduce the content of inhibitory substances in the branches, but also increase the water content in the branches.
v (1) Warm water washing treatment Soak the lower end of the cutting in warm water at 30-35°C for several hours or longer, with the specific time varying with tree species. Some coniferous branches such as pine, larch, and spruce are soaked for 2 h, which has a degreasing effect and is beneficial to cut healing and rooting.
v (2) Running water washing treatment Place the cuttings in flowing water and soak for several hours, with the specific time also varying with tree species. Most are within 24 h, some can reach 72 h, and some even longer.
v (3) Alcohol washing treatment Treatment with alcohol can also effectively reduce the inhibitory substances in cuttings and greatly increase the rooting rate. The concentration generally used is 1%-3%, or a mixed solution of 1% alcohol and 1% ether, with a soaking time of about 6 h, such as for rhododendrons.
v 3. Nutrient treatment Treating cuttings with vitamins, sugars and other nitrogen substances is also one of the measures to promote rooting. For example, treating cuttings of tree species such as cedar, dragon juniper, and dawn redwood with a 5%-10% sucrose solution for 12-24 h has a very significant effect on promoting rooting. If sugars are used together with plant auxins, the effect is even better. In softwood cutting, spraying urea on the leaves is also a kind of nutrient treatment.
v 4. Chemical agent treatment Some chemical agents can also effectively promote cutting rooting. Such as acetic acid, phosphoric acid, potassium permanganate, manganese sulfate, magnesium sulfate, etc. For example, in production, soaking cuttings of euonymus, lilac, etc. with a 0.1% acetic acid aqueous solution can significantly promote rooting. Soaking cuttings with a 0.05%-0.1% potassium permanganate solution for 12 h can not only promote rooting, but also inhibit bacterial development and play a disinfecting role.
v 6. Heating treatment In spring, because the air temperature is higher than the ground temperature, when cutting in the open field, buds and leaves tend to sprout first and then roots form, thereby reducing the cutting survival rate. For this reason, measures such as laying electric heating wires in the cutting bed (that is, the electric heating hotbed method) or placing fresh horse manure in the cutting bed (that is, the heating material root-promoting method) can be adopted to increase the ground temperature and promote rooting.
v 7. Inverted insertion for root promotion This is generally carried out in late winter and early spring. Taking advantage of the characteristic that the spring surface temperature is higher than the temperature inside the pit, place the cuttings upside down in the pit, fill the gaps with sand, and cover the pit surface with 2 cm of sand, so that the temperature at the base of the upside-down cutting is higher than that at the tip of the cutting. This creates favorable conditions for the formation of root primordia from the callus at the base of the cutting, thereby promoting rooting, but attention must be paid to water control.
v 8. Etiolation treatment Before the growing season, cover the branches to be used as cuttings with black plastic bags, so that they grow under dark conditions and form relatively young tissues. After their branches and leaves grow to a certain extent, cut them off for cutting, which can create relatively favorable conditions for rooting.
v 9. Mechanical treatment During the tree growing season, girdle, notch, or tie the base of the branch with wire, hemp rope or nylon rope, etc., to prevent the carbohydrates and auxins in the upper part of the branch from being transported downward, so that nutrients are stored. Then in the dormant period, cut the branch from the base for cutting, which can significantly promote rooting.
Picture 7
IV. Cutting period and selection and cutting of cuttings
(1) Cutting propagation timing
Generally speaking, plant cutting propagation can be carried out in all four seasons of the year. The suitable cutting period varies depending on the species and characteristics of the plant, the cutting method, and other factors.
1. Spring cutting: Suitable for most plants. Spring cutting uses dormant branches from the previous year directly or after winter cold storage for cutting, also known as hardwood cutting. The rooting-inhibiting substances in the branches have already been transformed, and nutrients are abundant, but under the same conditions, it is easy to cause metabolic imbalance within the branches due to uncoordinated development of above-ground and underground parts. Therefore, spring cutting should be done early, and conditions should be created to first break the dormancy of the lower part of the branch while keeping the upper part dormant, so that buds sprout and grow only after adventitious roots have formed. Thus, the key technique for seedling propagation by cutting in this season is to take measures to increase soil temperature. Methods used in spring cutting production include open-field cutting and plastic low-tunnel protected cutting.
2. Summer cutting: Summer cutting uses vigorously growing young shoots or semi-lignified branches of the current year for cutting, also known as softwood cutting. Generally, conifers use semi-lignified branches, while broadleaf trees use young shoots during the period of vigorous height growth. Summer cutting branches are in a period of vigorous growth, with strong cell division capacity, active metabolism, and high endogenous auxin content in the branches; these factors are all favorable for rooting. However, due to high temperatures in summer, the young and tender branches are prone to transpiration water loss and may wither and die. Therefore, the key technique for summer cutting propagation is to increase relative air humidity, reduce transpiration intensity from the leaves of cuttings, improve the survival rate of detached branches and leaves, and thereby increase the rooting survival rate. Methods commonly used in summer cutting include plastic low-tunnel cutting under shade frames and full-sunlight automatic intermittent mist cutting.
3. Autumn cutting: Autumn cutting uses branches that are well-developed, rich in nutrients, and have stopped growing but have not yet entered dormancy. The content of inhibitory substances in the branches has not reached its peak, which can promote earlier callus formation and is favorable for rooting. Autumn cutting should be done early to facilitate complete material transformation and safe overwintering. Therefore, the key technique for seedling propagation by cutting in this season is to take measures to increase soil temperature. Methods commonly used in autumn cutting include plastic low-tunnel protected cutting for seedling propagation; in northern regions, sunken hotbeds can also be used for cutting propagation.
4. Winter cutting: Winter cutting uses dormant branches with dormancy broken for hotbed cutting. In the north, it should be carried out in plastic tunnels or greenhouses, with electric heating wires laid on the substrate to increase the temperature of the cutting medium. In the south, cuttings can be placed directly in the nursery field.
Different regions can choose different periods for different tree species. For deciduous trees, cutting can be carried out in both spring and autumn. However, spring is more common, and spring cutting should be done early before buds sprout. In the north, it can be done when the soil begins to thaw, generally from mid-to-late March to mid-to-late April. Autumn cutting should be done before the soil freezes, cutting and inserting immediately; warm regions in southern China commonly use autumn cutting. In northern regions that are arid and cold or have little snow in winter, cuttings are prone to wind drying and frost damage during autumn cutting, so after cutting they should be covered with soil, and the soil should be removed when buds sprout in spring. To solve the difficulties of autumn cutting and reduce overwintering work such as soil covering, the cuttings can be stored until the following spring for cutting, which is extremely safe. Growing-season cutting of deciduous trees is mostly carried out during the stable period after the end of the first growth flush in summer. Production practice has proven that in many regions and for many tree species, cutting can be carried out in all four seasons. For example, roses, wild roses, pomegranates, gardenias, hypericums, and pine and cypress species can all be propagated by cutting in all four seasons in Hangzhou.
Cutting of evergreen tree species in the south is mostly carried out during the plum rain season. Generally, evergreen trees require higher temperatures for root initiation, so cuttings of evergreen trees should be taken at the end of the first growth flush and before the beginning of the second growth flush. This coincides with the plum rain season in the south from May to July, when there is abundant rain and high humidity, making it less likely for cuttings to wither and easier for them to survive.
Cuttings are divided into two types according to the period of collection: dormant-season and growing-season, the former being hardwood cuttings and the latter being soft (green) wood cuttings.
1. Selection and cutting of hardwood cuttings
(1) Timing of cutting collection: The nutrients stored in cuttings are the main energy source for rooting and shoot growth in hardwood cutting. The amount of stored nutrients varies with the time of collection, so the period when branches contain the most nutrients should be chosen for collection. This period is when sap flow is slow and growth has completely stopped, that is, for deciduous tree species, from after leaf fall in autumn or when leaves begin to fall until before bud break the following spring.
(2) Selection of cuttings: According to the principles of cutting survival, one should select well-developed, fully lignified 1- to 2-year-old branches or sprout shoots from superior young mother trees; select healthy, pest- and disease-free, thick and strong branches with high nutrient content.
(3) Storage of branches: In northern regions, if cuttings are not inserted immediately after collection, they are stored until the following spring for cutting. Methods include open-field burial and indoor storage. Open-field burial involves selecting a high, dry, well-drained, wind-sheltered, sun-facing location and digging a trench, generally 50-60 cm deep (depending on local climate, but the depth must be below the frost line). Branches are tied in bundles of 50-100 each, stood upright at the bottom of the trench, covered with wet sand, and a straw bundle is placed upright in the middle for ventilation. Inspections should be made 1-2 times per month to maintain suitable temperature and humidity conditions and ensure safe overwintering. After burial, the bark softens and stored internal substances begin to transform, laying a good foundation for rooting of spring cuttings. Indoor storage also involves burying branches in wet sand; attention should be paid to indoor ventilation and maintaining appropriate temperature. The number of layers stacked should not be too high; 2-3 layers is appropriate, as too high a stack will cause high temperatures and lead to branch rot. In the south, if there are few cuttings that need storage, they can be placed in the storage compartment of a refrigerator. In landscaping practice, branches removed during pruning and shaping can also be selected and stored for later use.
(4) Cutting of cuttings: Generally, long cuttings are 15-20 cm long, ensuring 2-3 well-developed buds on the cutting; single-bud cuttings are 3-5 cm long. When cutting, the upper cut is about 1 cm from the terminal bud. The position of the lower cut varies by plant species; generally, near the node there are more parenchyma cells, rapid cell division, and abundant nutrients, making it easy to form callus and roots, so the lower cut of the cutting should be close below the node. Lower cuts include flat cut, slant cut, double-faced cut, and heel cut (see Figure 5-1). Generally, flat cuts produce roots evenly distributed in a ring shape and facilitate mechanized cutting; for species that root from the bark and root quickly, flat cuts should be used. Slant cuts have a larger contact area with the cutting medium, can form a larger callus area, facilitate water and nutrient absorption, and improve survival rate, but roots mostly grow at one end of the slant cut, easily forming biased roots, and cutting is also more labor-intensive. Double-faced cuts have an even larger contact area with the cutting medium and are more commonly used for plants that are difficult to root. Heel cuts are generally used when the lower end of the cutting carries a 2- to 3-year-old branch segment, commonly used for conifers.
Image 8
Figure 5-1 Lower cut shapes of cuttings and rooting
1. Flat cut 2. Slant cut 3. Double-faced cut 4. Flat lower cut with even rooting 5. Slant lower cut with roots biased to one side
2. Selection and cutting of softwood cuttings
(1) Timing of softwood cutting collection: Softwood cuttings are collected and inserted immediately. It is best to select from vigorously growing young mother trees, and young shoots that have begun to lignify are best, as they contain sufficient nutrients, have strong vitality, and easily callus and root. However, branches that are too young and tender or too lignified are not suitable. Softwood cuttings should be collected in the early morning before sunrise or on cloudy and rainy days; do not collect cuttings in sunlight, wind, or very hot weather.
(2) Selection of softwood cuttings: Generally, for conifers such as pines, cypresses, and junipers, it is better to take semi-lignified branches from the middle and upper parts at the end of summer for cutting. Practical experience has shown that cuttings taken from the middle and upper parts generally root better than those from the base. Conifers are not very demanding regarding water, but care should be taken to maintain branch moisture. For softwood cutting of deciduous broadleaf trees and evergreen broadleaf trees, young shoots are generally taken during the period of most vigorous height growth for cutting; for large-leaved plants, it is preferable to collect cuttings when the leaves have not yet expanded into large leaves. After collection, spray water promptly and maintain moisture. For softwood cuttings, pre-treatment of branches before insertion is very important; plants with high tannin content and difficult-to-root plants can be treated with etiolation, girdling, and binding before the growing season.
(3) Cutting of softwood cuttings: After branches are collected, cut them in a cool, wind-sheltered place. Generally, cuttings are 10-15 cm long with 2-3 buds; the number of leaves retained on the cutting can be determined according to plant species and cutting method. The lower cut is made as a flat cut or a small slant cut to reduce cut rot.
V. Types and methods of cutting
In plant cutting propagation, according to the different materials used for propagation, it can be divided into stem cutting, root cutting, leaf cutting, bud cutting, fruit cutting, etc. The classification is shown in Figure 5-2.
Image 9
(1) Stem cutting
Stem cutting is the most widely used cutting method for garden trees. According to the maturity of the branches and the cutting season, stem cutting can be further divided into dormant branch cutting and growing branch cutting. Various stem cuttings are distinguished by the morphology and length of the materials used.
1. Dormant branch cutting: Dormant branch cutting uses branches that have already become dormant as cuttings; because dormant branches are already lignified, it is also called hardwood cutting. It is usually divided into long cutting and single-bud cutting. Long cutting uses two or more buds for cutting; single-bud cutting uses a branch segment with one bud for cutting; because the branch is shorter, it is also called short cutting.
(1) Long cutting: Usually includes ordinary cutting, heel cutting, mallet cutting, etc. (see Figure 5-3).
① Ordinary cutting: This is the most widely used method in woody plant cutting propagation, and most tree species can use this method. It can be done either in cutting beds or in open fields, such as flat planting or ridge planting. Generally, the cutting length is 10-20 cm, with 2-3 buds retained on the cutting; the cutting is inserted into soil or substrate to a depth of 2/3 of the cutting length. Short cuttings should be inserted vertically, which avoids biased roots caused by slant insertion and facilitates lifting of seedlings.
② Heel cutting: The base of the cutting carries a portion of a two-year-old branch, shaped like a heel. This kind of cutting has concentrated nutrients at the lower part and roots easily, but wastes branches, as only one cutting can be taken from each branch. It is suitable for difficult-to-root tree species such as pines, cypresses, and osmanthus.
③ Mallet cutting: This is a type of heel cutting in which the old branch portion carried at the base is larger than in heel cutting, generally 2-4 cm long, with both ends cut obliquely to form a mallet shape.
Image 10
Figure 5-3 Cutting of cuttings and hardwood cutting
1. Heel cutting 2, 3. Mallet cutting
In addition to the above three cutting methods, in order to improve rooting survival rate, several cutting methods have been developed based on ordinary cutting by adopting various measures:
Split cutting: The lower part of the cutting is split from the middle and a stone or similar object is inserted. Artificial wounding is used to stimulate callus formation and expand the rooting area of the cutting. This method is mostly used for tree species that are difficult to root and root through callus, such as osmanthus, camellia, and plum blossom.
Soil ball cutting: The base of the cutting is wrapped in a ball of relatively heavy clay soil, and then the cutting together with the soil ball is inserted into the soil, using the soil ball to maintain higher moisture. This method is mostly used for evergreen trees and conifers, such as deodar cedar and Buddhist pine.
Tumor cutting: This method involves creating a tumor-like protrusion of callus tissue at the base of the cutting by means of wounding or girdling during the growing season before the branch is cut from the tree, increasing nutrient storage, and then cutting it off for insertion. This method involves many procedures and wastes branches. However, it is beneficial for propagating difficult-to-root tree species, so it is mostly used for propagating precious tree species.
Long trunk cutting: This uses long branches for cutting, generally 50 cm long, or even 1- to 2-m-long 1-year or older branches or trunks as cuttings. It is mostly used for tree species that root easily. This method can produce large seedlings with a main trunk in a short time, or they can be inserted directly at the desired planting site, reducing transplanting.
Water floating cutting: This method uses water as the cutting medium, that is, inserting cuttings into water and planting them out promptly after rooting. Roots produced in water are relatively brittle and easily broken if too long.
(2) Single-bud cutting (short cutting): Cutting with a branch having only one bud. The branch selected is short, generally less than 10 cm, which saves material, but the cutting has fewer nutrients and loses water easily. Therefore, the lower cut is made obliquely to expand the water-absorbing area and callus surface of the cut, which is favorable for rooting, and spraying water is needed to maintain relatively high air humidity and temperature so that the cutting can root and survive in a short time. This method is mostly used for cutting propagation of evergreen tree species. When using this method to propagate white camellia, the branch is about 2.5 cm, and it roots in 2-3 months with a survival rate of up to 90%; the survival rate of osmanthus cutting reaches 70%-80%.
Before dormant branch cutting, the cutting bed should be prepared. For open-field cutting, the soil should be carefully prepared, with sufficient base fertilizer applied, so that the soil is loose and moisture is adequate. When necessary, the cutting medium should be disinfected. Cutting density can be determined according to the growth rate of the tree species, seedling specifications, soil conditions, and the equipment used. Generally, plant spacing is 10-50 cm and row spacing is 30-80 cm. In greenhouses and propagation rooms, dense cutting is generally used, and after the cuttings root and sprout, they are transplanted. The insertion angle of cuttings includes vertical insertion and slant insertion; under general conditions, vertical insertion is mostly used. The angle of slant insertion should not exceed 45°. Insertion depth should be determined according to tree species and environment. For deciduous tree species, the cutting is inserted completely into the ground, with one bud exposed above or level with the ground. In open-field cutting in warm, humid southern regions, buds can be slightly exposed. In greenhouses and propagation rooms, the upper end of the cutting is generally exposed above the cutting medium. For evergreen tree species, the insertion depth should be 1/3-1/2 of the cutting length.
2. Growing branch cutting: During the growing season, vigorously growing young shoots or semi-lignified branches are used as cuttings for insertion. Softwood shoots have many parenchyma cells, strong cell vitality, and strong meristematic capacity, and softwood shoots contain high water content, more soluble nutrients, strong enzyme activity, and new leaves can produce some photosynthetic products; these are all internal factors favorable for rooting, and many tree species are suitable for propagation by young shoot cutting. The cutting length is generally shorter than hardwood cuttings, mostly with 1-4 internodes, about 5-20 cm long, retaining some leaves; larger leaves are cut in half. The lower cut is located below the leaf and axillary bud to facilitate rooting; the cut can be flat or slanted. Then insert into the cutting medium (see Figure 5-4).
11
Figure 5-4 Common softwood cutting methods
For growing branch cutting periods, in the south, it can be carried out in spring, summer, and autumn; in the north, it is mainly carried out in summer. The specific cutting time is in the morning and evening, collecting and inserting immediately, mostly on cutting beds that are loose, aerated, and have good moisture retention. The insertion depth is about 3 cm, and the density should be such that the leaves of adjacent cuttings do not overlap, so as to maintain sufficient photosynthesis. The insertion angle is generally vertical. The insertion depth is generally 1/2-1/3 of the cutting length; if environmental conditions can be controlled artificially, the shallower the insertion depth, the better, about 0.5 cm, as long as it does not fall over. Growing branch cutting requires high air humidity to avoid excessive transpiration from the plant. Currently, full-sunlight automatic intermittent mist cutting equipment, small plastic tunnel cutting under shade frames, and methods such as dense insertion in large pots and water cutting are mostly used (see Figure 5-5) to ensure suitable air humidity. In this type of cutting, the density of cuttings on the bed is relatively high, and they are mostly transplanted to the nursery field immediately after rooting.
12
Figure 5-5 Softwood cutting methods
1. Plastic tunnel cutting 2. Dense insertion in large pots 3. Dark bottle water cutting
(2) Root cutting
For some tree species that are difficult to root by stem cutting, root cutting can be used for vegetative propagation to maintain the superior traits of the mother plant.
1. Root collection: Generally, healthy young trees or vigorously growing 1- to 2-year-old seedlings should be selected as mother trees for root collection; root cuttings are best one year old. If roots are collected from a single tree, too many should not be collected at one time, otherwise the growth of the mother tree will be affected. Do not damage the root bark when collecting roots. Root collection is generally carried out during the dormant period of the tree, and after collection, they should be buried promptly for storage. In the south, it is best to collect roots in early spring and carry out cutting immediately.
2. Cutting of root cuttings: Depending on the tree species, root cuttings can be cut into different specifications. Generally, root cuttings are 15-20 cm long, and the thick end is 0.5-2 cm in diameter. To distinguish the upper and lower ends of the root cutting, the upper end can be cut flat and the lower end cut obliquely. In addition, some tree species such as Chinese toon, black locust, and paulownia can also use thin short root segments, 3-5 cm long and 0.2-0.5 cm thick.
3. Insertion: Before cutting, level the cutting medium carefully and water thoroughly. Insert root cuttings about 15-20 cm long vertically or obliquely into the soil; pay attention to the upper and lower ends of the root and do not insert upside down. After insertion and before sprouting and rooting, it is best not to water, so as to avoid lowering the soil temperature and causing root cutting rot due to excessive water. For some tree species, thin short root segments can also be propagated by sowing.
(3) Leaf cutting
Using leaves for propagation to cultivate new plants is possible because leaves have regeneration and callus capacity. For most woody plants, the above-ground part of leaf-cutting seedlings develops from bud primordia. Therefore, leaf cuttings should carry bud primordia and protect them from damage, otherwise the above-ground part cannot form. The underground part (roots) is induced from root primordia at the callus site and develops into roots. Leaf cutting of woody plants mainly includes needle bundle water cutting for seedling propagation (for full-leaf cutting and partial-leaf cutting of herbaceous flowers and foliage herbaceous plants, refer to relevant floriculture textbooks). For example, the Forestry Research Institute of Jingzhou Prefecture, Hubei Province, successfully researched full-sunlight mist water cutting propagation of slash pine, loblolly pine, and masson pine and applied it in production; the Rushan County Nursery in Shandong and the Yantai Forestry Research Institute successively cultivated needle bundle seedlings of black pine and Japanese red pine by water cutting. The procedure for needle bundle seedling propagation is:
1. Leaf collection: In autumn and winter, select vigorous 2-year-old seedlings or current-year thick and strong needle bundles from young branches as propagation material.
2. Needle bundle treatment: Wash the collected needle bundles, then store them in disinfected pure sand (burying the bundle 2/3 deep is sufficient), water thoroughly, keep moist frequently, and control the temperature between 0-10°C for about one month. Sand storage serves to degrease. After sand storage, use a sharp blade to cut off the base of the bundle below the growing point (do not damage the growing point), creating a fresh wound favorable for callus formation and rooting. After base cutting, the bundles are then treated with hormones.
3. Water cutting: Water cutting is actually not insertion in water, but in a certain nutrient solution. The basic nutrient solution formula is boric acid 50-70 mg/L, ammonium nitrate 20 mg/L, vitamin B1 20 mg/L; other substances such as vitamin B6 can also be added depending on the tree species. Well water can be used for the nutrient solution, with a pH below 7. Insert the needle bundles that have undergone base cutting and hormone treatment into the hydroponic nutrient solution and fix them in place. Control the temperature between 10-28°C, relative air humidity at about 80%, and when accumulated temperature reaches about 1000°C, rooting accelerates. Generally, about once a week, rinse the bundles, clean the hydroponic container, and replace the nutrient solution.
4. Transplanting: When the roots of the needle bundles grow to 1-2 cm, they can be transplanted, and mycorrhizae should be inoculated at the same time. When transplanting, use a small shovel to make a hole, insert the rooted bundle, with a depth sufficient to cover the roots, and press gently; keep the soil moist frequently. In the early stage after transplanting, when the sunlight is too strong around noon, appropriate shading should be provided. The most critical issue after transplanting is to promote the activation of the growing point, sprouting, and stem elongation. Bundle sprouting is closely related to bundle quality. Vigorous and heavy bundles sprout easily. In addition, mycorrhizal inoculation has a role in promoting sprouting. Sometimes, to promote sprouting, gibberellin and other substances can also be sprayed.
After the bundle seedlings grow new roots, sprout, and elongate stems, the management is the same as general seedling propagation methods.
Post-cutting management is also very important. Generally, immediately after cutting, one thorough watering should be given; afterward, attention should be paid to frequently maintaining the moisture of the cutting medium and air, and good work should be done in moisture conservation and loosening the soil. If cuttings carry flower buds, they should be removed as early as possible. If the above-ground part has already unfolded leaves before rooting, some leaves should be removed. When new shoots grow to 15-30 cm, one healthy upright branch should be selected and retained, and the rest removed. When necessary, grass can be spread between rows to maintain moisture and prevent rainwater from splashing mud onto young leaves. For hardwood cutting of difficult-to-root tree species, rooting takes a longer time, and attention should be paid to shading when necessary. Softwood open-field cutting also requires building shade frames for cooling; shade from after 10 a.m. to before 4 p.m. each day for cooling, and spray water daily to maintain humidity. When using sealed plastic tunnel cutting, the number of waterings can be reduced to 1-2 times per week, but the temperature and humidity inside the tunnel should be adjusted promptly. After the cuttings survive, they must go through a hardening-off stage to gradually adapt to the external environment before being moved to the nursery field. When cutting in greenhouses or hotbeds, after rooting and leaf unfolding, windows should be gradually opened for air circulation so that the plants gradually adapt to the external environment, and then they can be moved to the nursery field.
In areas with relatively high air temperature and sufficient sunlight, full-sunlight intermittent mist cutting beds can be used for cutting.
VII. New techniques for cutting propagation
(1) Full-sunlight automatic misting technology
1. Origin of full-sunlight automatic mist cutting: During the long rooting process of cuttings, whether the cuttings can root and survive depends most importantly on keeping the branches from losing water. If the branches lose water, there is no hope of rooting. All measures taken during the cutting process are aimed at maintaining branch moisture, creating conditions for branches detached from the mother plant to avoid water loss and also receive supplementary water needed for life activities, as well as other nutritional and environmental conditions suitable for rooting.
As early as 1941, Raines, Cardell, and Fisher in the United States simultaneously reported that the application of misting technology could keep branches from losing water and also promote the rooting effect of cuttings. Hess and Snyder proposed the application of clock-controlled misting devices. Langhen and Peterson invented the use of sunlight for control. Pleton proposed the air humidification method. In the 1960s, Cornell University in the United States invented an intermittent misting device controlled by an electronic leaf and proved that its effect and economic benefits were superior to the previous three, which brought mist cutting misting devices into the stage of production application. In 1977, this new technology began to be reported and cited in China. In China, in the early 1980s, Tan Yong of Nanjing Forestry University first reported the development of the "electronic leaf" intermittent misting device and its successful application in seedling propagation. The Hunan Forestry Research Institute and other units successively developed improved "electronic leaf" and "electronic seedling" devices. The Beijing Municipal Bureau of Parks and the Beijing Botanical Garden of the Chinese Academy of Sciences also successively developed "electronic leaf" intermittent misting devices. In 1983, Xu ChuanSen of the Jilin Railway Branch developed a sensor based on the wet-and-dry bulb hygrometer principle and a complete set of misting devices, which were promoted and used by many seedling propagation units across the country. In 1987, the Science and Technology Information Center of the Ministry of Forestry developed the 2P-204 automatic intermittent misting device's moisture evaporation controller, which was also promoted nationwide. In only over ten years, full-sunlight mist cutting spread to many seedling propagation units across the country. In 1995, the Chinese Academy of Forestry introduced a rotary full-sunlight mist cutting device, greatly increasing the controlled area of the seedling bed and producing very good seedling propagation results and economic benefits.
2. Full-sunlight automatic misting device
(1) Humidity controller: Receives and amplifies signals input by the electronic leaf or sensor, controls the opening and closing of the relay; the opening and closing of the relay is synchronized with the solenoid valve, thereby controlling whether misting occurs. The humidity controller contains a signal amplification circuit and a relay.
(2) Electronic leaf and humidity sensor: The electronic leaf and humidity sensor are devices that generate signals. The electronic leaf is made by installing two electrodes of a low-voltage power supply on an insulating board; the two electrodes are connected to the humidity controller by wires and form a closed circuit. The humidity sensor uses the change in the temperature difference between wet and dry bulbs to generate a signal, which is input to the humidity controller to control misting.
(3) Solenoid valve: The solenoid valve is an electromagnetic water valve switch that controls the water switch. When the solenoid valve receives the electrical signal from the humidity controller, the solenoid valve opens and the nozzle sprays water. When there is no electrical signal, the solenoid valve closes and no water is sprayed.
(4) High-pressure water source: The pressure requirement of full-sunlight automatic misting for the water source is 1.5-3 kg/cm, and the water supply volume must match the nozzle spray volume, with uninterrupted water supply. Below this water pressure and flow rate, the sprayed water cannot atomize, so sufficient pressure and flow rate are necessary. The full-sunlight automatic misting device is shown in Figure 5-6.
13
Figure 5-6 Full-sunlight automatic misting device diagram
1. Electronic leaf 2. Solenoid valve 3. Humidity controller 4. Nozzle 5. Cutting bed
3. Working principle: Whether the nozzle can spray mist first depends on the electrical signal input by the electronic leaf or humidity sensor. There are two electrodes on the electronic leaf and humidity sensor. When there is water on the electronic leaf, the closed circuit of the electronic leaf or humidity sensor is connected, and an inductive signal is input. The weak electrical signal is amplified step by step through the wireless circuit signal. The amplified electrical signal is first input to a small relay, and the small relay then drives a large relay. When the large relay is energized, it pulls the solenoid valve switch into the closed state. When the water film on the electronic leaf evaporates dry, the induction circuit is in the open state, and no inductive signal is input to the small relay and large relay. The large relay is not energized and cannot pull down the solenoid valve switch. The solenoid valve switch is in the open state, the solenoid valve opens, and the nozzle sprays water. When the water mist reaches a certain degree, it again connects the closed circuit of the electronic leaf, an inductive signal is input, and after the above signal amplification, the relay linkage pulls the solenoid valve switch closed. This cycle repeats continuously.
4. Precautions for full-sunlight automatic mist cutting: The medium for full-sunlight automatic mist cutting must be loose, aerated, and well-drained to prevent water accumulation in the bed from causing branch rot, while still keeping the cutting bed moist.
For cuttings used in full-sunlight automatic mist cutting, generally speaking, the more leaves the cutting carries and the longer the cutting, the higher the rooting rate; larger cuttings produce stronger seedlings after survival. However, if the cutting is too long, it wastes cutting material and is not economical to use. Therefore, about 15 cm is generally appropriate. Conversely, if the branches have few leaves and are short and small, the survival rate is low, seedling quality is poor, and transplant survival rate is low. Leaves and small branches on the lower part of the cutting that would be inserted into the medium should be removed.
If rooting hormone treatment is used in full-sunlight automatic mist cutting, it can further promote rooting of cuttings. Especially for difficult-to-root tree species, hormone treatment can increase the rooting rate, advance rooting, and increase root quantity. Automatic mist cutting easily causes nutrient leaching from branches because frequent washing also leaches hormones from the branches. Using hormone treatment can increase branch nutrients and advance rooting, so combining mist cutting with hormone treatment is particularly important.
(2) Substrate electric heating hotbed root promotion seedling propagation technology
Electric heating hotbed seedling propagation technology is designed by utilizing the temperature difference effect of plant rooting to create the optimal temperature for plant callus formation and rooting. Using electric heating wires to increase the seedbed soil temperature and promote rooting of cuttings is a modern seedling propagation method. Because it uses electric heating, the target temperature can be manually controlled through a plant growth simulation computer and can maintain temperature stability, which is favorable for cutting rooting. It has been widely applied in ornamental tree cutting, forest tree cutting, fruit tree cutting, and vegetable seedling propagation. First, select a relatively high and dry flat area indoors or in a greenhouse, build a seedbed 1.5 m wide with brick edges, and lay a layer of yellow sand or perlite on the bottom. Place 7 cm x 7 cm wooden strips at both ends and in the middle of the bed, then nail small iron nails on the wooden strips every 6 cm, with the nail depth being 1/2 the length of the small iron nail. The electric heating wire is wound around between the small iron nails, and the two ends of the electric heating wire are led out of the hotbed and connected to the seedling propagation controller. After that, cover the electric heating wire with wet sand or perlite, arrange the bases of the cuttings downward in the hotbed, and then fill wet sand (or perlite) between the cuttings until the tops of the cuttings are covered. A temperature sensing probe should be inserted into the seedbed, with the sensing head close to the base of the cuttings to accurately measure the temperature at the rooting site. After power is turned on, the electric heating wire begins to generate heat. When the temperature rises to 28°C, the seedling propagation controller automatically regulates its operation so that the hotbed temperature stabilizes within the range of 28°C.
The hotbed should activate the misting system 2-3 times per day to spray water to increase humidity, so that the bases of the cuttings in the seedbed have sufficient moisture. If the seedbed is too dry, the cortex of the cuttings dries and shrivels, and roots will not form; if there is too much water, it will cause cortex rot. Generally, after 10-15 days of heat preservation and root promotion in the seedbed, the callus at the base of the cutting swells, the root primordia turn white, and young root protrusions about 1 mm long grow. At this point, they can be transplanted into the field nursery for planting. Transplanting too early or too late will affect the survival rate of the cuttings. When transplanting, the seedbed should be made into high beds, with a bed surface width of 1.3 m and unlimited length depending on the terrain. First dig a cutting trench perpendicular to the bed surface, 15 cm deep, water thoroughly at the bottom of the trench, place the cuttings vertically on one side of the trench at a plant spacing of 10 cm, then use fine soil to press and firm the cuttings, with terminal buds exposed on the bed surface. After planting, the bed surface should be covered with grass to preserve heat and moisture. After all transplanting is completed, water thoroughly once between beds to settle the roots.
This technology is particularly suitable for branches of trees and shrubs that lose their leaves in winter. After branch treatment, they are bundled or tightly inserted upright in the seedbed, and the optimal base temperature of the branches is regulated, so that respiration of damaged cells at the wound is enhanced, enzymatic reactions are accelerated, and callus or root primordia are produced as quickly as possible. For example, poplar, dawn redwood, mulberry, pomegranate, peach, plum, grape, ginkgo, and kiwifruit can all use bare hardwood branches after leaf fall for root promotion seedling propagation. It has the characteristics of small floor space and high density (5000-10000 cuttings can be placed per 1 sq m).
(3) Mist cutting (air humidification and heating seedling propagation) technology
For seedling propagation in the cold winter season, the air heating system needs to be turned on. Heat sources used for heating include air heating wires or oil-fired and gas-fired hot-air furnaces. After installing the heat source, it is connected to a plant growth simulation computer to achieve automatic control, so that the air temperature reaches the optimum. In addition, mist cutting (or aerial cutting) technology used in rapid plant propagation provides a stable growth and rooting temperature for the closed mist cutting room.
1. Characteristics of mist cutting: Mist cutting is carried out in a greenhouse or plastic tunnel. Current-year semi-lignified branches are fixed upright on racks with fixing frames, and through misting and heating, the cuttings are kept under conditions of high humidity, suitable temperature, and certain light, where they callus and root. Because the cuttings are under temperature, humidity, and certain light conditions more suitable than soil, mist cutting results in rapid callus formation and rooting, a high seedling formation rate, and a short propagation time. For example, jujube reaches 80% rooting in 5 days with mist cutting, and pearl plum can root 10 days after mist cutting, whereas soil cutting takes more than one month. Mist cutting saves land and can make full use of floor space and vertical space for multi-layer cutting. It is simple to operate and easy to manage, does not require operations such as digging up seedlings, and the root system is not damaged, resulting in a high transplant survival rate. It is not limited by external environmental conditions and uses a plant growth simulation computer to automatically regulate temperature and humidity, making it suitable for factory-scale seedling production.
2. Facilities and methods of mist cutting
(1) Mist cutting room (or aerial cutting room): Generally a greenhouse or plastic tunnel, with misting devices and cutting fixing frames installed inside.
(2) Cutting bed: In order to make full use of indoor space, beds are built on the ground with bricks, generally 1-1.5 m wide and 20-25 cm deep, with length determined by the length of the greenhouse or tunnel. The bottom of the bed is covered with 3-5 cm thick crushed stone or furnace slag to facilitate drainage, and on top is laid 15-20 cm thick sand or vermiculite as substrate. Walkways are left between and around the two beds, and a 10 cm deep water ditch is dug on one side for drainage.
(3) Cutting fixing frames: Layered cutting fixing frames are set up on the cutting bed. One type is made by using No. 8 galvanized wire to form parallel supports at a height of 2-3 cm above the bed surface, with row spacing of 8-10 cm, and each wire is bent into "U"-shaped openings, with plant spacing of 6-8 cm, so that cuttings are clamped vertically in the openings. The other type is an aerial layered fixing frame, mostly made of angle iron, with plastic boards placed on the frame, and equally spaced "U"-shaped holes cut on both sides of the boards. Cuttings are fixed vertically in the holes, and movable baffles are set beside the holes to prevent cuttings from falling out.
(4) Misting and heating equipment: In order to provide a suitable and stable environment for rooting of cuttings in the aerial cutting room, artificial misting pipes should be installed above the frame. Nozzles should be installed according to the misting distance. Fine mist is best. Through the plant growth simulation computer, the indoor relative humidity is controlled above 90%, the temperature is maintained at 25-30°C, and the light intensity is controlled at 600-800 Lx.
3. Management of mist cutting propagation
(1) Disinfection before cutting: Because the aerial cutting room remains under high humidity and suitable temperature, it is favorable for the growth and reproduction of pathogens. Therefore, attention must always be paid to disinfection. Before cutting, the aerial cutting room should be thoroughly disinfected, usually by spraying with 0.4%-0.5% potassium permanganate solution. After cutting, spray thoroughly with 1:100 Bordeaux mixture about every 10 days to prevent fungal occurrence. If mold infection appears, spray diseased plants with 800 times Tuzet to prevent spread; in severe cases, they can be pulled out and destroyed.
(2) Control temperature, humidity, and light in the aerial cutting room: The cutting environment should be kept stable and suitable. If there is a sudden power outage, in order to prevent cuttings from wilting, which can lead to bud regression and drying, artificial water spraying should be carried out promptly. In high-temperature summer seasons, the indoor temperature often exceeds 30°C, so water should be sprayed promptly to cool down, and windows should be temporarily opened for ventilation to regulate temperature. In winter, use sunlight to raise temperature during the day, and use heating wires at night to preserve heat, or use flues, hot-air furnaces, and other means to increase temperature.
(3) Check the rooting status of cuttings promptly: When new roots grow to 2-3 cm, they can be transplanted or potted promptly. Before transplanting, the seedlings should undergo appropriate hardening, generally in a shade frame or an ordinary greenhouse, and moved to the open field after growth has stabilized.