How does Gaillardia pulchella reproduce? Mainly by seed sowing
Gaillardia pulchella is a flowering plant native to tropical America, later introduced to China, and today it can be seen in many regions of China. As more people grow it in various places, questions about its reproduction have drawn greater interest. How does Gaillardia pulchella reproduce? What are the propagation methods of Gaillardia pulchella? Let's take a look below.
I. How does Gaillardia pulchella reproduce: sowing / cuttings
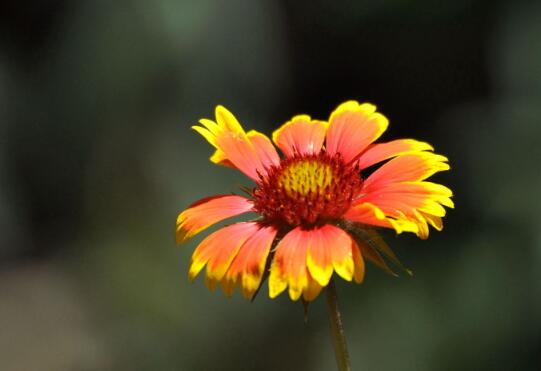
When it comes to how Gaillardia pulchella reproduces, it is mainly divided into two methods: seed sowing and cuttings. Seed sowing is generally carried out in summer, while cuttings are more suitable in spring and autumn. As for how to carry out these two propagation methods specifically, there is a detailed introduction below. Let's take a look.
II. Propagation methods of Gaillardia pulchella
Seed sowing
Seed germination: Before sowing Gaillardia pulchella seeds, we first need to germinate the seeds. We can soak the harvested seeds in warm water for about 3-10 hours. Once the seeds begin to absorb water and swell, we can take them out and sow them. This can increase the germination rate of the seeds.
Sowing method: Among the propagation methods of Gaillardia pulchella, seed sowing is a relatively commonly used method. First, before sowing, we should apply an appropriate amount of base fertilizer to the potting soil, then evenly scatter the seeds on the soil surface. After scattering, cover with 1-2cm of soil and then water. When watering, it is best to use the soaking method, because Gaillardia pulchella seeds are relatively small and can easily be washed away if watered directly.
Cutting propagation
Selection of cuttings: Before propagating Gaillardia pulchella by cuttings, we need to select suitable cuttings, which is a very important step. It is best to choose relatively robust branches free of pests and diseases as cuttings, as the survival rate will be very high. If you choose branches that look very thin and weak, then the cutting can basically be declared a failure, and the survival rate will not be high.
Cutting method: Among the propagation methods of Gaillardia pulchella, the operation of cutting propagation is relatively simple. Before cutting, we can first use chopsticks to poke a hole in the potting soil, then insert the cutting into it. This operation can prevent the cutting from being damaged and is very practical. After cutting is completed, we should also pay attention to light management. The stronger the light, the higher the temperature inside the cutting and the more water it consumes, which is not conducive to the survival of the cutting.
Follow-up management
After successful propagation according to the above methods, we can carry out daily care. There are also many points to note in terms of care, such as watering and fertilizing, which all require attention. If you don't know how to grow it, you can refer to the article on Gaillardia pulchella cultivation methods, which contains detailed instructions.
How does blanket flower (Gaillardia aristata) reproduce? Propagation methods of blanket flower
The cultivation technique of blanket flower is very simple and easy to master, because it is itself an ornamental flower with very strong adaptability. The flowering and fruiting period of blanket flower is July-August, but it begins to bloom from May, and remains in full bloom until October. Once planted for use in flower beds or garden landscapes, it can be grown for many years, and maintenance costs are not high. So how should blanket flower be propagated to help it grow faster and better? Let's take a look below.
Propagation methods of blanket flower
Blanket flower is mostly propagated by sowing, division, or cuttings, with seed sowing being the main method in production.
Seed sowing
Suitable for mass propagation, and can be sown in spring or autumn. The sowing substrate can be peat or vermiculite. Blanket flower seeds are relatively large, with a thousand-grain weight of 2.326g. Scatter the seeds in the seedbed, cover with fine sand 2-3mm, and keep the substrate moist. The suitable germination temperature is 22°C-25°C, and germination occurs 10-14 days after sowing. The seed germination rate is very high, reaching over 95%.
Division propagation
Mostly carried out in spring and autumn. Dig up robust 2-3 year old plants, remove dead leaves and dead roots, divide the clump from the base into several small clumps with fibrous roots, and plant them in fertile, well-drained sandy loam. Provide appropriate shade, pay attention to drainage, and they will survive in 5-10 days.
Cutting propagation
Stem cuttings are used. During the vigorous growth period, select robust, relatively tender stem sections from the middle and upper part of the plant, cut at the internodes, with cuttings 8-10cm long. Remove the leaves at the base and appropriately remove some upper leaves. Dip in rooting powder diluted 1000 times for about 10 seconds, insert into a moist sand or vermiculite substrate to a depth of about 3cm. After cutting, provide shade and keep moist, and roots will form in 7-10 days.
The above is a detailed introduction to the propagation methods of blanket flower. Those who grow blanket flower can use it as a reference! Hope it is helpful to everyone.
Cultivation and management techniques of blanket flower
Blanket flower, also called Gaillardia aristata and wheel flower, belongs to the Asteraceae family and is a perennial herbaceous flower. One excellent horticultural variety is called 'Arizona Sun'. Blanket flower has a short growth cycle, needing only 105 days from sowing to flowering; the plant is low and compact, with abundant flowers and a long flowering period.I. Propagation methods of blanket flower
Blanket flower is mainly propagated by seed sowing.
1. Sowing
Around April 5, sow the blanket flower seeds in a greenhouse.
Substrate: When sowing blanket flower, use a soil-free formula substrate based mainly on peat, without adding base fertilizer. Perlite also needs to be added when mixing. Perlite should be completely soaked with water before mixing. Mix peat and perlite at a ratio of 1:1, then add water and stir evenly. At this point, the seedling trays can be filled.
Blanket flower is generally sown in 60x25x5cm seedling trays. When filling, first spread a layer of ceramsite in the seedling tray. Ceramsite has large particles and good air permeability, which is beneficial for drainage. First spread a portion of the substrate in the seedling tray and smooth it with a trowel. Then use a sieve to hold some substrate and sift a layer of fine soil onto the surface of the seedling tray that has already been filled with substrate, then gently smooth it with a trowel to ensure the substrate is loose and breathable. After filling the substrate, gently carry the seedling tray to the seedbed and spray thoroughly with water using a spray gun. Then you can sow directly on the seedling tray.
Sowing: These are blanket flower seeds. The sowing rate is 500 to 1000 seeds per seedling tray. When sowing, scatter the seeds evenly. After sowing, spray water immediately, then move the seedling tray to the germination room for germination.
2. Management after sowing
Temperature: After the seedling tray reaches the germination room, pay attention to controlling the germination room environment. The temperature is best controlled at 20-22°C. A thermometer can be placed on the seedling tray to check the germination temperature at any time. The humidity in the germination room should be maintained above 95%.
Emergence: After 2 days, the blanket flower seeds show white, which means the radicle has broken through the seed coat. At this time, move the blanket flower from the germination room to the large greenhouse for seedling-stage management. II. Seedling-stage management of blanket flower
1. Management of plug seedlings
When the cotyledons of blanket flower are fully expanded and the root system of the seedlings has grown to about 2cm, it is time to transplant the seedlings. Use 128-cell plug trays for transplanting.
Plug tray substrate: The preparation method of the plug tray substrate for blanket flower is the same as that for the seedling tray substrate. When filling, first scatter a little substrate at the bottom of the plug tray, then fill it fully. Wipe away excess substrate and gently smooth the surface substrate of the plug tray.
After the plug tray is filled, water thoroughly with a 1000-mesh nozzle. At this point, transplanting can be carried out. Transplant the seedlings from the seedling tray into the 128-cell plug tray. This process is commonly called seedling pricking. The most suitable depth for pricking is to keep the two cotyledons 2-3mm above the soil surface. After pricking is completed, water thoroughly with a fine mist nozzle. In the early stage after pricking, keep the substrate moist.
Temperature: As the plants gradually grow, their resistance gradually increases, and the weather also gradually becomes warmer, so temperature control is no longer particularly strict. The greenhouse needs to have its windows opened every day for ventilation, mainly to reduce the occurrence of pests and diseases indoors and to lower the temperature.
Water: When blanket flower has grown one to two true leaves and the root system is growing rapidly, a wet-dry cycle can be carried out. That is, water thoroughly when the substrate is relatively dry but the seedlings have not yet wilted, and repeat this cycle.
Fertilization: Fertilize once 3-5 days after pricking of blanket flower is completed. Generally, a water-soluble compound fertilizer with a nitrogen, phosphorus, and potassium ratio of 20:10:20 is used at a concentration of 50-100ppm. The best time to fertilize is after each watering, once the substrate has slightly dried, then fertilize. Thereafter, fertilize once with each watering, continuing until potting.
2. Potting
About 30-40 days after pricking, blanket flower grows its fourth and fifth true leaves, and the plug seedling root system has also filled the cells. It can be seen that the roots of the seedlings taken out of the plug tray form a complete soil ball. At this time, the narrow space of the plug tray can no longer meet its growth needs, and it needs to be transplanted into pots.
Pots: Because the blanket flower is still a seedling at this time, choose 11X11cm pots for transplanting.
Substrate: The materials for the potting substrate of blanket flower are generally peat and perlite. Mix peat and perlite at a ratio of 2:1, then add slow-release fertilizer at a ratio of 6 grams per kilogram of substrate. Slow-release fertilizer allows nutrients to be continuously released with each watering, making management convenient. Then add water to moisten the substrate and stir evenly.
Transplanting and potting: When potting, fill the pot fully with substrate, then take out the blanket flower plug seedlings and place the whole seedling into the prepared hole. The most suitable depth for planting is for the original soil ball to be level with the new soil surface in the pot. Water thoroughly immediately after potting.
Because the seedlings need to adapt to the environmental conditions after potting, it is best not to fertilize within one week after potting, but be careful to keep the substrate moist.
3. Repotting
As the temperature rises, blanket flower begins to enter a rapid growth stage. About 30-40 days after potting, the root system of blanket flower reaches the bottom of the pot, and it needs to be transplanted into 18 by 18cm pots.
Substrate: The materials needed for the substrate configuration when repotting blanket flower are peat, pine needles, garden soil, and perlite. Mix peat, pine needles, garden soil, and perlite at a ratio of 4:3:2:1, then add an appropriate amount of slow-release fertilizer at a ratio of 6 grams per kilogram of substrate, add water, and stir evenly.
Repotting: When repotting blanket flower, first evenly spread a layer of substrate on the bottom of the prepared pot, then take out the seedlings from the original 11cm pots, place them into the pot, and slowly pour substrate along the roots of the seedlings into the pot. The most suitable depth for planting is to have the substrate just cover the original root crown of the seedlings. The filled substrate should be 1.5 to 2cm below the rim of the pot to facilitate watering. Water thoroughly immediately after potting. Blanket flower can remain in 18X18cm pots throughout the entire growing season without needing to be repotted again.
Water: With the arrival of high summer temperatures, the growth rate of blanket flower will increase significantly, and the demand for water will correspondingly increase. In hot and dry weather, an 18cm potted plant needs to be watered thoroughly once a day, and the best time to water is before 10 a.m.; in the afternoon, the moisture should be checked again. If the potting soil is moist but the leaves are wilted, water can be appropriately sprayed on the leaves.