How to propagate Pentas? Introduction to seed sowing and cutting propagation methods
Pentas is a fairly common flowering plant in people's daily lives, with high ornamental value, and it can be seen in many regions of our country. As more and more people grow it in various places, questions about its propagation have also drawn people's attention. On the topic of how to propagate Pentas, what are the propagation methods for Pentas? Below, the editor takes everyone through a look.
I. How to propagate Pentas: seed sowing / cuttings
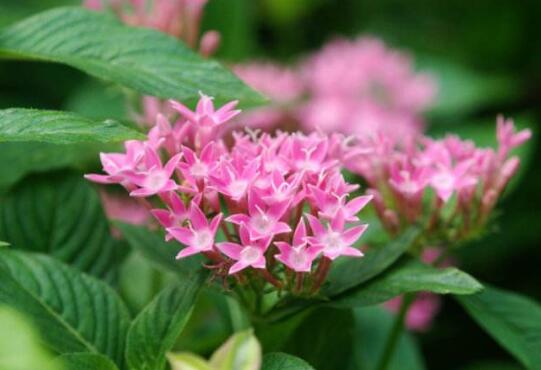
When it comes to how to propagate Pentas, it is mainly divided into two methods: seed sowing propagation and cutting propagation. As long as the operation is done properly and the process is careful, the survival rate of both methods is very high. Below are the specific operating details of the two propagation methods; interested friends can take a look.
II. Propagation methods of Pentas
Seed sowing propagation
Sowing time: When we carry out seed sowing propagation of Pentas, choosing a suitable time is very important. When it comes to when it is most suitable to sow Pentas, we can choose spring and autumn, as the climate in these two seasons is relatively suitable for its growth, so the survival rate of sowing is also relatively high.
Seed germination: Before planting Pentas, there is another pre-treatment to do, which is to germinate its seeds. We can soak its seeds in warm water for 12-24 hours, and when the seeds begin to absorb water and swell, take them out and plant them. This can greatly improve the survival rate and also allow the seeds to sprout more quickly.
Sowing method: Before sowing, we should first flatten the selected potting soil, then evenly scatter the seeds on the soil surface. When scattering, keep the row spacing slightly larger. After sowing, cover with about 1-2cm of soil and then water. When watering, we can choose a spray bottle, as this makes watering more even. Generally, water until the soil is moist. After everything is done, they will generally sprout in about 10-14 days.
Cutting propagation
Selection of cuttings: Before we carry out cutting propagation of Pentas, we must first select the cuttings. Generally, it is best to choose relatively robust branches free of pests and diseases as cuttings. If the branch we choose looks very thin, then it can basically be judged that the cutting will fail, so choosing the cuttings is a very important step.
Cutting method: Among the propagation methods of Pentas, cutting propagation is considered a relatively simple method. First, we can use chopsticks to poke a hole in the soil, then insert the cutting, because the branches of Pentas are relatively easily damaged, and inserting them directly can easily harm the roots. After inserting the cutting, we can water it. About four to five weeks after watering, it will take root.
How to plant Pentas: planting methods of Pentas / plant in spring and autumn
Among the propagation methods of Pentas, there are mainly two methods: seed sowing propagation and cutting propagation. Among them, seed sowing propagation is a relatively commonly used one, and the survival rate is also very high. However, to succeed in planting, there are also many points that need attention. On how to plant Pentas? What are the planting methods of Pentas? Below, the editor takes everyone through a look.
I. How to plant Pentas
When it comes to how to plant Pentas, there are many methods we need to pay attention to, such as the selection and disinfection of the substrate, the germination of seeds, and other aspects, all of which are relatively important. Of course, the most important thing is to operate carefully. After all, this propagation method has been tested by countless people and has accumulated a lot of experience, so the survival rate is still quite high. As for the specific planting techniques, they are introduced below. Let's take a look.
II. Planting methods of Pentas
1. Planting time: spring and autumn
When we plant Pentas, choosing a suitable time is very important. When it comes to when it is most suitable to sow Pentas, we can choose spring and autumn, as the climate in these two seasons is relatively suitable for its growth, so the survival rate of sowing is also relatively high.
2. Substrate selection: good drainage is required
Before planting Pentas, we first need to choose a substrate. Generally, it is best to choose peat soil containing a little fertilizer and with good drainage as the substrate. A pH value of 6.5-6.8 is best, as this can avoid iron toxicity and magnesium deficiency. If the pH value is below 6.0, iron toxicity will produce severe leaf edge scorching, causing the plant to stop growing.
3. Substrate disinfection: sun exposure or stirring and heating
After choosing the substrate, we cannot immediately sow Pentas seeds; the substrate also needs to be disinfected to prevent pests and diseases in it from infecting Pentas. When disinfecting, we can choose to break it up and spread it flat under the scorching sun for disinfection, or put it into a pot and stir-fry it over heat, so that if there are pests in the soil they will also be killed.
4. Seed germination: soak for 12-24 hours
Before planting Pentas, there is another pre-treatment to do, which is to germinate its seeds. We can soak its seeds in warm water for 12-24 hours, and when the seeds begin to absorb water and swell, take them out and plant them. This can greatly improve the survival rate and also allow the seeds to sprout more quickly.
5. Planting method: sprout in 10-14 days
Before planting, we should first flatten the selected potting soil, then evenly scatter the seeds on the soil surface. When scattering, keep the row spacing slightly larger. After sowing, cover with about 1-2cm of soil and then water. When watering, we can choose a spray bottle, as this makes watering more even. Generally, water until the soil is moist. After everything is done, they will generally sprout in about 10-14 days.
What is Cypress vine? How to propagate Cypress vine by cuttings
Cypress vine, also known as Mi Luo Song, is commonly called five-pointed star flower and lion grass. Cypress vine is named according to the shape of its leaves; for example, the one with feather-like leaves is called feathery cypress vine. Next, let us take a look at the propagation techniques and planting of cypress vine.
Cypress vine is named according to the shape of its leaves; for example, the one with feather-like leaves is called feathery cypress vine. The main ornamental types include feathery cypress vine, maple-leaf cypress vine, and round-leaf cypress vine. Feathery cypress vine is also known as cypress vine pine, dragon-twining flower, and brocade screen; maple-leaf cypress vine is also known as large-flowered cypress vine, scarlet cypress vine, palm-leaf cypress vine, and red five-pointed star; round-leaf cypress vine is also known as orange-red cypress vine.
Cypress vine likes light and prefers a warm and humid environment. It grows in areas at an altitude of 0 to 2500 meters. It is not cold-tolerant and can self-sow (generally introduced and cultivated artificially). It requires fertile soil. Cypress vine has strong stress resistance and is easy to manage. Its capsule contains 4 seeds, which after maturity fall to the ground on their own and grow by themselves the next year. If sown artificially, sow in late March. Transplant when the seedlings grow to 10 cm. To make it bloom more, it should be planted in fertile soil in a sunny place. Potted plants must have a support for them to twine around, and when blooming they are extremely delicate and beautiful.
Cypress vine has a long flowering period. In the Hunan and Hubei areas of our country, the flowering period can last from April to November each year. It has low requirements for soil and fertilizer; scattering seeds on moist soil is enough for germination, with a germination rate of over 95%.
Cypress vine is an annual slender twining herb, hairless. Leaves ovate or oblong, 2-10cm long, 1-6cm wide, simple leaves alternate, leaf lobes slender like threads, pinnately parted to the midrib, with 10-18 pairs of linear to filamentous flat fine lobes, lobe tips acute; petiole 8-40mm long, base often with false stipules.
Inflorescence axillary, composed of a few flowers forming a cyme; peduncle mostly longer than the leaves, 1.5-10cm long; flowers upright, pedicel longer than calyx, 9-20mm long, thickening into club-shaped form in fruit; sepals green, slightly unequal in length, elliptic to oblong-spatulate, the outer one slightly shorter, about 5mm long, apex obtuse with a small mucro; corolla salverform, about 2.5cm or more long, deep red, hairless, tube slender, slightly enlarged above, limb spreading, about 1.7-2cm in diameter, 5-lobed; stamens and style exserted; filament base hairy; ovary hairless. On it are several five-pointed-star-shaped small flowers, deep red and vivid; besides red, there are also white ones.
Capsule ovate, 7-8 mm long, 4-loculed, 4-valved, septum persistent, transparent. Seeds 4, ovate-oblong, 5-6 mm long, dark brown. Flowering period from early July to late September, with a batch opening every day, opening in the morning and wilting in the afternoon. Capsule ovate, 7-8mm long, 4-loculed, 4-valved, septum persistent, transparent. Seeds 4, ovate-oblong, 5-6mm long, dark brown. The slender smooth trailing stems of cypress vine can reach 4-5m in length, are soft, and are extremely good at climbing, making it an ideal hedge plant.
Cutting propagation of cypress vine
Softwood cuttings are often taken in late spring and early autumn using branches of the current year, or hardwood cuttings are taken in early spring using branches from the previous year.
When carrying out softwood cuttings, in late spring to early autumn when the plant is growing vigorously, select thick and strong branches of the current year as cuttings. After cutting off the branches, select the sturdy parts and cut them into sections 5-15 cm long, each section carrying more than 3 leaf nodes. When cutting the cuttings, note that the upper cut should be made flat about 1 cm above the topmost leaf node, and the lower cut should be made at an angle about 0.5 cm below the bottommost leaf node; both upper and lower cuts should be smooth (the knife must be sharp). When carrying out hardwood cuttings, after temperatures rise in early spring, select robust branches from the previous year as cuttings. Each cutting usually retains 3-4 nodes, and the cutting method is the same as for softwood cuttings.
Temperature: The optimum temperature for rooting of cuttings is 20-30°C. Below 20°C, rooting of cuttings is difficult and slow; above 30°C, the upper and lower cuts of the cuttings are easily infected by pathogens and rot, and the higher the temperature, the greater the proportion of rot. When low temperatures are encountered after cutting, the main measure for keeping warm is to wrap the flowerpot or container used for cuttings with plastic film; when the temperature after cutting is too high, the main cooling measure is to shade the cuttings, blocking 50-80% of sunlight, and at the same time spray the cuttings, 3-5 times a day. On sunny days with higher temperatures, spray more times; on cloudy and rainy days with lower temperatures and higher humidity, spray fewer times or not at all.
Humidity: After cutting, the relative humidity of the air must be kept at 75-85%. The basic requirement for rooting of cuttings is that before the cuttings take root, it must be ensured that the cuttings remain fresh and tender so they can carry out photosynthesis to produce rooting substances. However, cuttings that have not rooted cannot absorb enough water to maintain their internal water balance. Therefore, spraying must be used to reduce water evaporation from the cuttings: under shaded conditions, spray the cuttings 3-5 times a day. On sunny days, the higher the temperature, the more times to spray; on cloudy and rainy days, the lower the temperature, the fewer times to spray or not spray at all. But excessive spraying can easily cause the cuttings to be infected by pathogens and rot, because many kinds of pathogens exist in water.
The above is the relevant introduction in this article. I believe after reading it you also have a simple understanding of this. If needed, you can continue to follow No.1 Home Network to learn more information.