How to grow potted orchids? Cultivation methods and precautions: they love diffused light and dislike strong light
Orchids, known as the “first fragrance,” have delicate, far-reaching floral scent, evergreen leaves all year round, and elegant posture. They are a very popular indoor potted plant in recent years and are deeply loved by flower enthusiasts. In daily life, many people want to grow a pot of orchids, so how do you grow potted orchids? Below are the orchid cultivation methods and precautions carefully compiled by the editor, very detailed, friends who want to grow them must take a look~
I. How to grow potted orchids: understand their habits
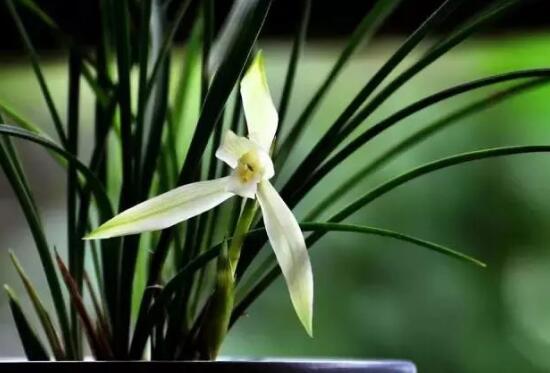
Orchids like warm, humid environments. They are relatively shade-tolerant, dislike strong light, and are not cold-tolerant, so how do you grow potted orchids? You should place orchids in a bright spot with diffused light, avoid direct sunlight, water moderately during daily care, keep the potting soil slightly moist, and take good cold-protection measures in winter. As for the growing medium, it is best to choose loose, breathable, well-drained humus soil.
II. Orchid cultivation methods and precautions
1. Soil
How to grow orchids? First, you should reselect the potting soil. Nowadays, the orchid pots that flower enthusiasts have are basically bought online, very cheap. This results in very cheap soil. Normal care can keep the plant growing, but if you want orchid flowers to bloom beautifully, it is best to reselect the soil.
Soil selection: According to the growth habits of orchids, they like loose, breathable, well-drained humus soil. For this, the editor recommends using a soil mix of 7 parts leaf mold, 2 parts perlite, and 1 part river sand.
2. Light
Orchids like shade and fear direct strong light, so in orchid cultivation methods, light is something everyone needs to pay attention to. When growing indoors, orchids should be placed on a balcony with bamboo blinds for shade, shading them from 9 a.m. to 6 p.m. when light is strong, and not shading them at other times. In winter, when light is weak, they can be placed in a bright spot with diffused light for care.
3. Temperature
How to grow orchids? Adjusting the temperature in a timely manner is also very important. Orchids like warm environments and are not cold-tolerant. When winter temperatures are low, move them indoors. How to grow orchids? Adjusting the temperature in a timely manner is also very important. After spring arrives and the temperature gradually warms up, the orchids can slowly be moved to the courtyard or balcony.
4. Watering
Growing plants inevitably involves watering, and in orchid cultivation methods, watering is a very important part. Orchids like humid environments, and daily care needs to keep the potting soil slightly moist. In spring and autumn, water orchids once every 2-3 days; in summer, when temperatures are high and orchids are in their vigorous growth period, water 1-2 times a day; in winter, when temperatures are low, generally water once every 5-7 days.
Precautions: When watering orchids, everyone should be careful not to splash water on the leaves, so as to avoid black spots and affecting the ornamental effect; in addition, watering should be neither too much nor too little, and it is best to follow the principle of not dry in autumn and not wet in winter. Also, if grown outdoors, orchids can receive a little light rain, but be careful to avoid moldy rain, showers, or continuous rain.
5. Fertilizing
How to grow orchids? After watering, let's talk about fertilizing, which is also indispensable in the growth process of orchids. Orchids like fertilizer, and during the growth period they should be given organic fertilizer once every 10 days, such as farmyard manure. In addition, when fertilizing orchids, the amount should be small and the solution clear and dilute, truly achieving light fertilizer applied frequently.
6. Pruning
In the process of growing orchids, timely pruning is also very important. During their growth, we should continuously cut off withered yellow old leaves and diseased or pest-infested leaves to facilitate ventilation. In addition, when the last flower on the orchid inflorescence has been open for one week, it should be cut off 3 cm from the pot surface, so as to avoid consuming too many nutrients and affecting flowering the next year.
7. Preventing pests and diseases
In the process of growing orchids, due to improper care, high air humidity, insufficient light, poor ventilation, and other reasons, orchids are prone to pests and diseases. To prevent this phenomenon, in addition to appropriately controlling the dryness and moisture of the potting soil at ordinary times, everyone should also master orchid pest and disease control, and spray pesticides promptly after discovering pests and diseases.
Indoor potted spider plant cultivation methods and precautions
Spider plant is also called hanging pot grass, hanging orchid, fishing orchid, orchid grass, folding crane orchid, etc. It is a perennial evergreen herbaceous plant of the genus Chlorophytum in the family Liliaceae under the class Monocotyledoneae. Its flowering period is May, and its fruiting period is August. It is native to southern Africa and is widely cultivated around the world. It has high ornamental value, and the plant has an air-purifying effect. The whole plant can be used as medicine. Let's take a look below at the cultivation methods and precautions for spider plants!
Spider plant growth habits
Spider plants like warm, humid, semi-shaded environments. They are highly adaptable, relatively drought-tolerant, not very cold-tolerant, and not picky about soil. They grow better in well-drained, loose, fertile sandy soil. They are not strict about light and are generally suitable for growing under medium light conditions, and they also tolerate weak light. The optimum growth temperature is 15-25°C, and the overwintering temperature is 5°C. At 20-24°C they grow fastest and are also prone to producing stolons. Above 30°C they stop growing, and the leaves often turn yellow with dry tips. If the indoor temperature in winter is kept above 12°C, the plant can grow normally, produce leaves, and flower. If the temperature is too low, growth slows or it goes dormant. Below 5°C, cold damage is likely to occur.
Spider plant propagation methods
1. Cutting method: Spider plant cuttings can be done at any time from spring to autumn. Cut off the clustered stems and leaves on the spider plant's stolon (in fact, this is a young new plant, with leaves above and aerial roots below), directly plant it into a flowerpot for cultivation, water thoroughly, and place it in a cool place for care. When cutting, be careful not to bury it too deep, otherwise the center is prone to rot. When potting spider plants, the number of cuttings depends on the size of the pot. Generally, a small pot can take 2-3 plants, a medium pot about 3 plants, and a large pot up to 5-6 plants.
2. Division method: When dividing spider plants, you can lift the spider plant out of the pot, remove the old soil and decayed roots, cut apart the old roots so that each divided plant retains three stems, and then transplant and cultivate them separately. You can also cut off the clustered stems and leaves on the spider plant's stolon (in fact, this is a young new plant, with leaves above and aerial roots below), and directly plant it into a flowerpot for cultivation.
3. Sowing method: Seed propagation of spider plants can be carried out every March. Because the seeds are not large, after sowing, the covering soil should not be thick, generally 0.5 cm is enough. At a temperature of 15°C, the seeds can sprout in about 2 weeks. After the seedlings take shape, transplant and cultivate them. When seed propagation is used for varieties with leaf variegation, the offspring revert to an all-green variety.
Spider plant cultivation methods
1. Soil selection: Spider plant cultivation is suitable with loose, fertile sandy loam, requiring soil that contains humus and has strong permeability. For potting, you can use equal parts leaf mold or peat soil, garden soil, and river sand mixed with a small amount of base fertilizer as the substrate. After repotting, be careful to prepare new soil again.
2. Suitable light: Spider plants like semi-shaded environments and are very sensitive to light. If exposed to direct sunlight in summer and autumn, the leaves will wither and yellow, and even the whole plant may die, so avoid direct strong sunlight and place them in a cool, ventilated place, and pay attention to maintaining environmental humidity. At most, they can only receive some slanted light in the morning and evening. In winter, because the sunlight is not strong, spider plants can appropriately receive some direct sunlight.
3. Cultivation temperature: Spider plants like warm, humid climates and are not tolerant of severe cold or extreme heat. The optimum growth temperature for spider plants is 15-25°C, and the indoor temperature in winter must not be lower than 5°C. In high-temperature seasons, avoid direct strong light and maintain light shade; in low-temperature cold periods, it is better to see more sunlight so as to keep the leaf color bright. In Guangdong Province, China, the temperatures in spring, summer, and autumn are all suitable for spider plant growth, but when the winter temperature is below 5-7°C, attention must be paid to cold protection and insulation.
4. Watering: Spider plants like water. Because their fleshy roots have well-developed water-storage tissue, they have relatively strong drought resistance, but from March to September during the vigorous growth period they need a large amount of water, so they should be watered and misted frequently to increase humidity and keep the potting soil completely moist. During the winter dormant period, water again after the soil about 1 cm below the pot surface is dry. Note that if the soil is too dry, the leaf cluster may temporarily fade; although it will recover its original color after watering again, the leaf tips may permanently turn brown. Around noon and in the evening, water should also be sprayed on the branches and leaves.
5. Fertilization management: Spider plants are relatively tolerant of fertilizer. If fertilizer and water are insufficient, they are prone to scorched tips and aging, and the leaves turn yellow, losing ornamental value. For spider plants that have already begun to produce small plantlets, a nitrogen-based topdressing can be applied once every half month. Well-growing spider plants can also go without fertilizing.
6. Soil and pot changing: Spider plant cultivation generally involves repotting once every 2-3 years, but in specific care, in order to seek lush stems and leaves, you can change the soil and repot once every March.
7. Reasonable pruning: In terms of pruning, yellow leaves should be cut off at any time in ordinary times. Once a year in March, you can repot, cutting off old roots, decayed roots, and excess fibrous roots. In early to mid-May, some old leaves of the spider plant can be cut off, which will encourage the spider plant to sprout more new leaves and small spider plants.
8. Hydroponic spider plant: Spider plant cultivation can also use hydroponics. When doing hydroponics, first take the potted spider plant out of the pot, wash off the soil with water, cut off old leaves and old roots, place it in a hydroponic vessel, and then pour in clean water. Note that there should not be too much water, just enough to reach the root crown. For vigorous growth, you can drip a few drops of nutrient solution into the water. The vessel can be a wide-mouthed glass bottle, glass cup, or other container. The water in the container can be changed every few days, or you can simply add some water.
Hydroponic spider plant cultivation methods
1. Choose a container: Generally, the vase should be chosen according to the size of the hydroponic spider plant. It can be fixed or not fixed.
2. Seedling selection: You can choose young seedlings newly growing on the stolon, preferably with aerial roots. You can also wash the soil off a soil-grown spider plant and then use it for hydroponics.
3. Hydroponic method: When doing hydroponics, do not add too much water; just enough to cover 1/3-1/2 of the root system.
4. Care management: Change the purified water once every 2-3 days. For those changed from soil culture to hydroponics, some roots will rot in the early stage and need to be cut off when changing the water, and disinfection is best. When new water roots are 3-5 cm long, nutrient solution needs to be added to the water, and the amount does not need to be large. The care environment should preferably have diffused light, and it should not be too shady or exposed to the sun. If the leaf tips dry up, prune them promptly.
Spider plant cultivation benefits
1. Beautifying the room: Spider plants are one of the most traditional hanging plants for rooms. The leaves are slender and soft, and small plantlets grow from the leaf axils, hanging down from the pot edge, spreading and drooping like flowers. They are evergreen all year round and bloom small white flowers in summer with yellow stamens. They are one of the best green plant varieties for beautifying rooms.
2. Freshening the air: Spider plants have a very notable air-freshening effect. They can carry out photosynthesis under weak light and absorb more than 80% of harmful gases indoors, with an extremely strong ability to absorb formaldehyde. Generally, keeping 1-2 spider plants in a room can absorb nearly all toxic gases in the air. One spider plant in a room of 8-10 sq m is equivalent to an air purifier. It can kill 80% of harmful substances in a room within 24 hours, absorb 86% of formaldehyde, absorb nearly all carbon monoxide and nitrogen dioxide released by stoves, electrical appliances, and plastic products, and can also decompose benzene and absorb relatively stable harmful substances such as nicotine in cigarette smoke. Therefore, spider plants also have the laudatory name of “green purifier.”
3. Improving feng shui: The placement of spider plants also has a certain significance in home feng shui layout. Placing them according to the home's feng shui layout adds a positive energy field, enhances family fortune and wealth, and is beneficial to the health of family members' respiratory tract, lungs, and spleen.
4. Medicinal value: The roots and whole plant of spider plants can be used as medicine, with effects of resolving phlegm and relieving cough, dispersing blood stasis and reducing swelling, and clearing heat and detoxifying. It mainly treats phlegm-heat cough, bruises, fractures, carbuncles, hemorrhoids, and burns. It is used for high fever in children, lung-heat cough, vomiting blood, bruises and swelling pain, etc.
Spider plant pest and disease control
1. Scale insects: According to the various occurrence conditions of scale insects, spray pesticide during the peak nymph stage. Because at this time most nymphs have recently hatched, their body surface has not yet secreted wax, and the scale shell has not yet formed, so pesticide is still likely to kill them. Spray once every 7-10 days, for 2-3 consecutive times. You can use 40% omethoate 1000x solution, or 50% malathion 1500x solution, or 255 phosmet 1000x solution, or 50% dichlorvos 1000x solution, or 2.5% deltamethrin 3000x solution, and spray.
2. Whiteflies: Use carbendazim wettable powder 500-800x solution to drench the roots, once a week, for 2-3 consecutive times.
3. Aphids: Aphids in spring are one of them. They should be wiped off promptly, and 1500x omethoate can be sprayed to kill them.
4. Mites: Mites in summer and autumn are secondary and need to be killed with 1000x dicofol. Pay attention to ventilation and increasing leaf surface humidity, which can reduce mite infection.
5. Root rot: For prevention, wettable powder can be used to drench the roots at 2-4 grams per sq m, or before onset or in the early stage of onset, use 1500-3000x solution for root drenching, 200 ml of medicinal solution per plant. If the onset is severe, remove the diseased plants and at the same time use root-fixing treatment for root drenching.
Spider plant precautions
1. Too much fertilizer, exceeding the plant's needs. At first the leaves are shiny and uneven, then the root system rots and the leaves turn yellow. Stop fertilizing, water more with clear water, or repot to clean the roots and replace with new soil.
2. If repotting and soil changing have not been done for a long time, the various nutrient elements contained in the potting soil have been exhausted, and the three elements nitrogen, phosphorus, and potassium have not been replenished in time. The plant lacks nutrients, and the leaves appear yellow and thin. Replace with fertile loam in time and water with alum fertilizer water.
3. Although spider plants are semi-shade flowers, they still need at least more than four hours of diffused light every day, otherwise chlorophyll decreases and the leaves turn yellow.
4. If the potting soil has poor breathability and water permeability, and the potting soil accumulates water and does not dry for a long time, root respiration becomes difficult, causing the leaves to turn yellow. Loosen the soil and control moisture in time.
5. Long-term watering without soaking through causes the roots to lose water, and the lower old leaves turn yellow. Water thoroughly and keep the potting soil warm and moist.
Spider plant cultivation methods and precautions: spider plant cultivation introduction
Spider plant is also called hanging pot grass, hanging orchid, fishing orchid, orchid grass, folding crane orchid, and in Western Europe it is also called spider grass or airplane grass. Its place of origin is South Africa. Spider plant, everyone's impression of it is mostly that it can purify air. Especially in newly renovated houses, people often place a few pots of spider plants, but in fact, spider plants can be used as medicine and can resolve phlegm and relieve cough, disperse blood stasis and reduce swelling, and clear heat and detoxify. So how should we grow spider plants in daily life? Today, the editor will talk about spider plant cultivation methods and precautions, and an introduction to spider plant cultivation.
Spider plant cultivation methods
1. Potting soil requirements
For potted spider plants, a substrate of equal parts humus, peat soil, garden soil, and river sand mixed with a small amount of base fertilizer is commonly used. Note that the substrate should be replaced every 2 to 3 years. When changing the substrate, it is best to replace it with loose, humus-rich, well-drained culture soil, and then apply livestock hoof and horn pieces or decomposed cake fertilizer as base fertilizer. Note that soil and pots should be changed once every March to April. If the pot is relatively deep and the base fertilizer is sufficient, repotting can be done once every two years. When repotting, knock the plant out of the pot and cut off withered and decayed roots and excess roots.
2. Temperature regulation
Spider plants like warm, moist climates and are not cold-tolerant. They grow relatively well at 20-24°C. In summer, pay attention to ventilation and cooling. In winter, the temperature must not be lower than 5°C, and around 10°C is best. While regulating temperature, pay attention to controlling temperature to prevent spider plant plants from becoming leggy. Do not let the day-night temperature difference be too large, so as to avoid causing spider plant leaves to turn yellow.
3. Water and fertilizer regulation
Spider plants like moisture, so relatively high air humidity should be maintained. Watering should be sufficient, preferably once in the morning and once in the evening. During the growing season, apply liquid nitrogen fertilizer once about every 15 days. Spider plants are relatively fertilizer-tolerant foliage plants. If fertilizer and water are insufficient, they are prone to scorched tips and aging, and the leaves turn yellow, losing ornamental value. From late spring to early autumn, apply organic fertilizer liquid once every 7-10 days, but for varieties such as golden-edged and golden-hearted, note that nitrogen fertilizer should be applied sparingly, so as to avoid the variegated leaf color fading or even disappearing and affecting appearance.
4. Light regulation
A semi-shaded environment is suitable. In spring and summer, shading treatment is needed, and diffused light is best. They should be placed in a cool, ventilated place, preferably on a windowsill or a table near a window. Note that in summer they must not be placed in direct sunlight. Appropriate shading treatment can be used, while also ensuring exposure to diffused light. In winter, pay attention to receiving sufficient sunlight. In summer, when sunlight is especially strong, they can only receive some slanted light in the morning and evening. During the day, 50% to 70% of sunlight needs to be blocked, otherwise the leaf tips will dry up. Variegated varieties are especially afraid of strong sunlight.
5. Pest and disease control
1 Spider plants have relatively few pests and diseases. The main issue is yellowing at the leaf tips, and at this time attention should be paid to regulating water and fertilizer. Cut off diseased leaves. If the potting soil accumulates water and ventilation is poor, in addition to causing root rot, root rot disease may also occur, and attention should be paid to spraying pesticide for control. One more point to note: poor growth, short small leaves, and dry leaf tips are mainly caused by direct strong light and dry air, so attention should be paid to frequently spraying water on the leaf surface.
Spider plant cultivation introduction
Spider plant cultivation precautions
1. Too much fertilizer, exceeding the plant's needs. At first the leaves are shiny and uneven, then the root system rots and the leaves turn yellow. Stop fertilizing, water more with clear water, or repot to clean the roots and replace with new soil.
2. If repotting and soil changing have not been done for a long time. The various nutrient elements contained in the potting soil have been exhausted, and the three elements nitrogen, phosphorus, and potassium have not been replenished in time. The plant lacks nutrients, and the leaves appear yellow and thin. Replace with fertile loam in time and water with alum fertilizer water.
3. Although spider plants are semi-shade flowers, they still need at least more than four hours of diffused light every day, otherwise chlorophyll decreases and the leaves turn yellow.
4. If the potting soil has poor breathability and water permeability, and the potting soil accumulates water and does not dry for a long time, root respiration becomes difficult, causing the leaves to turn yellow. Loosen the soil and control moisture in time. Fifth, long-term watering without soaking through. The roots of the spider plant lose water, and the lower old leaves turn yellow. Water thoroughly and keep the potting soil warm and moist.
Alright, today's related questions about spider plant cultivation methods and precautions, and an introduction to spider plant cultivation, have been summarized here by the editor. I hope the above content can help you.
You may also like