Potted Plant Care Methods: Master the Techniques for Lush, Vibrant Plants
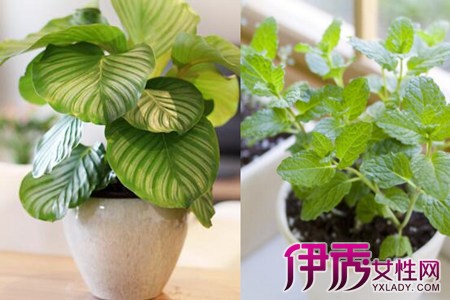
For potted plant care, the first step is to find a suitable flower pot, because small plants look very pretty placed on a table. So when choosing a pot, the small porcelain kind looks more delicate and beautiful, but the pot must have holes in the bottom. A pot with holes allows for better airflow, which greatly helps the plant's growth.
After choosing a suitable pot, you need to find suitable potting soil. Many people think you can just grab any soil and grow a plant in it. That idea is completely wrong. When growing potted plants, you must choose soft, loose soil, because only this kind of soil allows the plant's roots to take hold without being hindered, so it can grow better.
Newly planted plants must be watered thoroughly. Many people think just moistening the soil is enough. That way, the soil underneath stays dry and the roots can't penetrate, making it very hard for the plant to survive. So you must water thoroughly for the plant to grow better. Otherwise the roots may turn black, or in severe cases even rot.
Temperature must also be well controlled. Many people put newly planted plants outdoors. Under blazing sun, the leaves will turn yellow, and some plants get sunburned red and find it hard to return to their normal color. So newly planted plants are actually better suited to growing indoors. Placed in a ventilated spot indoors, they grow faster.
In winter, many people put plants next to the indoor radiator, thinking that keeps them warmer. In fact, plants can grow normally as long as they're kept at around 18°C, so don't always leave them baking by the radiator, as that will actually affect normal growth.
Which Plants Can Be Grown Hydroponically? An Introduction to Hydroponic Green Plant Varieties
Green plants are becoming more and more popular. Many people who grow green plants like hydroponic ones, because hydroponic plants are simpler to care for, and you can see the plants' white roots, which looks very clean and fresh. So which plants can be grown hydroponically? Let's look at a few below.
1. Pennywort (Hydrocotyle vulgaris)
Pennywort is a plant very well suited to hydroponics. Hydroponically grown pennywort has very lush leaves, and after the leaves turn emerald green, it can also produce yellow-green flowers. Pennywort can also be soil-grown, but soil-grown pennywort needs plenty of moisture, so it requires frequent watering. With hydroponics, though, you don't need to water that often, just top up the water when there's little left.
2. Ivy (Hedera helix)
Ivy is also a very popular green plant. It not only decorates the home but also purifies the air well, making it the top choice for many newly renovated households. Hydroponically grown ivy grows very fast, and ivy can also root from water cuttings, making it one of the easiest green plants to propagate. Grown in a small pot, it looks very delicate and elegant.
3. Pothos (Epipremnum aureum)
Pothos is also very easy to care for, especially when grown hydroponically. You just need to add water at the right time, and occasionally add a little nutrient solution to the water, and the pothos will keep growing like crazy. Pothos is better suited to a semi-shaded environment; it can't take direct sunlight, or the leaves will easily turn yellow and dry out.
4. Spider Plant (Chlorophytum comosum)
Spider plant is the most ordinary plant of all, arguably the most common green plant in the home. It's very well suited to hydroponics; you just need to take a small offshoot with aerial roots and put it in water, and it will root and grow. Care is also very simple, and when soil-grown it easily fills out the pot. Its vitality is unusually vigorous.
The four plants the editor introduced can all be grown hydroponically. For plant growing, hydroponic plants don't fill out the pot as easily as soil-grown ones, and the simple, fresh, elegant look of hydroponics makes plants appear petite and cute, which many girls love. Speaking of which, the editor wants to ask: when you grow plants, do you prefer hydroponics or soil culture? Do you know what other plants can be grown hydroponically? Feel free to leave a comment and share.
How to Grow Calla Lily: Calla Lily Care Methods (Best Grown in August-September)
The calla lily, which has risen in popularity in recent years, is not only enjoyed as a flowering plant but also has the effect of purifying the air, so many people want to grow calla lilies. So how much do you know about how to grow calla lilies? For beginners, understanding calla lily care methods is still very important. Let the editor of Huayu Web answer for you how to grow calla lilies and the calla lily care methods!
Calla Lily Care Methods
Before understanding how to grow calla lilies, let's first learn about the calla lily's flowering period. The calla lily's natural flowering period runs from November until June of the following year, with the whole flowering period lasting 6 to 7 months, and it happens to fall in the peak season for cut flowers. Moreover, the calla lily is an important cut flower both domestically and abroad, with very wide uses, and it also has the effect of breaking down toxins, purifying the air and improving mood. Below, let's learn together the basic knowledge of calla lily care.
1. Best Time to Grow
In calla lily care methods, the first thing to note is the best time to grow them. The most suitable season for growing calla lilies is summer, in August to September. Generally speaking, calla lilies enter dormancy in June to July. At this time, you can take the corms around the mature plant to grow new potted plants. Division propagation must be done in autumn, otherwise it will be hard for them to bloom that year, and even if they do bloom, the flowering period will be late.
2. Propagation Methods
To understand how to grow calla lilies, we must understand the calla lily's propagation methods. Calla lily propagation is mainly done by dividing the corms. After the plant enters dormancy, you can peel off the small corms around the tuber and plant them separately. Of course, they can also be grown from seed; once the seeds mature, sow them in pots, and the suitable germination temperature is around 20°C.
Note that calla lilies are usually planted as corms after autumn. Each September, take the plant out of the pot, break off the small corms around the mother plant, and coat the wounds with plant ash to prevent infection and rot. Replace the soil with sterilized potting mix, then place the mother corm and small corms into a 4000-fold potassium permanganate solution, soak for 15 to 20 minutes, let them dry, and pot them separately according to corm size, so that next year the plants will be uniform in size. Small corms need 3 years of growing before they can bloom. Division propagation must be done in autumn, otherwise it will be hard for them to bloom that year, and even if they do bloom, the flowering period will be late.
3. Environmental Requirements
Calla lilies like a warm climate, are not tolerant of high temperatures or cold, and the suitable growing temperature is around 20°C. At 0°C the rhizome will freeze and die. So in winter, they need plenty of sunlight; with insufficient light they bloom less, and they are slightly shade-tolerant; in summer's high temperatures, they should be shaded appropriately. One more thing: calla lilies like a humid environment, and a little standing water won't affect growth much, but they are not tolerant of drought.
Moreover, their dormancy period varies by region. When grown in the Yangtze River basin and northern China, they should be moved into a greenhouse in winter, bloom in winter and spring, and go dormant in summer due to high temperatures and drought; while in subtropical regions where winters aren't cold and summers aren't dry and hot, they don't go dormant all year round. Overall, after reading the calla lily care methods, you'll feel that calla lilies are very easy plants and flowers to grow.
4. Soil Requirements
In the question of how to grow calla lilies, soil requirements also need attention. When growing calla lilies, the soil should be mainly sandy loam mixed with 1/3 garden soil and 1/3 leaf mold, plus 1/5 organic fertilizer. Because its roots grow on the upper part of the bulb, the bottom layer of the potting soil should be lined with permeable, breathable cinder or coarse sand. Then mix in one third garden soil and leaf mold, and add a small amount of organic fertilizer.
5. Light Requirements
During the calla lily's flowering period, light needs great attention. The calla lily "likes long light but not strong light," and especially in summer, direct blazing sun is most taboo. So in calla lily care methods, calla lilies should usually be placed in a spot with ample light, and in summer can be moved farther from the window. If the calla lily gets insufficient light during its flowering period, it will only produce buds without blooming, or even the buds will gradually turn green and shrivel. In spring and autumn, no shading is needed.
6. Pest and Disease Control
Pest and disease control is also something to note when understanding how to grow calla lilies. The main disease harming calla lily stems and leaves is gray mold, which can be treated by spraying a 500-800 fold dilution of 50% carbendazim, or a 600-800 fold dilution of 75% chlorothalonil; these two can be applied alternately. You should also prevent taro mosaic virus; plants infected with this virus have mosaic-patterned leaves that shrink, become deformed and curl. If you find such diseased plants, immediately pull them out and bury them deep or burn them, and never use the tubers of such plants for propagation.
7. Hydroponic Calla Lily
Among calla lily care methods, you can also choose hydroponic calla lilies. The method is to place a potted calla lily with a budded shoot into a shallow porcelain dish slightly larger than the pot's bottom diameter, then pour about 0.5 cm of clean water into the dish, and in daily care mainly water the potting soil to keep it moist. When the temperature rises back to around 15°C, the buds enter a rapid growth phase, and you can apply flake or granular compound fertilizer with no irritating odor to the potting soil to promote plant growth and bud swelling.
This way, during the calla lily's flowering period, the plant not only has enough nutrients but is also always in a relatively moist environment, ensuring it grows lush leaves and crystal-clear buds, and can sprout more small offshoots. Growing calla lilies hydroponically in a shallow dish not only avoids the worry of dirtying the table when watering the potting soil, but also means that when no one is around to tend the potted flower for a short time, its growth won't be affected by lack of water.
Calla Lily Care Precautions
1. Pay Attention to Watering
Calla lilies like moisture and fertilizer. From the time they sprout, they can't lack water. It's best to water once a day to keep the potting soil constantly moist. But watering shouldn't make the potting soil too wet either, otherwise it easily causes tuber rot, and especially during dormancy the potting soil must never be waterlogged.
2. Avoid Water in the Leaf Center
Calla lilies should not have water sitting in the leaf center. If you accidentally let water drip into the leaf center while watering, it will cause soft rot.
3. Fertilizing Tips
When fertilizing, apply it from the edge of the pot, and never let fertilizer solution splash into the leaf stalks or leaf center, or it will also cause yellow leaves or rot. After buds form, it's best to apply liquid fertilizer mainly of phosphorus, which makes the flower color purer. The day after fertilizing, water once with clean water and loosen the soil in time.
4. How to Store Tubers
February to April is the calla lily's peak flowering period, and after flowering, gradually stop watering; after May the plant begins to yellow, and you should ensure ventilation and keep it dry to prevent tuber rot. When the plant is completely dormant, you can take out the tubers, dry them and store them, then plant them again in autumn.
5. Keep Leaves Clean
During the growing period, calla lilies like ample moisture. Frequently sprinkle water on the leaves and the ground, and pay attention to keeping the leaves clean.
6. Pay Attention to Lighting and Rain Shelter
During care, to avoid too many leaves affecting light exposure, you can remove the outer leaves, which also helps the flower stalks extend. If growing them outdoors, you must use rain-shelter growing facilities to prevent rain from reducing flower quality.